
How email notifications work
AI Overview
Tipo Appointment can automatically send emails when a booking is created or updated. This guide explains who receives emails, which events trigger them, how to customize them, and how they are delivered. Everything is managed from the Notifications page in the app.
View moreView less
- Open the app and click Notifications; tabs are Customer, Merchant, and Team member.
- Turn on or off emails per event: created, approved, canceled, declined, reminder, rescheduled.
- Edit each email's subject and content, using variables like `{{ customer.name }}`.
- Delivery uses Tipo email by default or your own SMTP server.
- Typical start: customer emails for created, approved, canceled and reminders; team member and merchant emails for new bookings.
Summary generated by AI. It can make mistakes, so check the full guide below.
Tipo Appointment can automatically send emails when a booking is created or updated. This guide explains who receives emails, when they’re sent, and how to customize them.
ℹ️ The basics
Section titled “ℹ️ The basics”Email notifications in Tipo are based on 4 things:
- Recipient — Who should get the email (Customer / Merchant / Team member)
- Trigger — What event sends the email (Approved, Canceled, Reminder, etc.)
- Content — Subject + email body (you can edit both)
- Provider — How the email is delivered (Tipo email or your SMTP)
📍 Where to manage email notifications
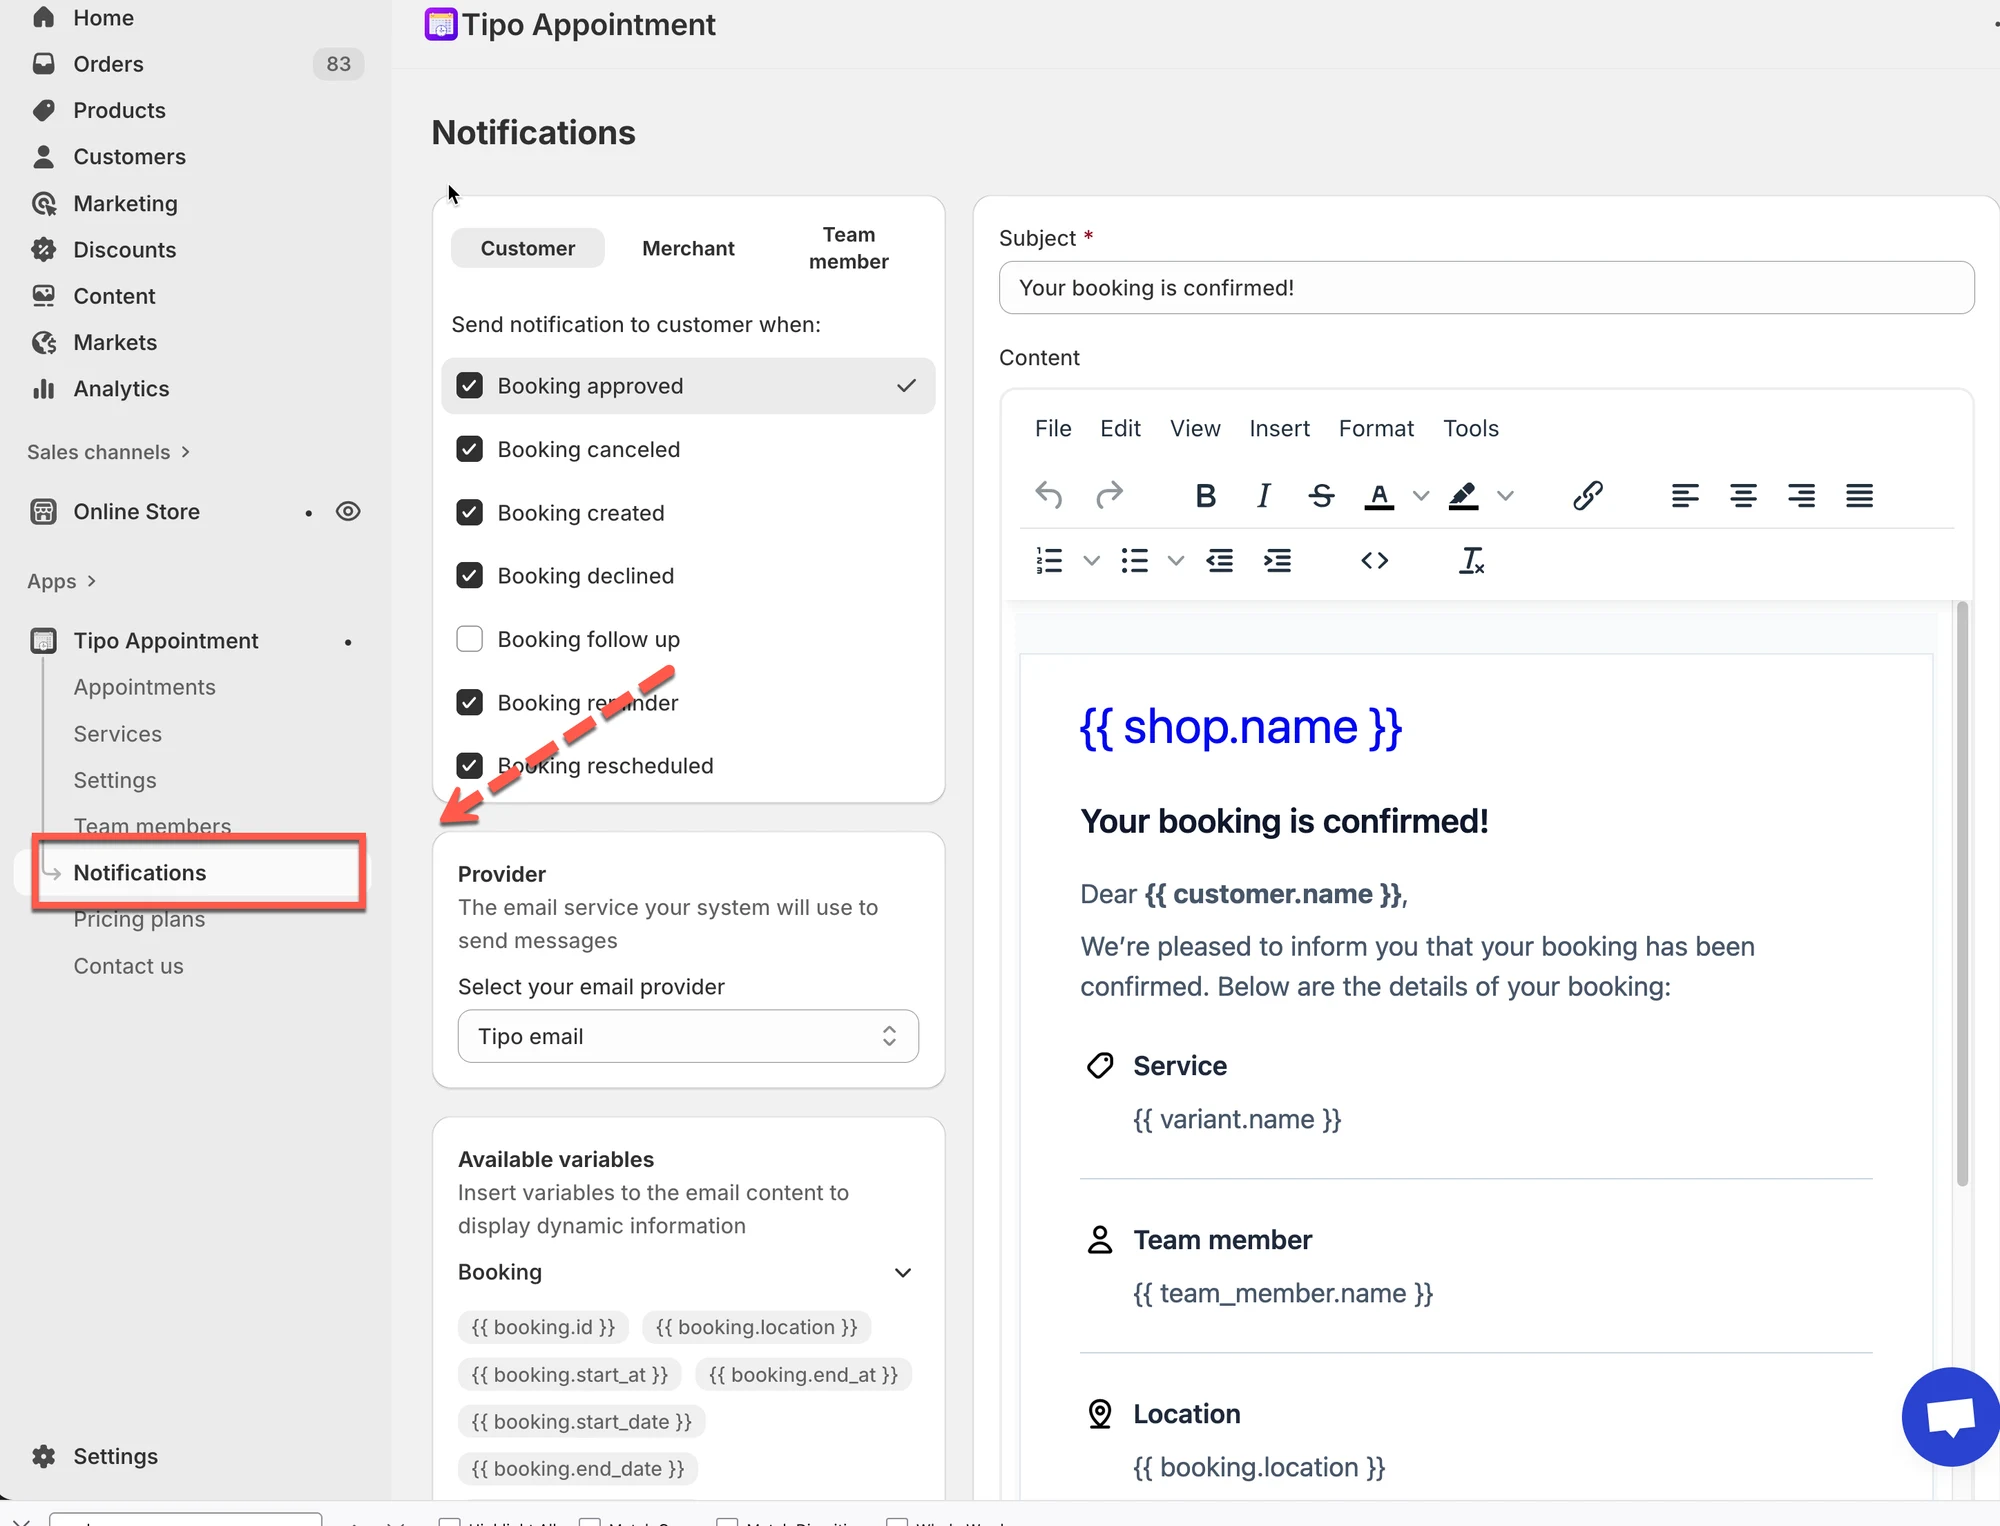
Section titled “📍 Where to manage email notifications”Open the app > click Notifications
👥 Who can receive emails
Section titled “👥 Who can receive emails”At the top of the Notifications page, you’ll see 3 tabs:
- Customer: emails sent to the person who books
- Merchant: emails sent to the store/admin email
- Team member: emails sent to the assigned staff/provider (if your booking uses team members)
Tip: If you want different wording for customers vs staff, switch tabs and edit each template separately.
⚡ What triggers an email
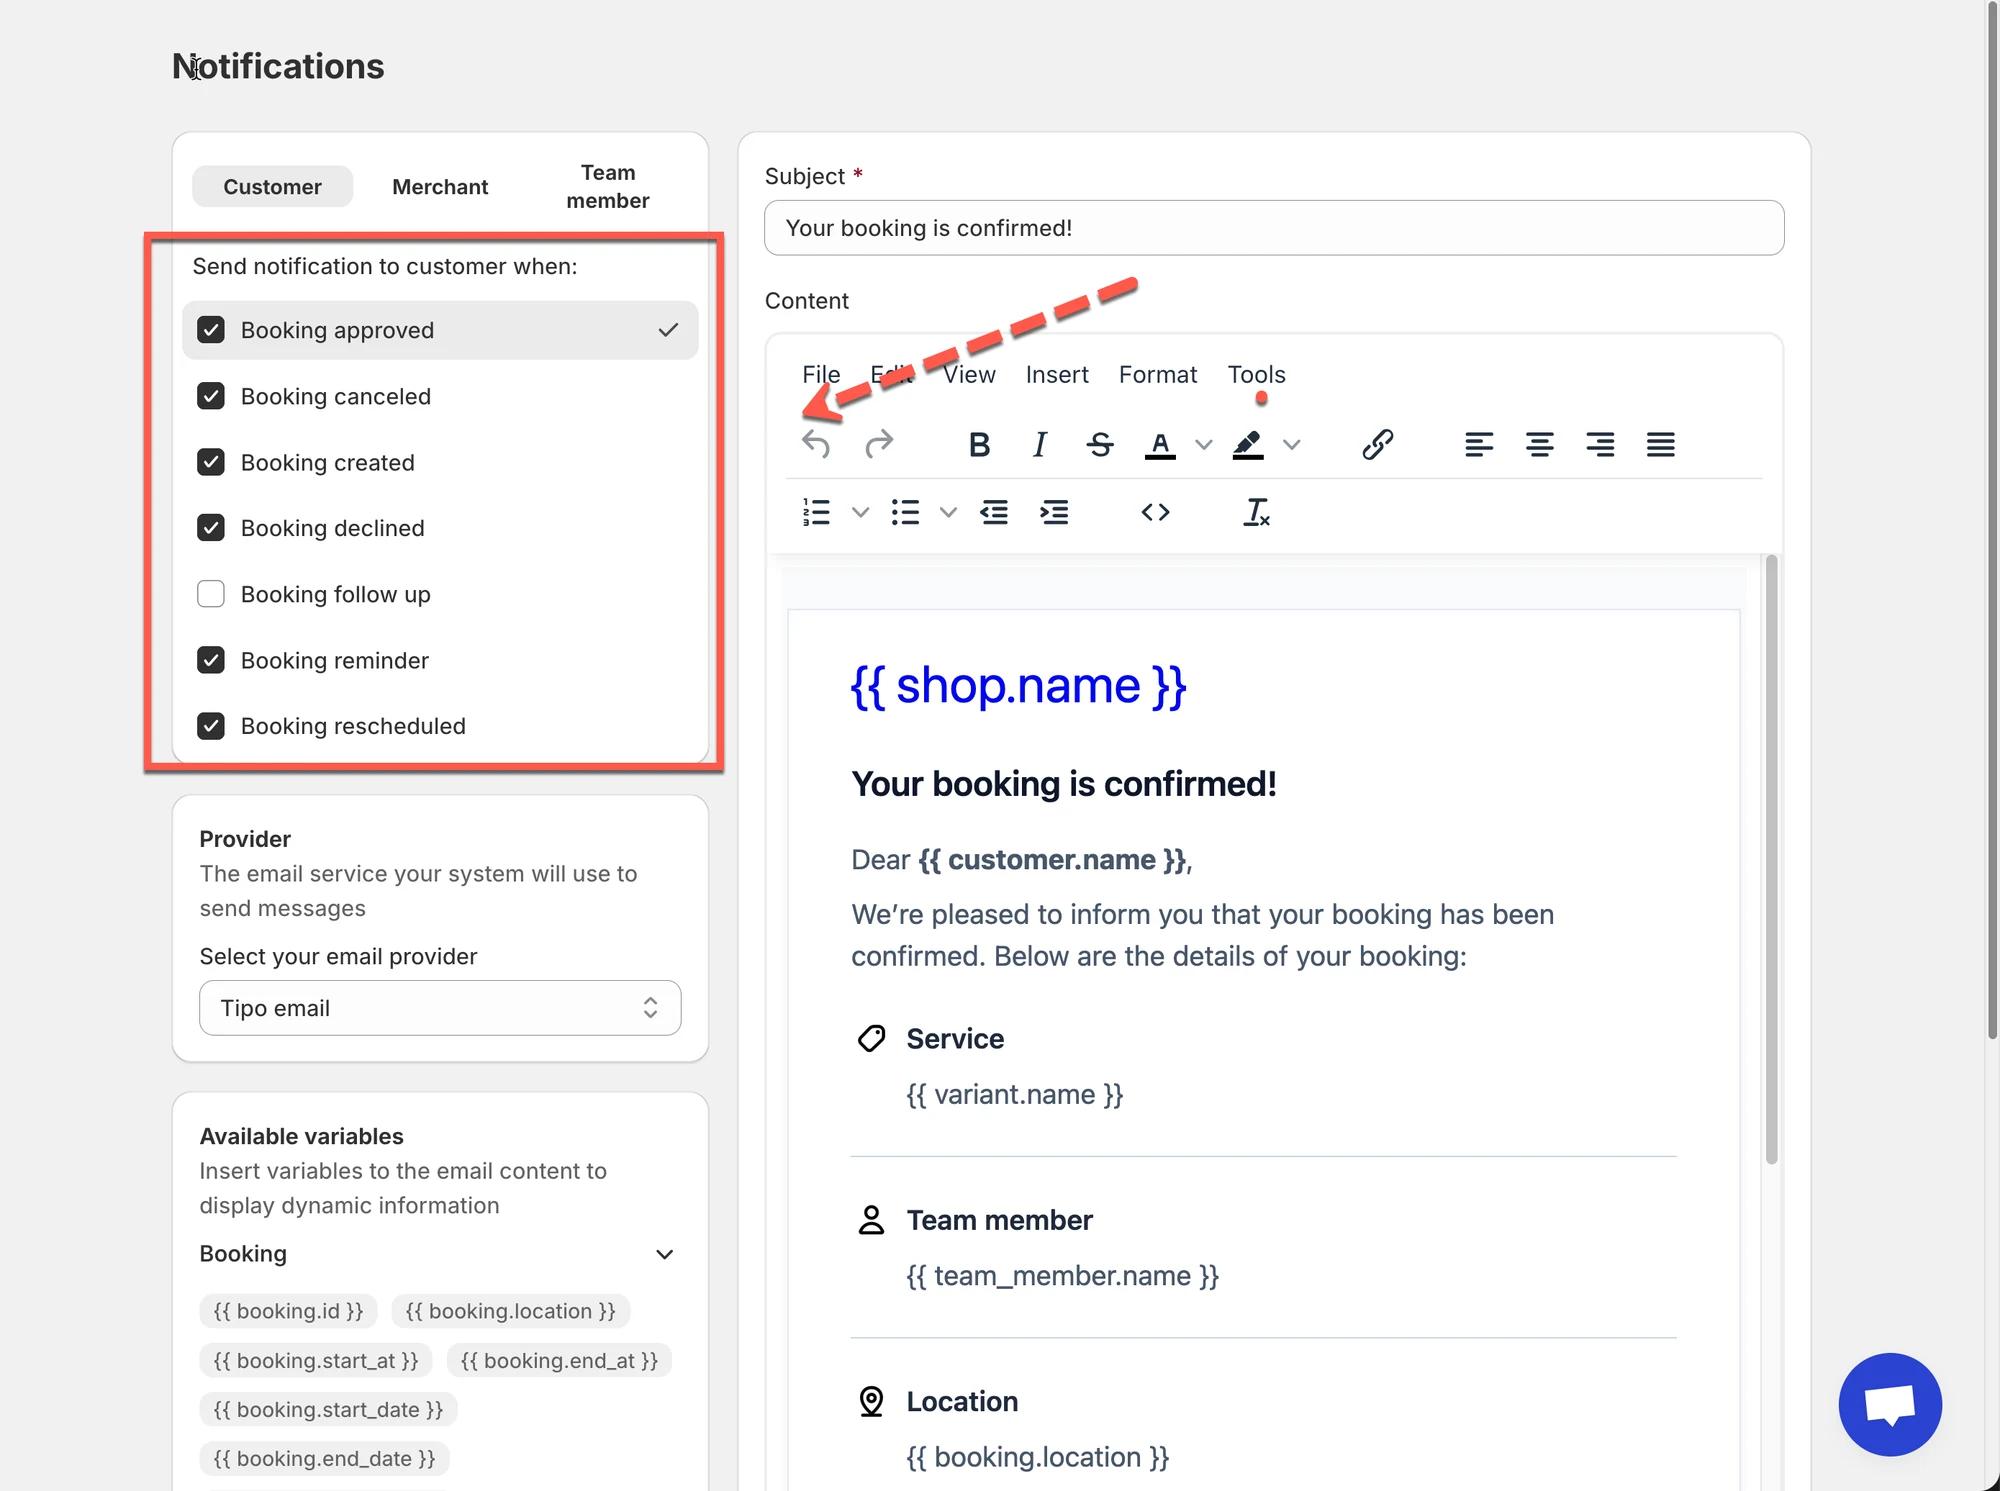
Section titled “⚡ What triggers an email”Inside each tab, you can turn on/off notifications for events like:
- Booking created
- Booking approved
- Booking canceled
- Booking declined
- Booking reminder
- Booking rescheduled
If a checkbox is enabled, Tipo will send that email when the event happens.
If it’s disabled, no email will be sent for that event.
✍️ What the email looks like
Section titled “✍️ What the email looks like”For each trigger, you can customize:
- Subject (the email title)
- Content (the email body)
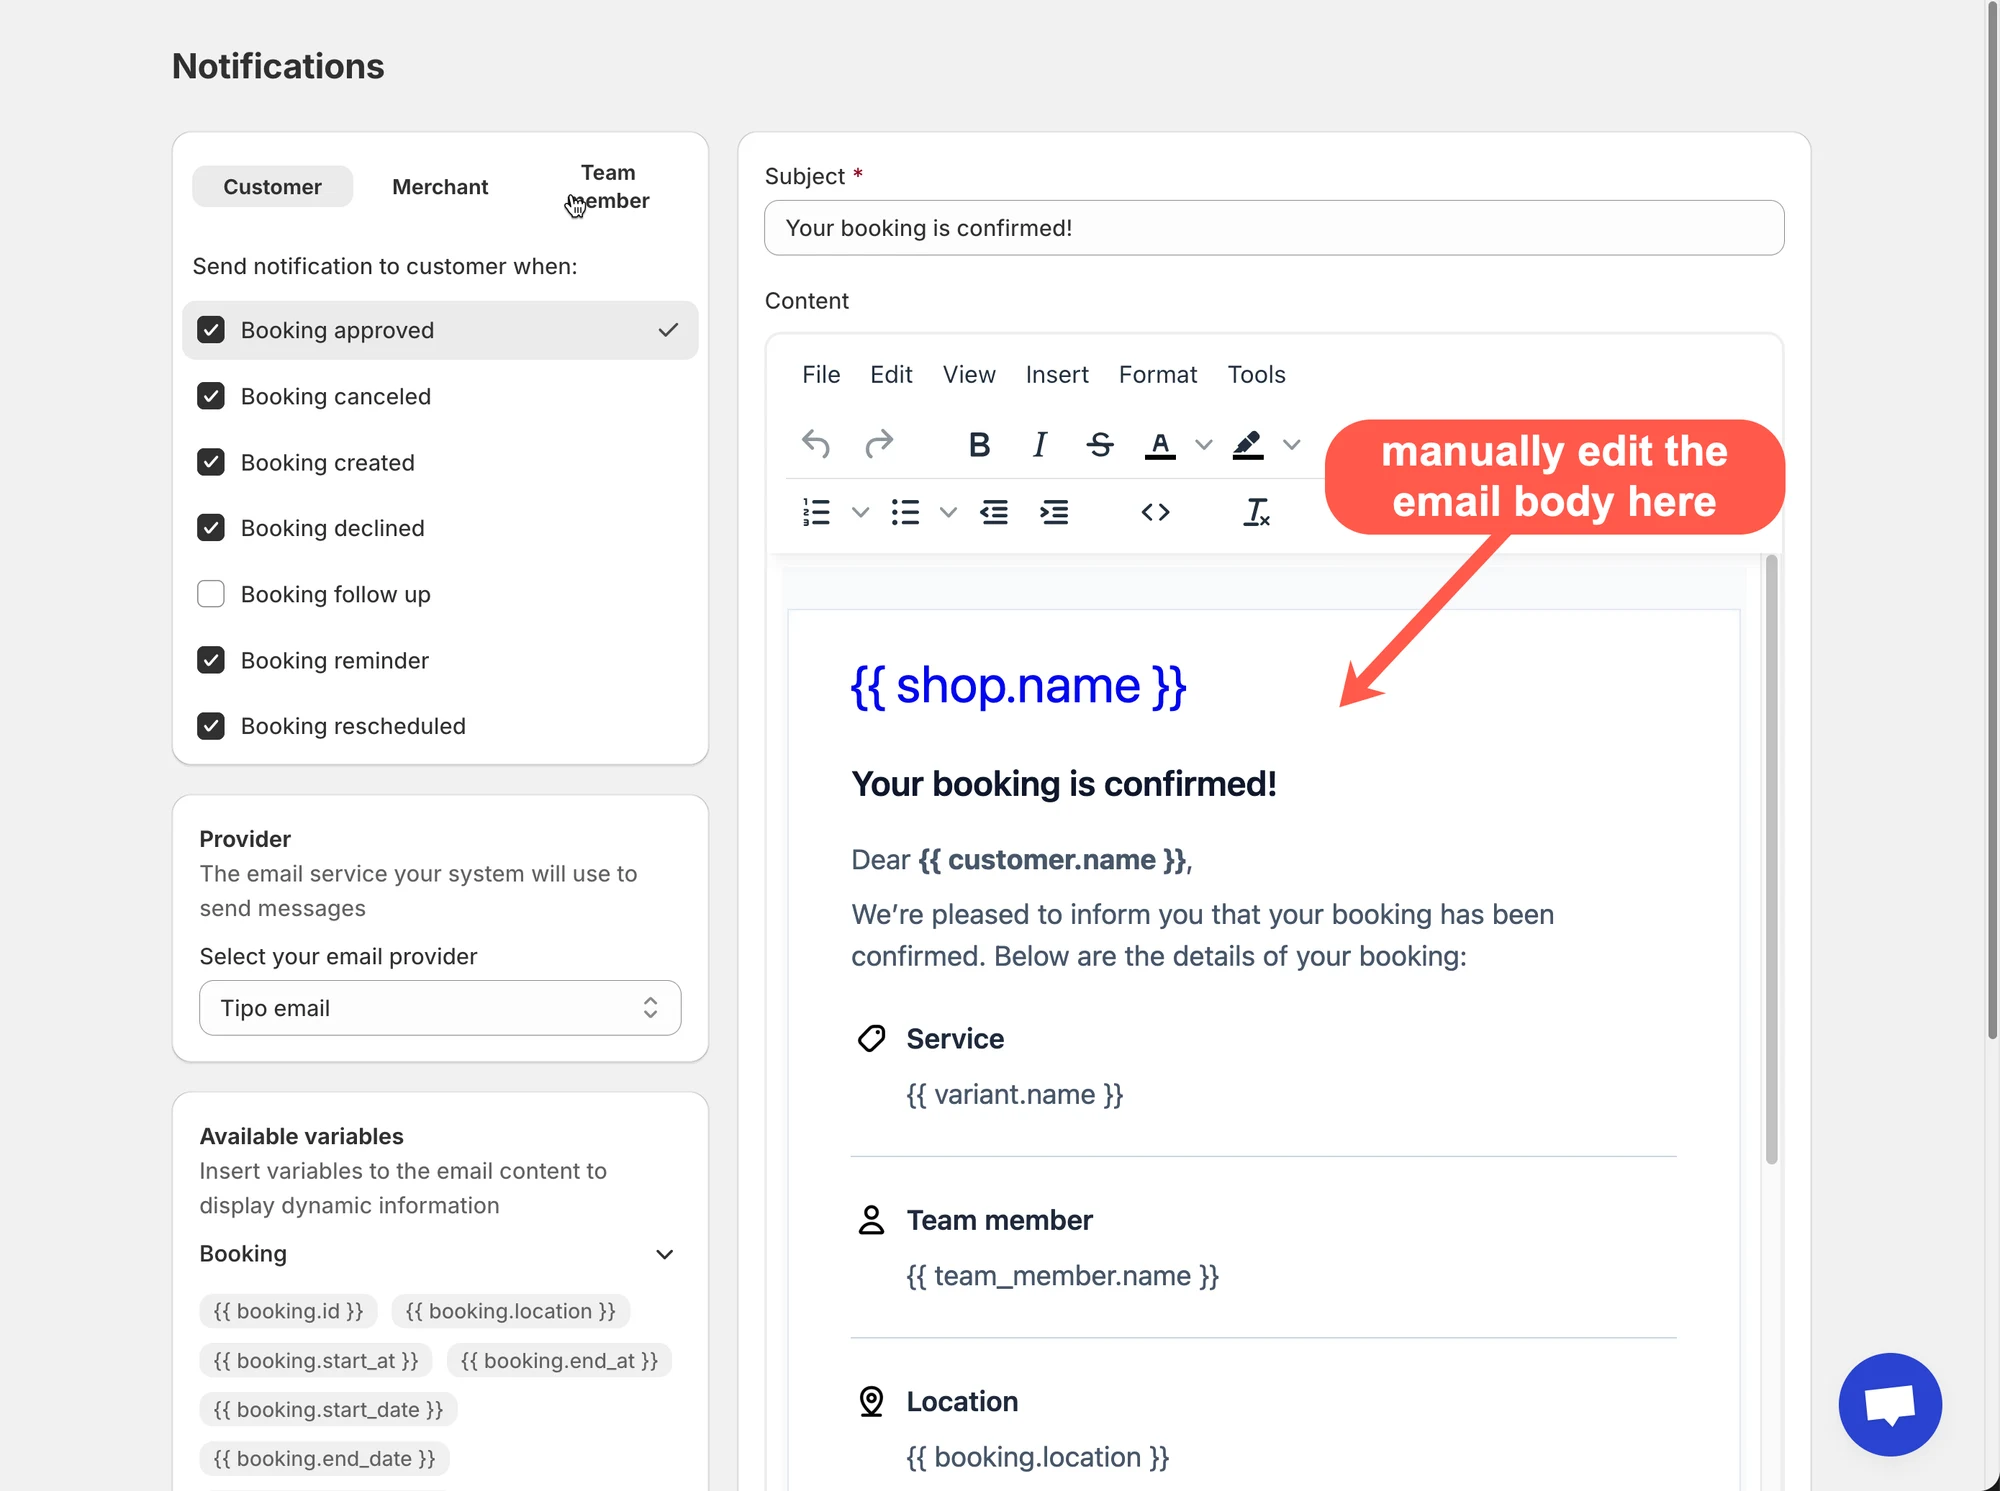
You can also insert variables (placeholders) like:
{{ customer.name }}{{ booking.start_at }}{{ variant.name }}
Variables automatically pull real booking data when the email is sent.
On the left side, look for Available variables to copy/insert into your template.
🚚 How emails are delivered (Email Provider)
Section titled “🚚 How emails are delivered (Email Provider)”In the Notifications page, you’ll also see Provider settings.
- Tipo email (default): quickest setup, works for most stores.
Sender name: store name
Sender email address: no-repoly@tipo.io
- SMTP (optional): use your own email server if you need a custom sending domain, stricter control, or deliverability rules
✅ Typical setup
Section titled “✅ Typical setup ”For most stores, start with:
- Customer tab
- Enable: Booking created / approved / canceled
- Enable: Booking reminder (if you use reminders)
- Team member tab
- Enable: Booking created (so staff know when they get a new booking)
- Merchant tab
- Enable: Booking created / canceled (so you can monitor changes)
Then customize subject/content after you confirm emails are sending correctly.
🧩 Related email guides (suggested next reads)
Section titled “🧩 Related email guides (suggested next reads)”- Customer emails
- Team member emails
- Admin (merchant) emails
- Customize email content
- Email provider (SMTP)
🙋 Still need support?
If you still need help, please feel free to contact us at hi@tipo.io. We’ll be happy to assist you further.