
Klaviyo integration
AI Overview
Connect Tipo to Klaviyo so customers from new bookings are added to a Klaviyo list. You create a private API key in Klaviyo and paste it into Tipo's Integrations settings, then choose the list to use.
View moreView less
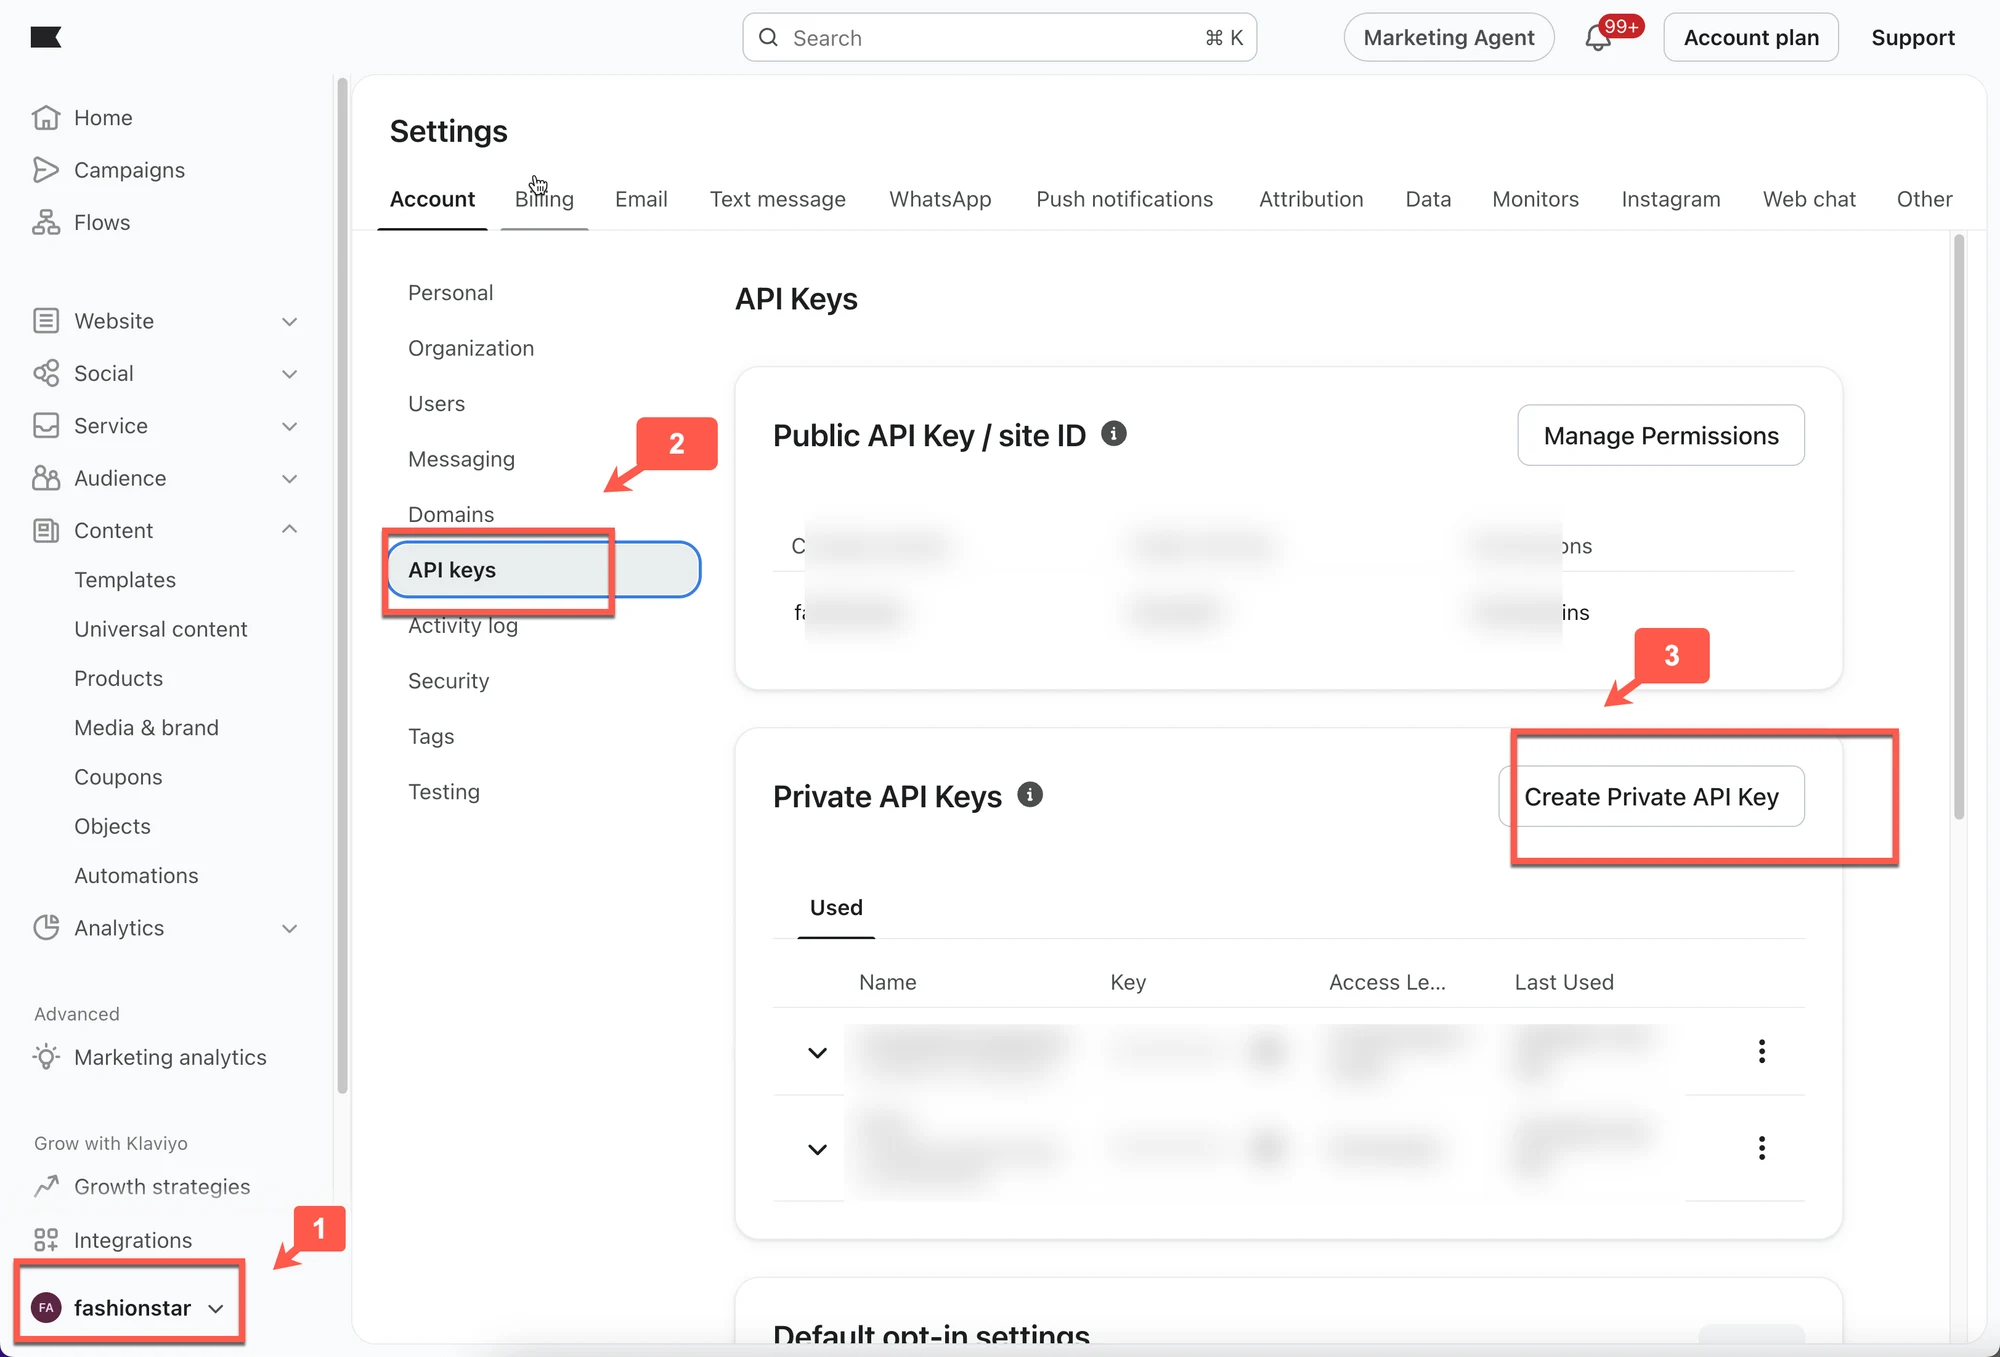
- In Klaviyo, go to Account > Settings > API Keys and click Create Private API Key with the permissions needed.
- In Tipo, open Settings > Integrations, find Klaviyo, and click Connect.
- Paste the key in API Key and select a Klaviyo list under Integrate.
- Click Save; after a booking, the customer email is added to the selected list.
Summary generated by AI. It can make mistakes, so check the full guide below.
Connect Tipo to Klaviyo so customers from new bookings are added to a Klaviyo list.
🔑 Step 1: Create a Klaviyo private API key
Section titled “🔑 Step 1: Create a Klaviyo private API key”1. Go to klaviyo.com and log in to your account
- Click your profile icon in the bottom left corner > select Account > click Settings
- choose API Keys > click the Create Private API Key button > set the permissions your integration requires
🔌 Step 2: Connect Tipo to Klaviyo
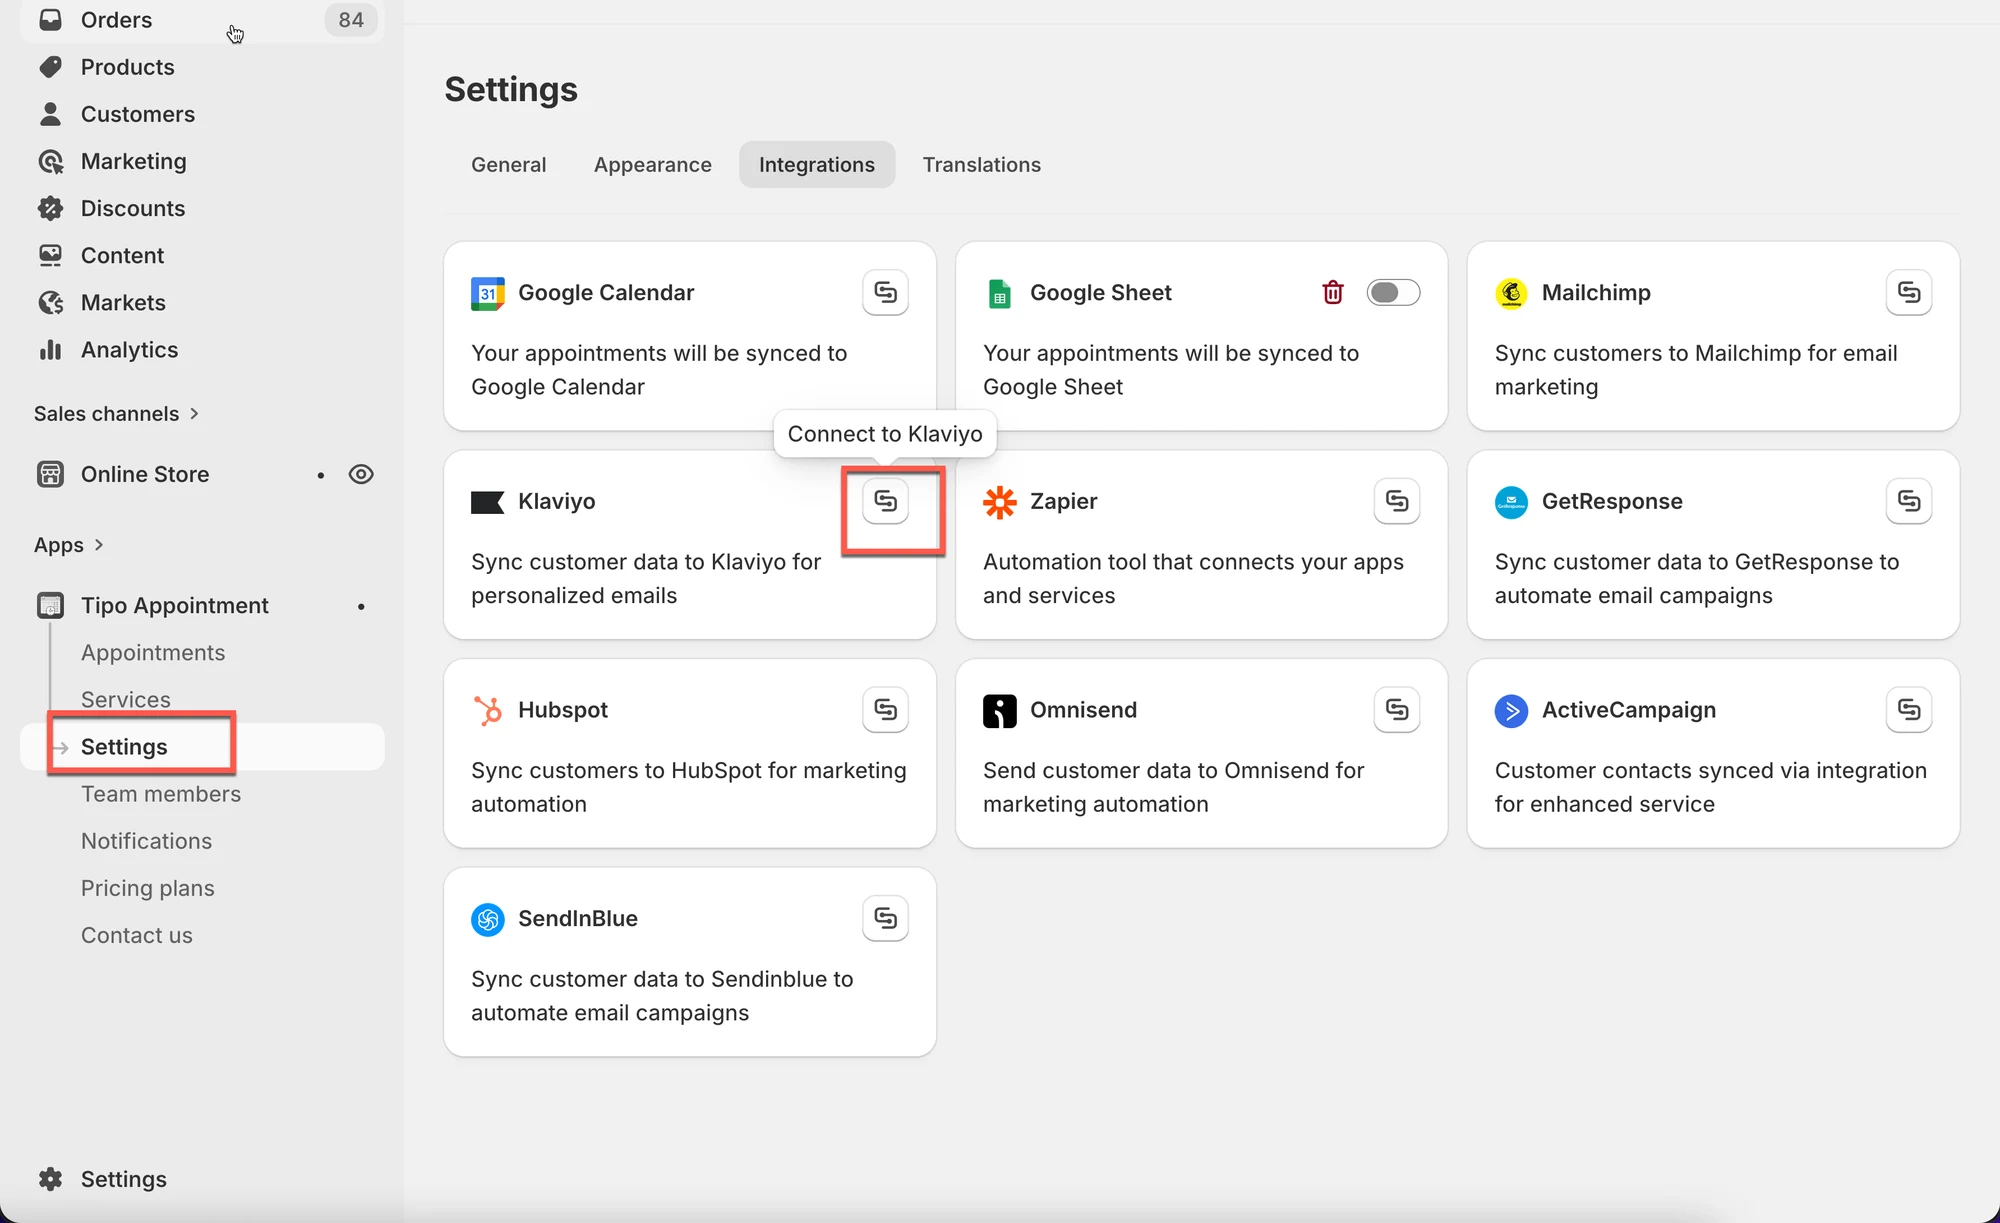
Section titled “🔌 Step 2: Connect Tipo to Klaviyo”- Open the app > click Settings > Integrations > find Klaviyo
- Click on the Connect icon
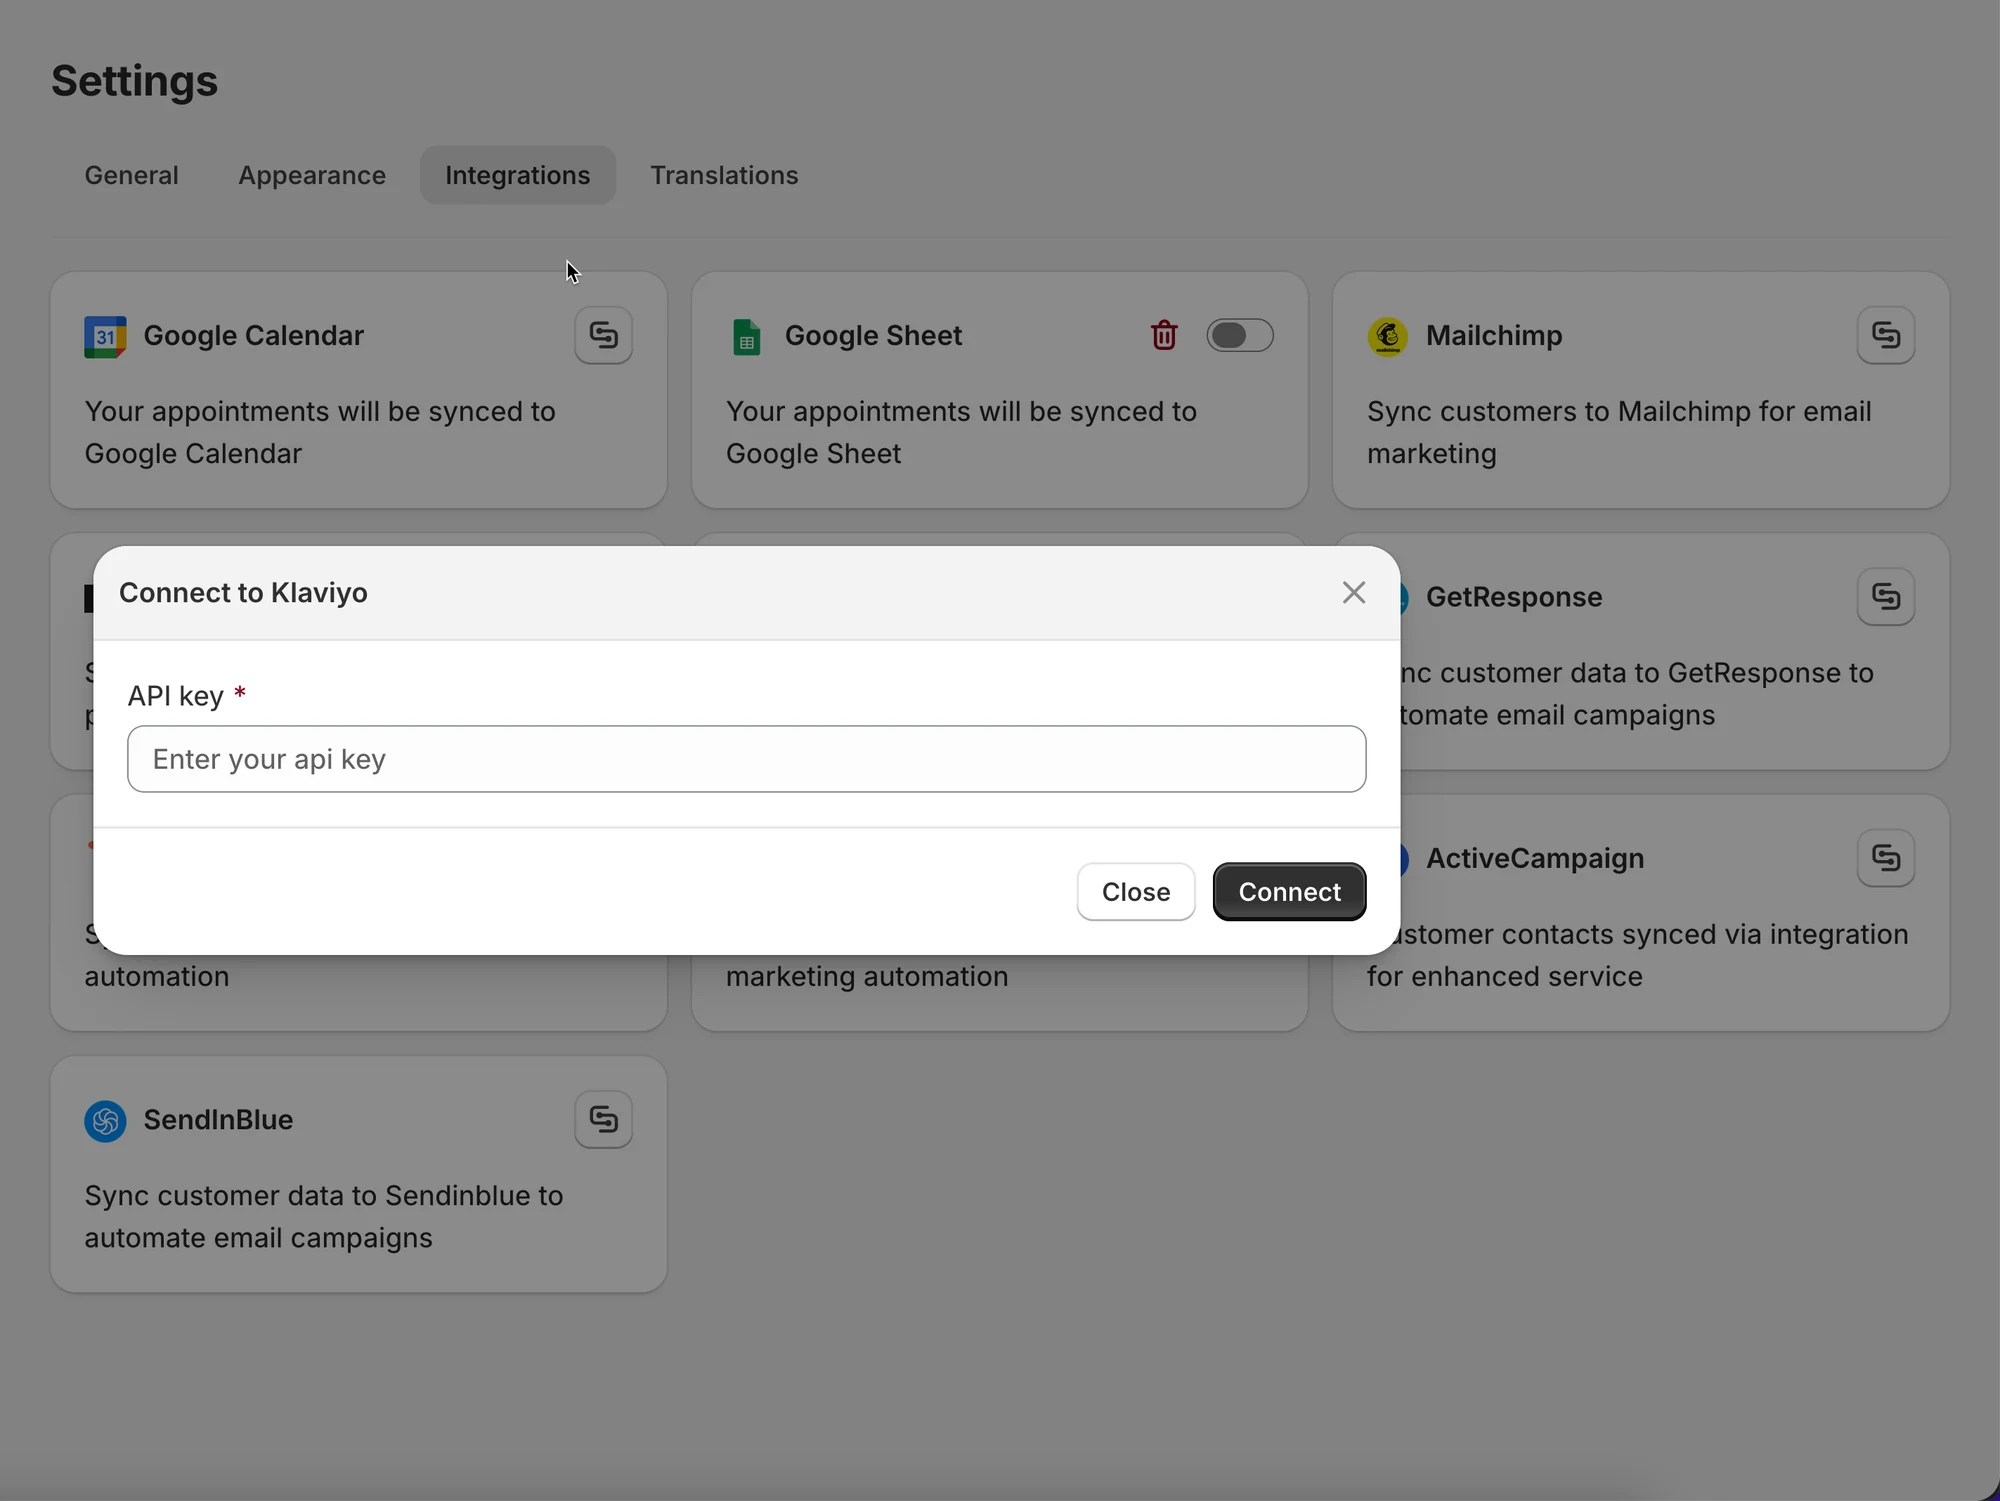
- Paste the Private API Key in API Key field
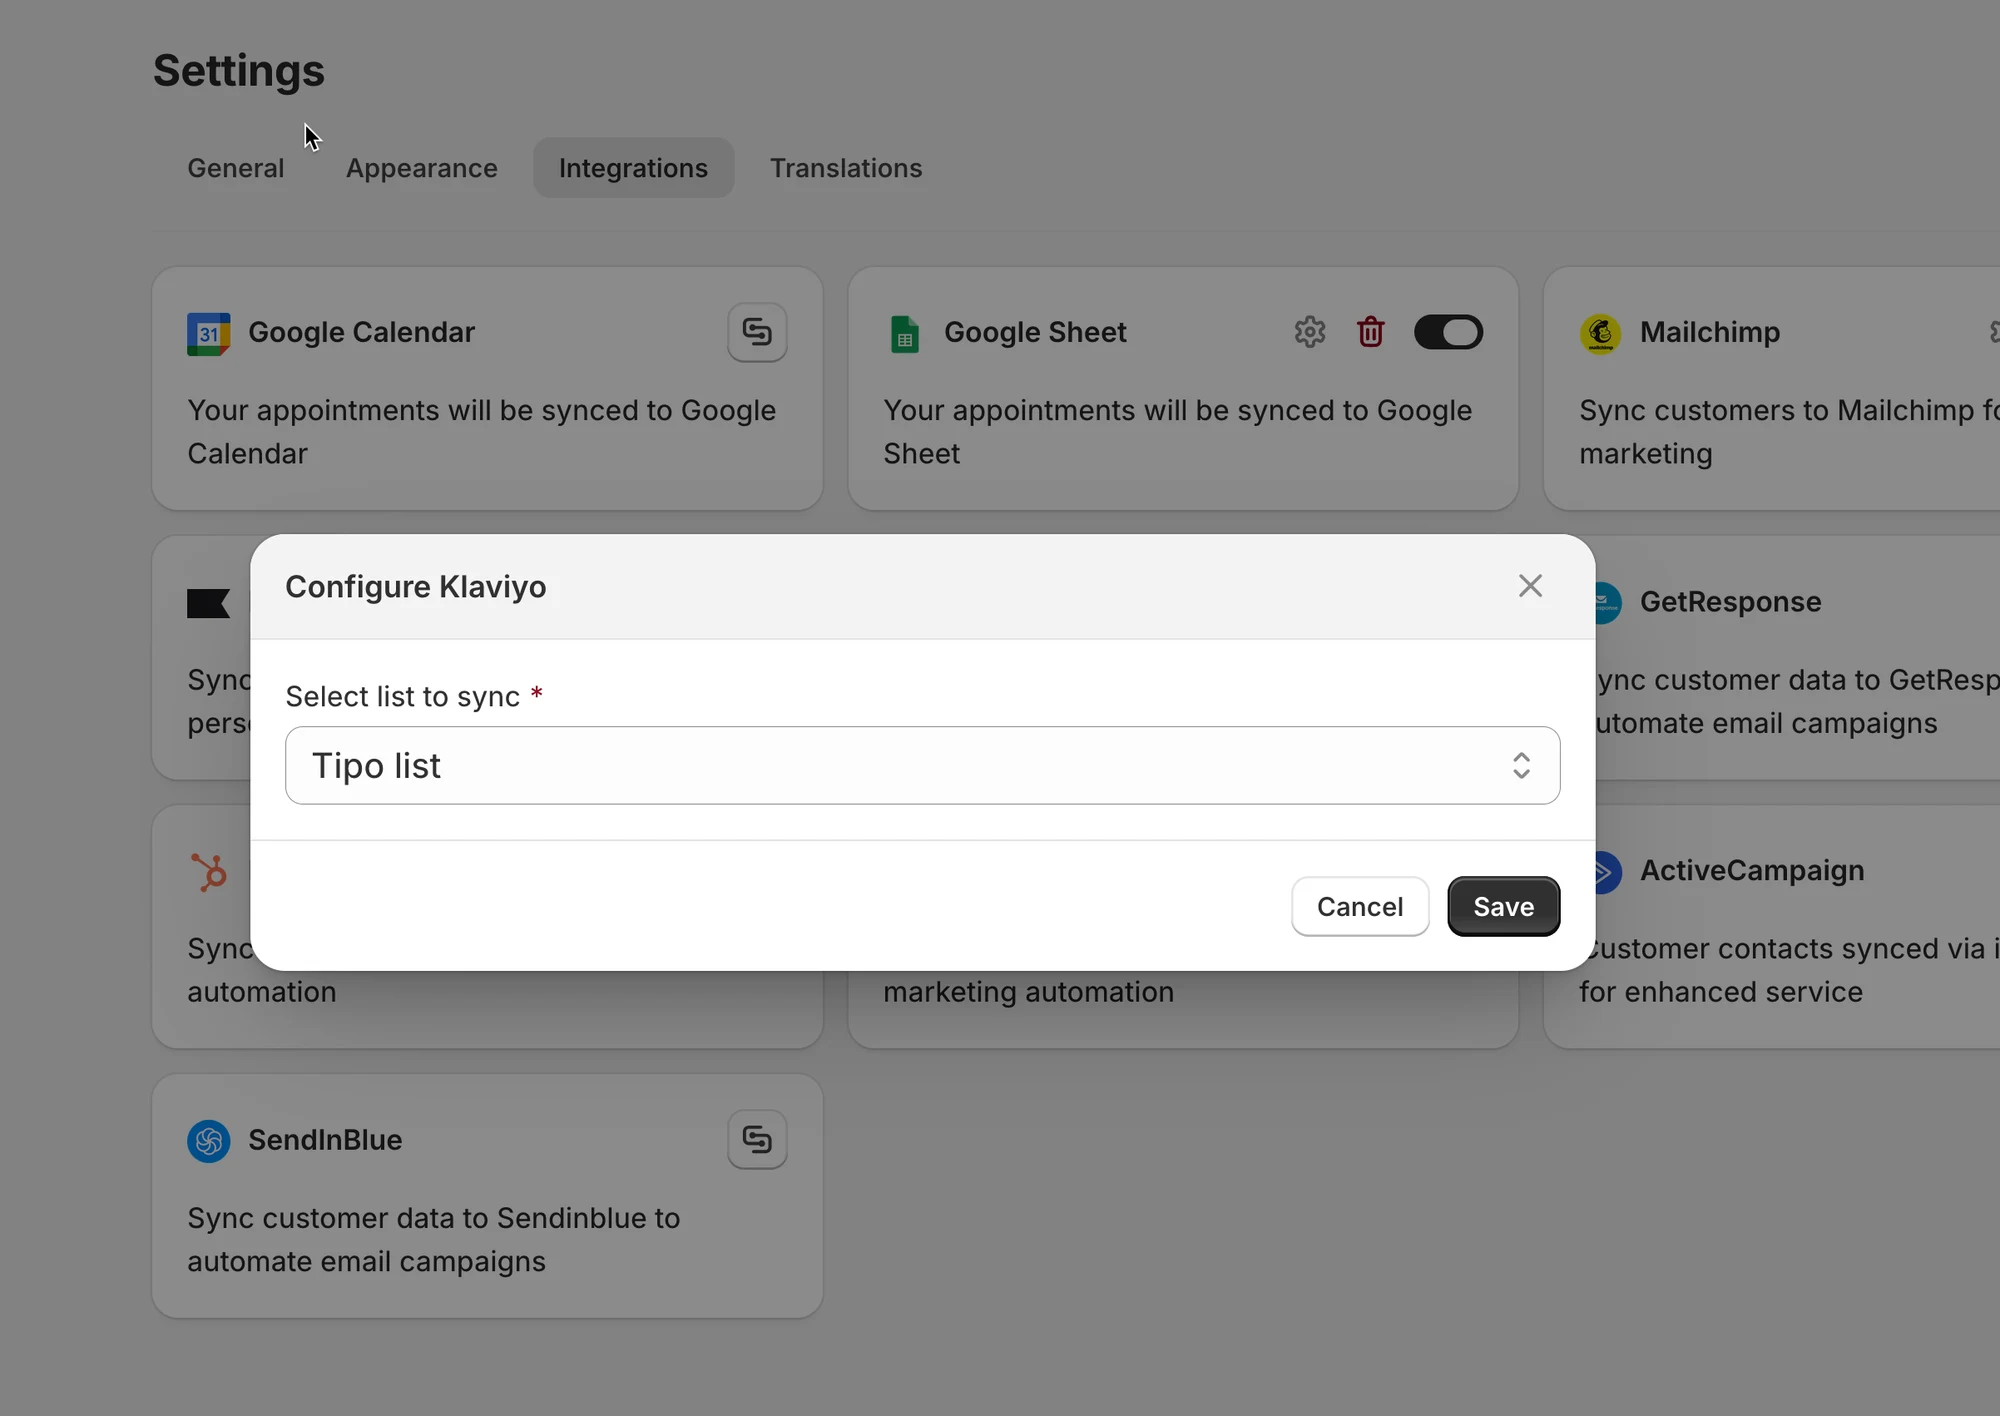
- In Integrate sections, select a list from Klaviyo to connect data
- Click Save
✅ How Klaviyo integration works?
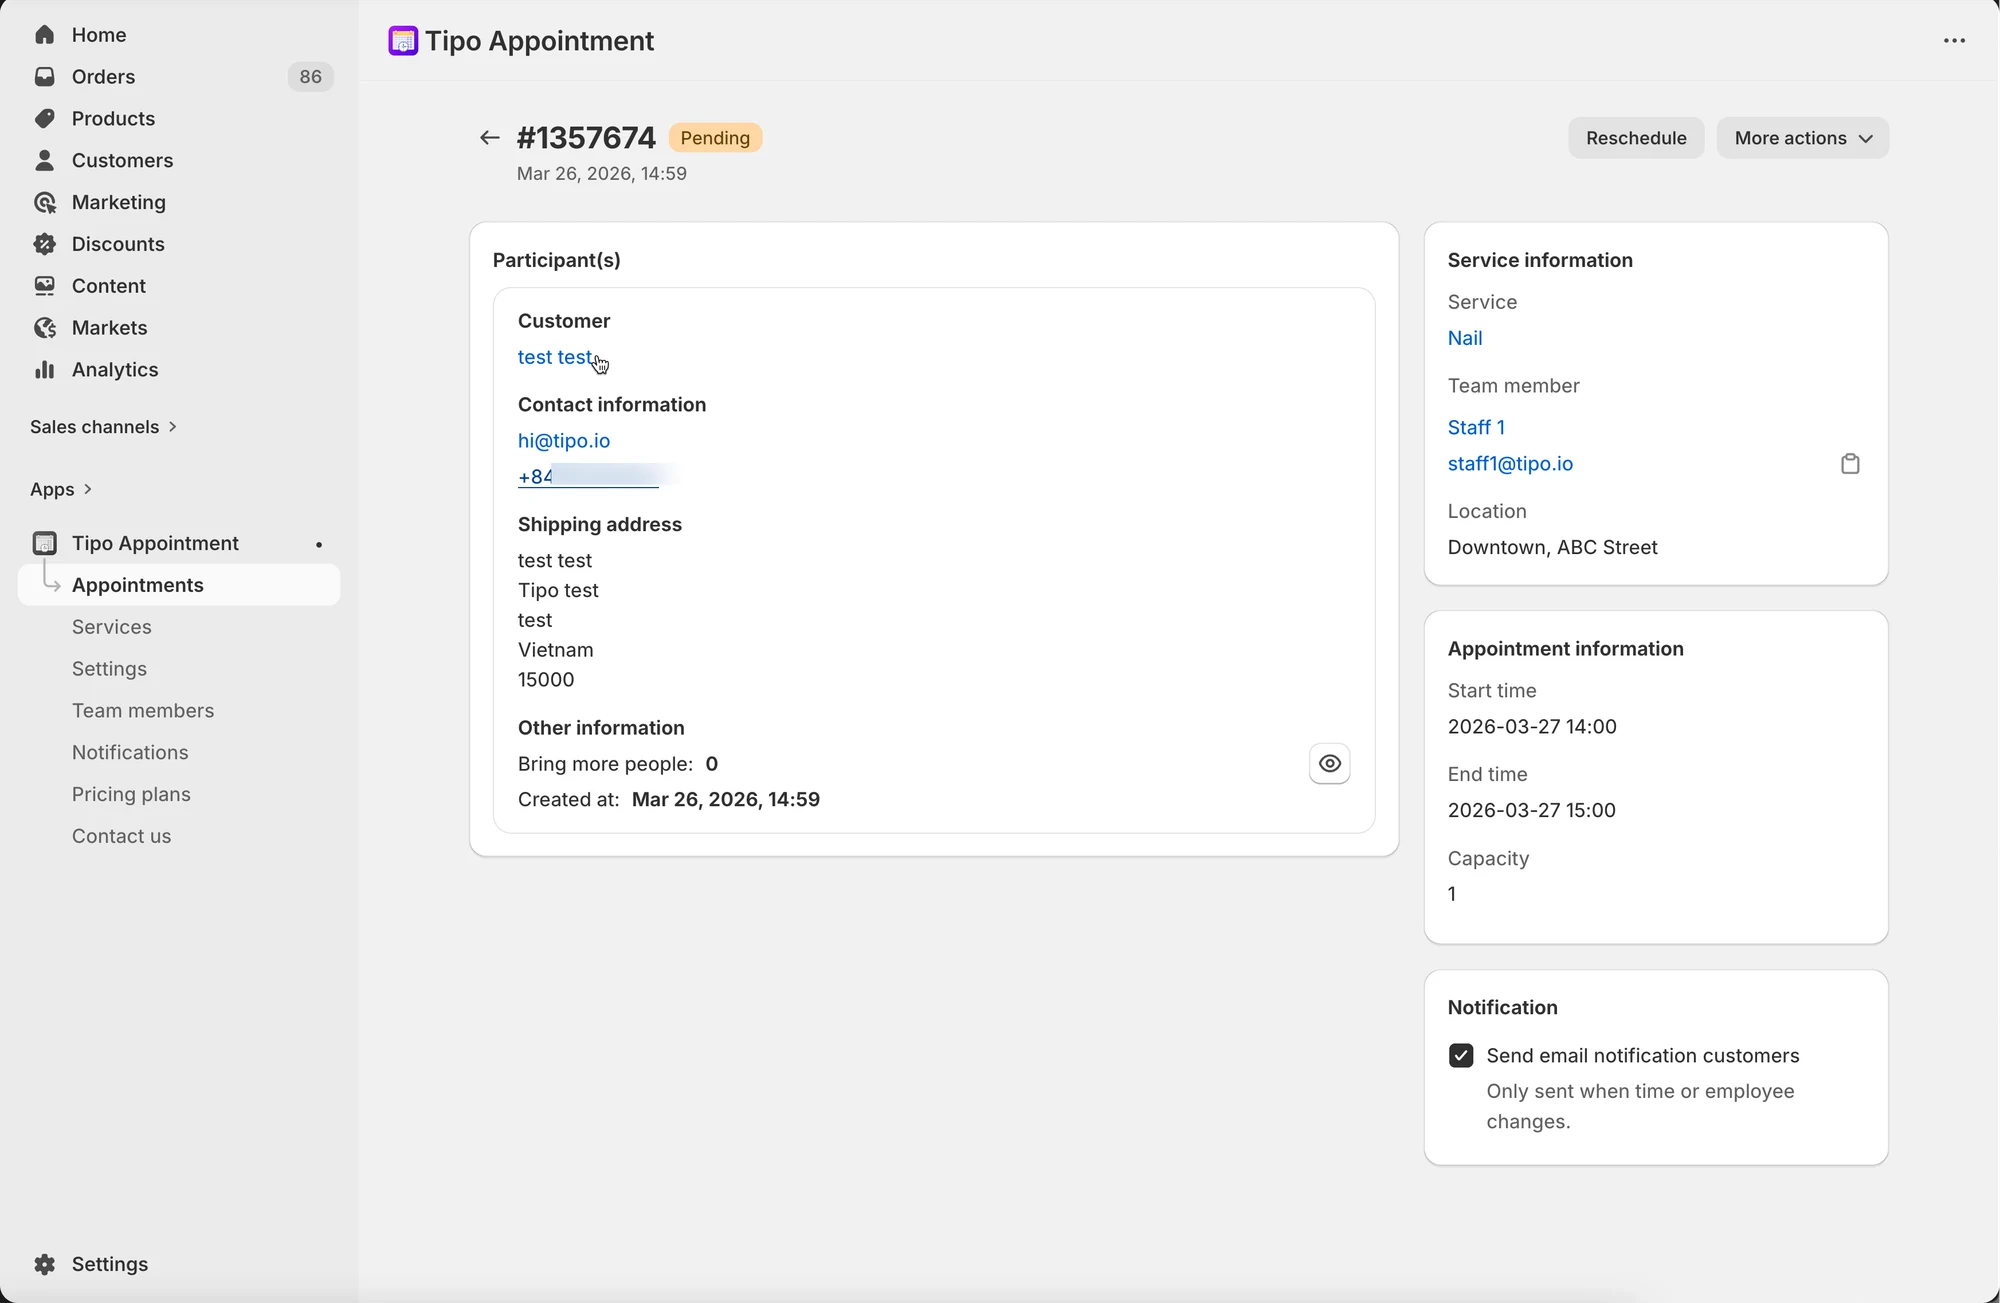
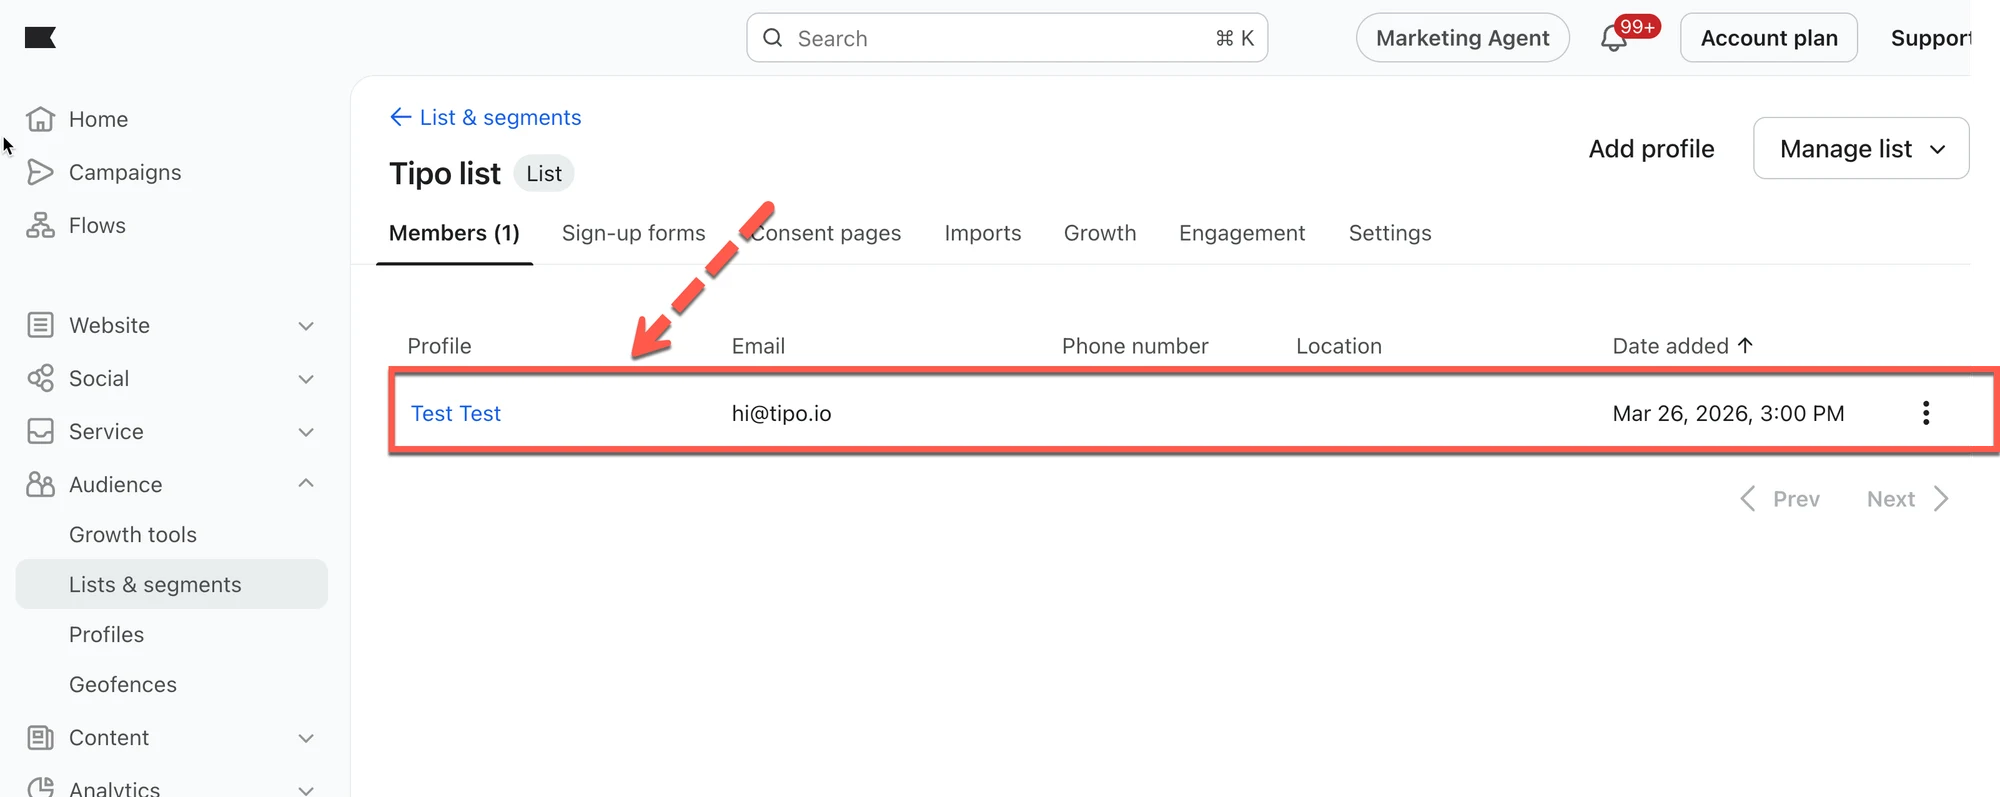
Section titled “✅ How Klaviyo integration works? ”After an appointment is booked on Tipo calendar, the customer email will be added to the selected Klaviyo contact list.
🙋 Still need support?
If you still need help, please feel free to contact us at hi@tipo.io. We’ll be happy to assist you further.