
Reschedule or cancel an appointment
AI Overview
Shows how to reschedule or cancel appointments in Tipo Appointment Booking, as an admin in the app or as a customer. Admins can do both from Appointment details. Customers can reschedule from their booking email, and can cancel from their account only if you enable it in settings.
View moreView less
- The team member must have availability for the new date and time.
- Admin: open the appointment, click Reschedule, choose team member, date and time, then confirm.
- Customers can reschedule by email up to 1 day before the appointment; they cannot cancel from email.
- Admin cancel: More actions > Cancel appointment, then confirm.
- Customer cancel: tick Allow customers to cancel bookings under Customer account settings and add the Booking history block to the account page.
Summary generated by AI. It can make mistakes, so check the full guide below.
Use this guide to change an appointment time (reschedule) or stop an appointment (cancel) from the Tipo Appointment Booking app.
✅ Before you start
Section titled “✅ Before you start”- You need at least 1 appointment created.
- Your staff/team member must have availability for the new date/time (otherwise the time picker may not offer the slot).
📅 Reschedule an appointment
Section titled “📅 Reschedule an appointment”Appointments can now be rescheduled by both admin and customers.
Option 1 — Admin reschedules (from app)
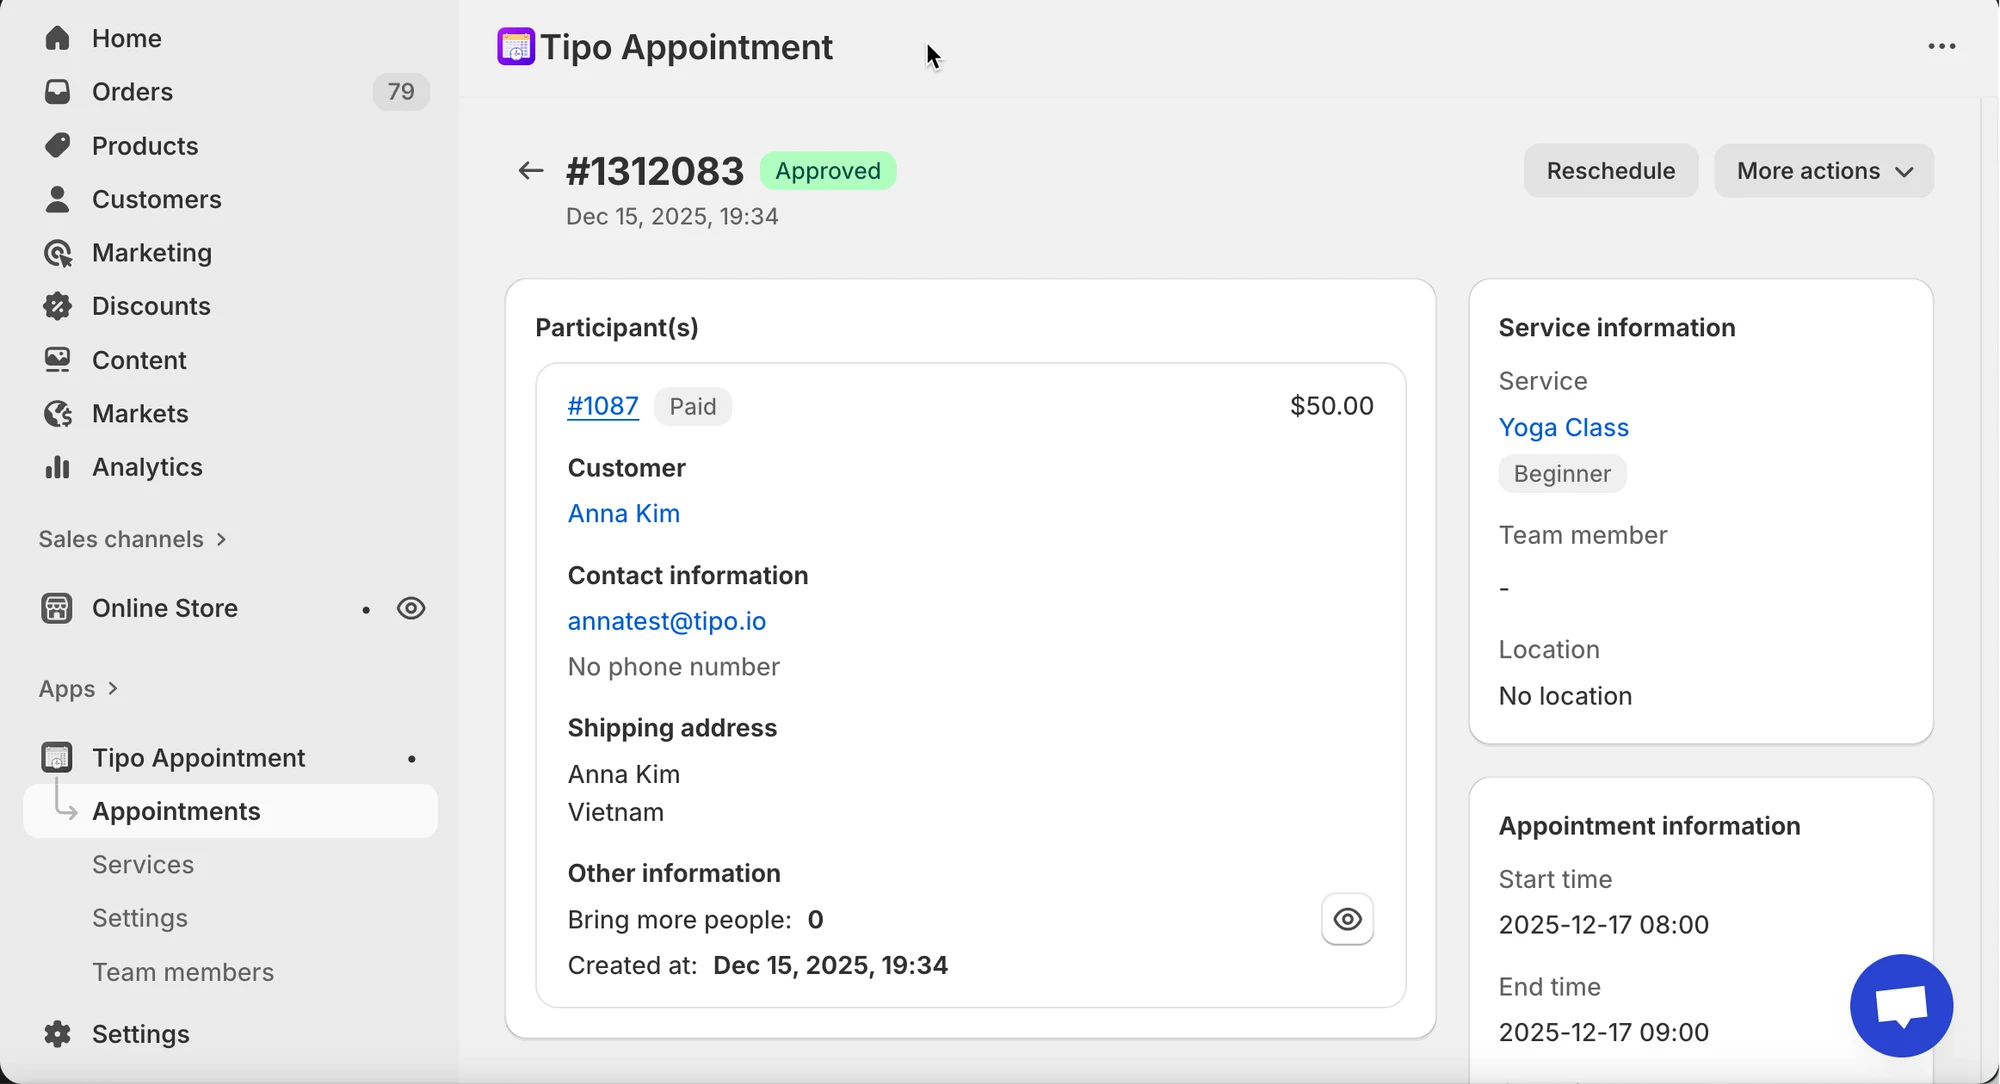
Section titled “Option 1 — Admin reschedules (from app)”1. Open the app > click Appointments > click on the appointment you want
Choose a view:
- Month view = quick overview
- List view = easier filtering/searching
- Select the appointment to open Appointment details
- Click Reschedule (top-right)
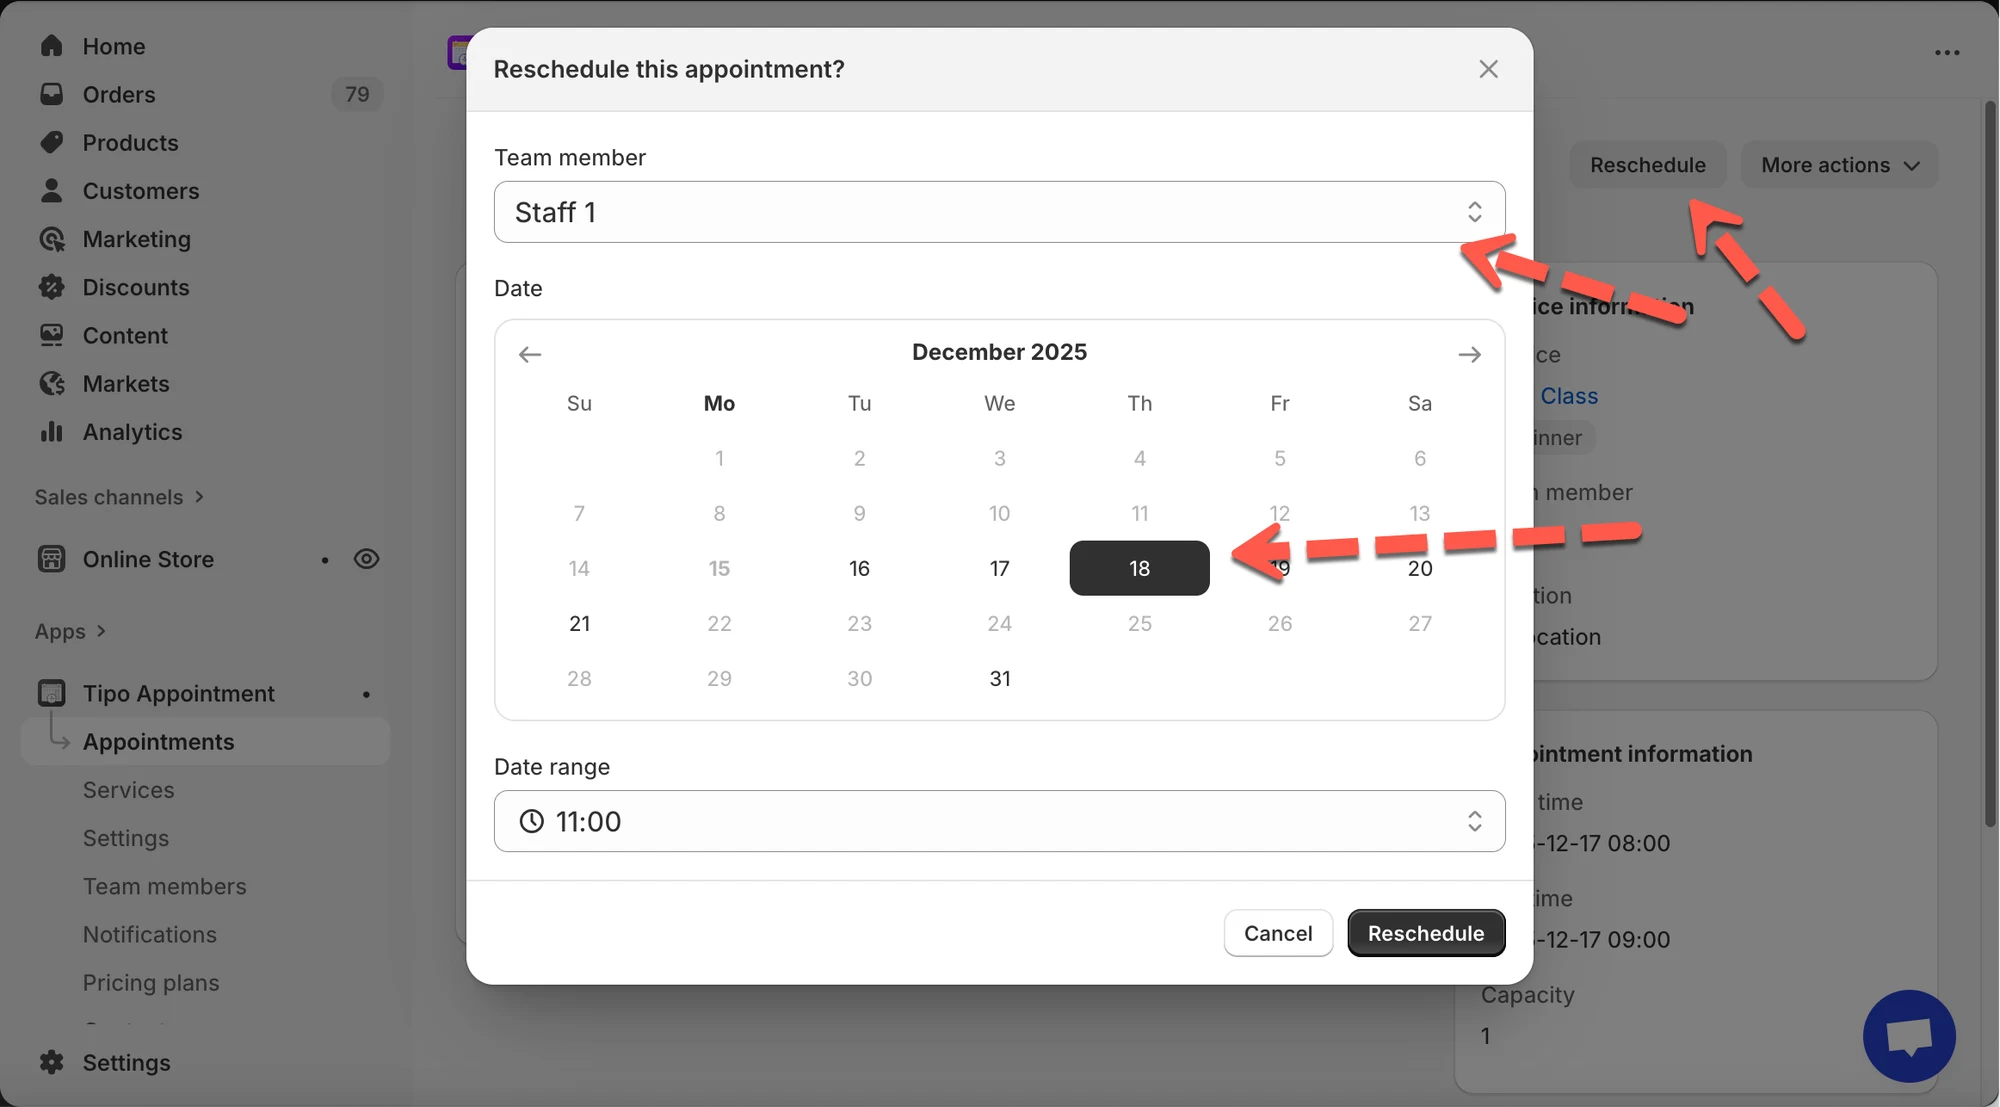
- In the popup:
- Select Team member (if available)
- Pick a new date
- Pick a new time in Date range
- Click Reschedule to confirm
Option 2 — Customer reschedules (from email)
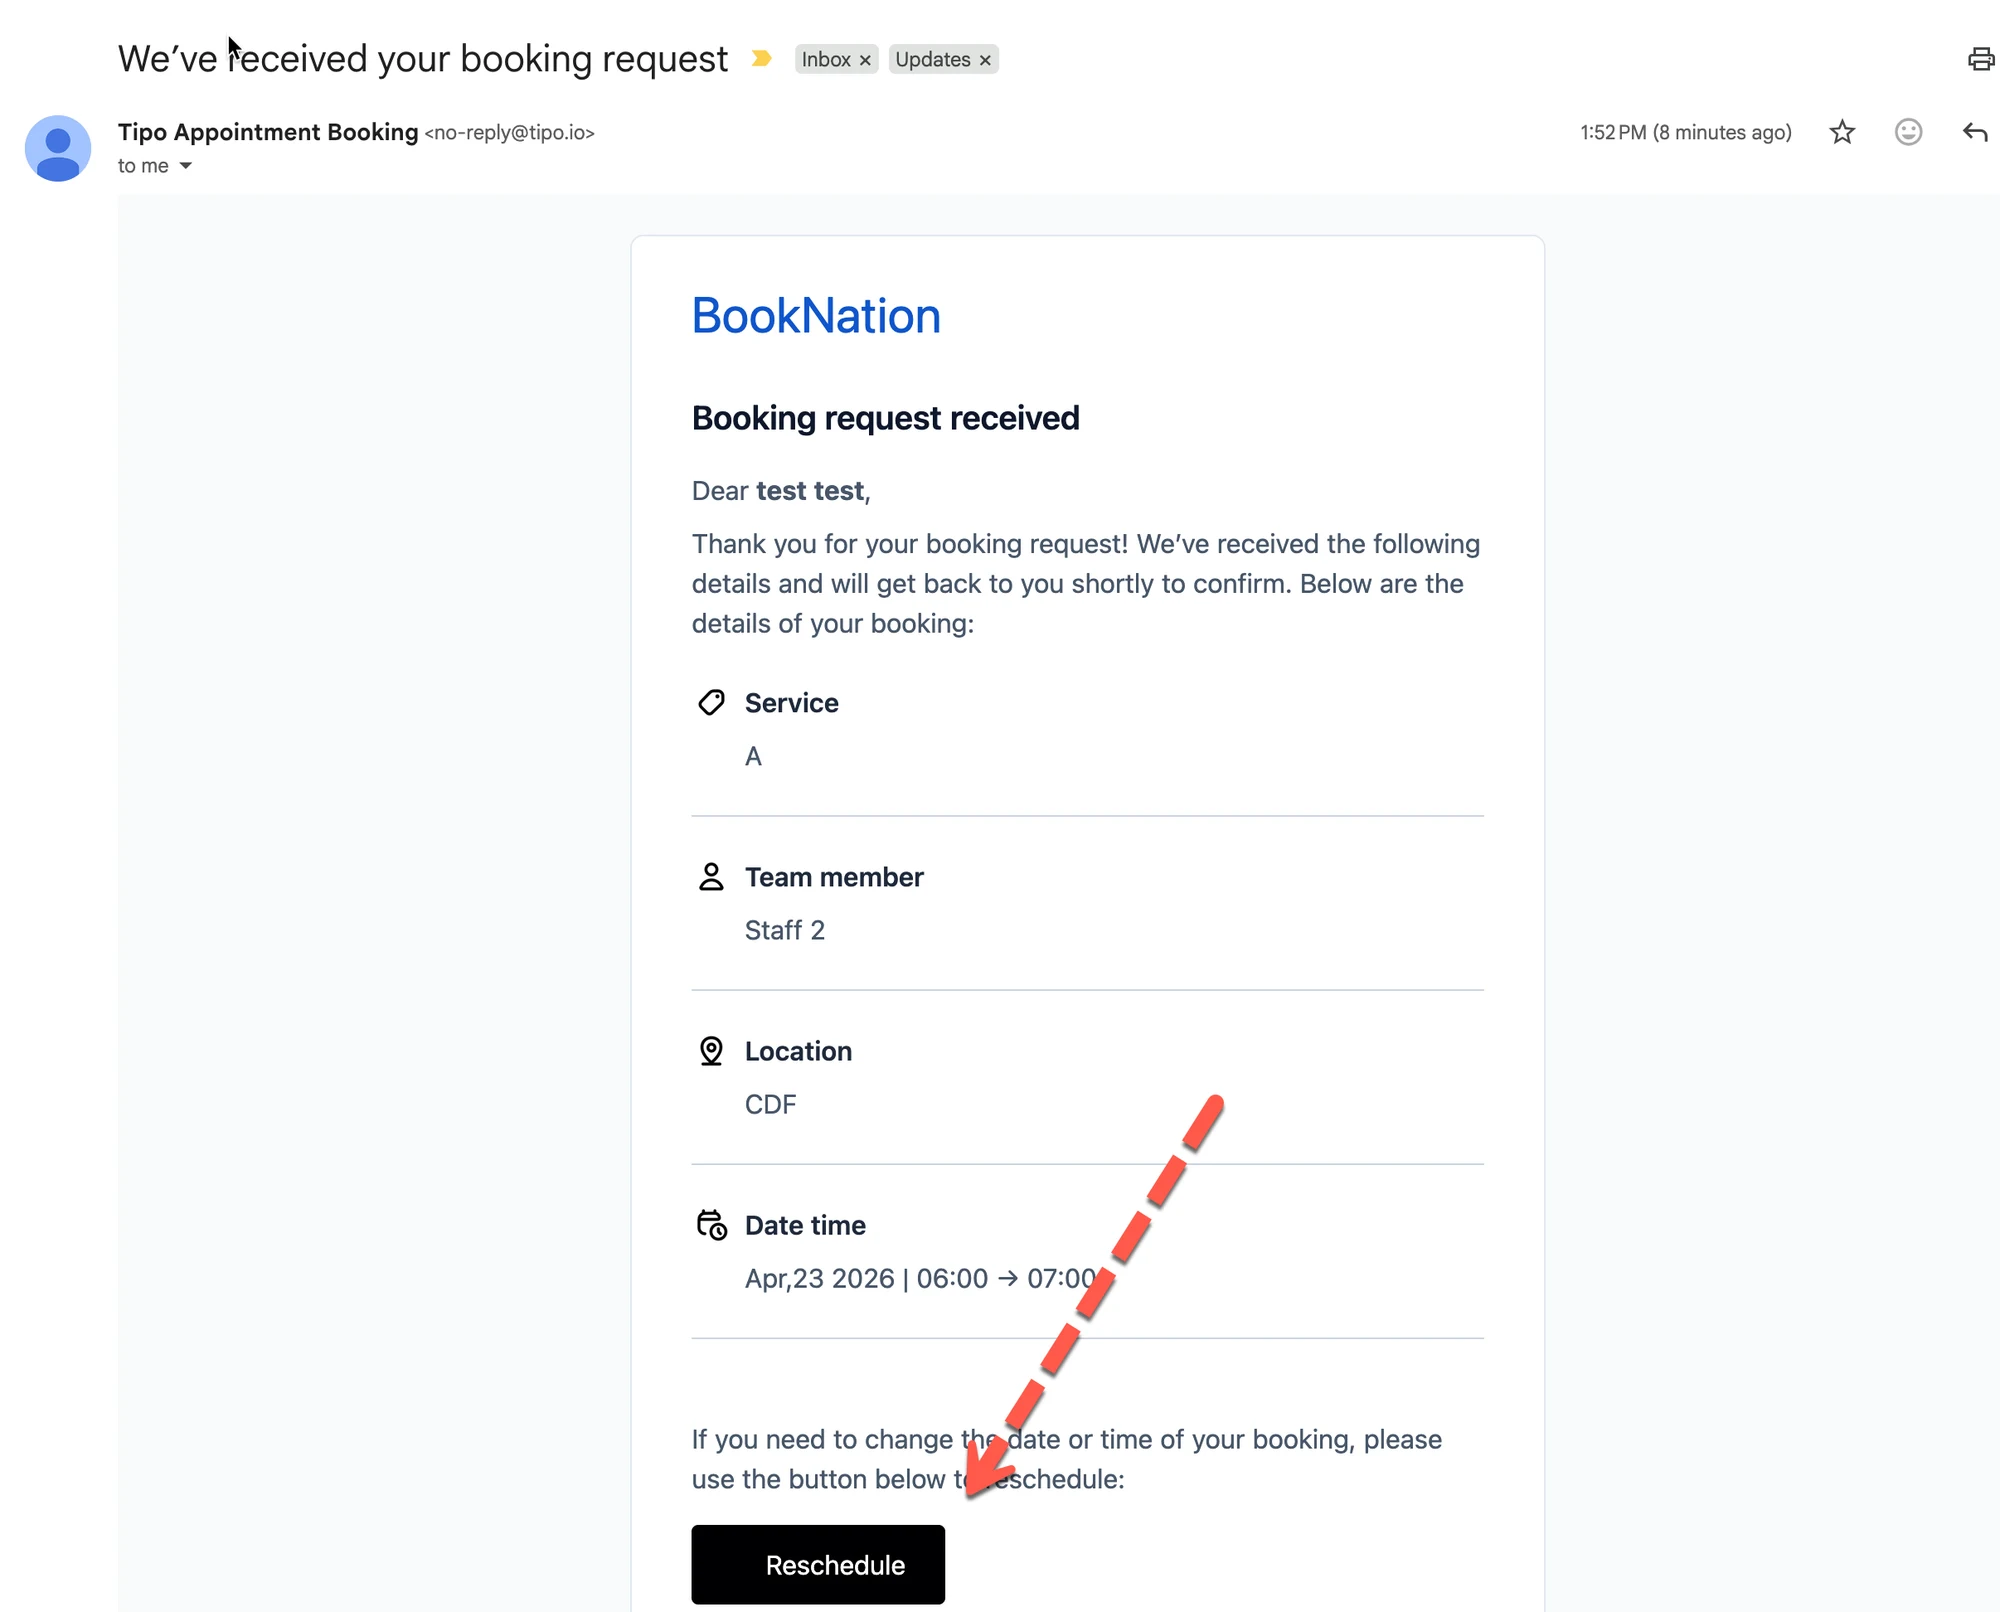
Section titled “Option 2 — Customer reschedules (from email)”Customers can reschedule directly from their booking email.
How it works
Section titled “How it works”- Customer opens booking confirmation email
- Clicks Reschedule appointment button
- A reschedule widget opens > Customer selects a new available time
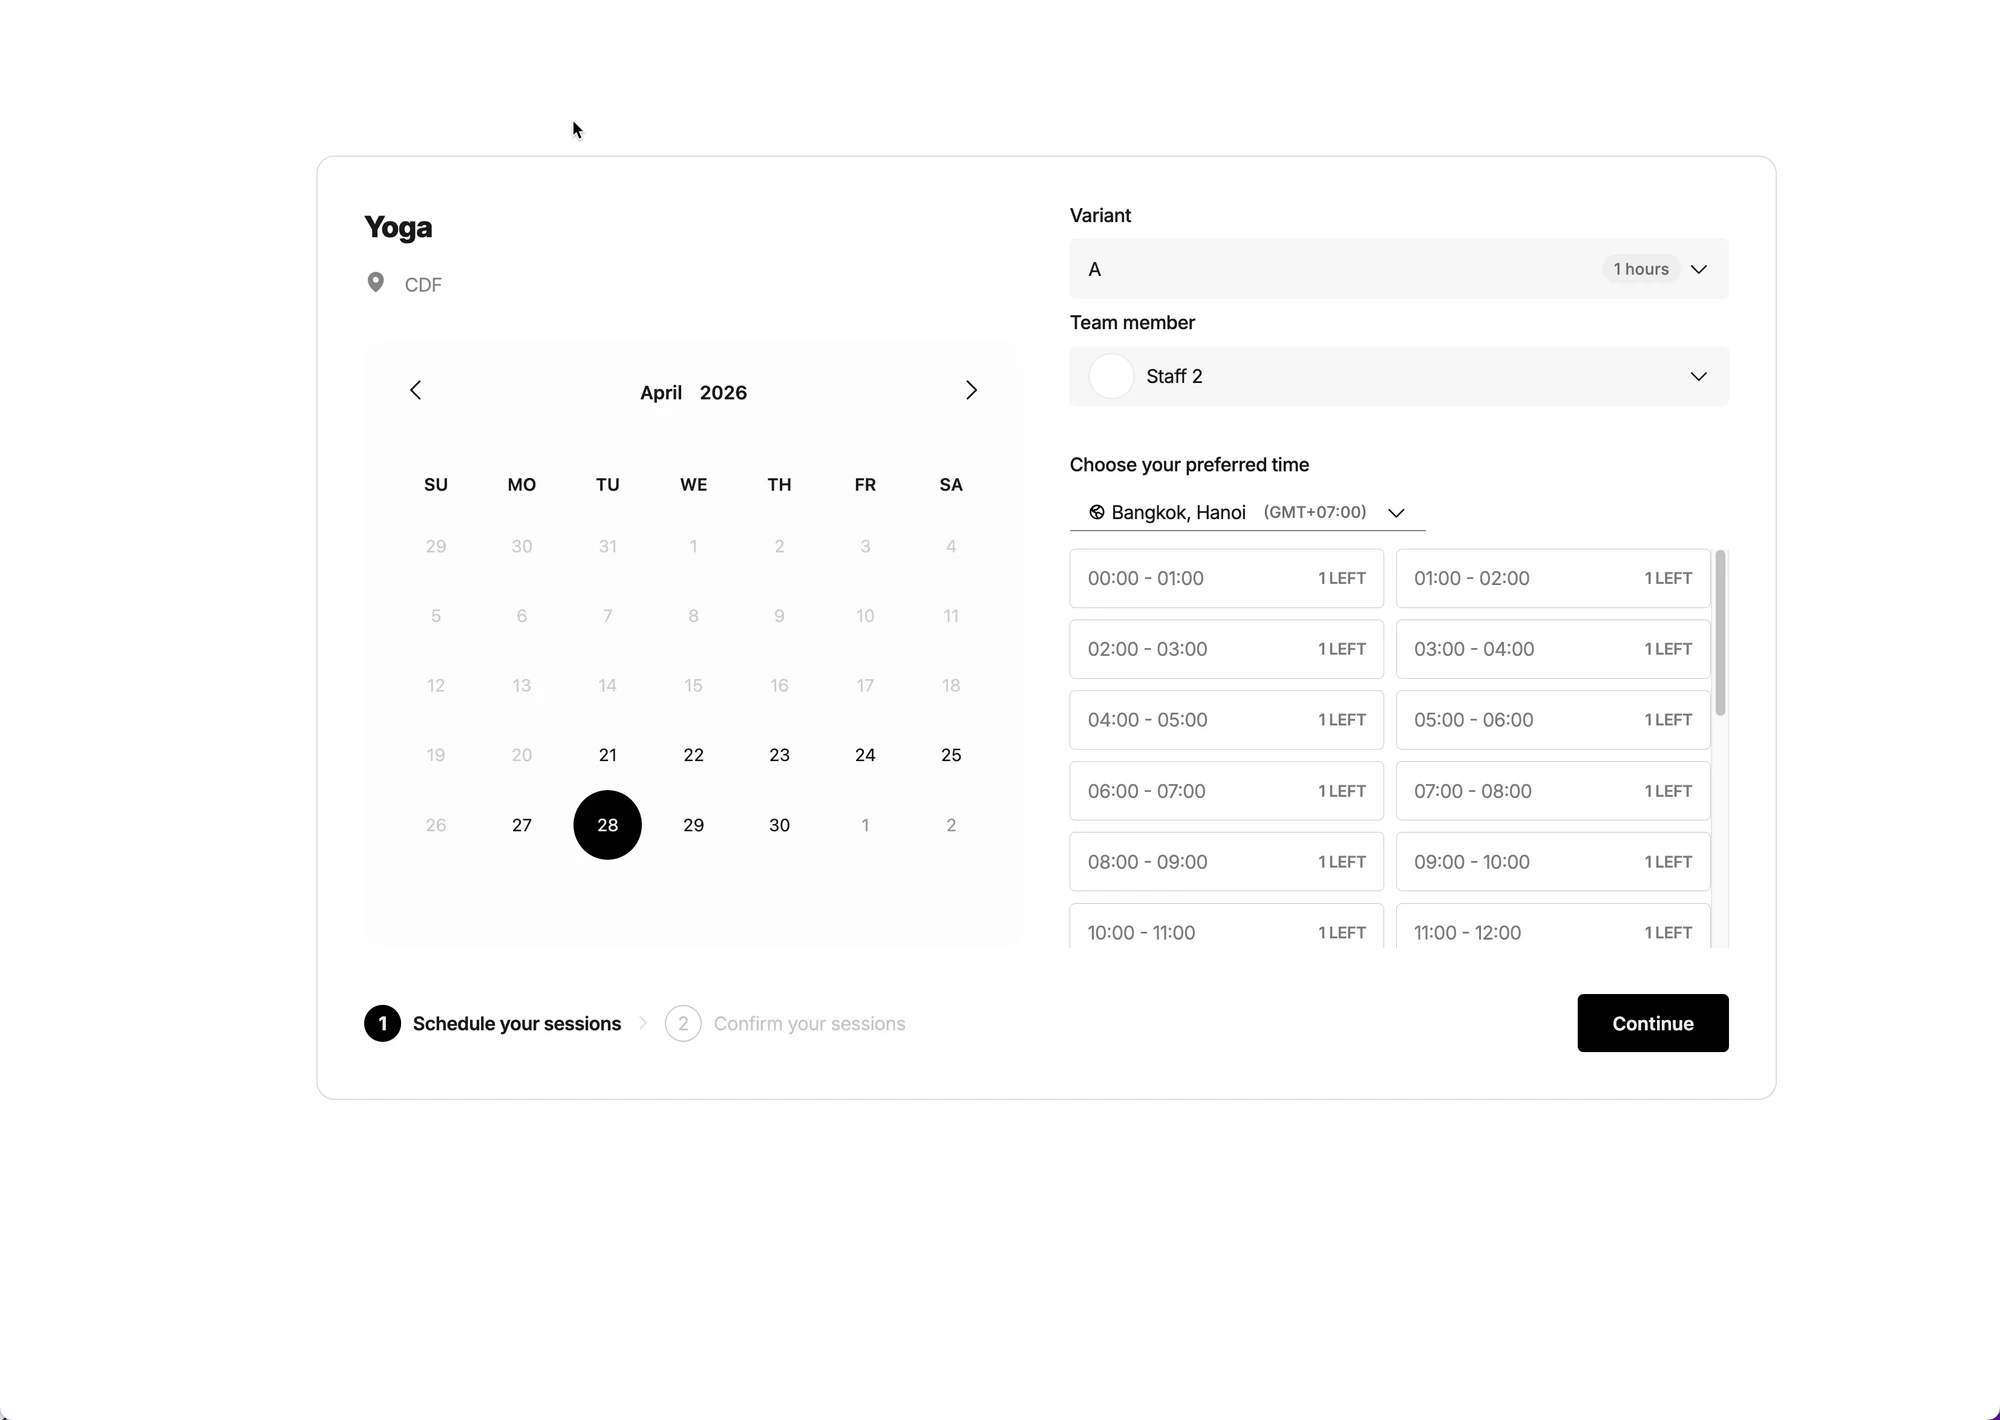
- Click Confirm
The appointment updates automatically.
Important rules
Section titled “Important rules”
- Customers can only reschedule, not cancel appointments
- Rescheduling depends on slot availability
- Admin will see the updated time in calendar
⏱️ Reschedule time limit: To avoid last-minute changes:
- Customers can reschedule until 1 day before the appointment. Within 24 hours → rescheduling is blocked
- Admin can still reschedule manually if needed
⇒ This ensures merchants have enough preparation time.
💡 What changes after rescheduling?
Section titled “💡 What changes after rescheduling?”- The appointment’s start/end time updates.
- The appointment stays linked to the same customer and service.
- If the time slot is not available, you may need to adjust staff availability first.
❌ Cancel an appointment
Section titled “❌ Cancel an appointment”Option 1 — Admin Cancels (From App)
Section titled “Option 1 — Admin Cancels (From App)”1. Open the app > click Appointments > click on the appointment you want
Select the appointment to open Appointment details
Choose a view:
- Month view = quick overview
- List view = easier filtering/searching
- On the Appointment details page, click More actions
- Select Cancel appointment > confirm to cancel again on the popup
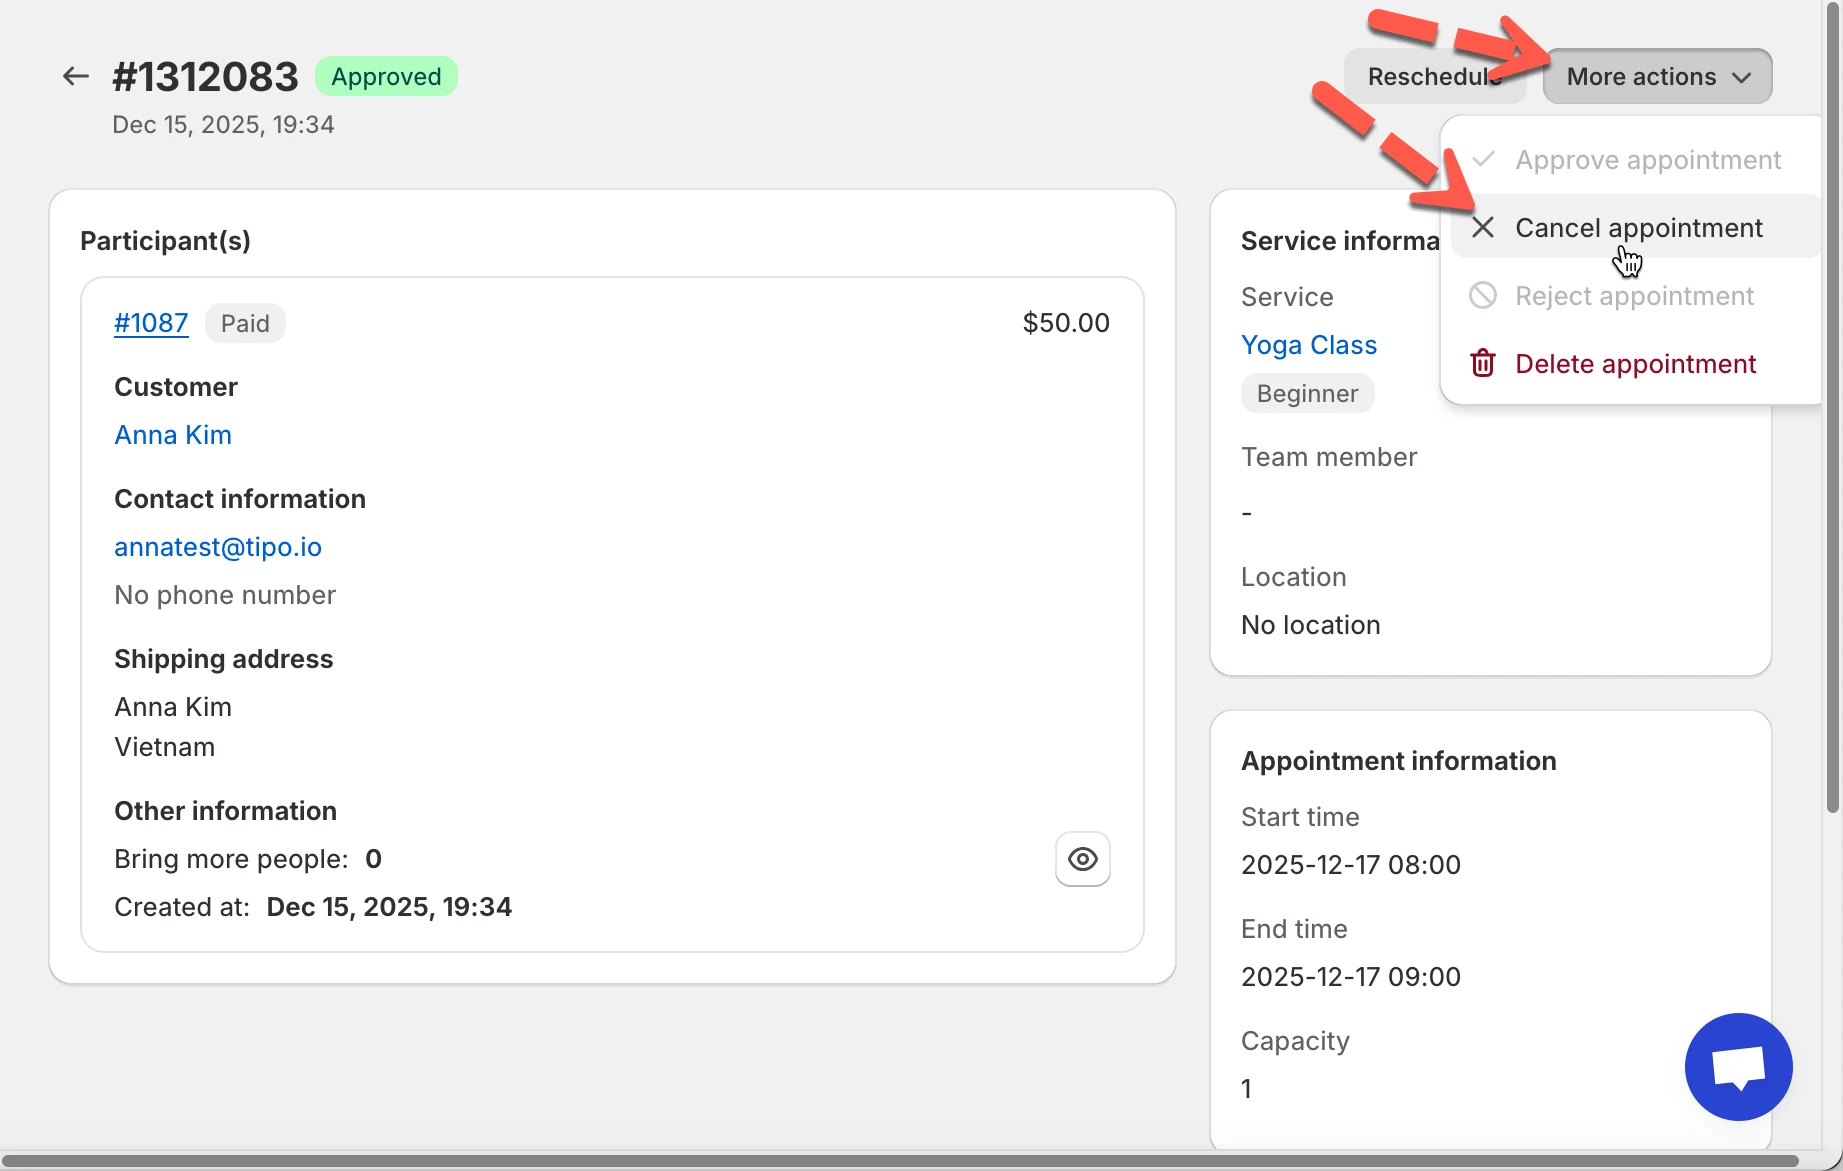
What happens when you cancel?
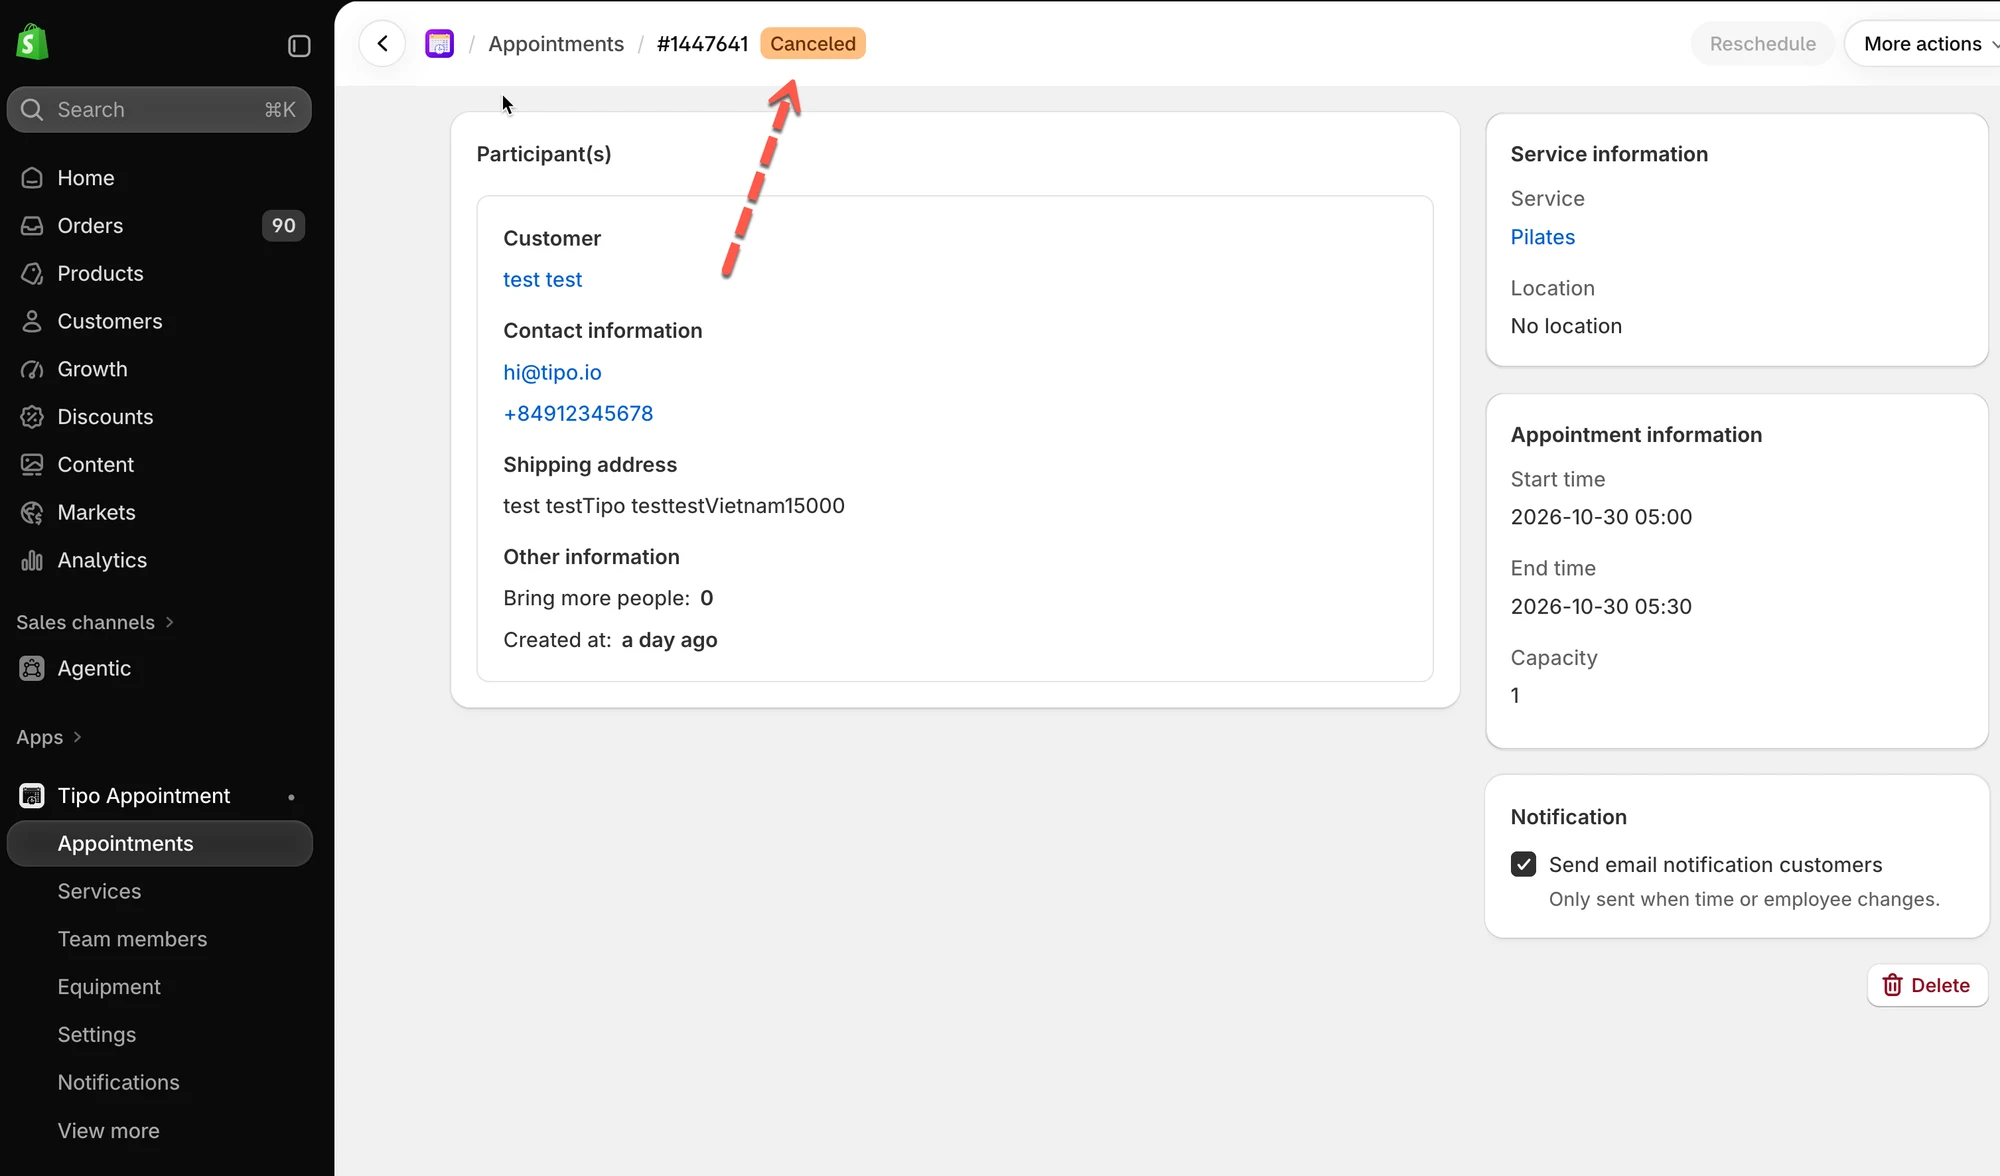
Section titled “What happens when you cancel?”- The appointment is marked as Canceled (or removed from active scheduling depending on your system rules).
- The time slot becomes available again (unless blocked by other rules).
🧪 Example: Reschedule
Section titled “🧪 Example: Reschedule”Scenario:
A customer booked Yoga Class on Dec 17, 2025 (08:00–09:00), but asks to move it to a different day.
Steps:
- Open Apps → Tipo Appointment booking app → Appointments
- Click the Yoga Class appointment → open details
- Click Reschedule (top-right)
- In the popup:
- Team member: Staff 1
- Date: choose Dec 18, 2025
- Time: choose a new time from the dropdown , e.g. 11:00
- Click Reschedule to confirm
✅ Done, the appointment date/time is updated.
Option 2 — Customer Cancels (From Their Account)
Section titled “Option 2 — Customer Cancels (From Their Account)”Customers can now cancel their own upcoming bookings, if you’ve enabled it.
How to set
Section titled “How to set”Step 1 : Turn on Allow cancel settings
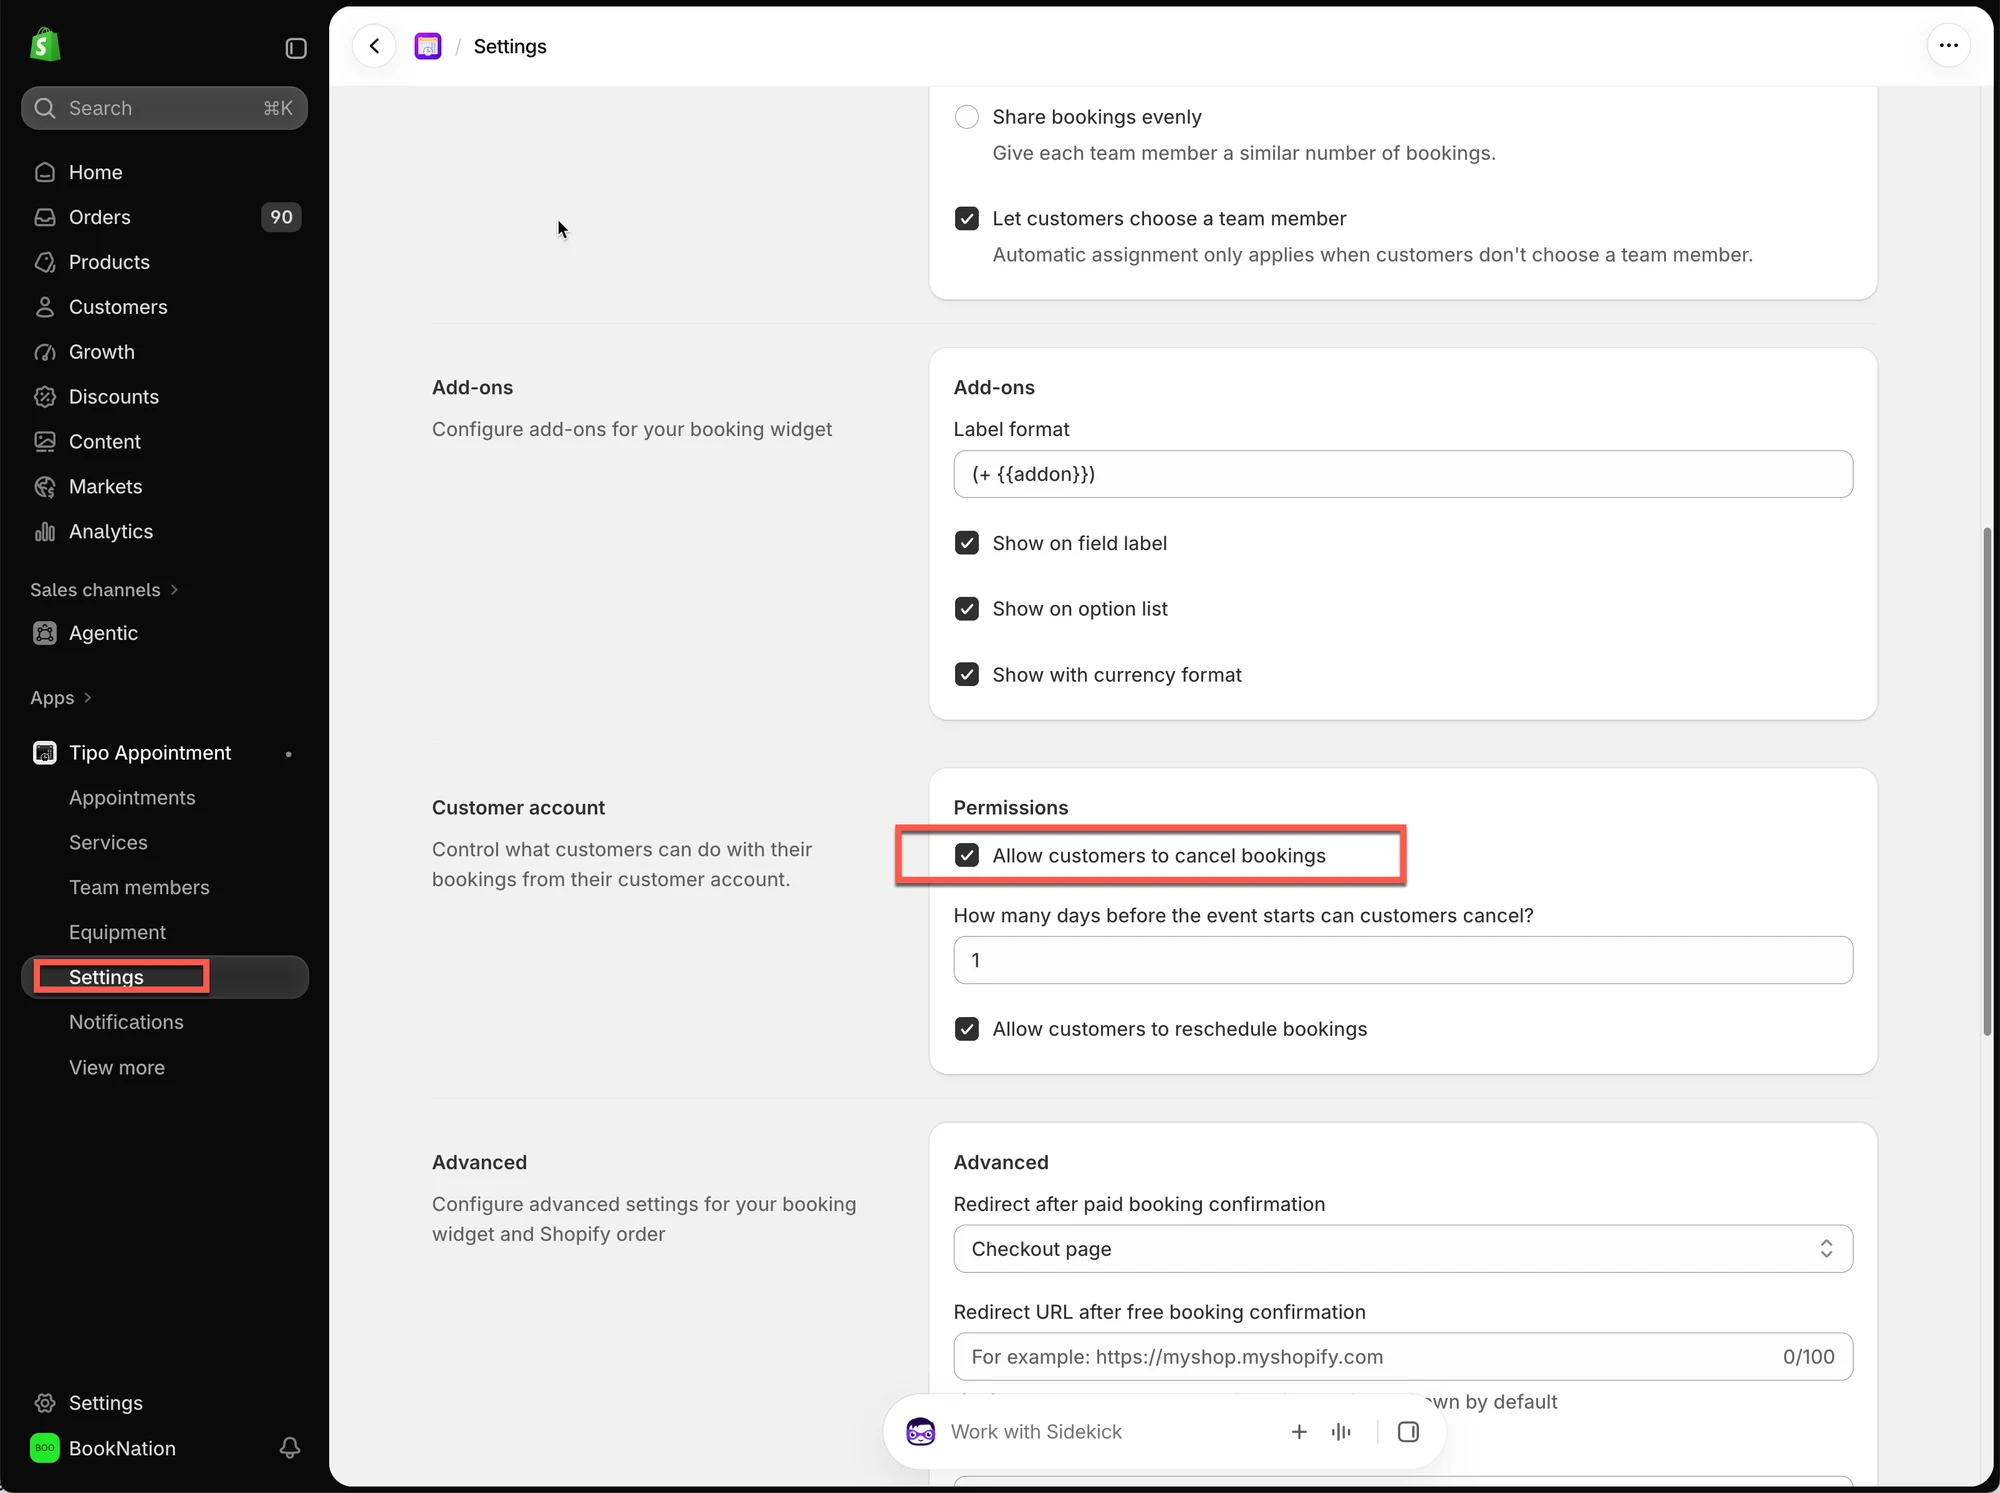
- Open the app > Settings > scroll to Customer account
- Under Permissions , tick Allow customers to cancel bookings
- Optional — limit how close to the booking time cancellation is allowed:
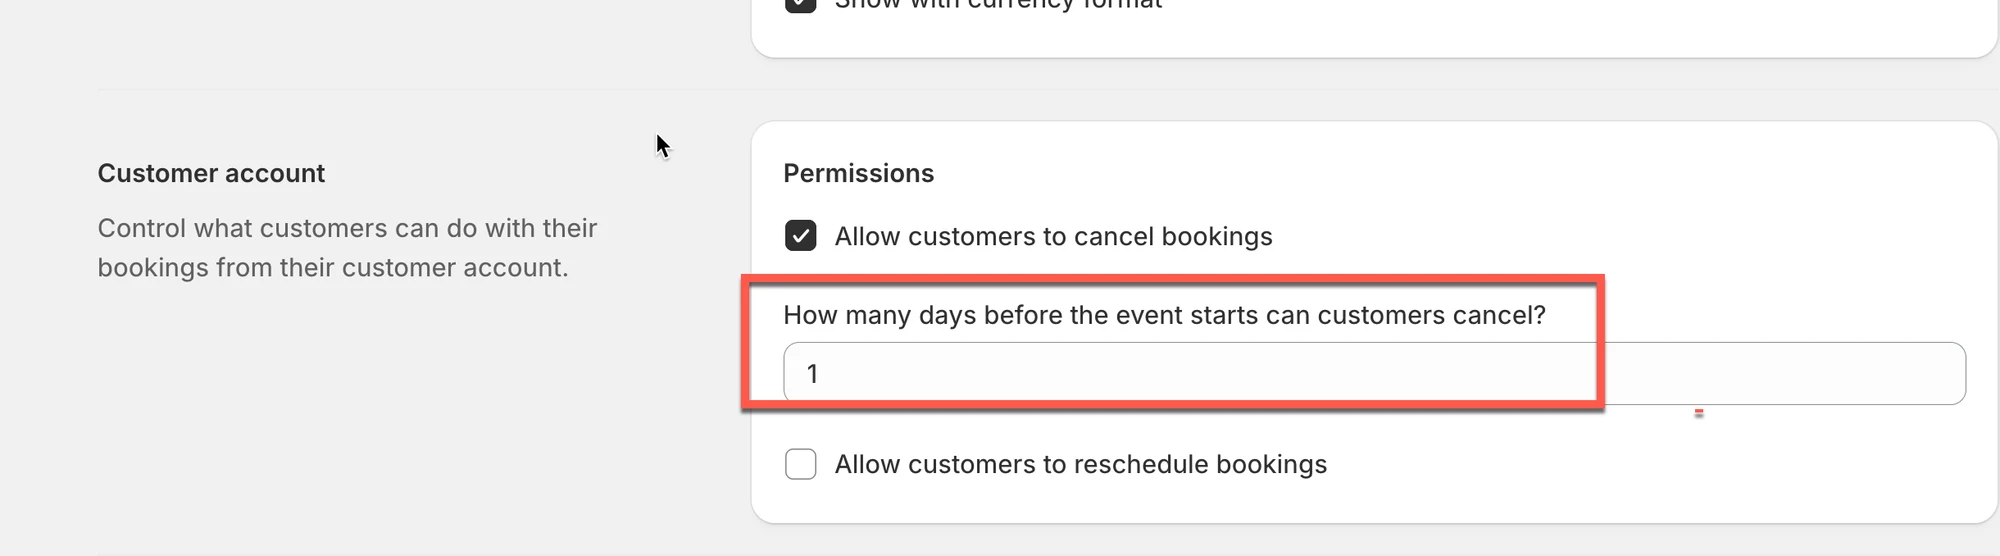
📌 Note: This cutoff setting applies globally , to every service — you can’t yet set a different window per service.
- Save the app settings
Step 2: Add Booking history block to account page
- Open the store > Sale channels > click Online stores > Edit theme > open the theme editor > open the account page template
- Add block > add Booking history block from our app
- Save it
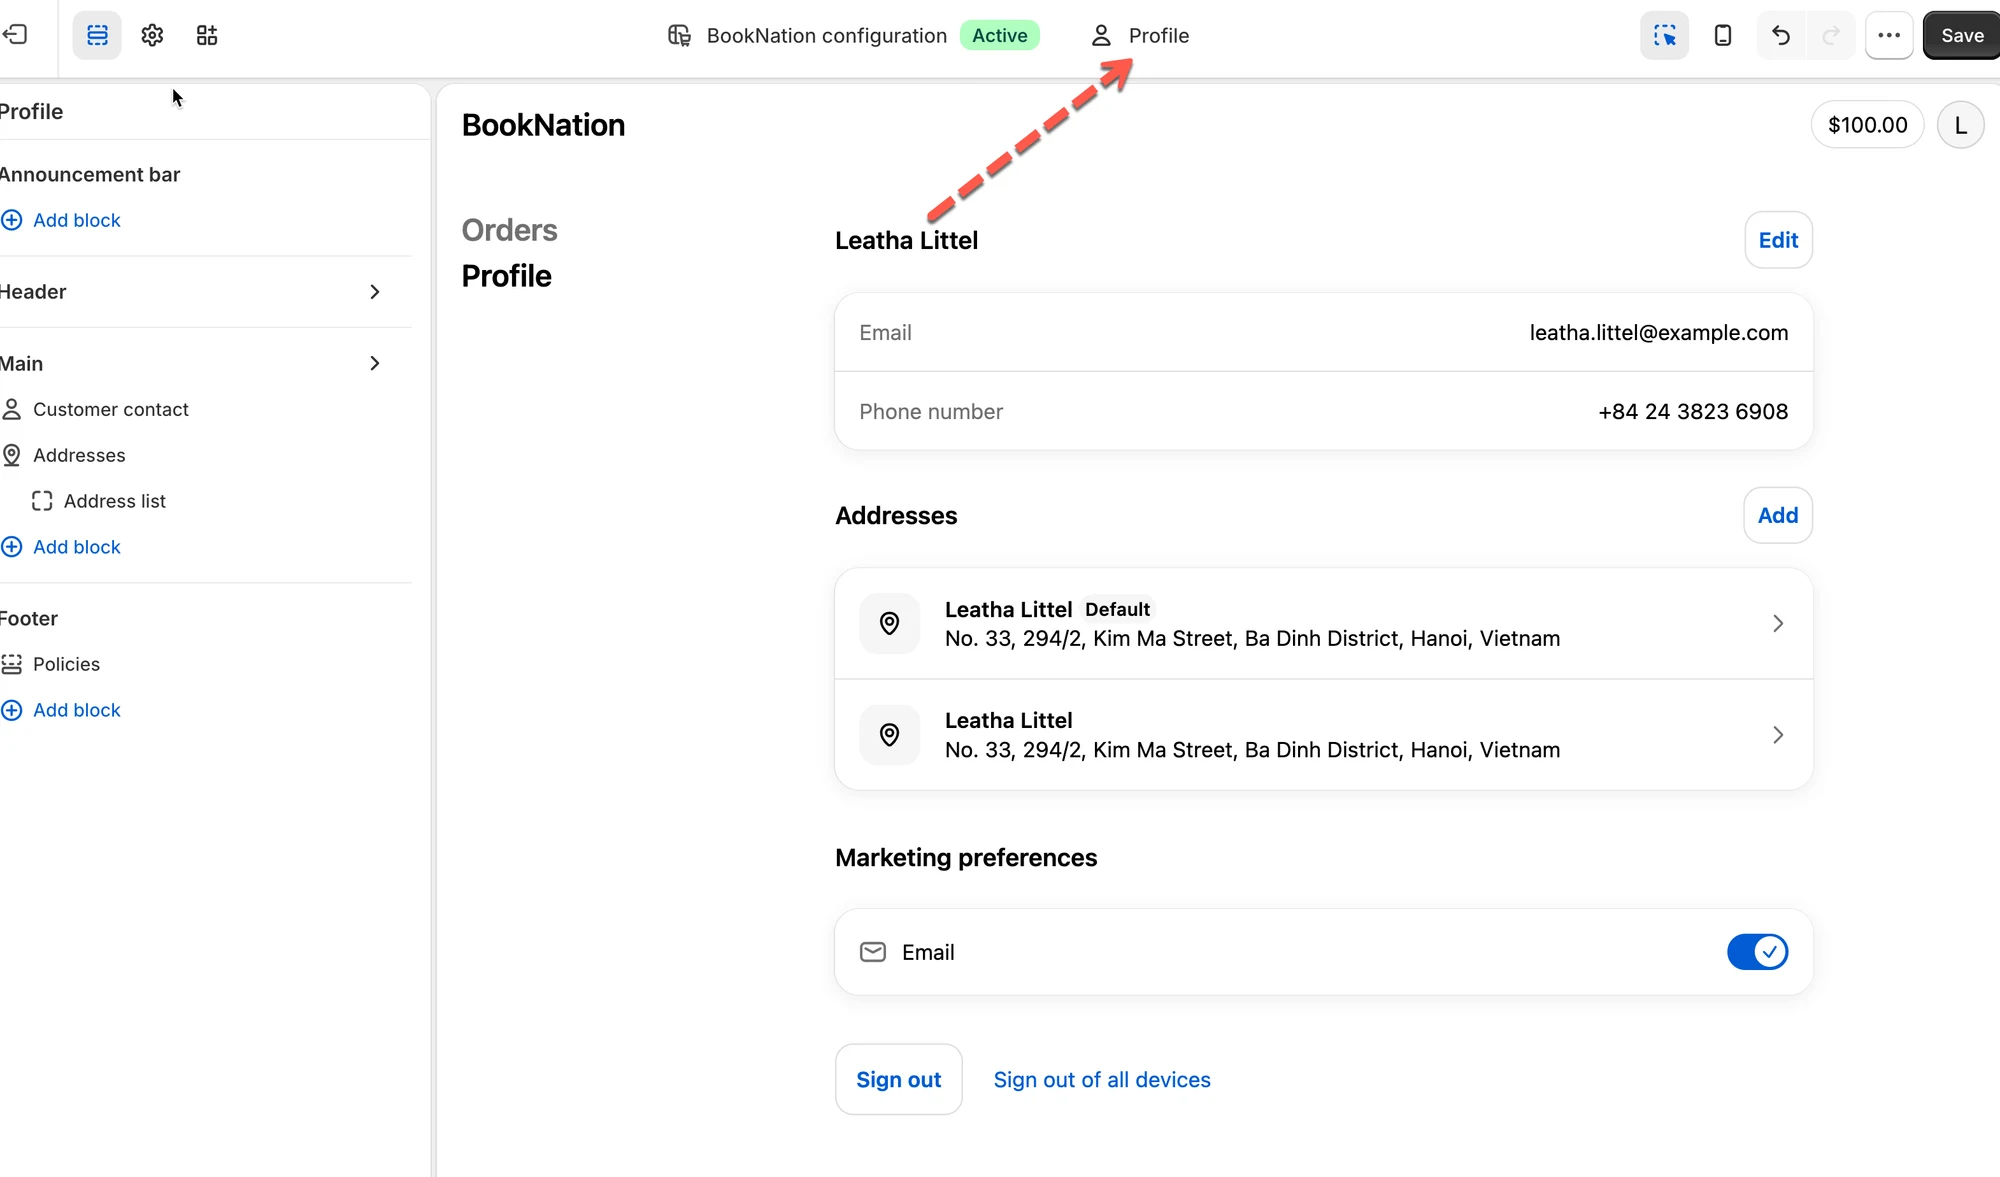
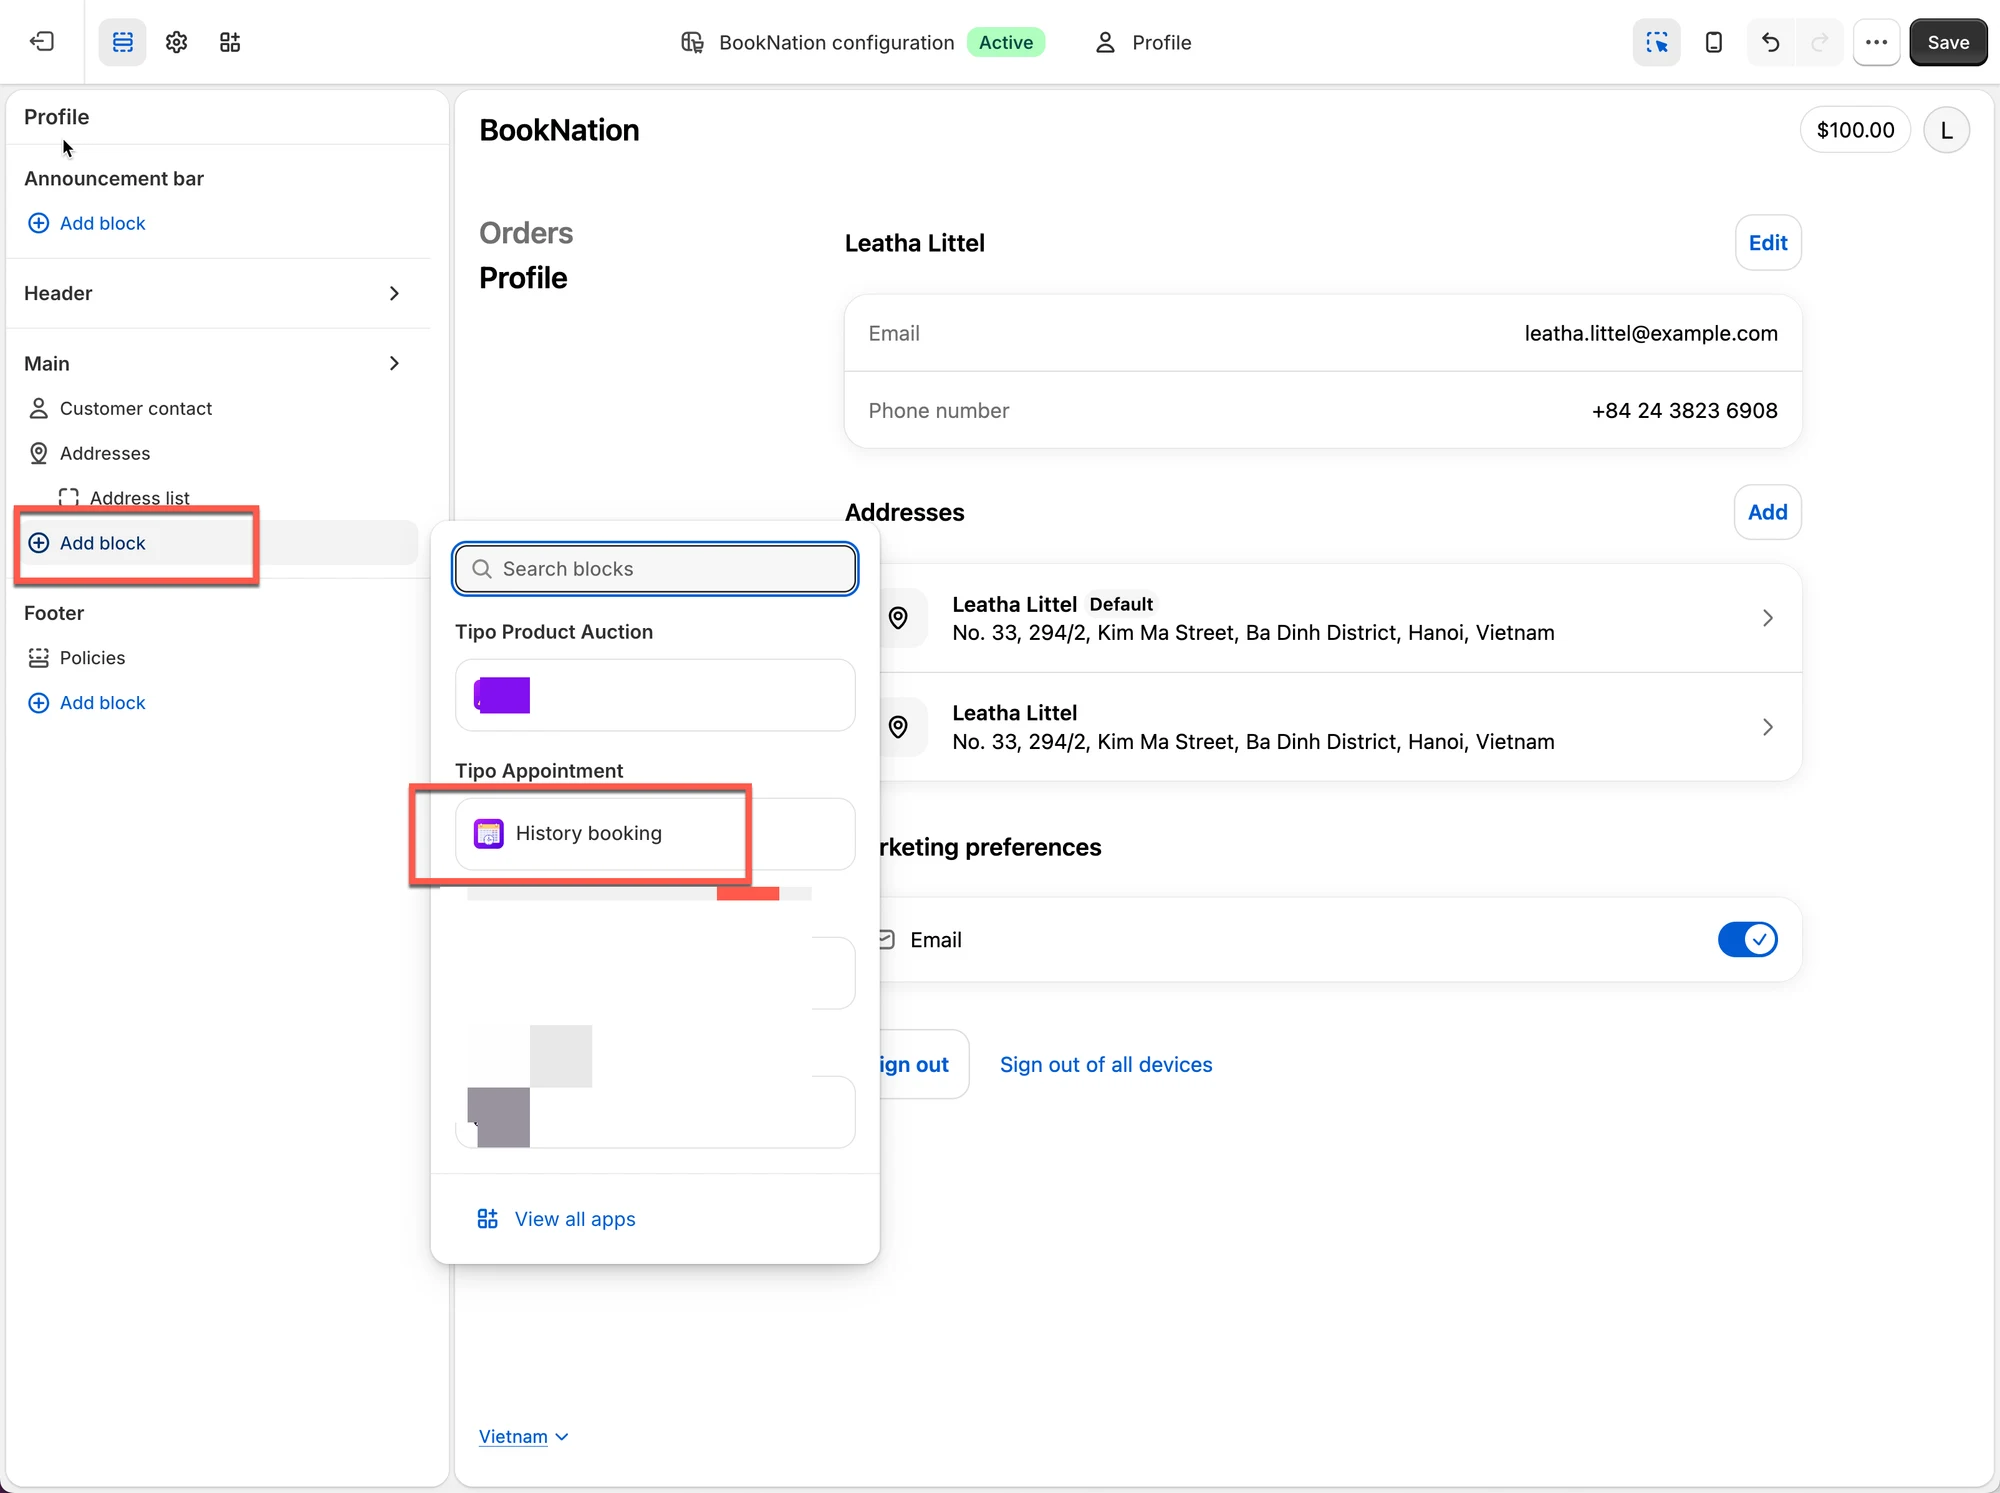
How customers cancel:
Section titled “How customers cancel:”- Customer logs into their Shopify customer account
- Goes to Profile > History booking
- Finds the upcoming booking and clicks Cancel booking , next to View detail
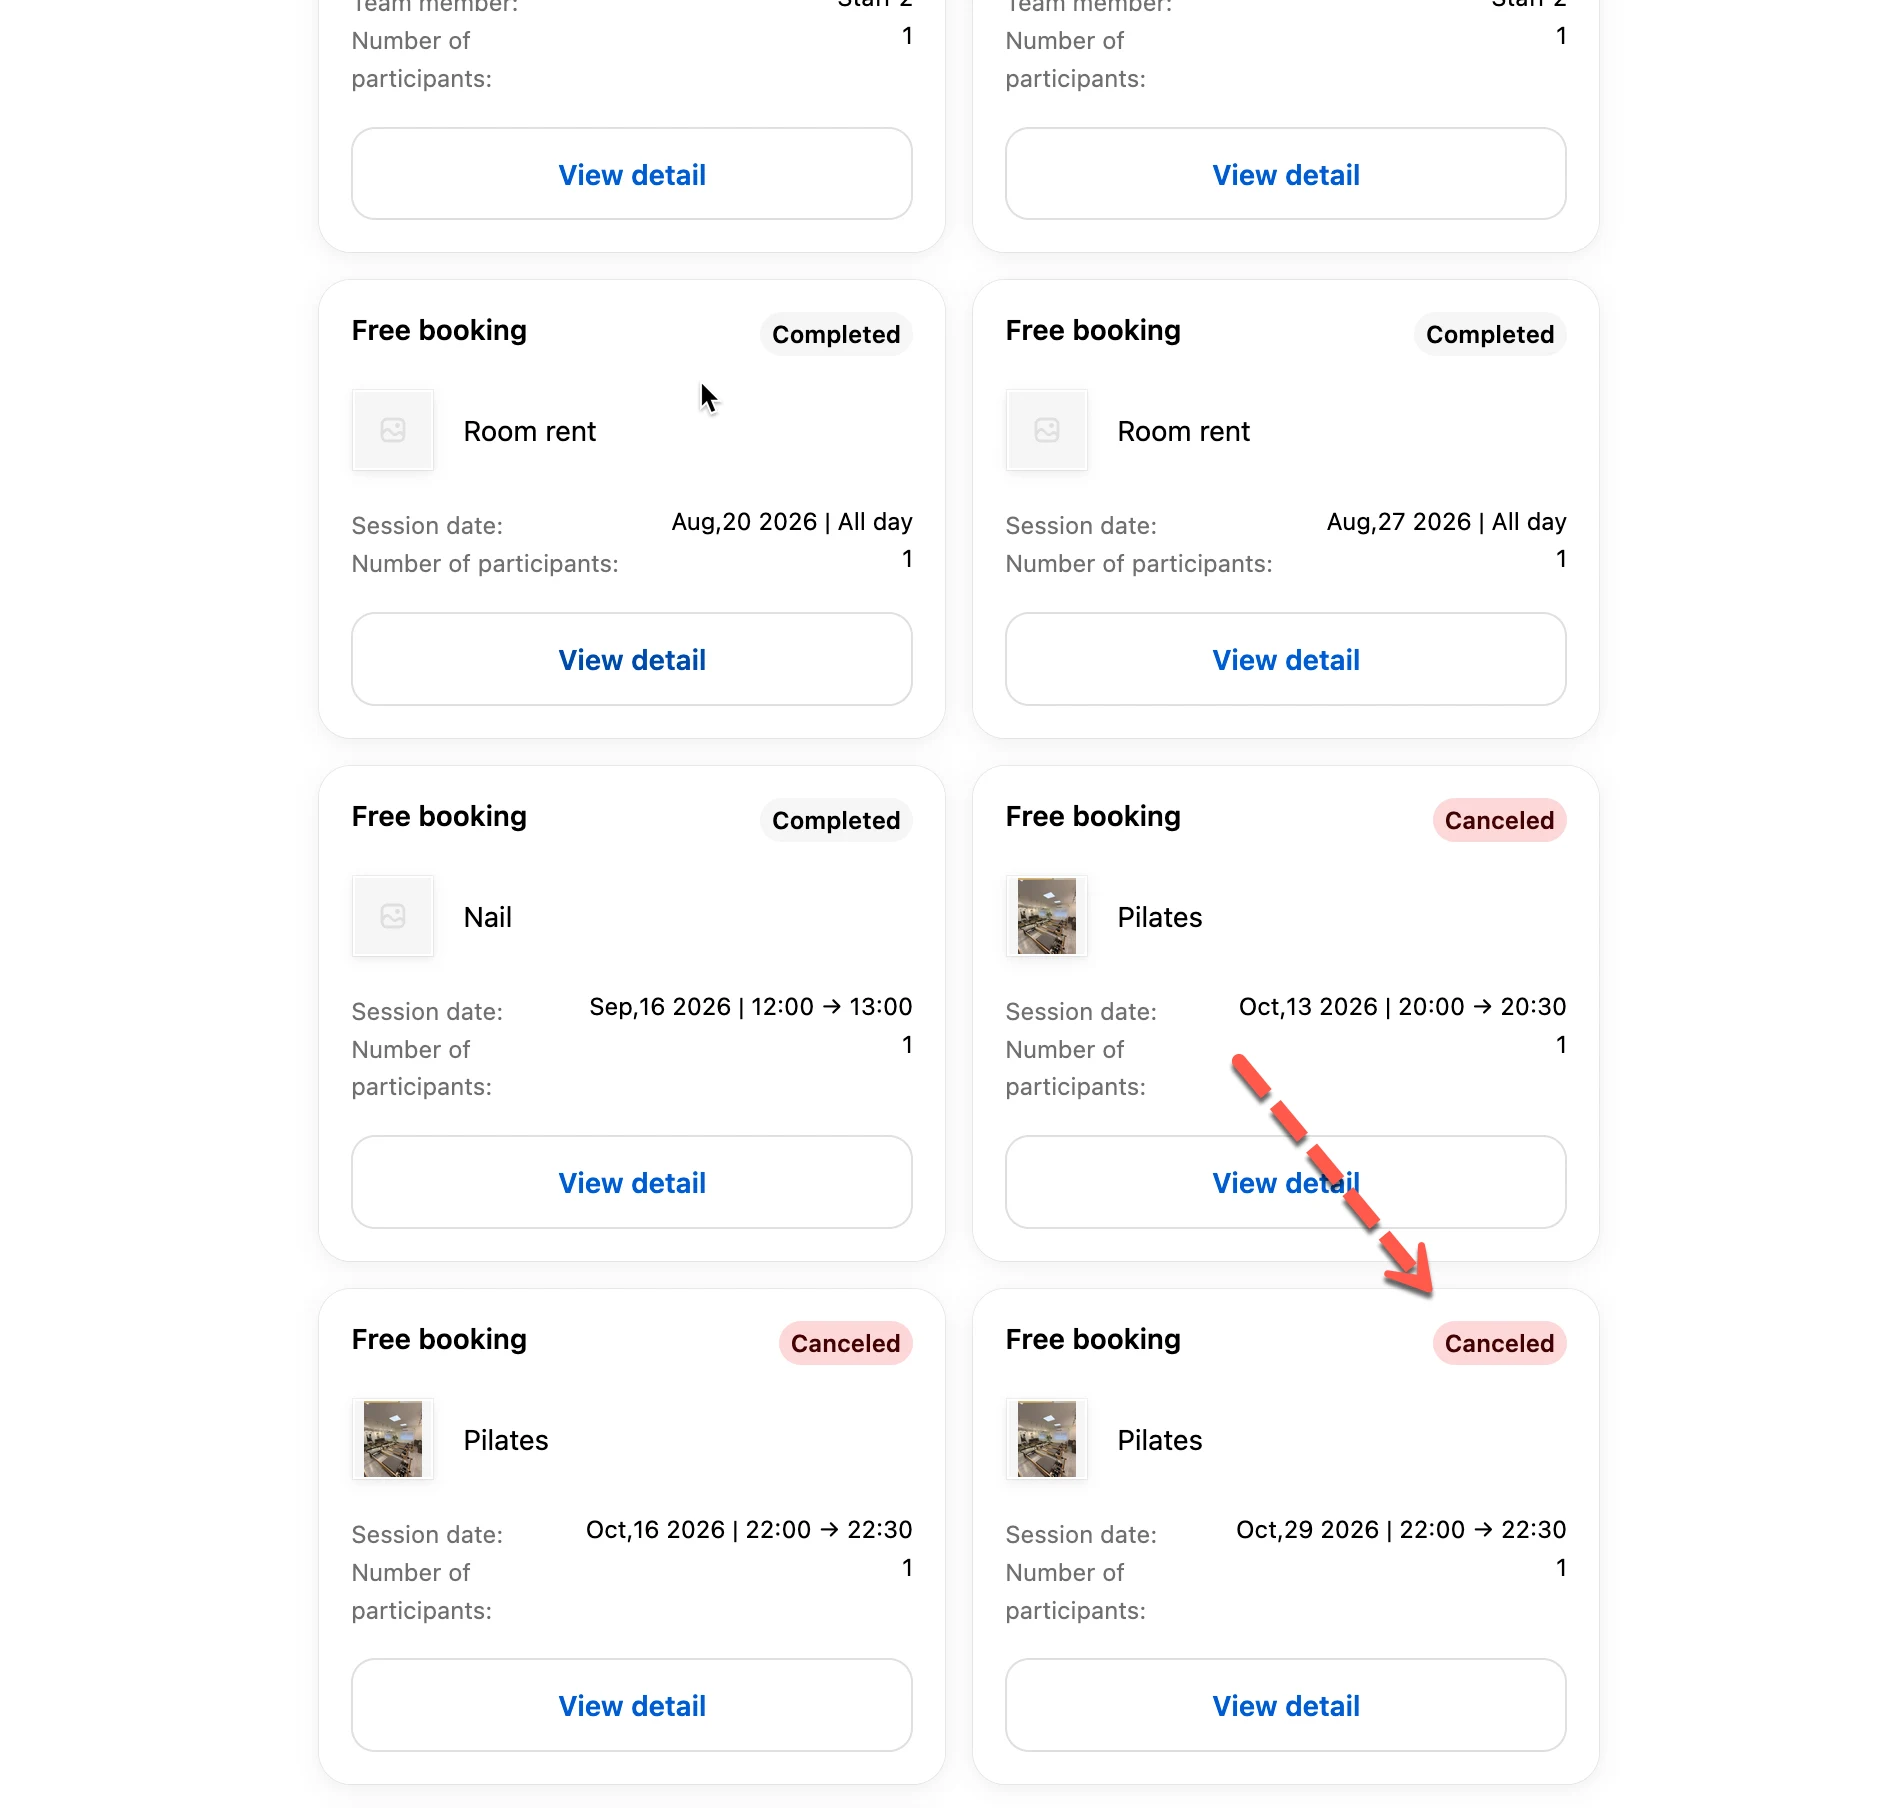
📌 Note: Cancel booking only appears on bookings with Upcoming status — not on Completed or already-Canceled ones.
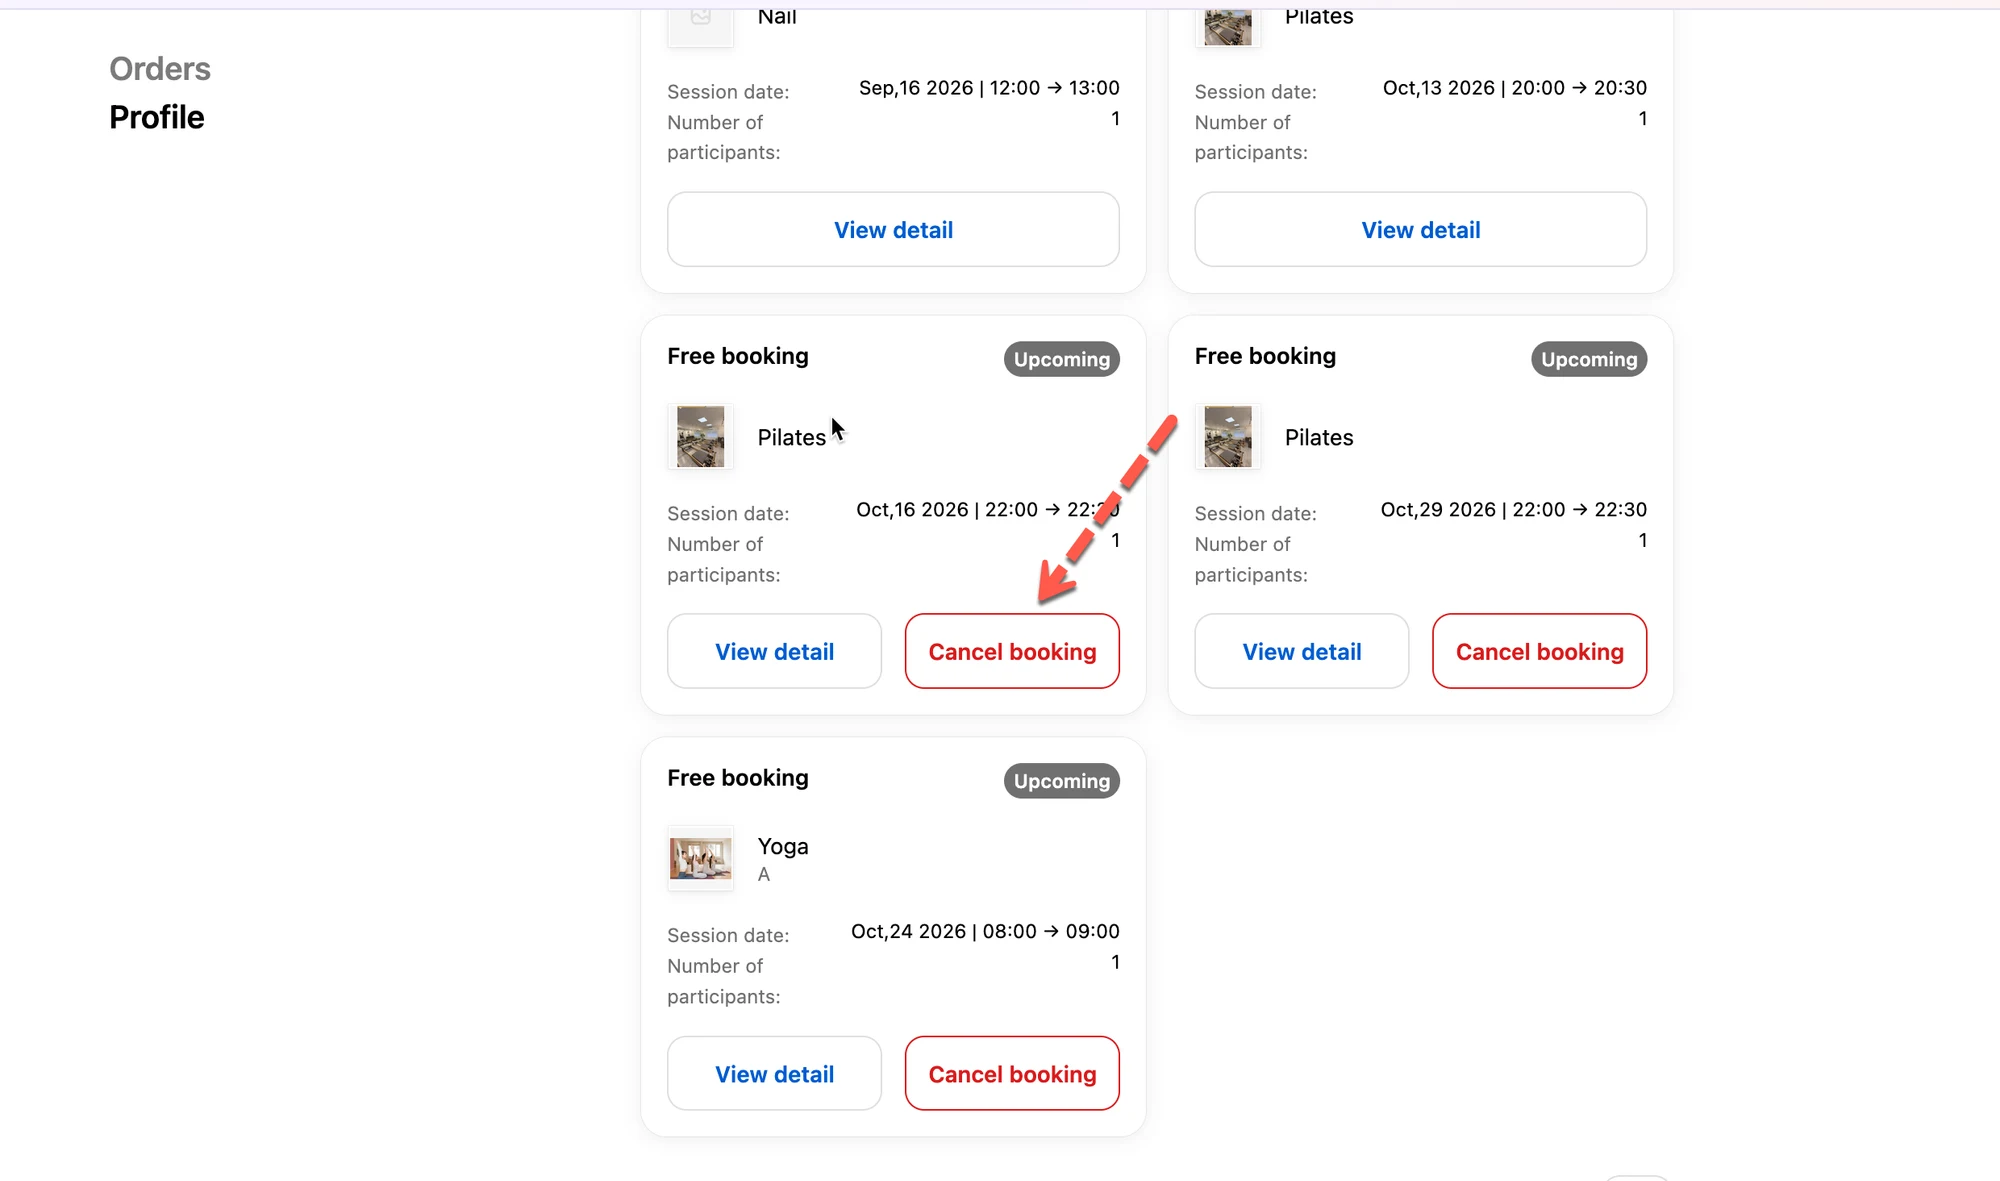
What Happens After a Booking Is Canceled
Section titled “What Happens After a Booking Is Canceled”- The status updates to Canceled — in the app, in your Shopify Admin ( Appointments ), and in the customer’s own booking history
- Both the customer and admin automatically receive a cancellation confirmation email
- The time slot becomes available again (unless blocked by other rules)
🙋 Still need support?
If you still need help, please feel free to contact us at hi@tipo.io. We’ll be happy to assist you further.