# Reschedule or cancel an appointment
Use this guide to change an appointment time (reschedule) or stop an appointment (cancel) from the Tipo Appointment Booking app.
## ✅ Before you start
* You need at least **1 appointment** created.
* Your staff/team member must have **availability** for the new date/time (otherwise the time picker may not offer the slot).
***
## 📅 Reschedule an appointment
Appointments can now be rescheduled by both admin and customers.
### Option 1 — Admin reschedules (from app)
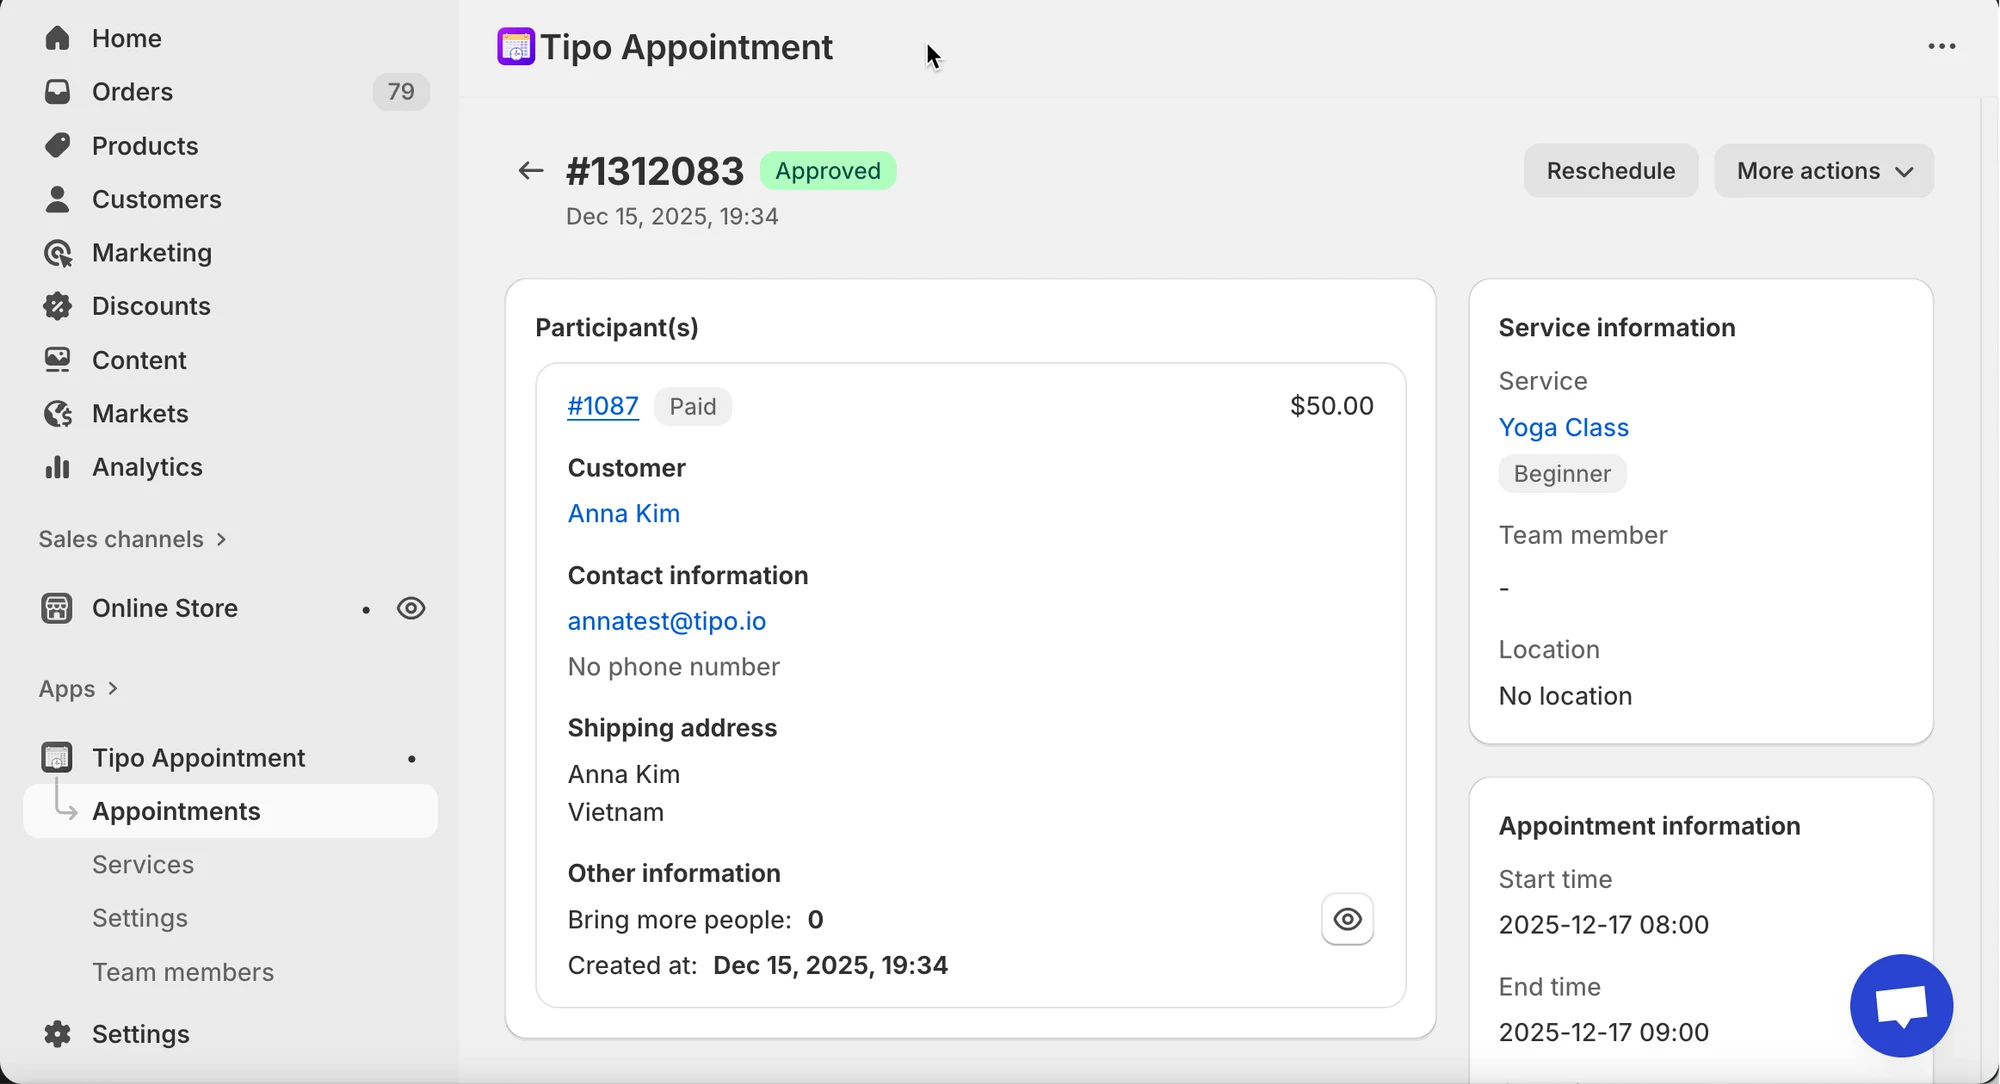
1\. Open the app > click **Appointments** > click on the appointment you want
Choose a view:
* **Month** view = quick overview
* **List** view = easier filtering/searching
2. Select the appointment to open **Appointment details**
3. Click **Reschedule** (top-right)
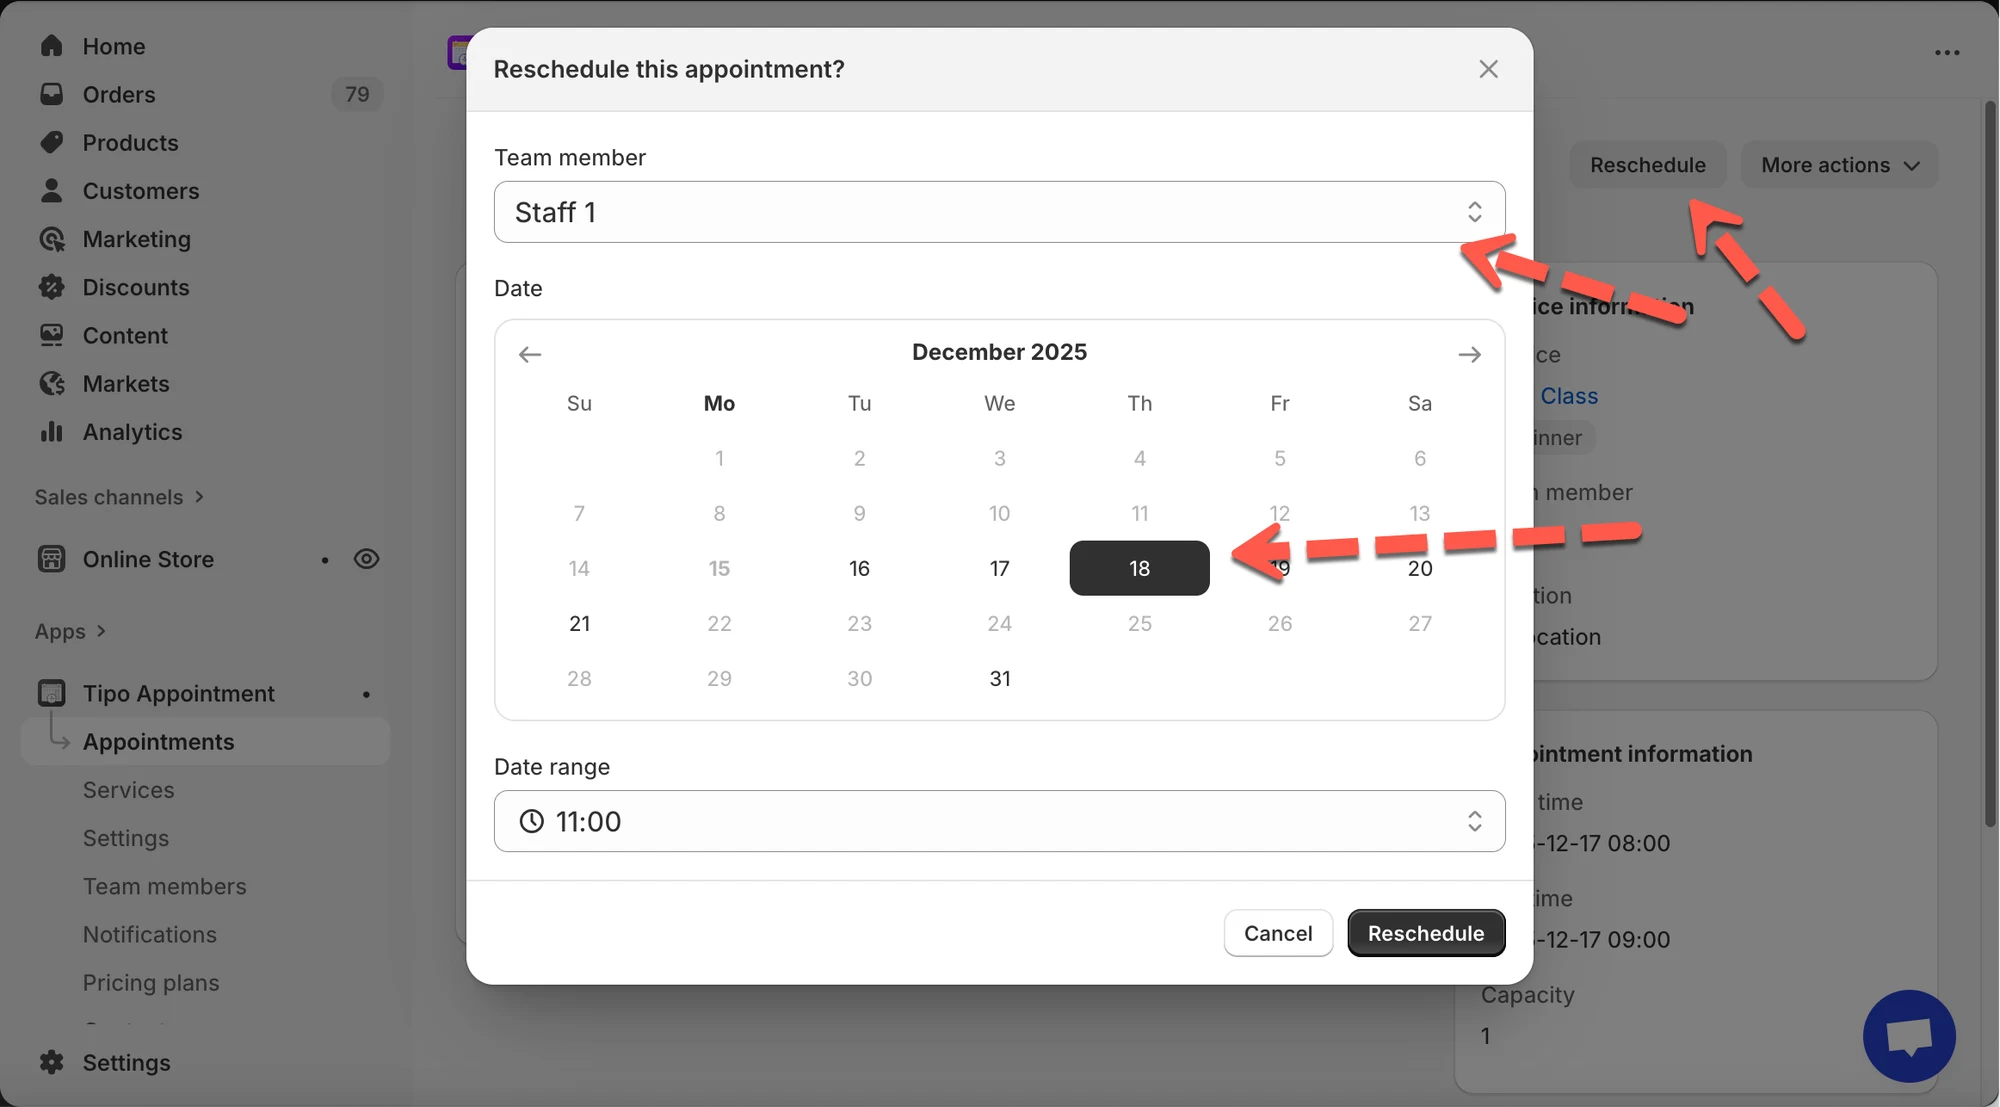
* In the popup:
* Select **Team member** (if available)
* Pick a **new date**
* Pick a **new time** in **Date range**
* Click **Reschedule** to confirm
***
### Option 2 — Customer reschedules (from email)
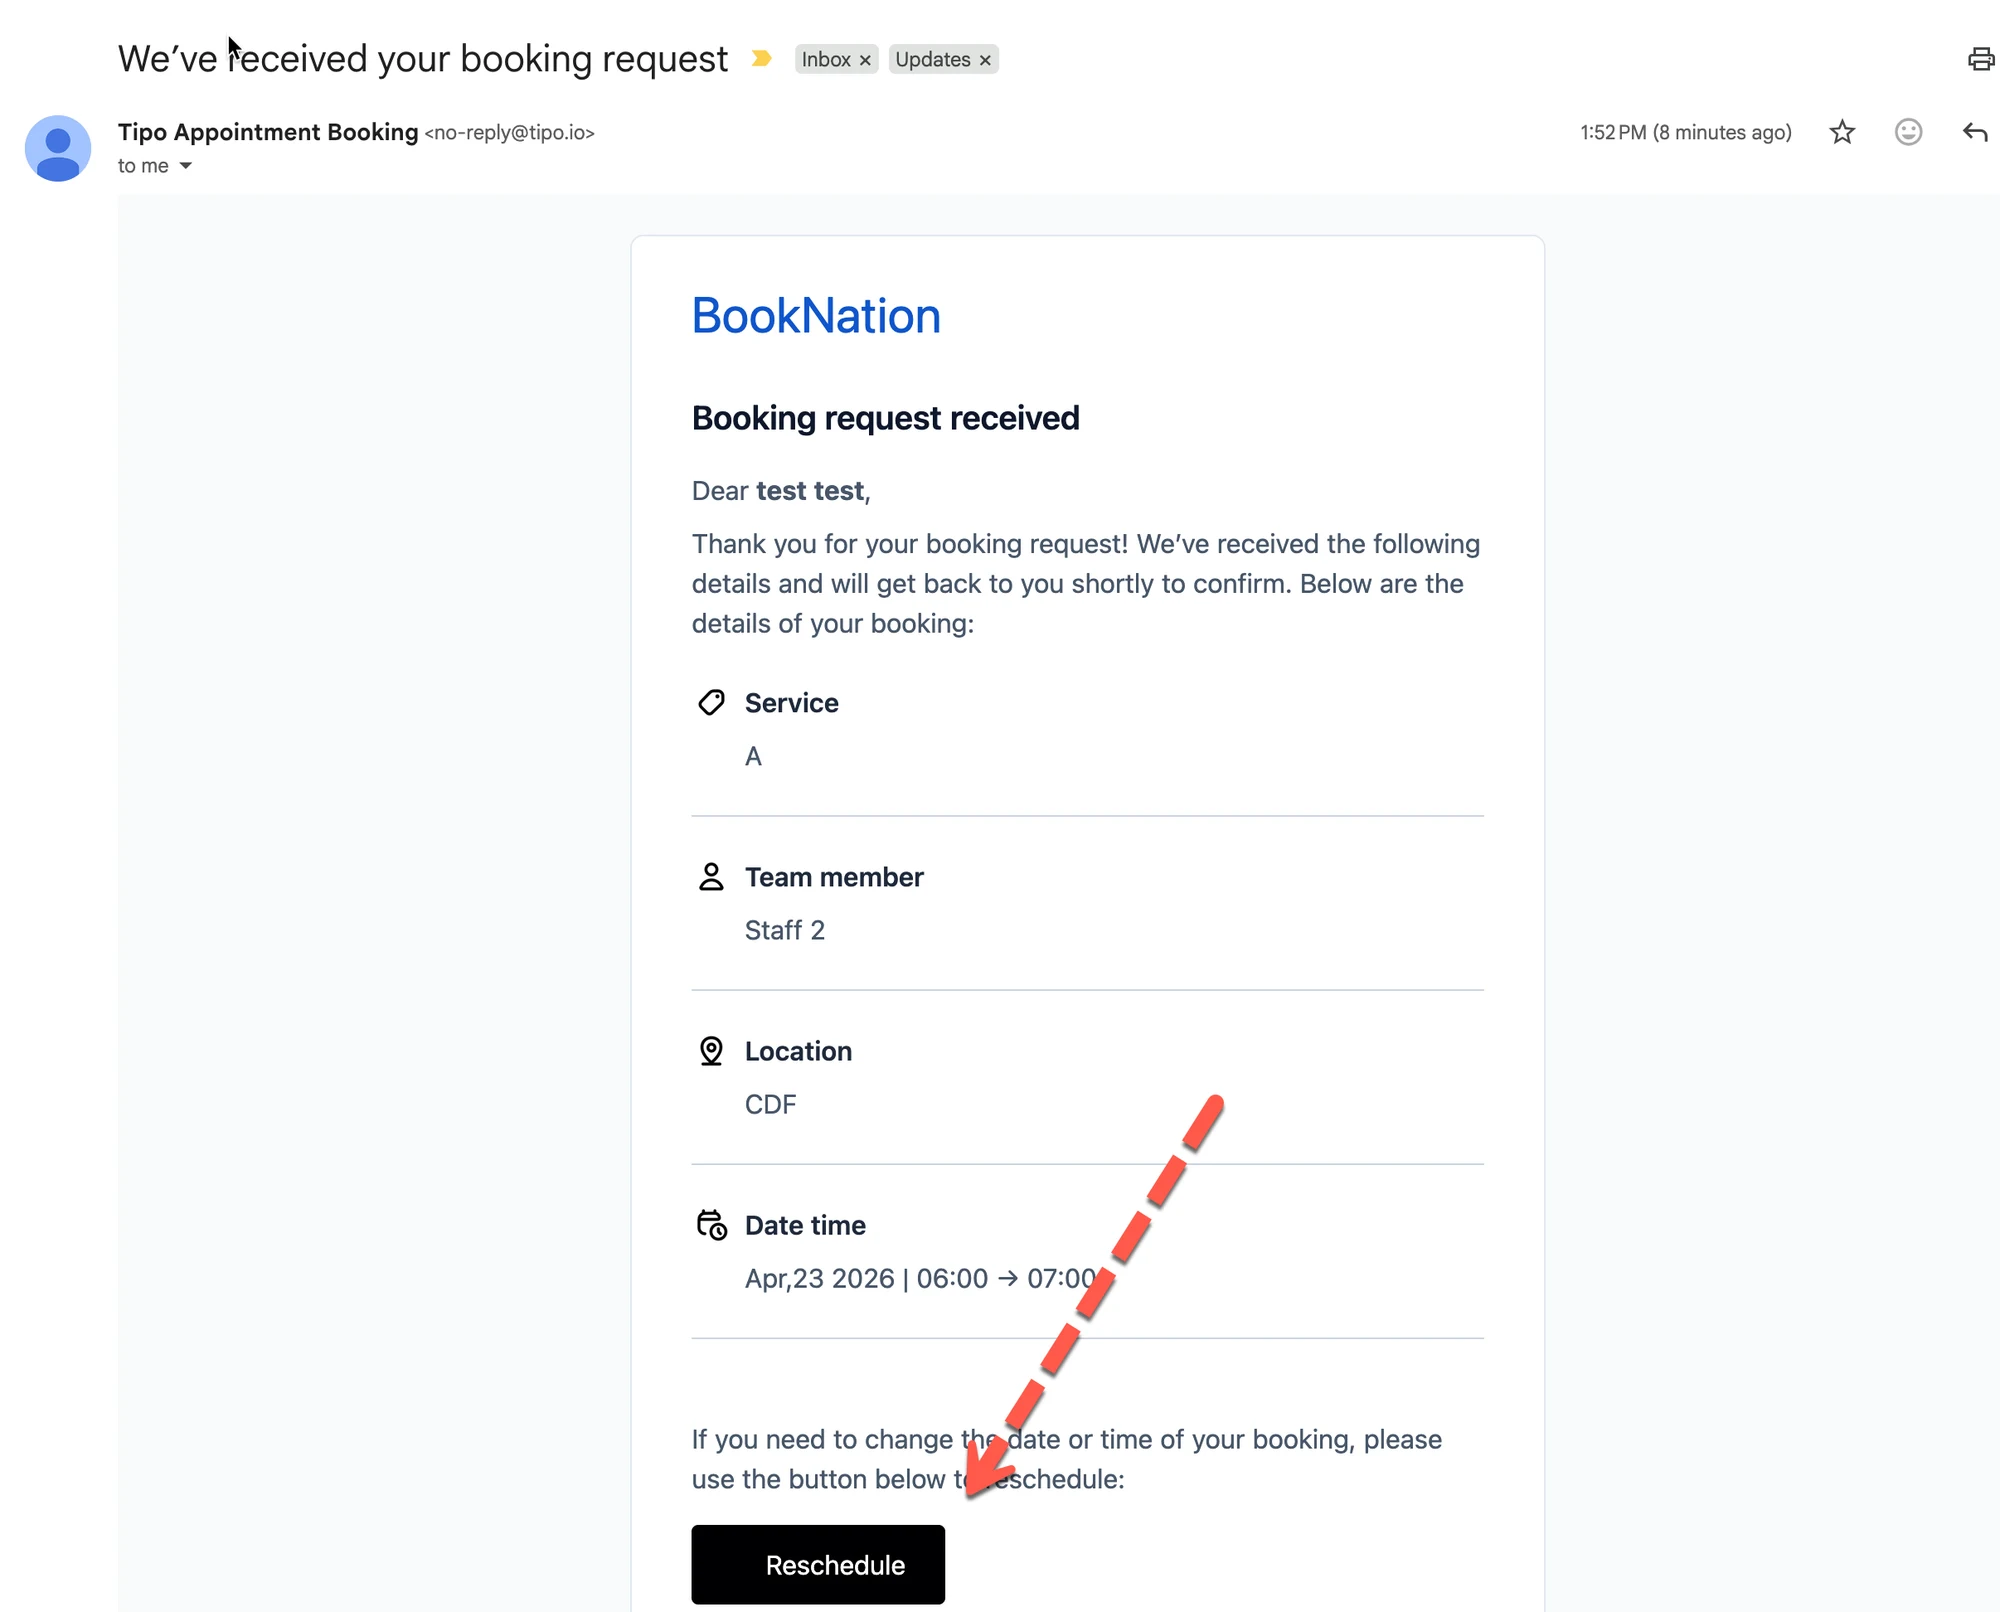
Customers can reschedule directly from their booking email.
#### How it works
1. Customer opens booking confirmation email
2. Clicks **Reschedule** appointment button
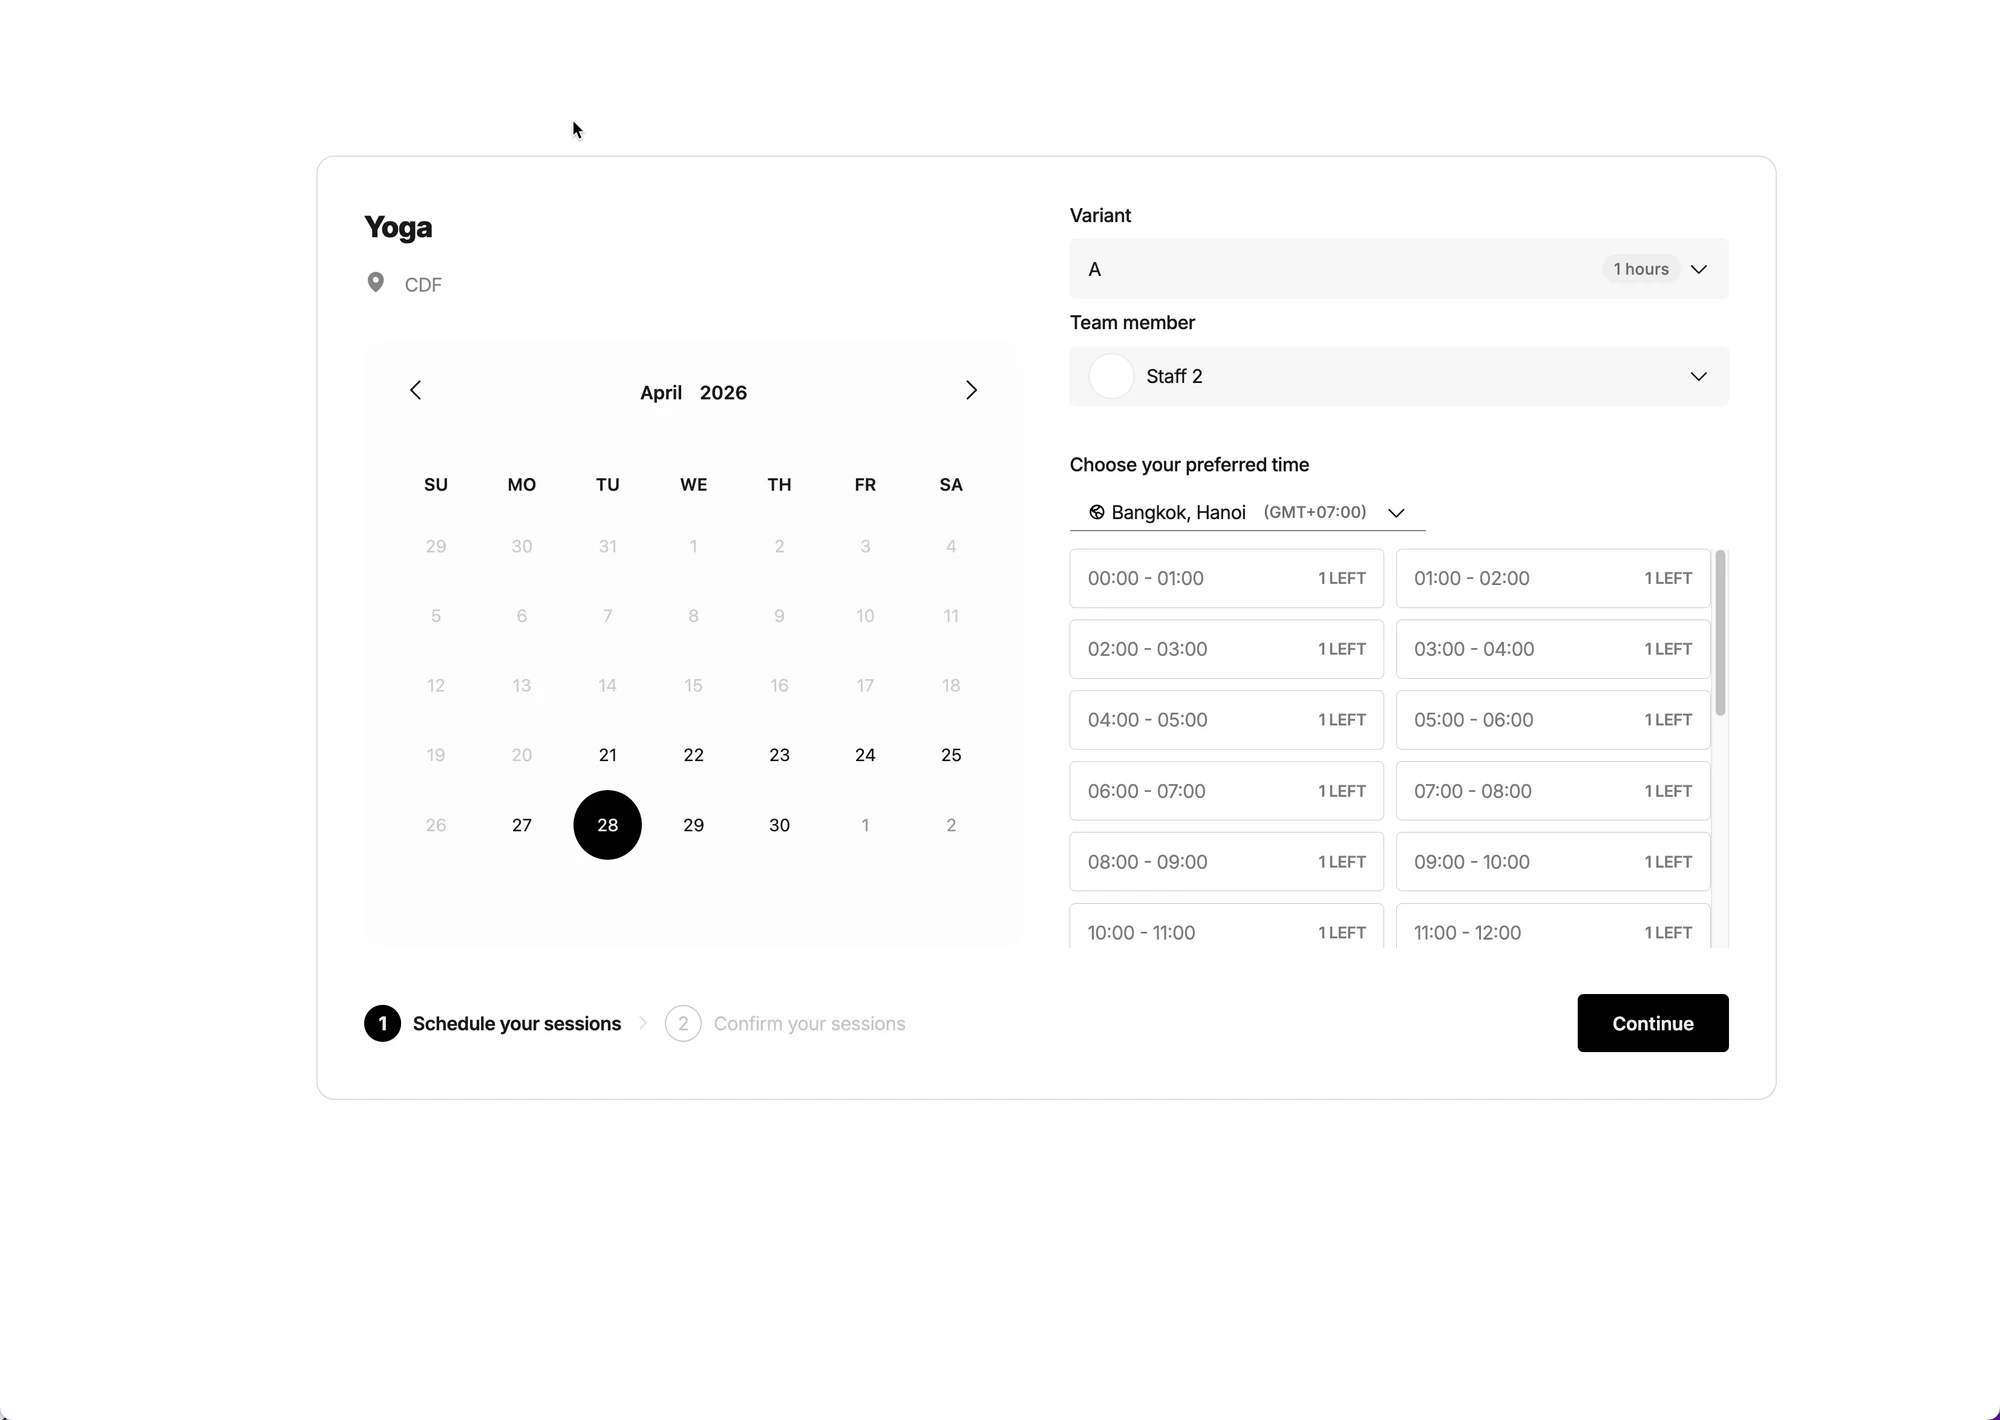
3. A reschedule widget opens > Customer selects a new available time
4. Click **Confirm**
The appointment updates automatically.
> #### Important rules
>
> * Customers can only reschedule, not cancel appointments
> * Rescheduling depends on slot availability
> * Admin will see the updated time in calendar
**⏱️ Reschedule time limit:** To avoid last-minute changes:
* Customers can reschedule **until 1 day before the appointment.** Within 24 hours → rescheduling is blocked
* Admin can still reschedule manually if needed
⇒ This ensures merchants have enough preparation time.
#### 💡 What changes after rescheduling?
* The appointment’s **start/end time** updates.
* The appointment stays linked to the same **customer** and **service**.
* If the time slot is not available, you may need to adjust staff availability first.
***
## ❌ Cancel an appointment
### **Option 1 — Admin Cancels (From App)**
1\. Open the app > click **Appointments** > click on the appointment you want
Select the appointment to open **Appointment details**
Choose a view:
* **Month** view = quick overview
* **List** view = easier filtering/searching
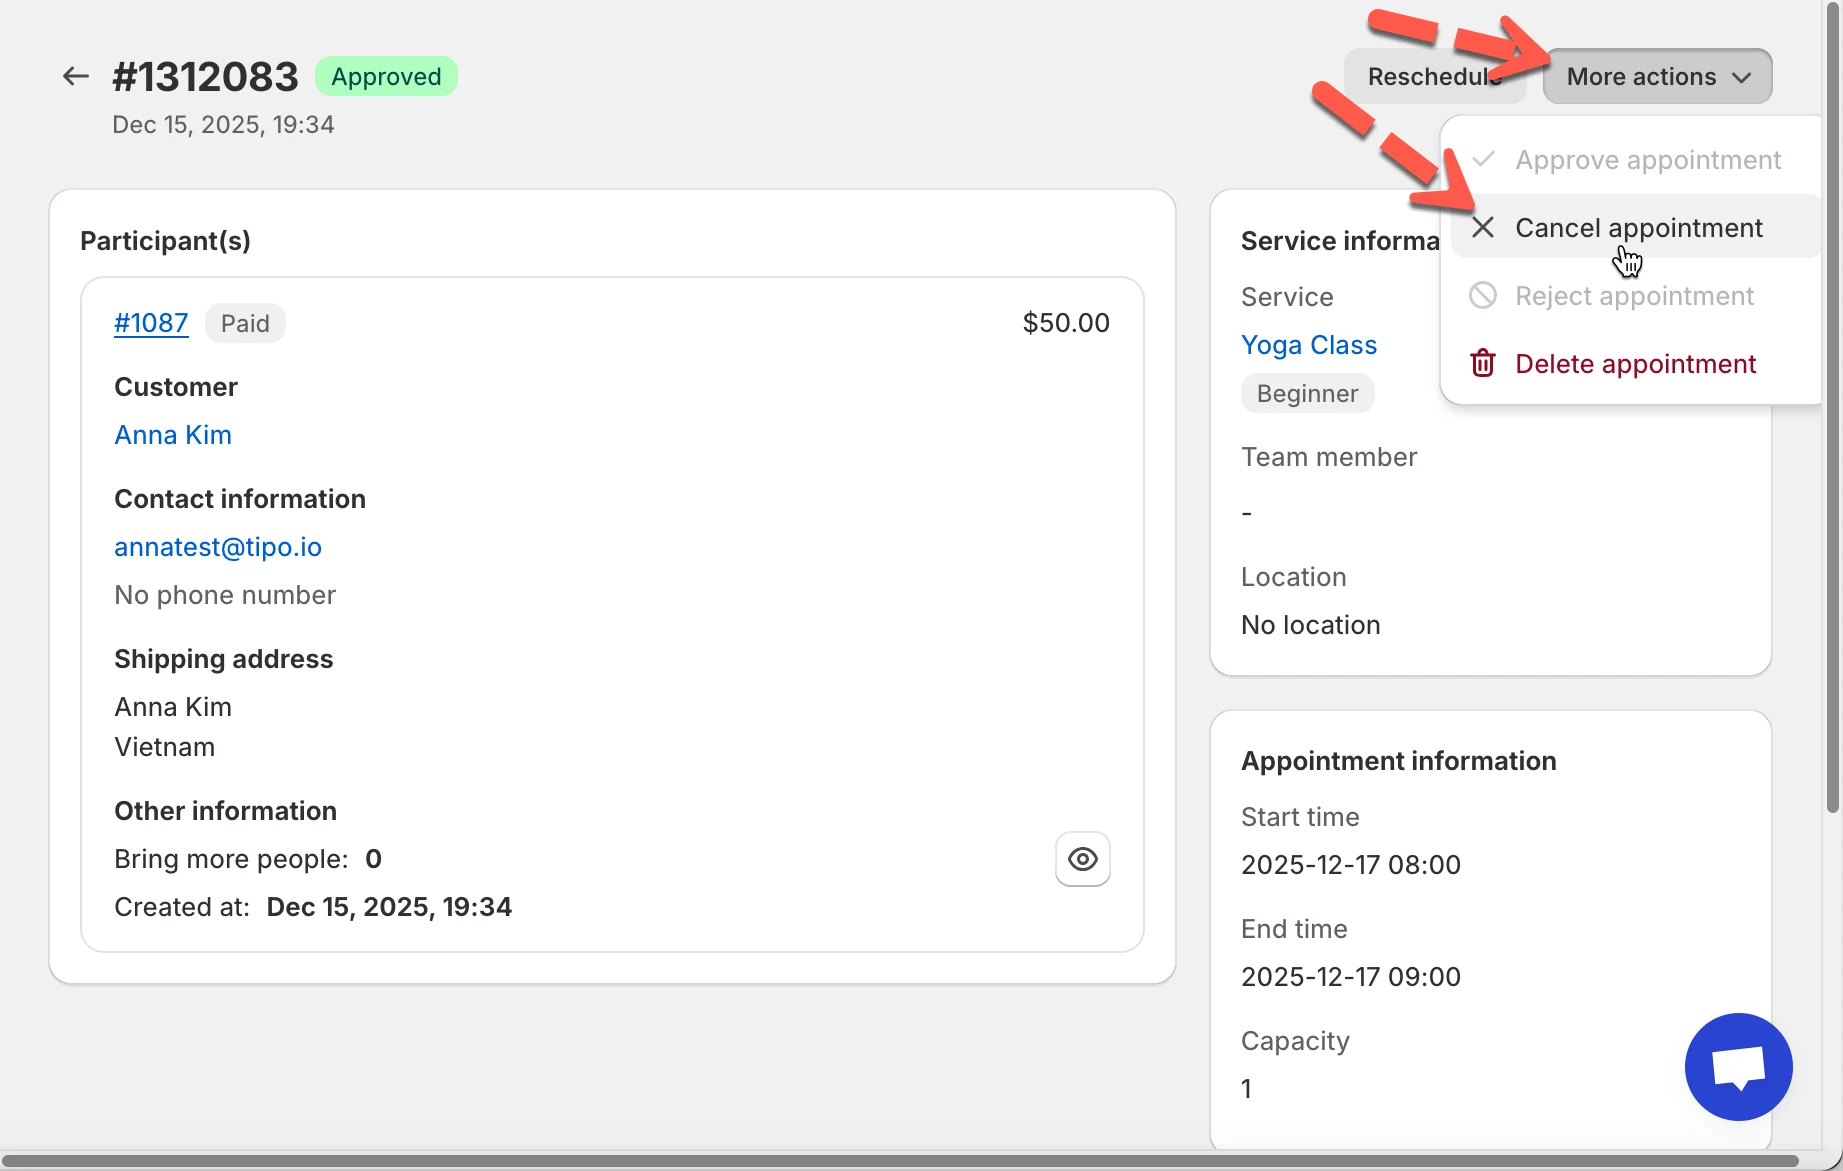
2. On the **Appointment details** page, click **More actions**
3. Select **Cancel appointment** > confirm to cancel again on the popup
#### What happens when you cancel?
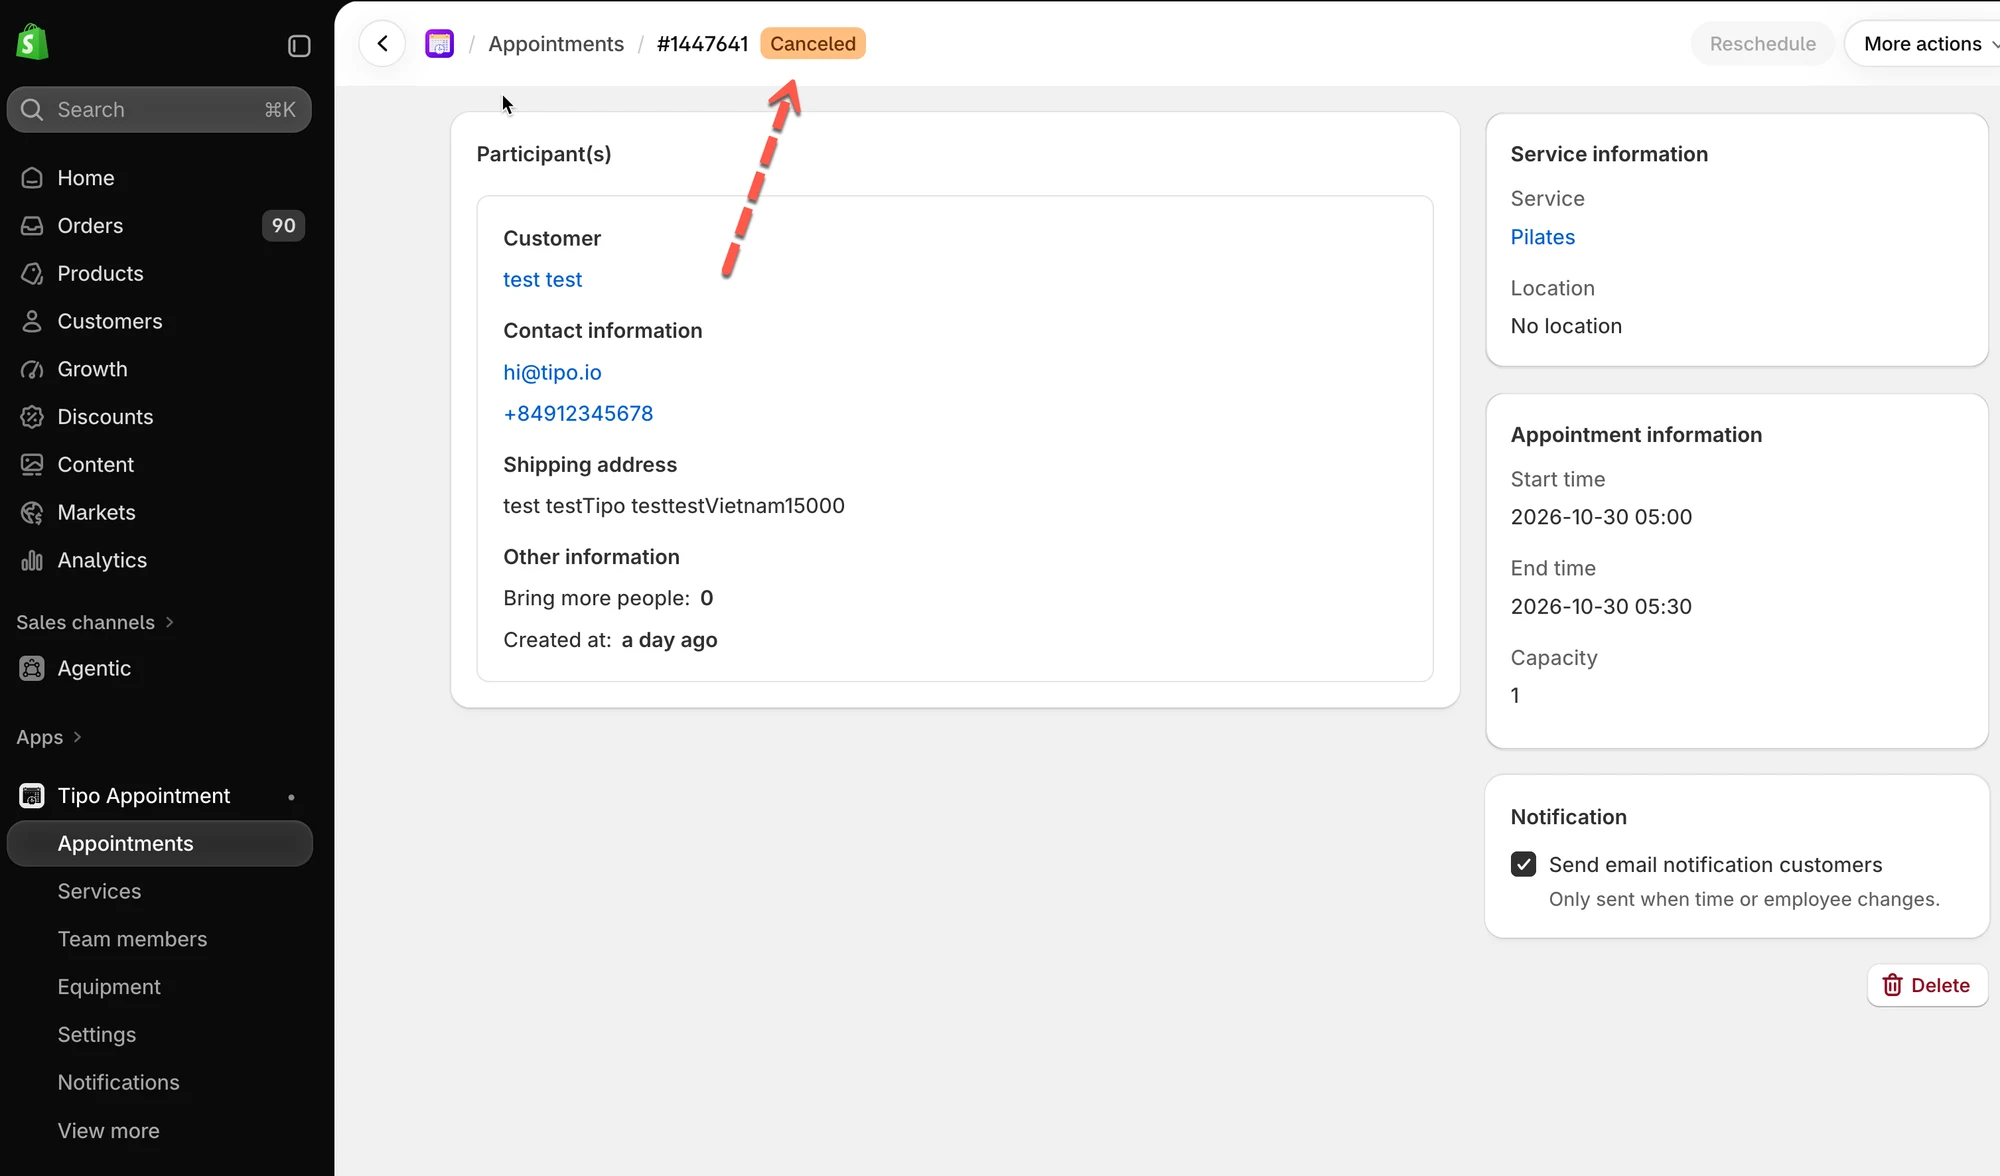
* The appointment is marked as **Canceled** (or removed from active scheduling depending on your system rules).
* The time slot becomes available again (unless blocked by other rules).
***
#### 🧪 Example: Reschedule
**Scenario:**\
A customer booked **Yoga Class** on **Dec 17, 2025 (08:00–09:00)**, but asks to move it to a different day.
**Steps:**
1. Open **Apps → Tipo Appointment booking app → Appointments**
2. Click the **Yoga Class** appointment → open details
3. Click **Reschedule** (top-right)
4. In the popup:
* Team member: **Staff 1**
* Date: choose **Dec 18, 2025**
* Time: choose a new time from the dropdown , e.g. **11:00**
5. Click **Reschedule** to confirm
✅ Done, the appointment date/time is updated.
### **Option 2 — Customer Cancels (From Their Account)**
Customers can now cancel their own upcoming bookings, if you've enabled it.
#### How to set
**Step 1 : Turn on Allow cancel settings**
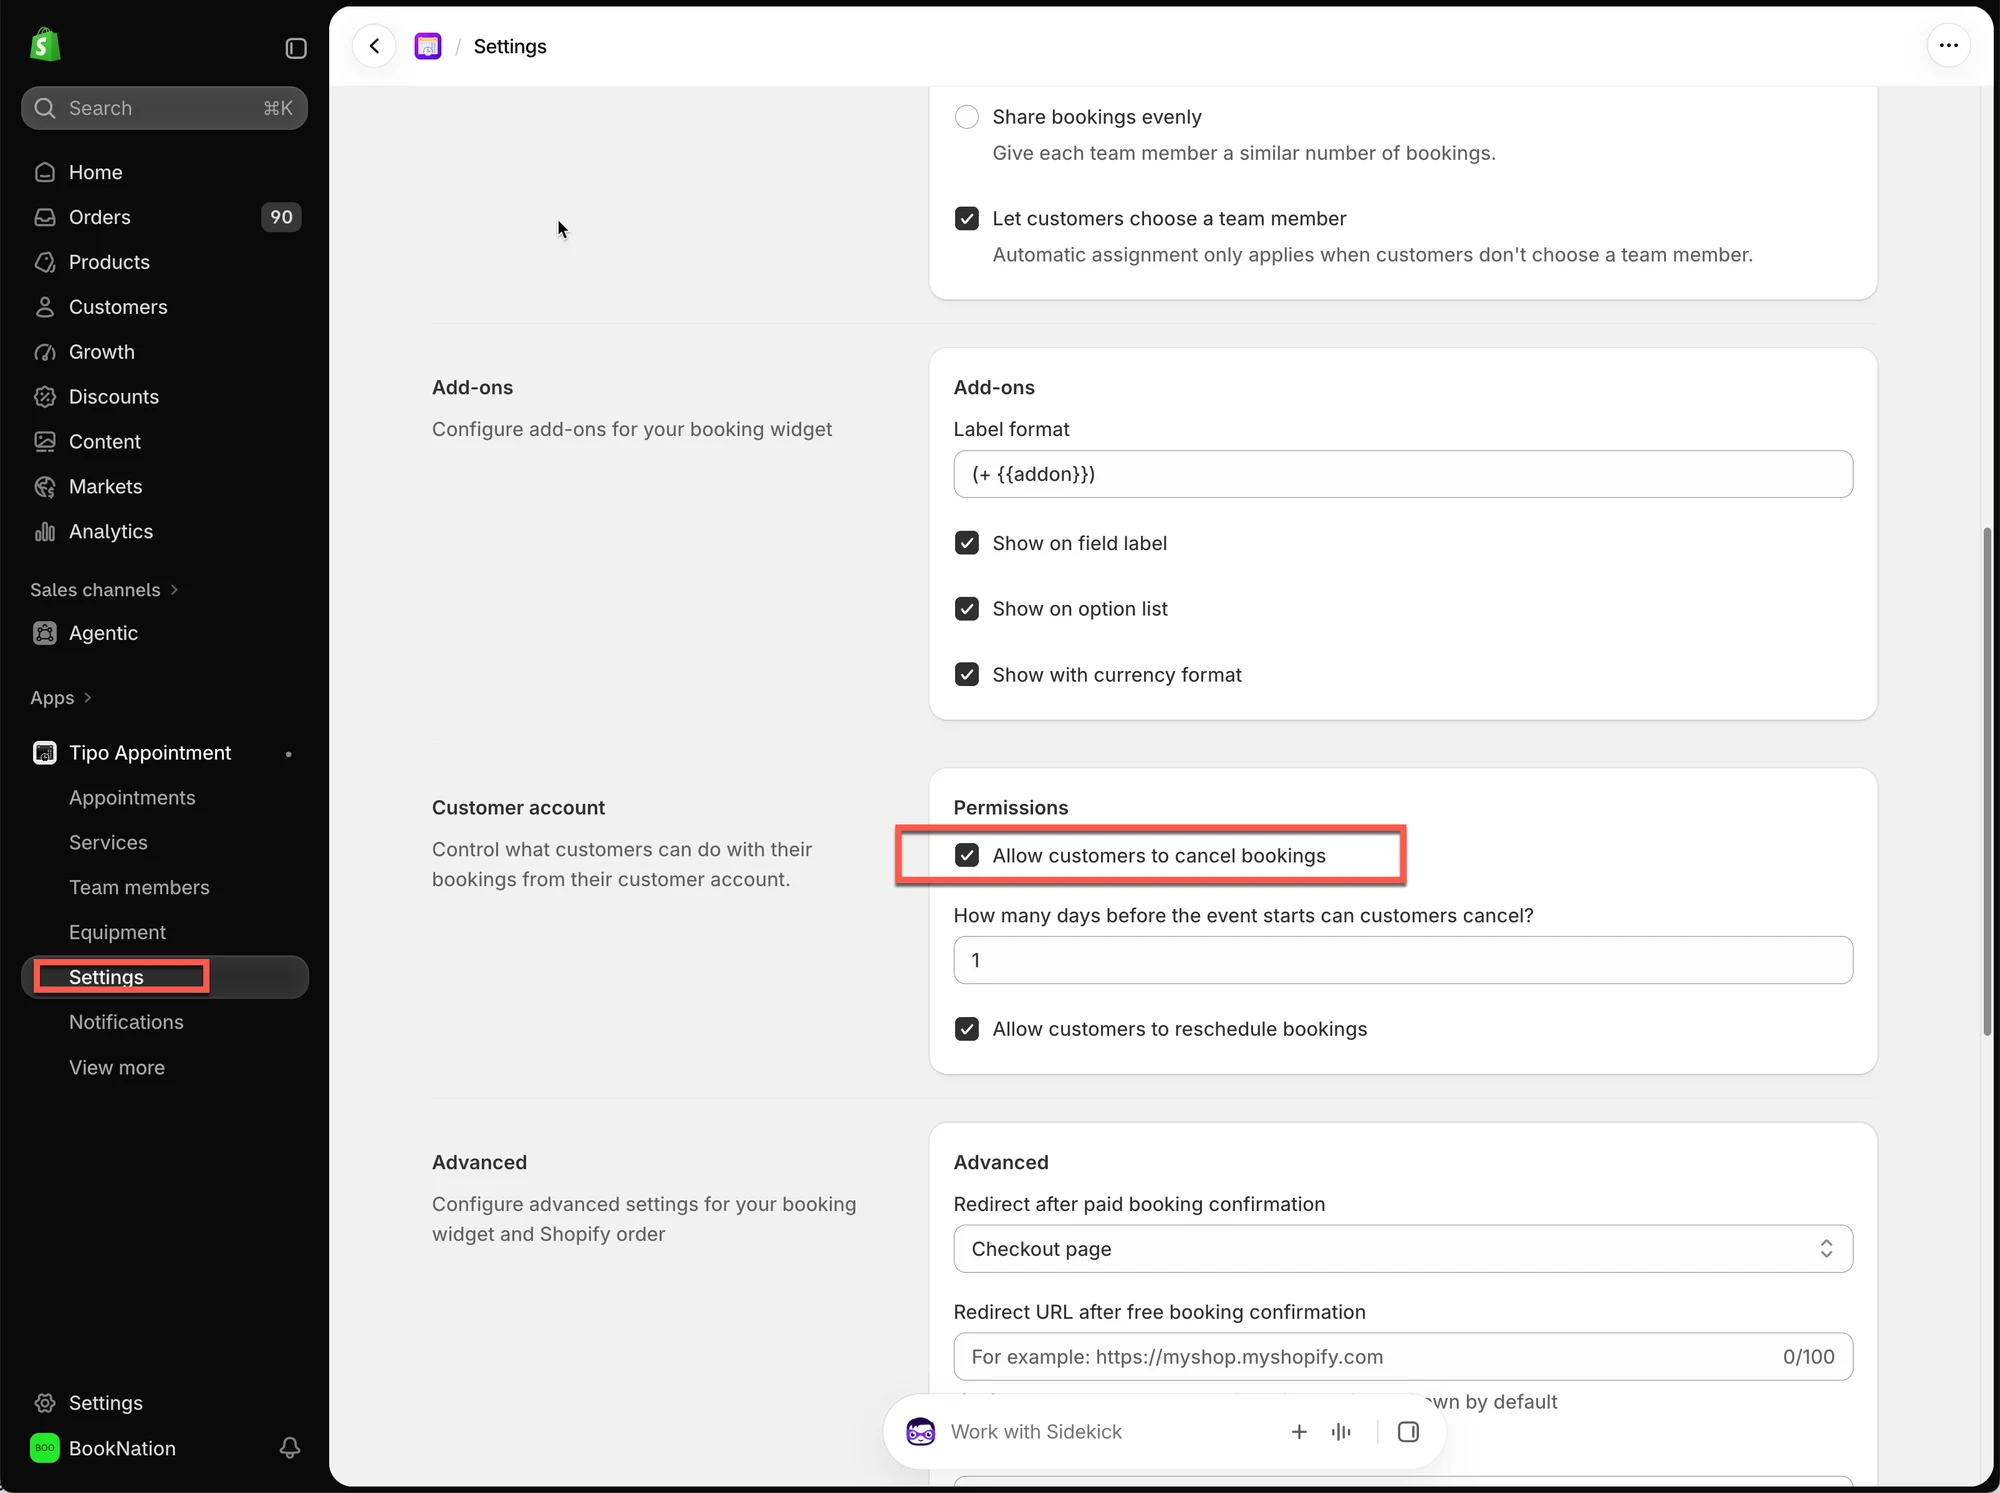
1. Open the app > **Settings** > scroll to **Customer account**
2. Under **Permissions** , tick **Allow customers to cancel bookings**
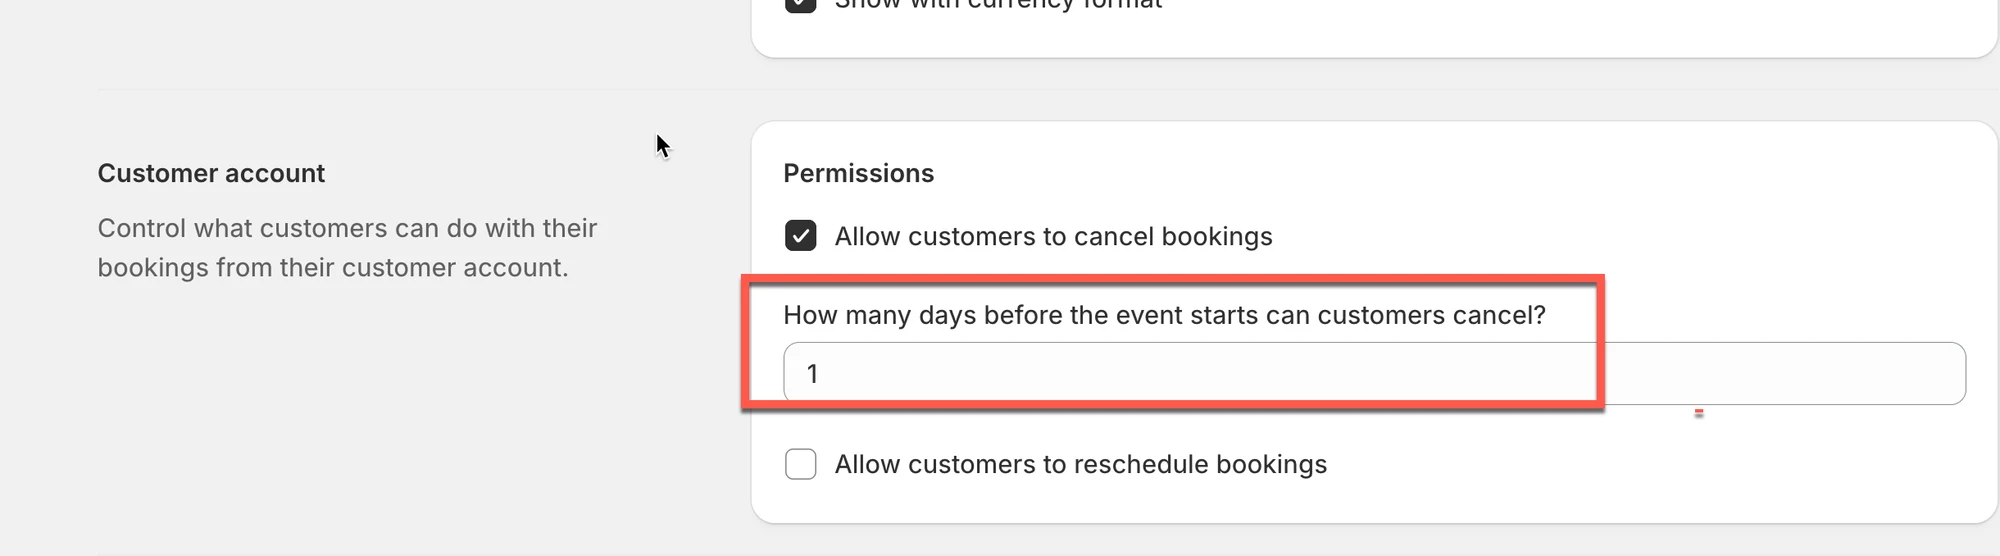
3. Optional — limit how close to the booking time cancellation is allowed:
**📌 Note:** This cutoff setting applies **globally** , to every service — you can't yet set a different window per service.
4. Save the app settings
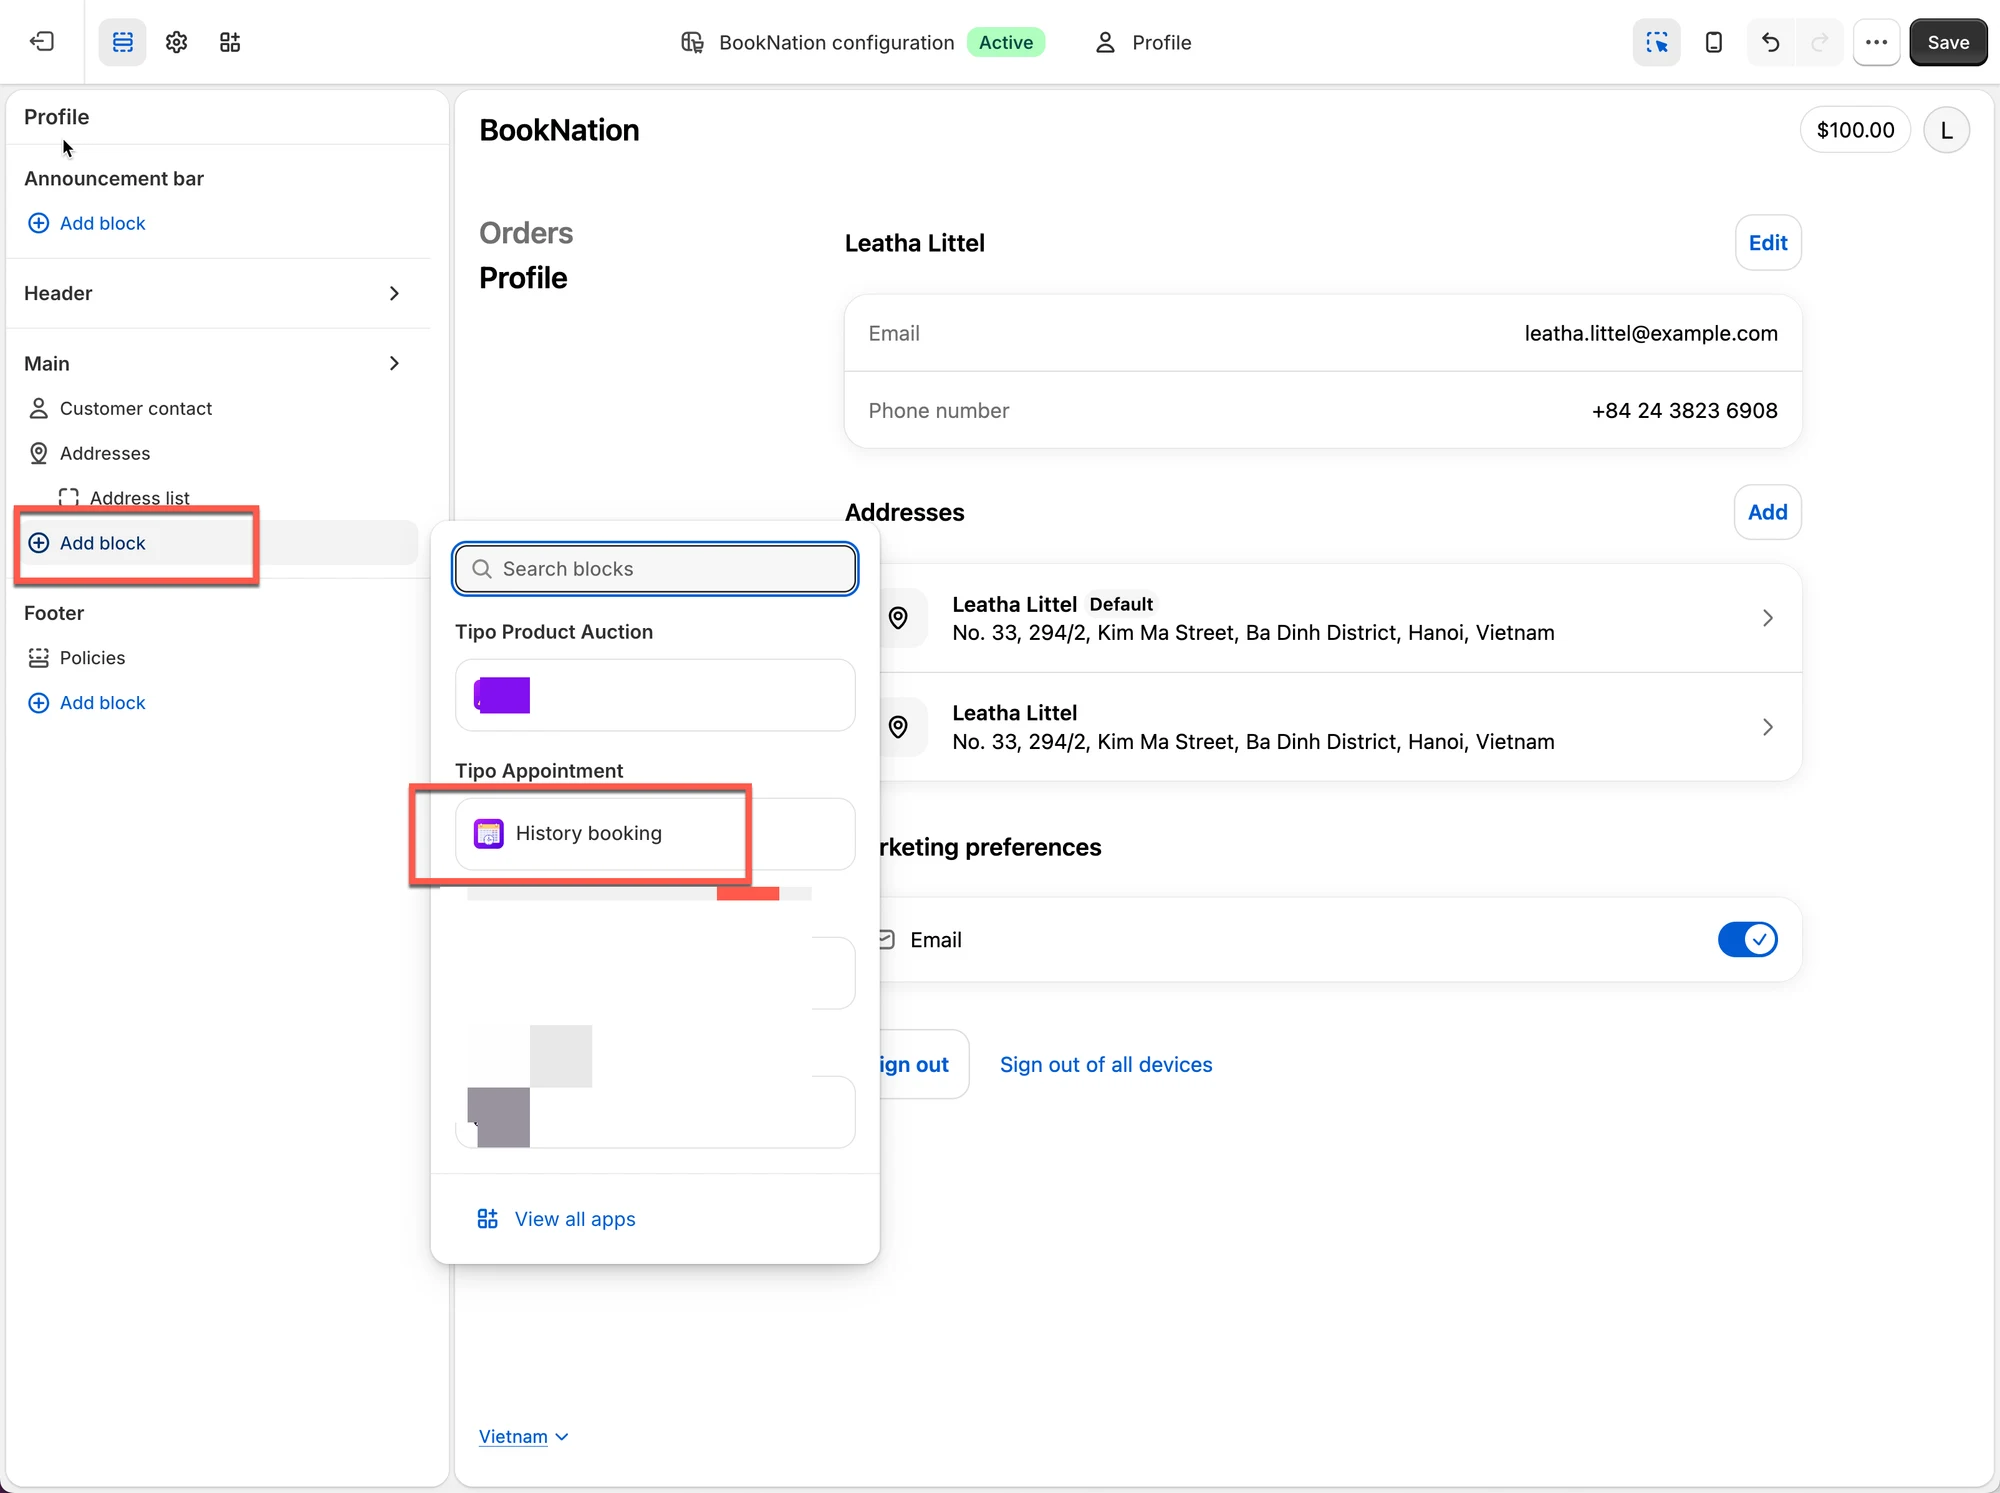
**Step 2: Add Booking history block to account page**
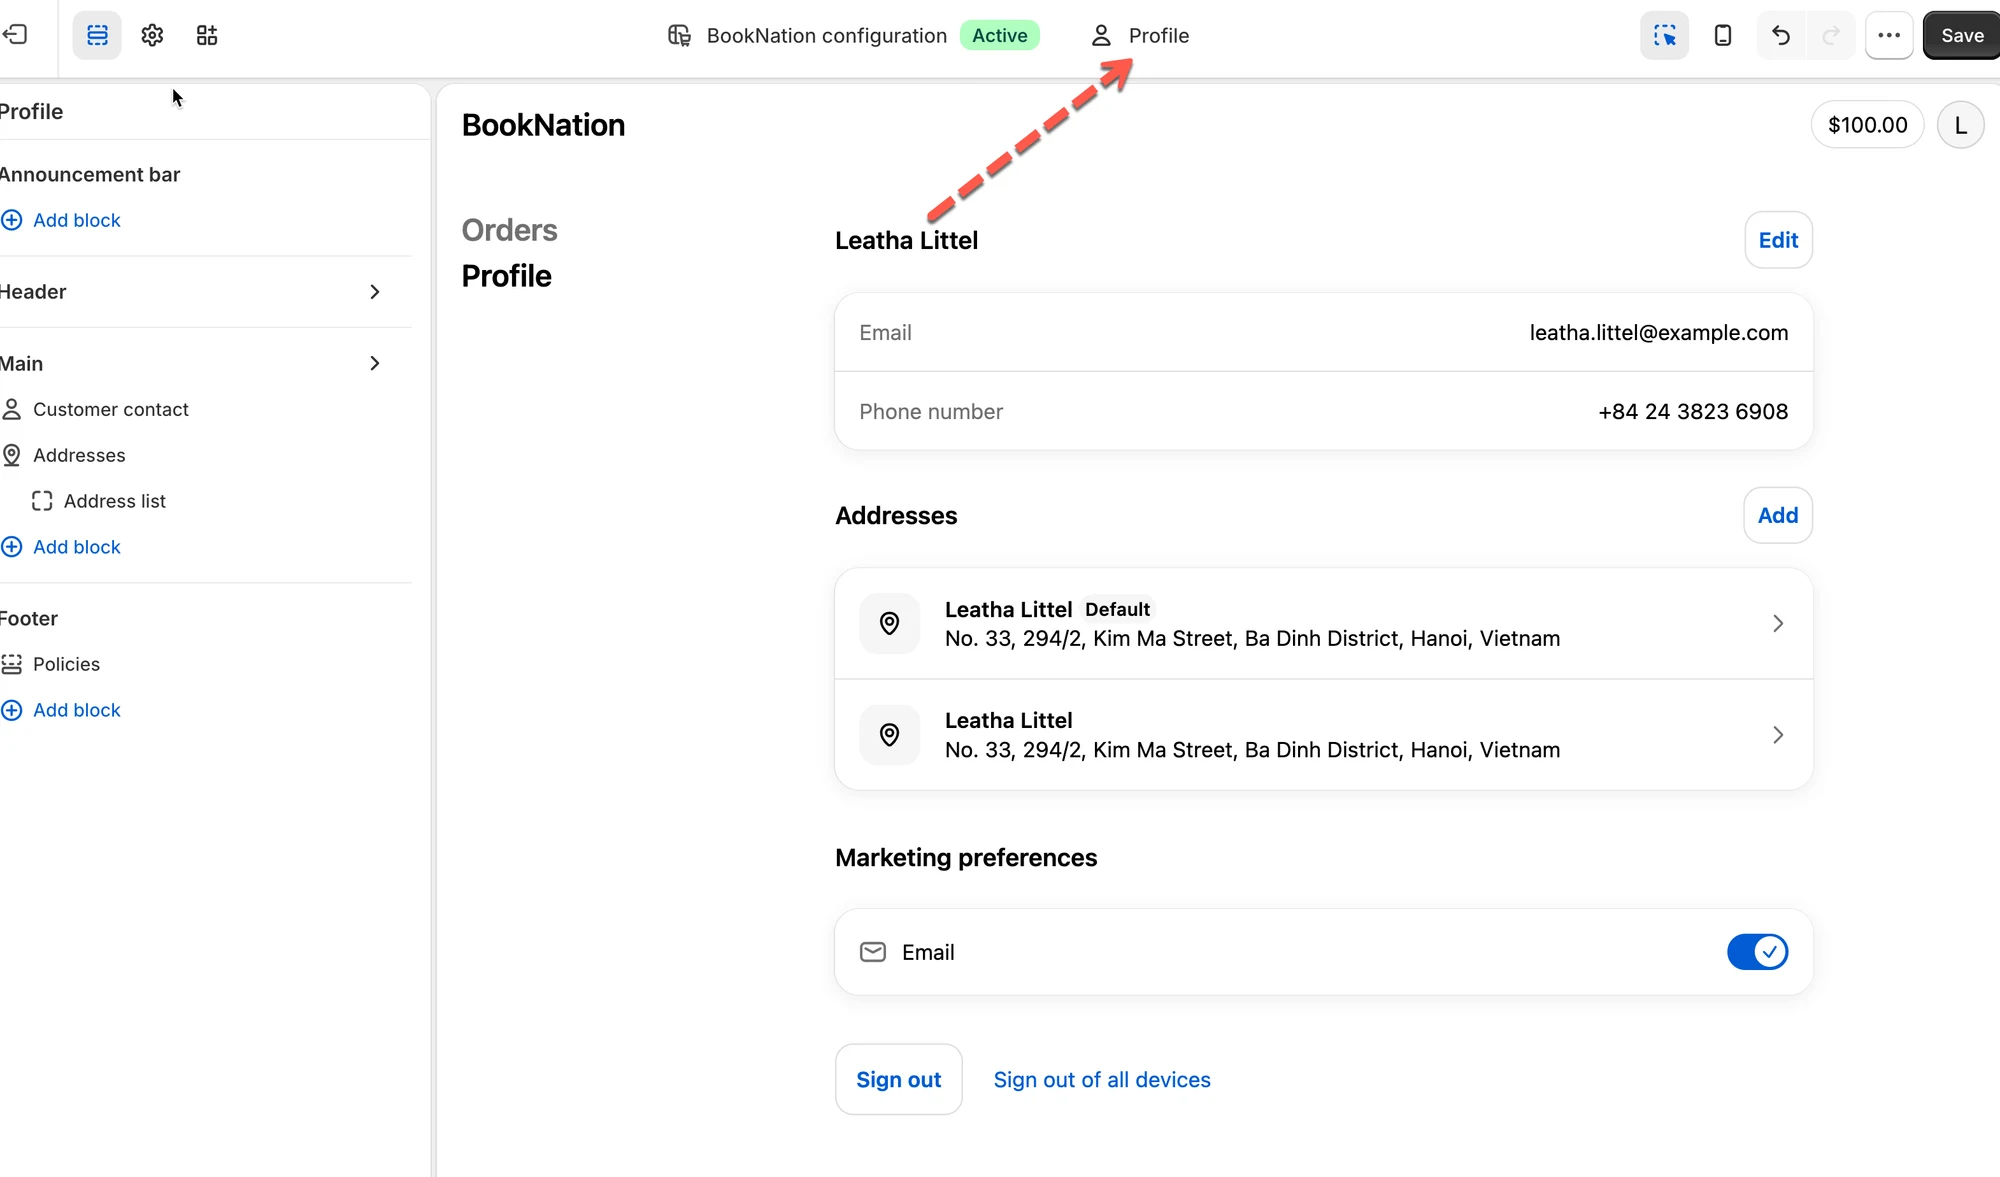
1. Open the store > **Sale channels** > click **Online stores > Edit theme** > open the theme editor > open the account page template
2. **Add block** > add **Booking history** block from our app
3. Save it
#### **How customers cancel:**
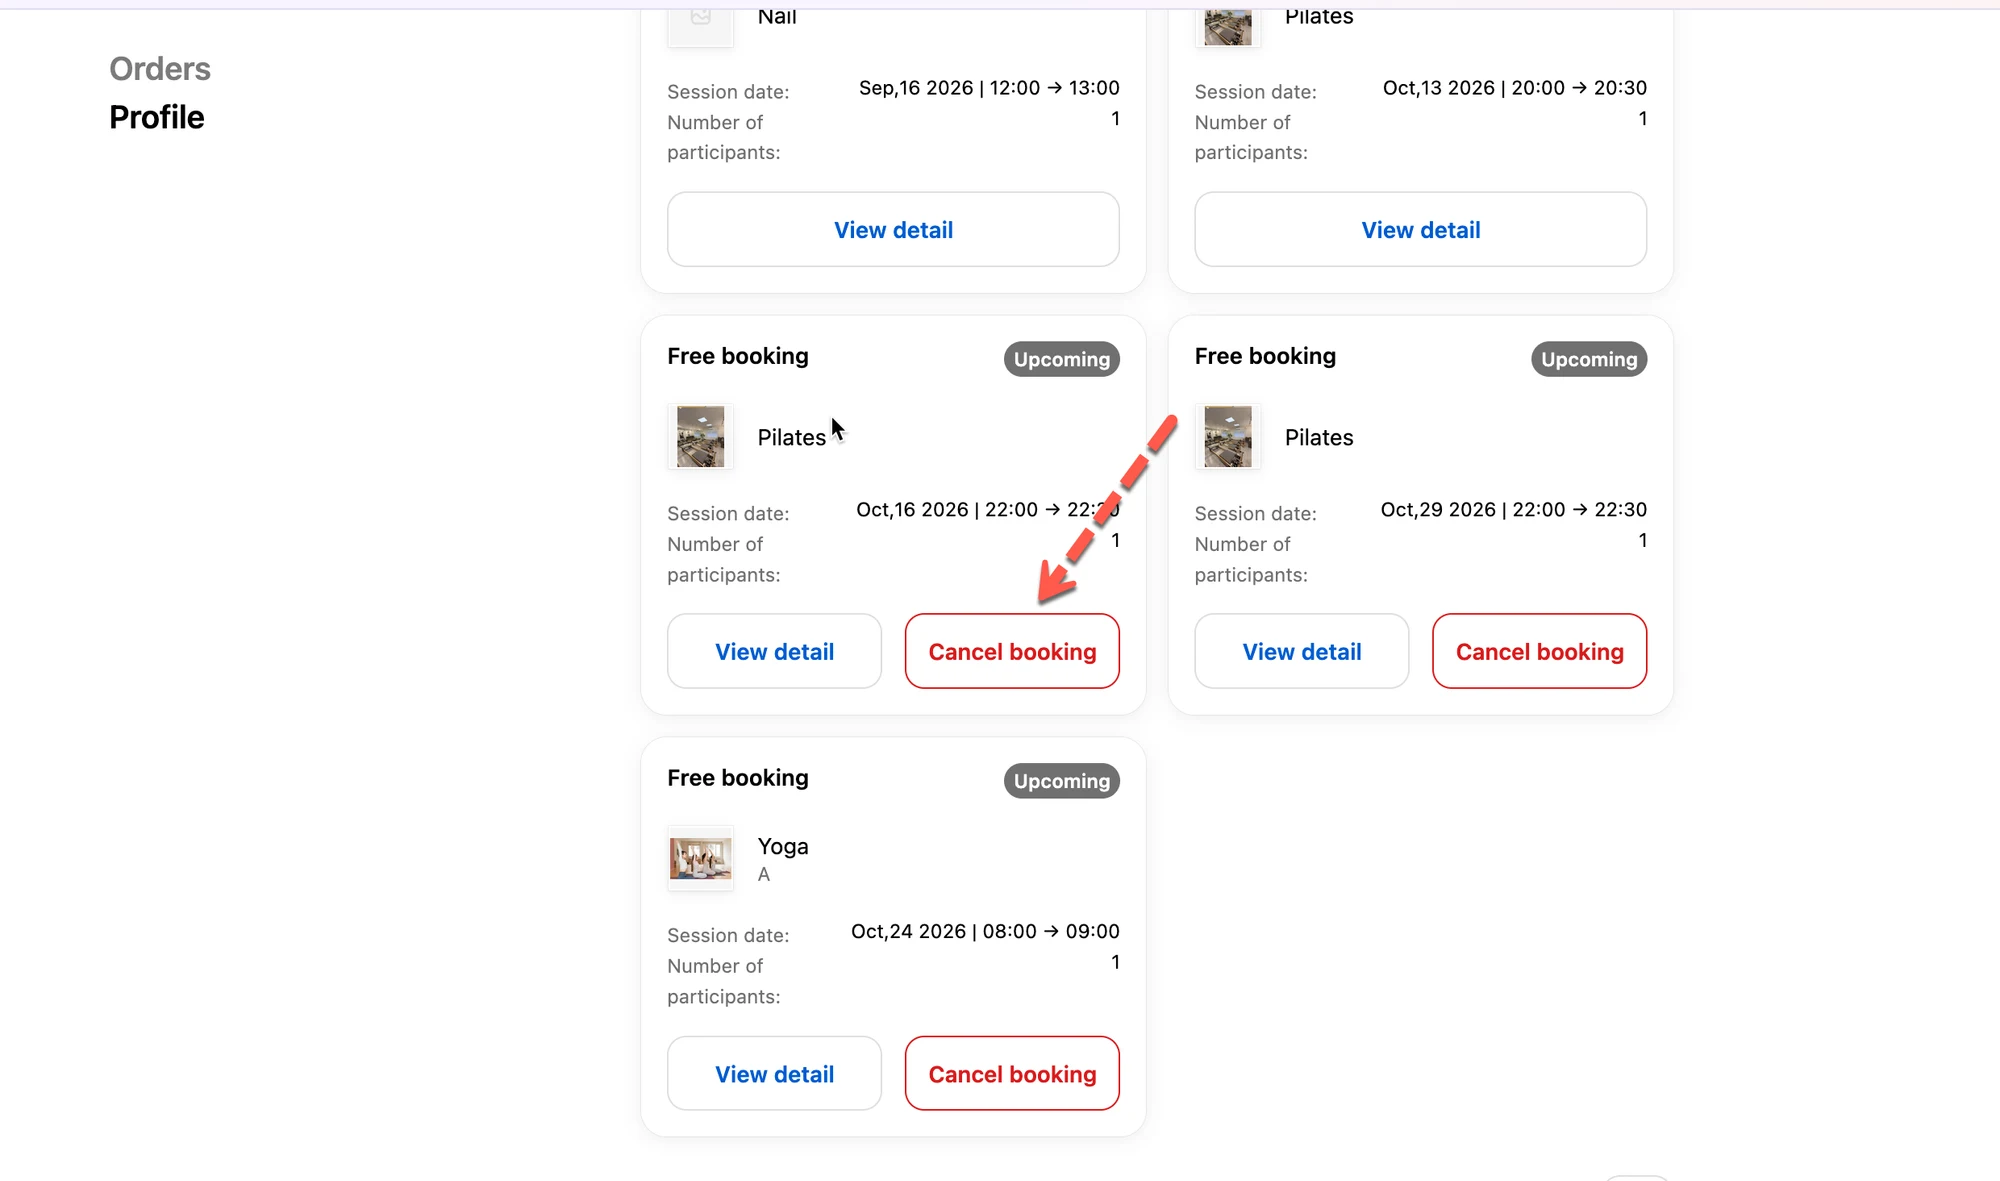
1. Customer logs into their Shopify customer account
2. Goes to **Profile** > **History booking**
3. Finds the upcoming booking and clicks **Cancel booking** , next to **View detail**
> **📌 Note: Cancel booking** only appears on bookings with **Upcoming** status — not on Completed or already-Canceled ones.
#### **What Happens After a Booking Is Canceled**
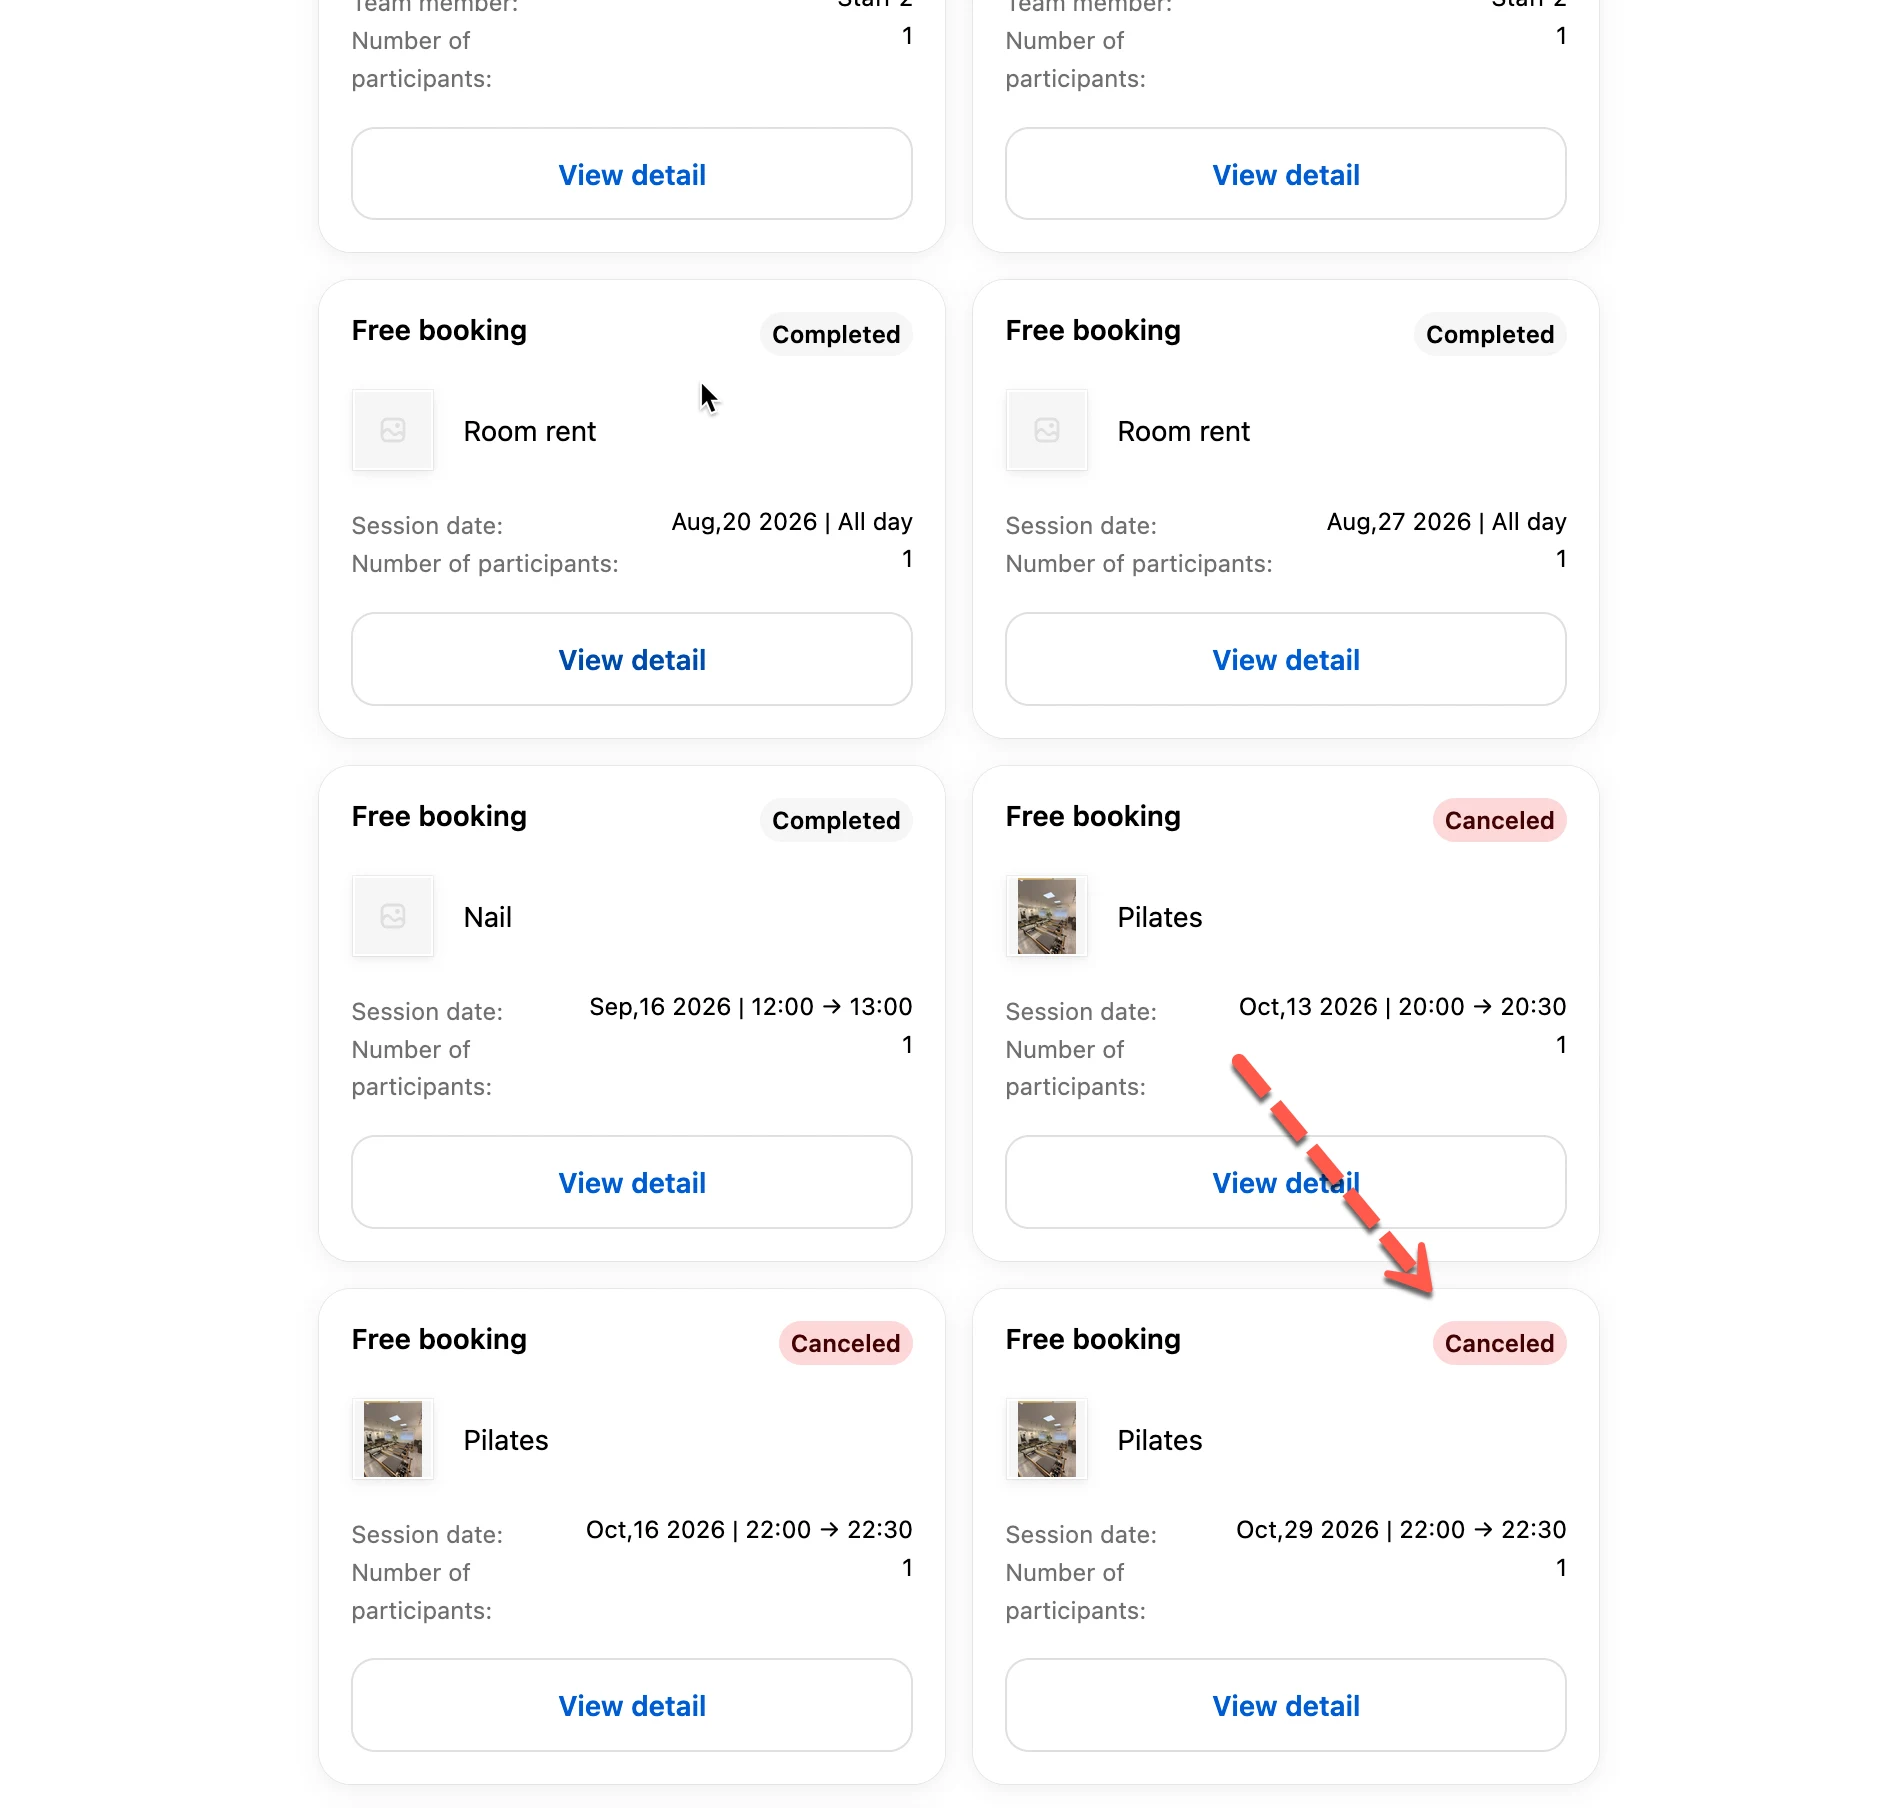
* The status updates to **Canceled** — in the app, in your Shopify Admin ( **Appointments** ), and in the customer's own booking history
* Both the customer and admin automatically receive a cancellation confirmation email
* The time slot becomes available again (unless blocked by other rules)
**🙋 Still need support?**
If you still need help, please feel free to contact us at . We’ll be happy to assist you further.