
Manage appointments
AI Overview
Use the Appointments page in Tipo Appointment Booking to view, approve, reschedule, cancel, delete and export bookings. You can switch between Month and List views, filter by status, open an appointment for customer, order, service and time details, and set how appointments display on the calendar.
View moreView less
- Open Appointments; filter by All, Approved or Pending, and use Month or List view.
- Click an appointment and use Reschedule to change team member, date and time, within availability rules.
- Use More actions to approve, cancel (keeps history) or delete (removes it entirely).
- Use Settings for Default or Simple calendar view, and Export to download appointments for a date range.
Summary generated by AI. It can make mistakes, so check the full guide below.
Use the Appointments page to view, approve, reschedule, cancel, and export bookings.
✅ What you can do here
Section titled “✅ What you can do here”- View appointments in a Calendar (Month) or List view
- Filter by status (All / Approved / Pending)
- Open an appointment to see details (customer, order, time, service)
- Reschedule or take actions (approve / cancel / delete)
- Export appointments to a file (CSV)
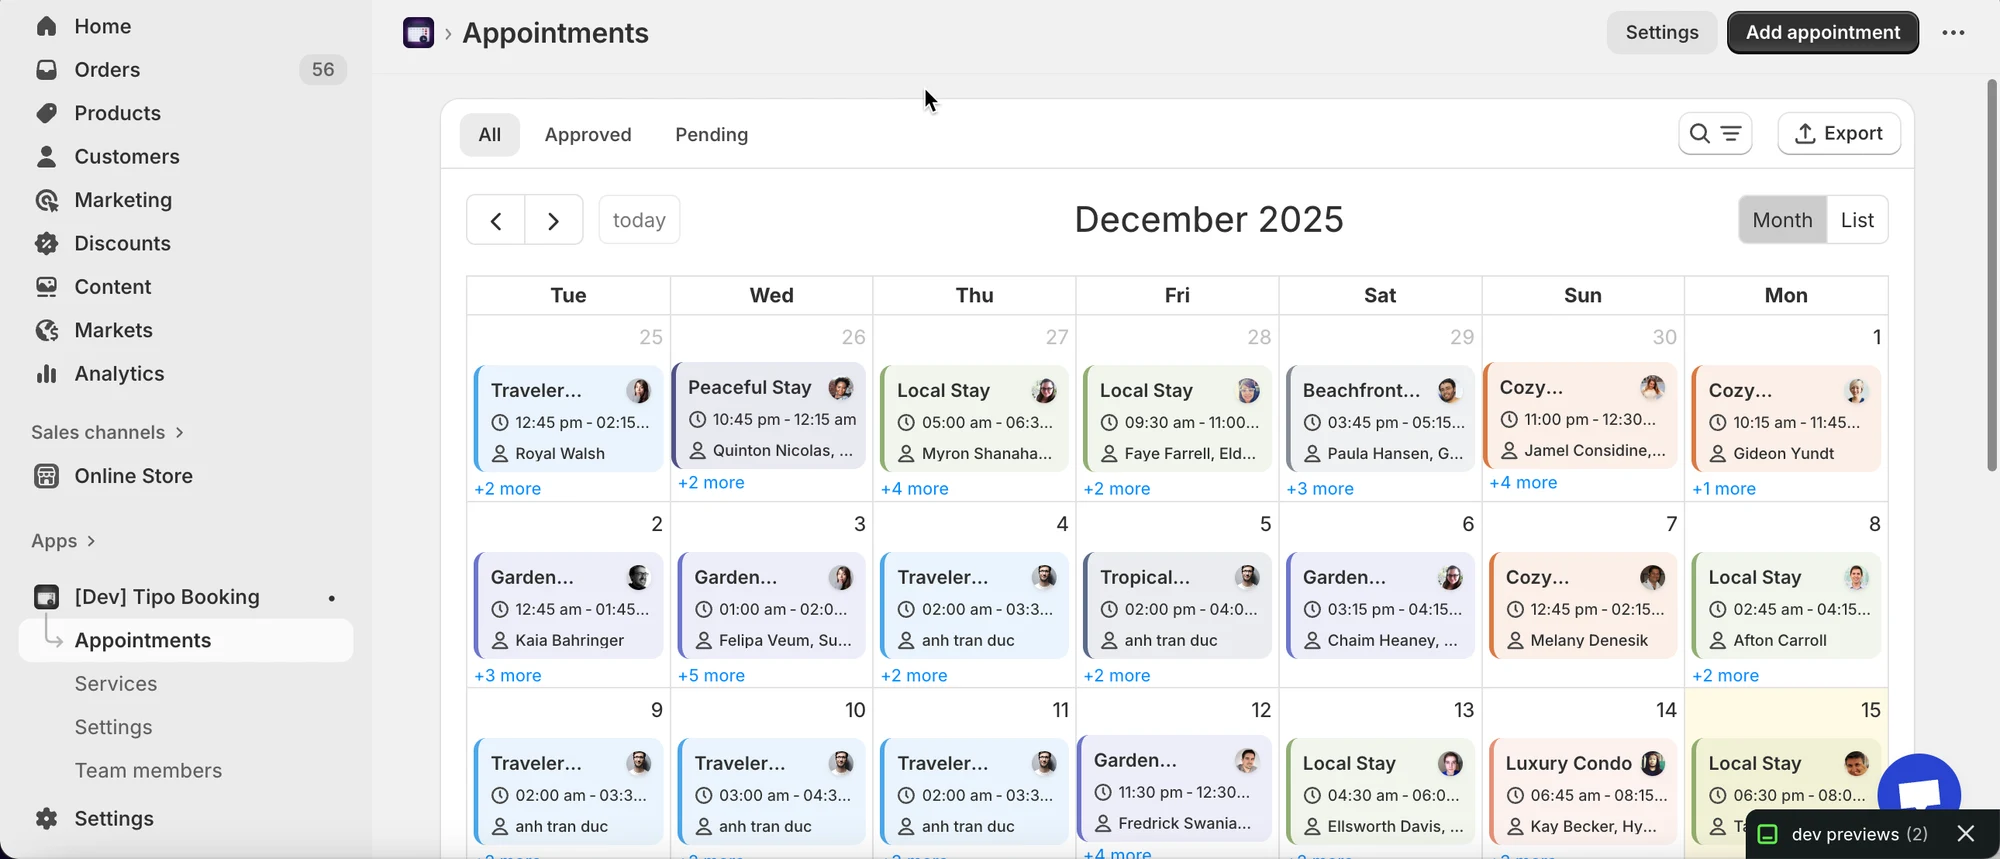
📂 Open the Appointments page
Section titled “📂 Open the Appointments page”Open the app > go to Appointments.
What you’ll see:
- Tabs: All / Approved / Pending
- A calendar header (Month + navigation)
- Top-right buttons: Settings, Add appointment, Export
⚙️ Choose how you want to view appointments
Section titled “⚙️ Choose how you want to view appointments”Month view (Calendar)
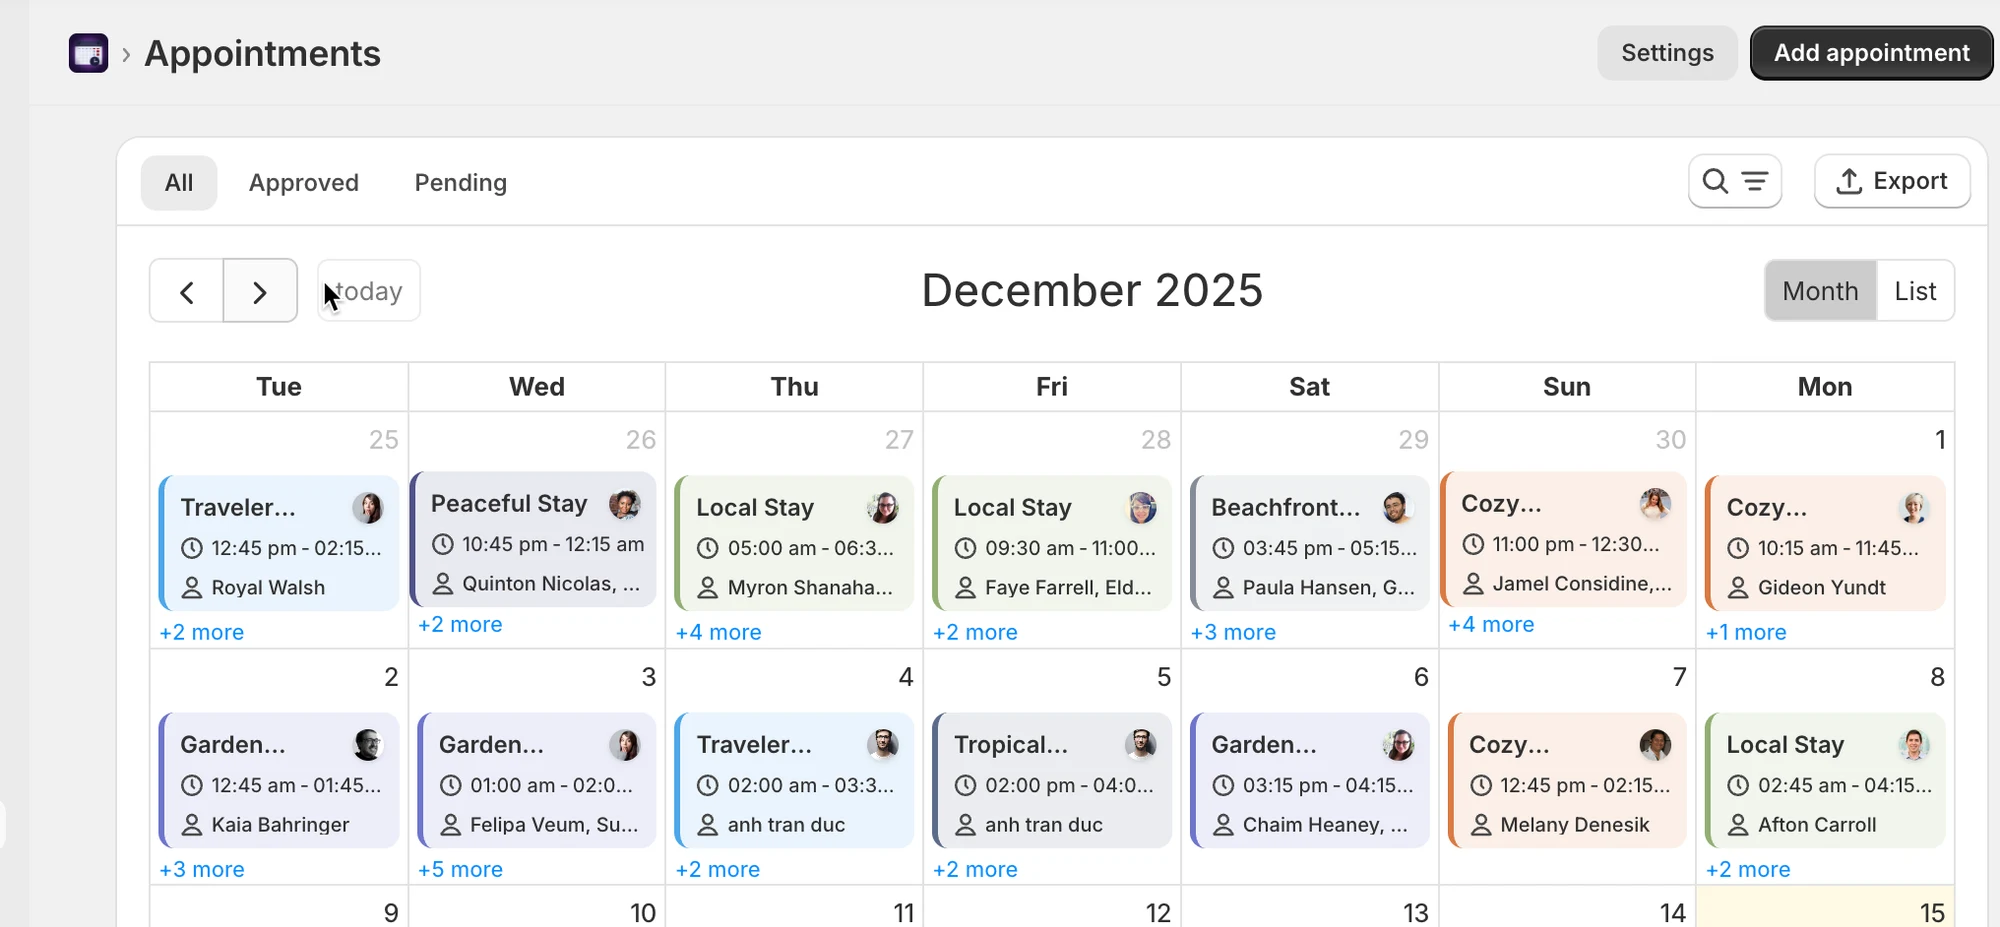
Section titled “Month view (Calendar)”Best for seeing your schedule at a glance and spotting busy days.
- Click Month (top right)
- Click an appointment block on the calendar to preview details (service, status, date/time, participants).
List view
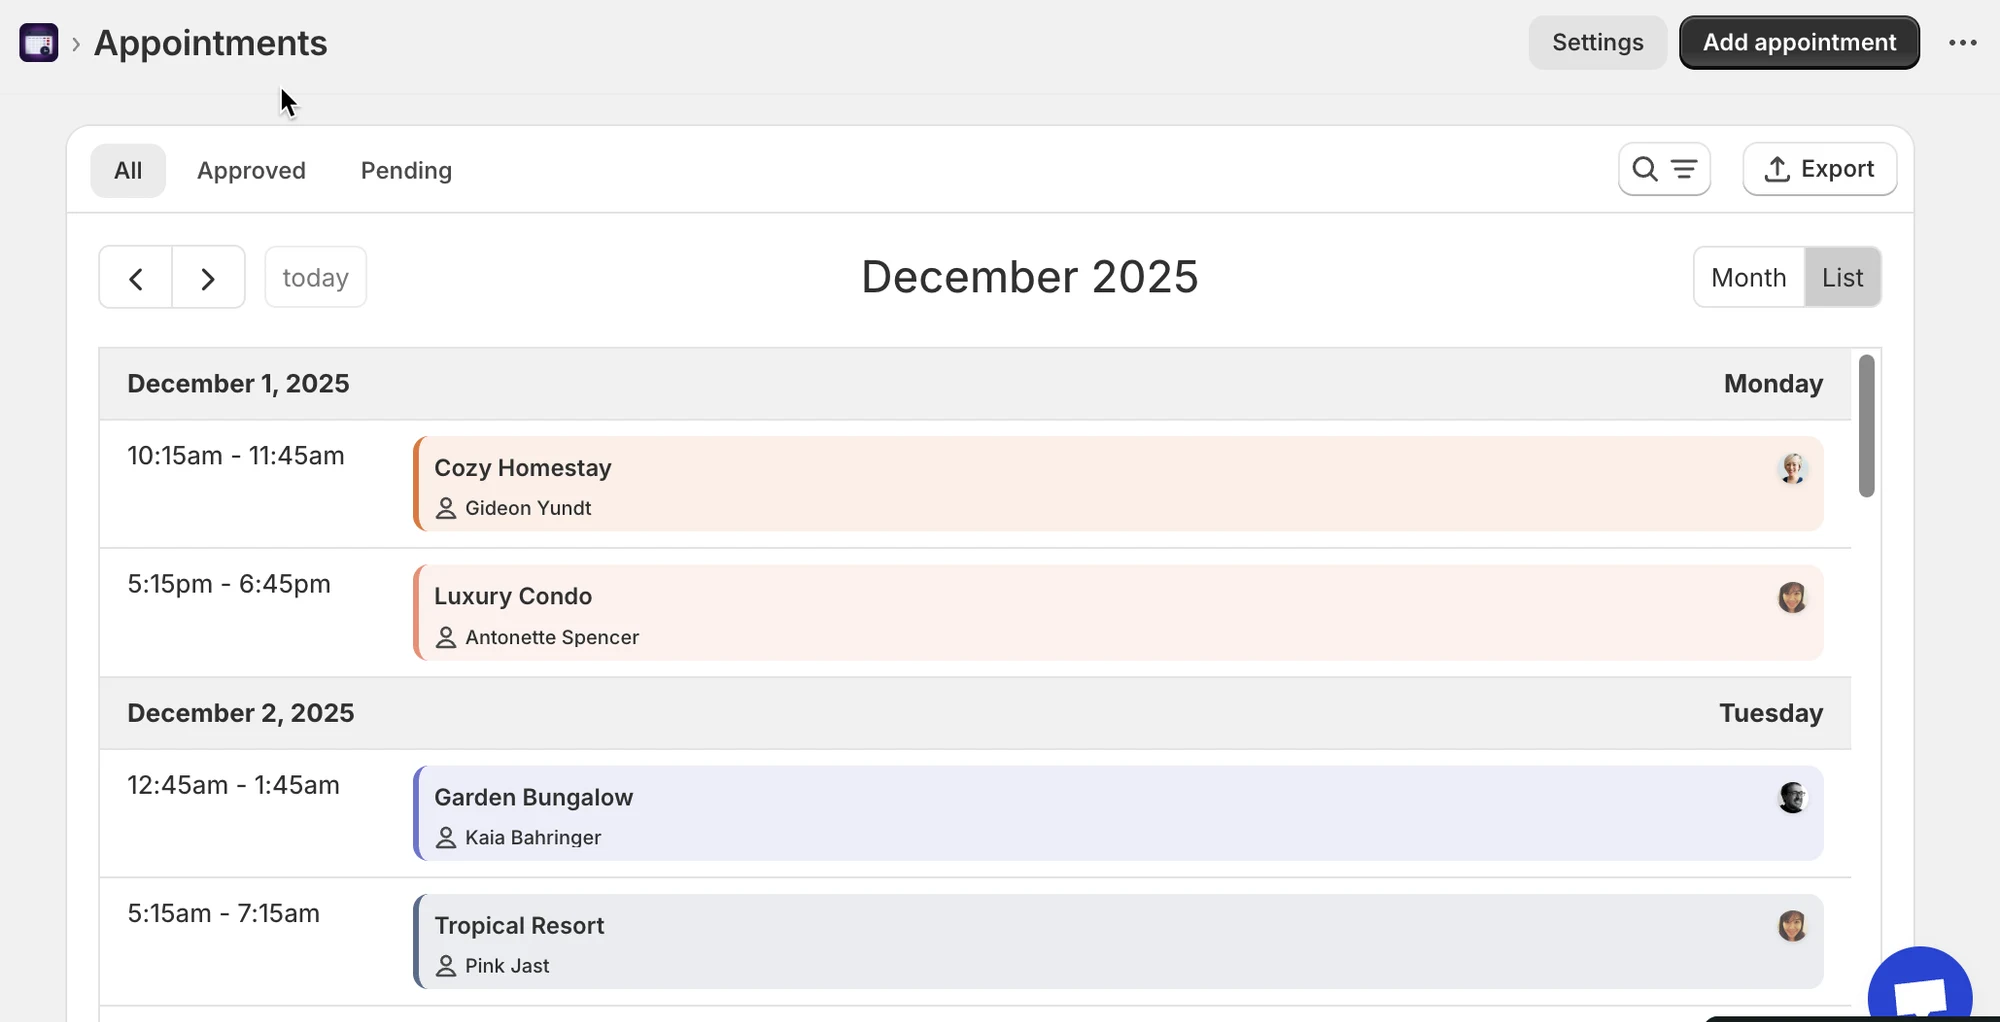
Section titled “List view”Best for scanning lots of appointments quickly.
- Click List (top right)
- Use filters/search to narrow down results.
Tip: Use Approved when you want only confirmed bookings, and Pending when you want to review requests.
🔍 Filter appointments by status
Section titled “🔍 Filter appointments by status”At the top of the page, choose one:
- All – everything
- Approved – confirmed bookings
- Pending – waiting for your approval (if your store uses approval)
This helps you focus on the right workload (review vs. manage).
📋 View appointment details
Section titled “📋 View appointment details”Click an appointment on the calendar (or list) to open it.
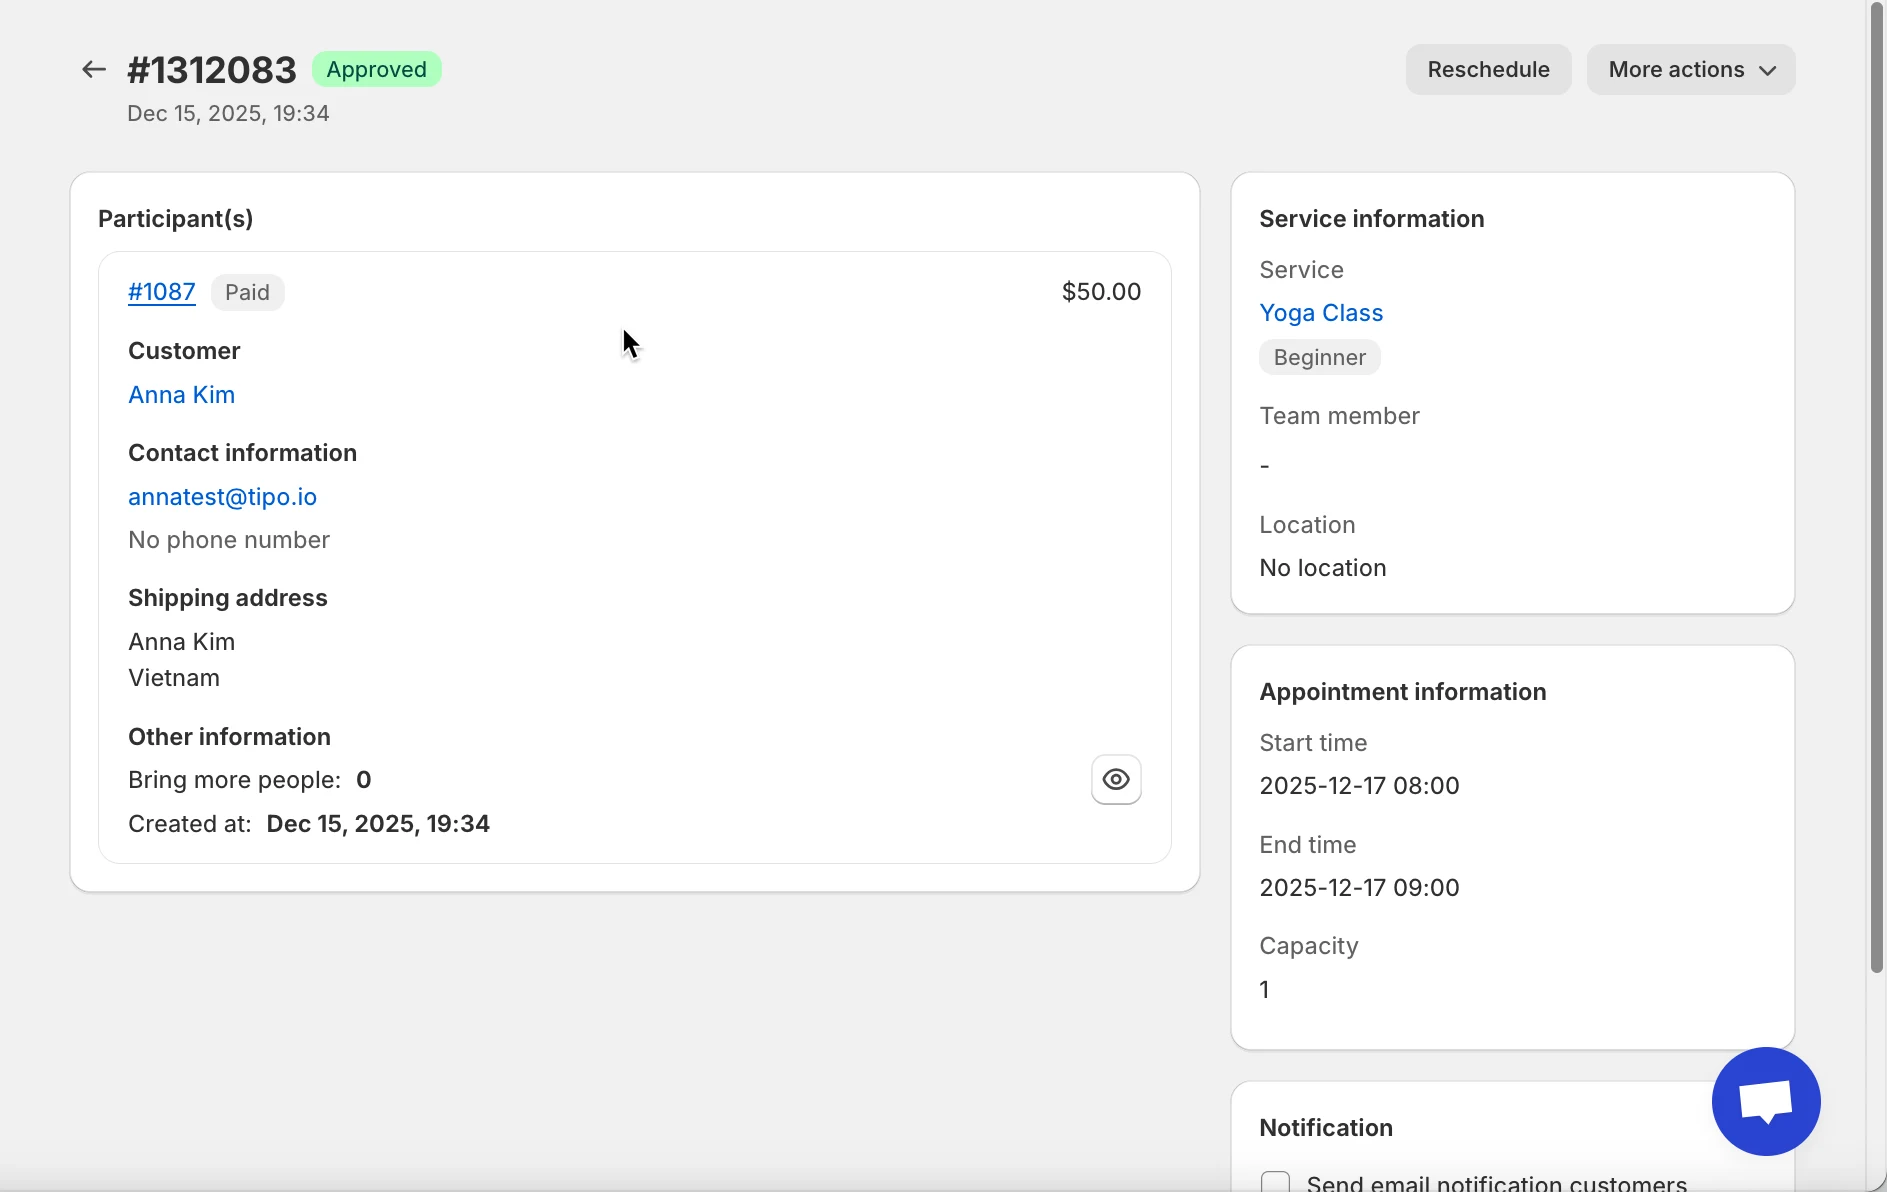
Inside the appointment detail page, you’ll typically see:
Participant(s)
Section titled “Participant(s)”- Customer name + contact info
- Linked order number (if paid)
- Payment label (example: Paid) and amount
Service information
Section titled “Service information”- Service name + variant (if any)
- Team member (if assigned)
- Location (if used)
Appointment information
Section titled “Appointment information”- Start time / End time
- Capacity
🔁 Reschedule an appointment
Section titled “🔁 Reschedule an appointment”On the appointment detail page, click Reschedule (top right).
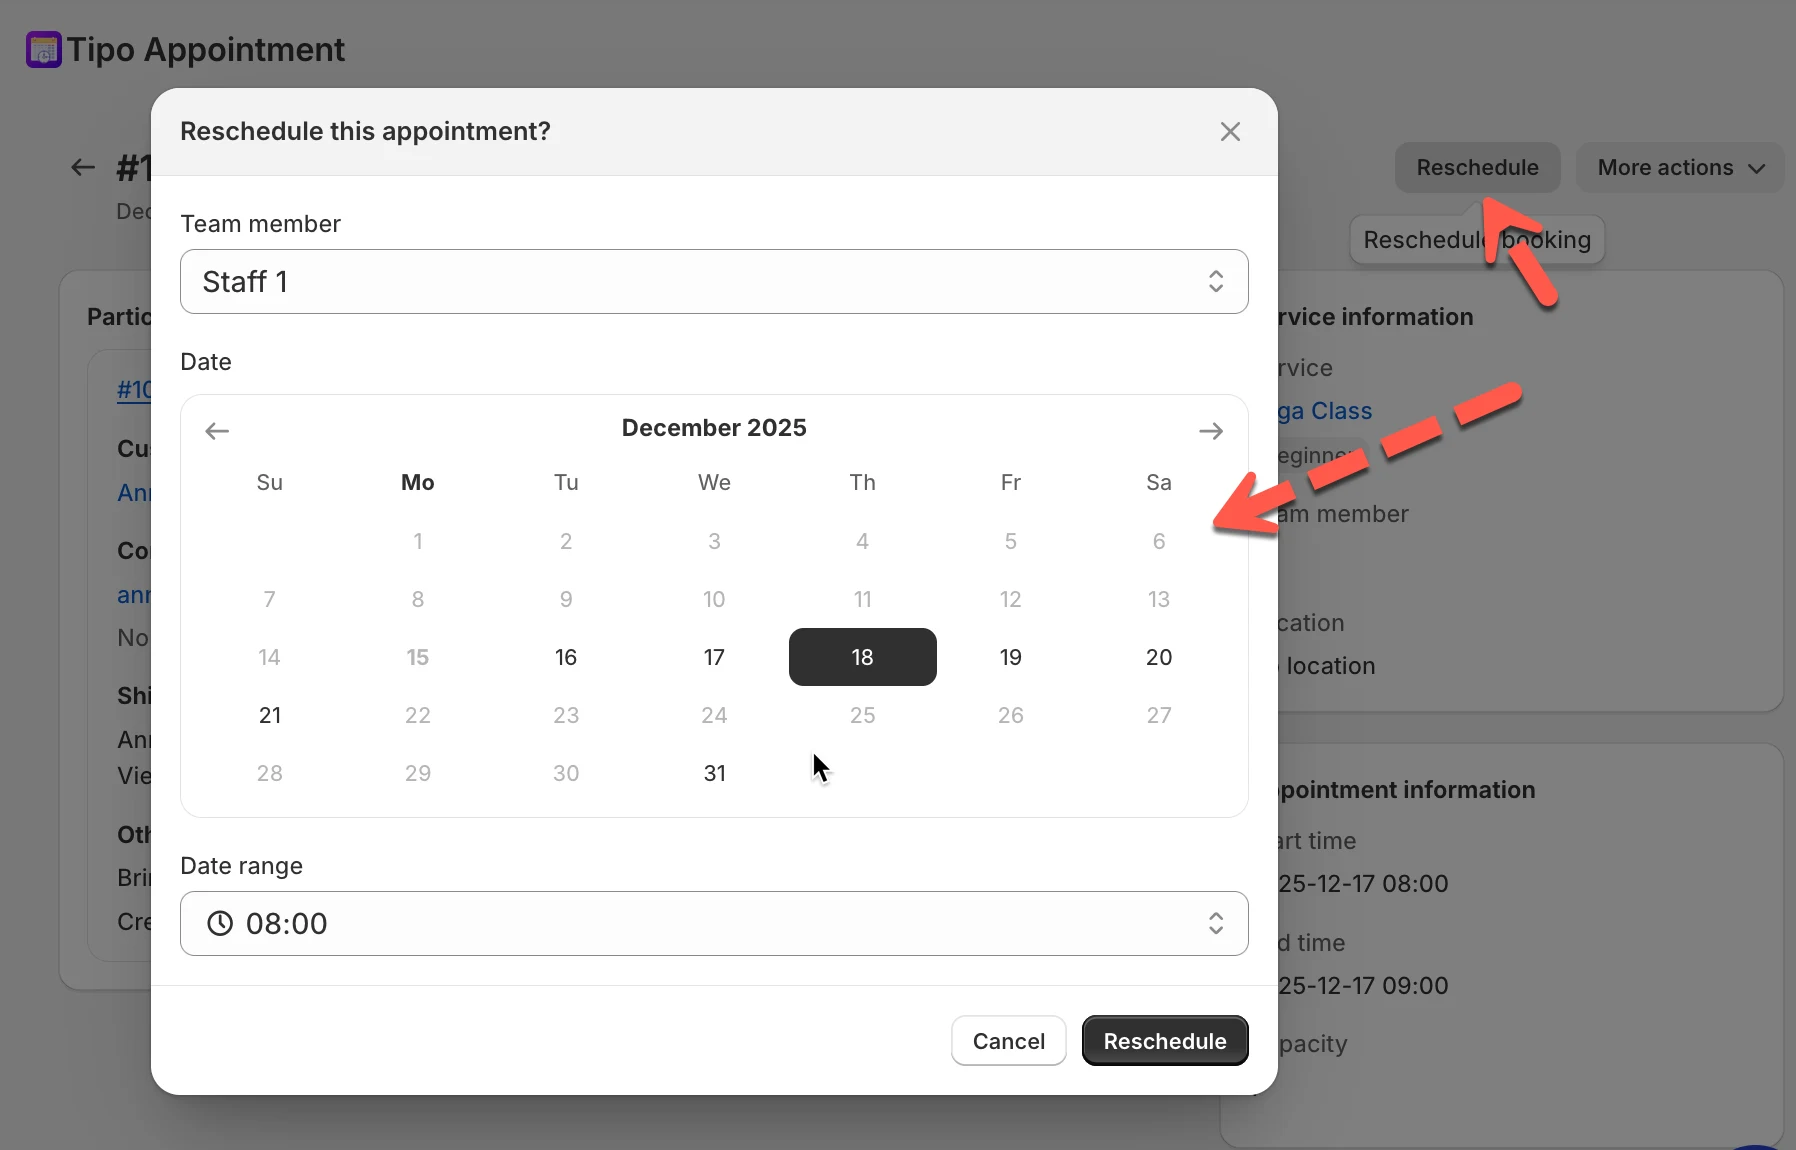
A reschedule form will open where you can:
- Select Team member
- Pick a Date
- Choose a new Time (time range)
Rescheduling must follow availability rules (team member schedule + blocked times + booking date range).
✏️ Take actions: approve, cancel, delete appointments
Section titled “✏️ Take actions: approve, cancel, delete appointments”On the appointment detail page, click More actions.
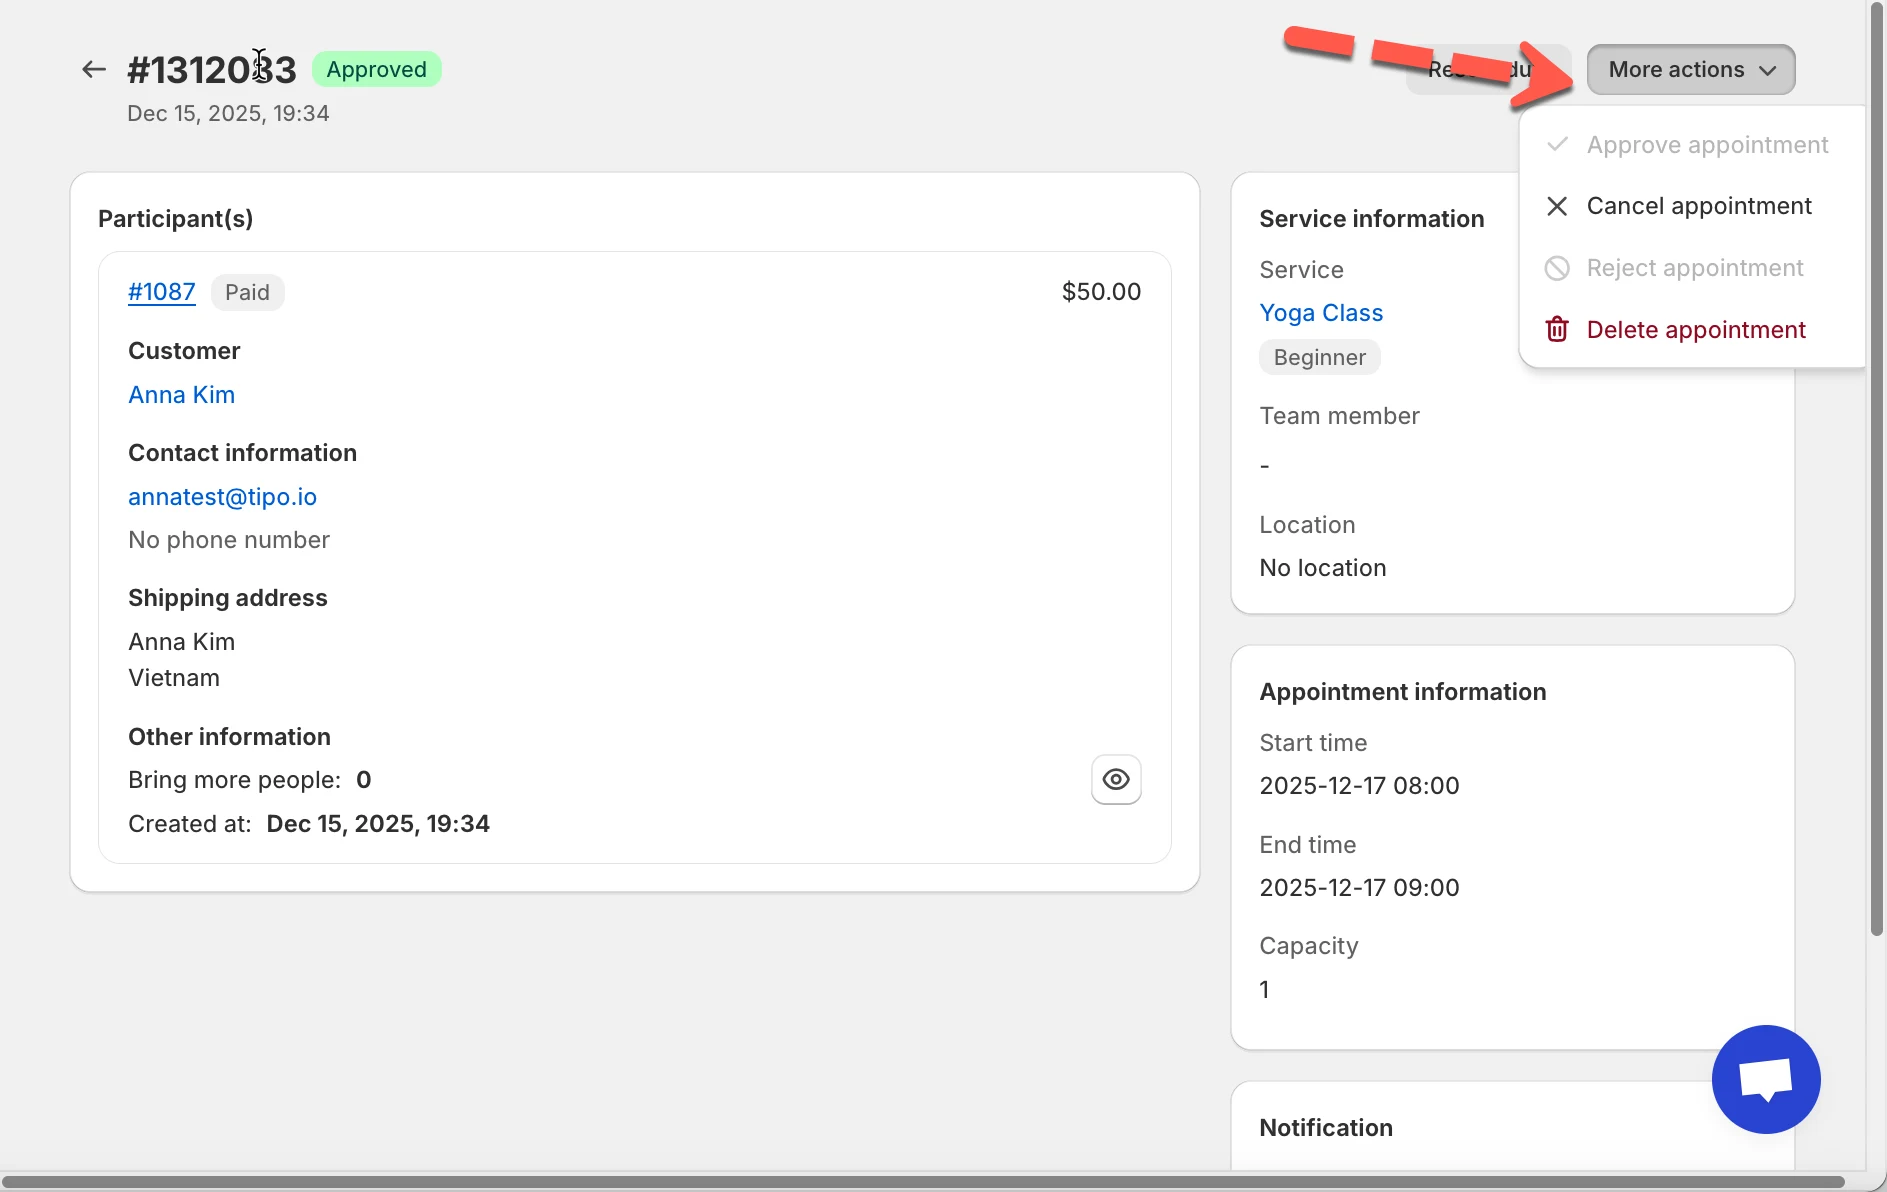
Common actions you may see:
- Approve appointment (for pending bookings)
- Cancel appointment (keep record but mark it canceled)
- Delete appointment (remove it entirely)
Suggested guidance text
- Use Cancel when you want to keep history/reporting.
- Use Delete only when you truly want it removed (ex: test bookings).
⚙️ Appointment settings (display style)
Section titled “⚙️ Appointment settings (display style)”From the main Appointments page, click Settings (top right).
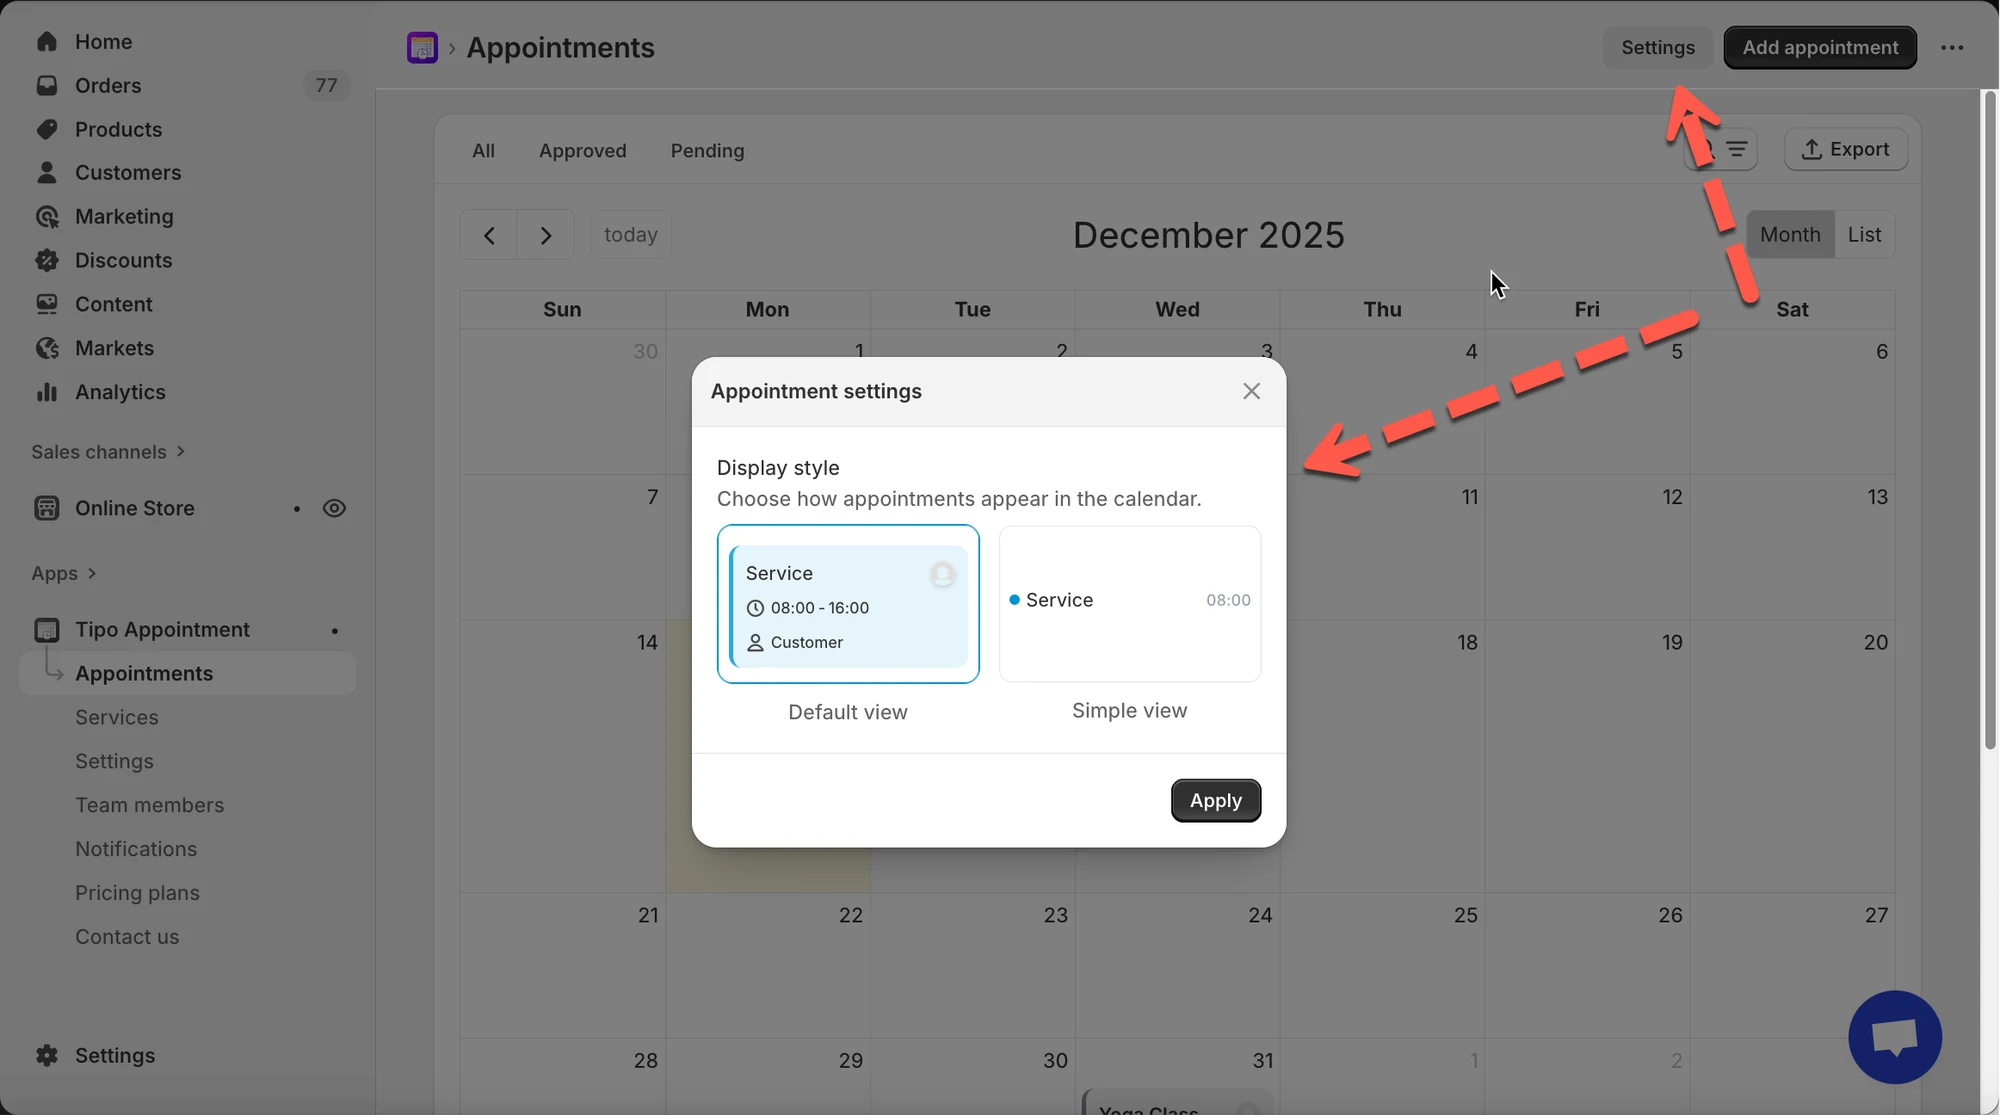
You can choose how appointments appear on the calendar, for example:
- Default view (shows more details like service + time + customer)
- Simple view (more compact display)
Click Apply to save.
📤 Export appointments
Section titled “📤 Export appointments”From the main Appointments page, click Export (top right).
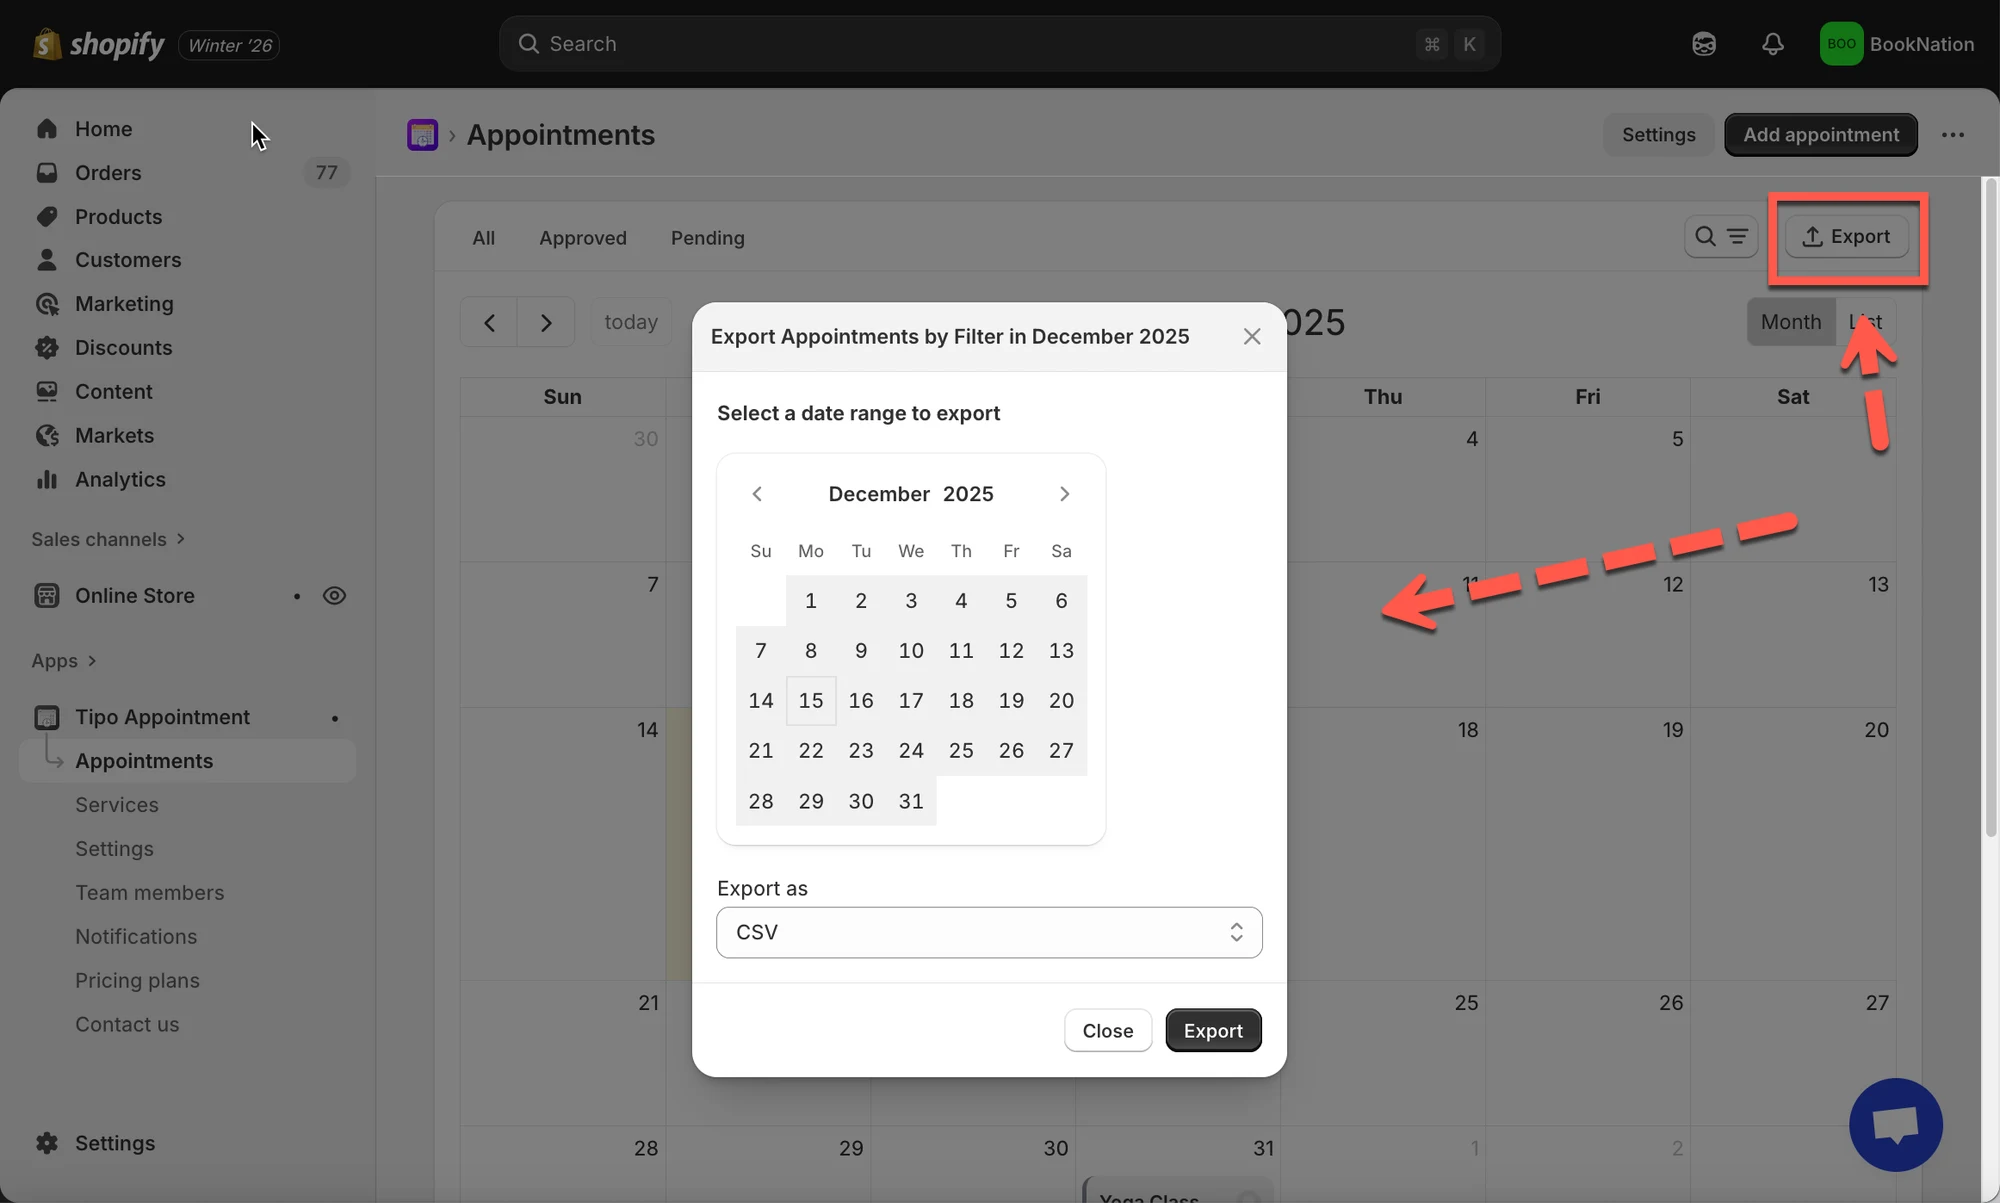
In the export popup:
- Select a date range (calendar picker)
- Choose Export as → usually CSV
- Click Export
🙋 Still need support?
If you still need help, please feel free to contact us at hi@tipo.io. We’ll be happy to assist you further.