
Create an appointment manually
AI Overview
Create an appointment on behalf of a customer from the Tipo admin, useful for phone bookings, walk-ins, or fixing and recreating a booking. You choose the service, team member, date, time, and status. An existing customer is required to save the booking, so create the customer in Shopify first if needed.
View moreView less
- Customer must already exist; create them in Shopify first if not.
- Open the app, click Appointments, then Add appointment.
- Select the service and variant, assign a team member, and pick the date and start time.
- Select the customer and set appointment status (Approved or Pending) and payment status (Paid or Unpaid).
- Optionally bring more people, send an email notification, or add internal notes, then save; the booking appears on the calendar.
Summary generated by AI. It can make mistakes, so check the full guide below.
Create an appointment on behalf of a customer directly from the admin, perfect for phone bookings, walk-ins, or manual adjustments.
🧭 When should you use this?
Section titled “🧭 When should you use this?”Use manual booking when:
- A customer calls or messages you to book
- You need to add a walk-in appointment
- You want full control over time, staff, and status
- You’re fixing or recreating a booking
🛠️ Step-by-Step: Create a Booking Manually
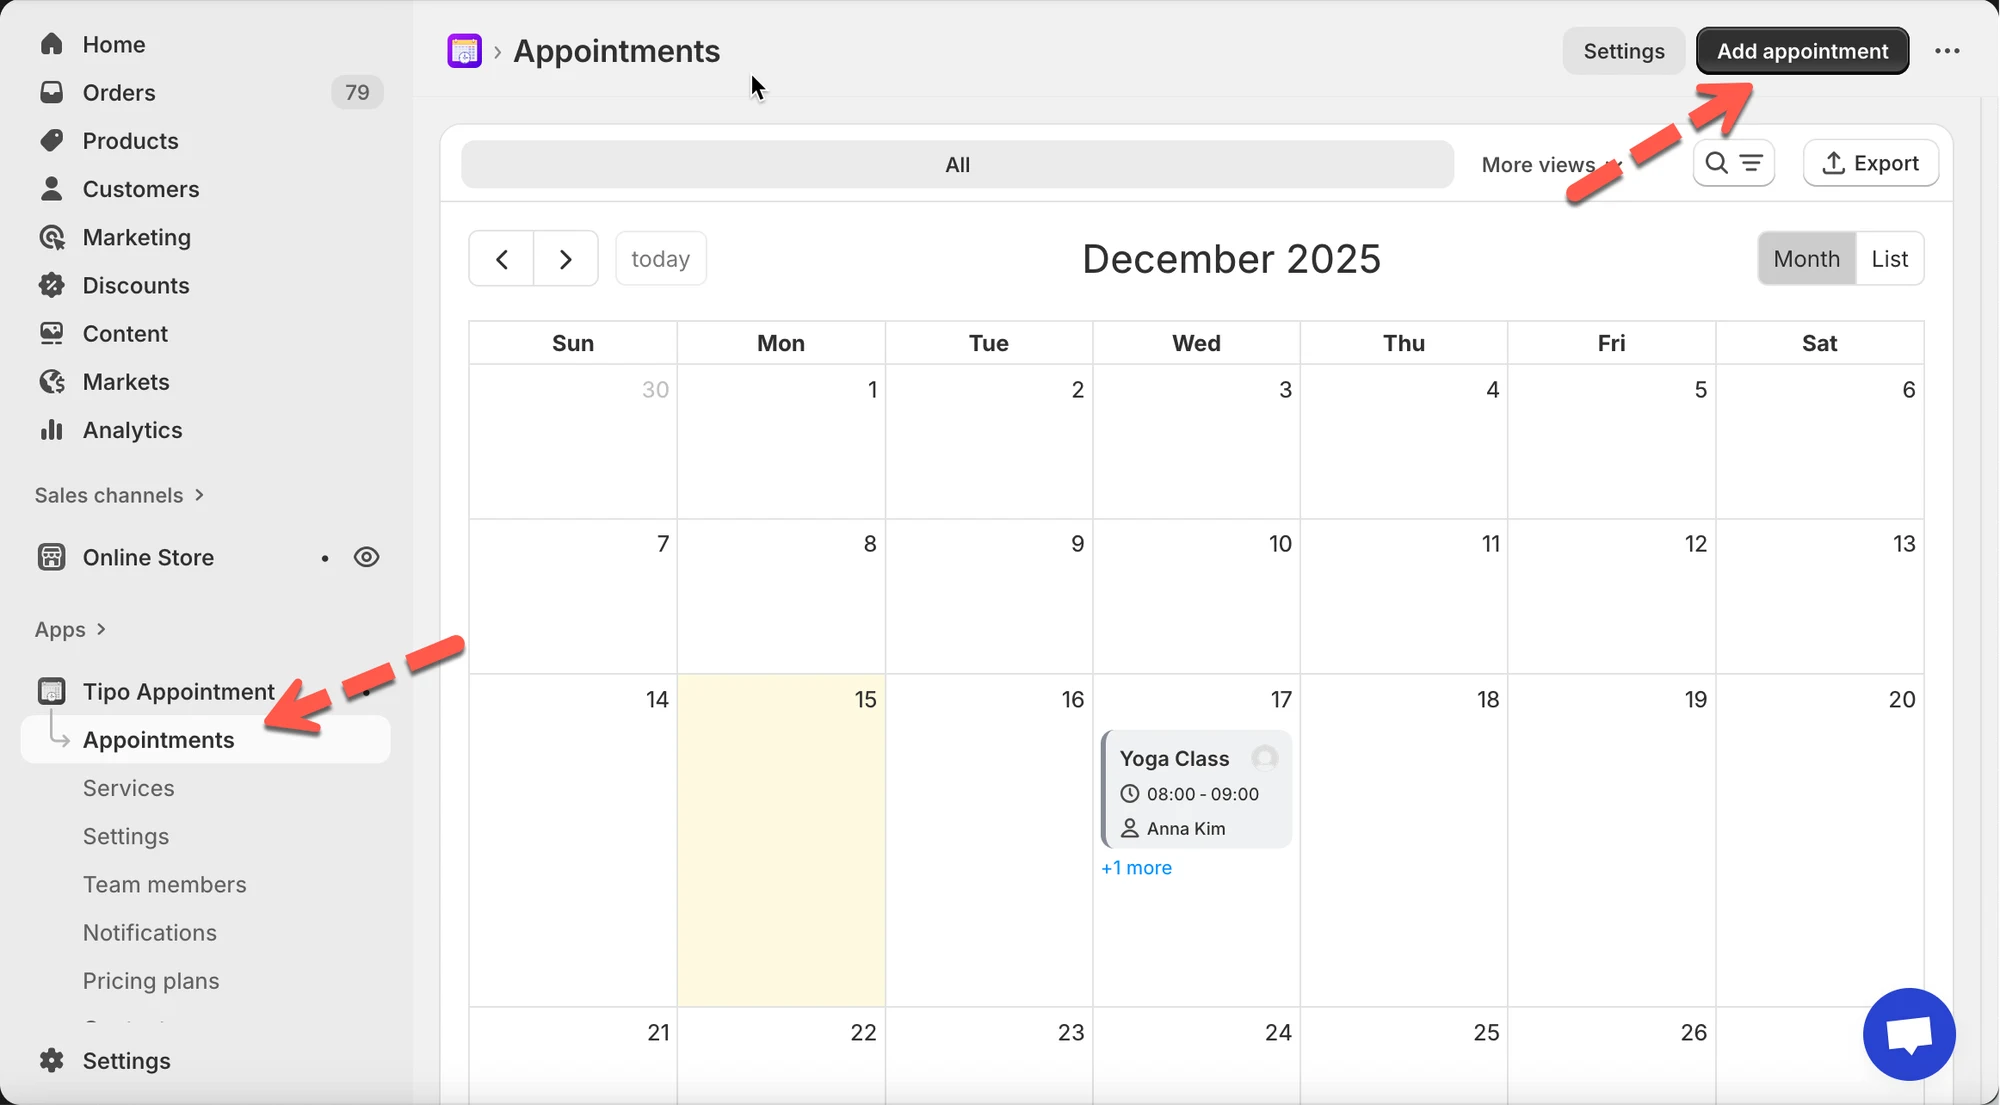
Section titled “🛠️ Step-by-Step: Create a Booking Manually”- Open the app > click Appointments
- Click Add appointment (top-right corner). The Create Appointment form opens
- Select the service & variant
- Service: Choose the service (e.g. Yoga Class)
- Variant (if available): Choose the service option (e.g. Beginner)
The service duration will automatically apply.
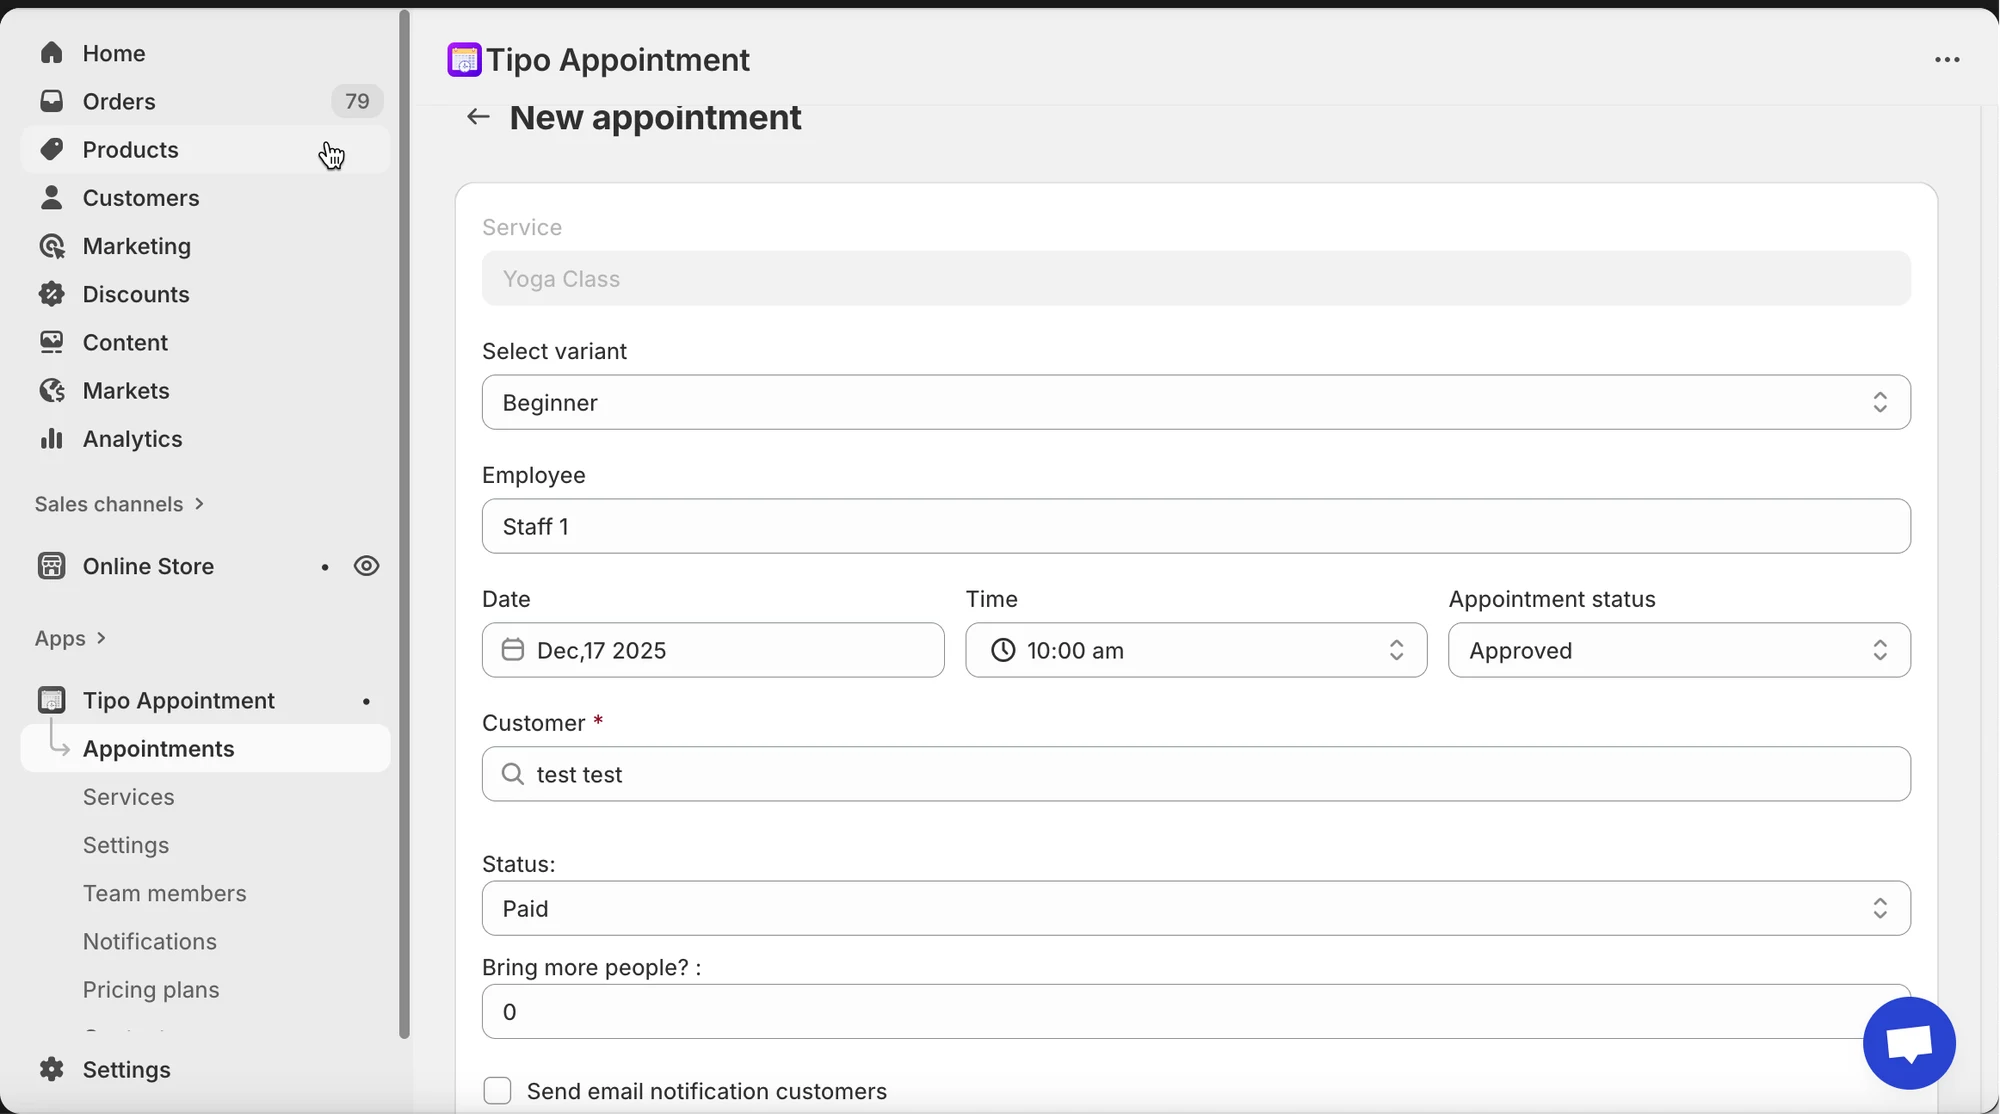
- Assign a team member. Available times depend on this staff’s availability
- Choose date & time
- Pick the Date
- Select the Start time
⏱️ End time is calculated automatically based on service duration.
- Select a customer
- Search and select an existing customer
- Customer is required to save the booking
📌 Tip: Create the customer in Shopify first if they don’t exist.
- Set appointment & payment status
- Appointment status
- Approved (default)
- Pending
- Payment status
- Paid
- Unpaid (for free or pay-later services)
- Optional settings
- Bring more people (for group bookings)
- Send email notification to the customer
- Add internal notes (not visible to customer)
- Save the appointment
🎉 The booking now appears on the calendar.
✅ What happens after creation?
Section titled “✅ What happens after creation?”Once created:
- The appointment appears in the calendar
- You can:
- Reschedule
- Cancel
- Delete
- View full booking details
- Customer details, service info, and time are all visible on the appointment page
📘 Example: Walk-in booking
Section titled “📘 Example: Walk-in booking”Scenario:
- Customer Anna Kim walks in
- Wants a Yoga Class – Beginner
- Dec 17, 2025 at 11:00 AM
- Payment collected in store
Admin action:
- Click Add appointment
- Select Yoga Class → Beginner
- Assign Staff 1
- Set Dec 17, 2025 – 11:00 AM
- Select Anna Kim
- Set status to Approved
- Set payment to Paid
- Save
✅ Booking is instantly confirmed and visible in the calendar.
▶️ Tutorial video
Section titled “▶️ Tutorial video”🙋 Still need support?
If you still need help, please feel free to contact us at hi@tipo.io. We’ll be happy to assist you further.