# Zapier 整合
使用 Zapier 將 Tipo 連接到數千款應用程式(Slack、Google Sheets、HubSpot、Trello 等)。在 Zapier 中,Tipo 扮演觸發應用程式的角色。
Tipo 在 Zapier 中是觸發應用程式,意思是 Zapier 會監聽來自 Tipo 的預約事件,然後在其他工具中執行動作。
### ⚡ 您可以用 Zapier 做什麼
透過 Zapier,您可以自動:
* 將預約新增到 **Google Sheets**
* 傳送通知到 **Slack**
* 在 **CRM 工具**中建立或更新聯絡人
* 將預約同步到內部系統
* 為進階使用情境建立自訂工作流程
> 💡 如果您想要比內建整合更大的彈性,Zapier 是理想的選擇。
***
### 🔌 在 Tipo 中啟用 Zapier
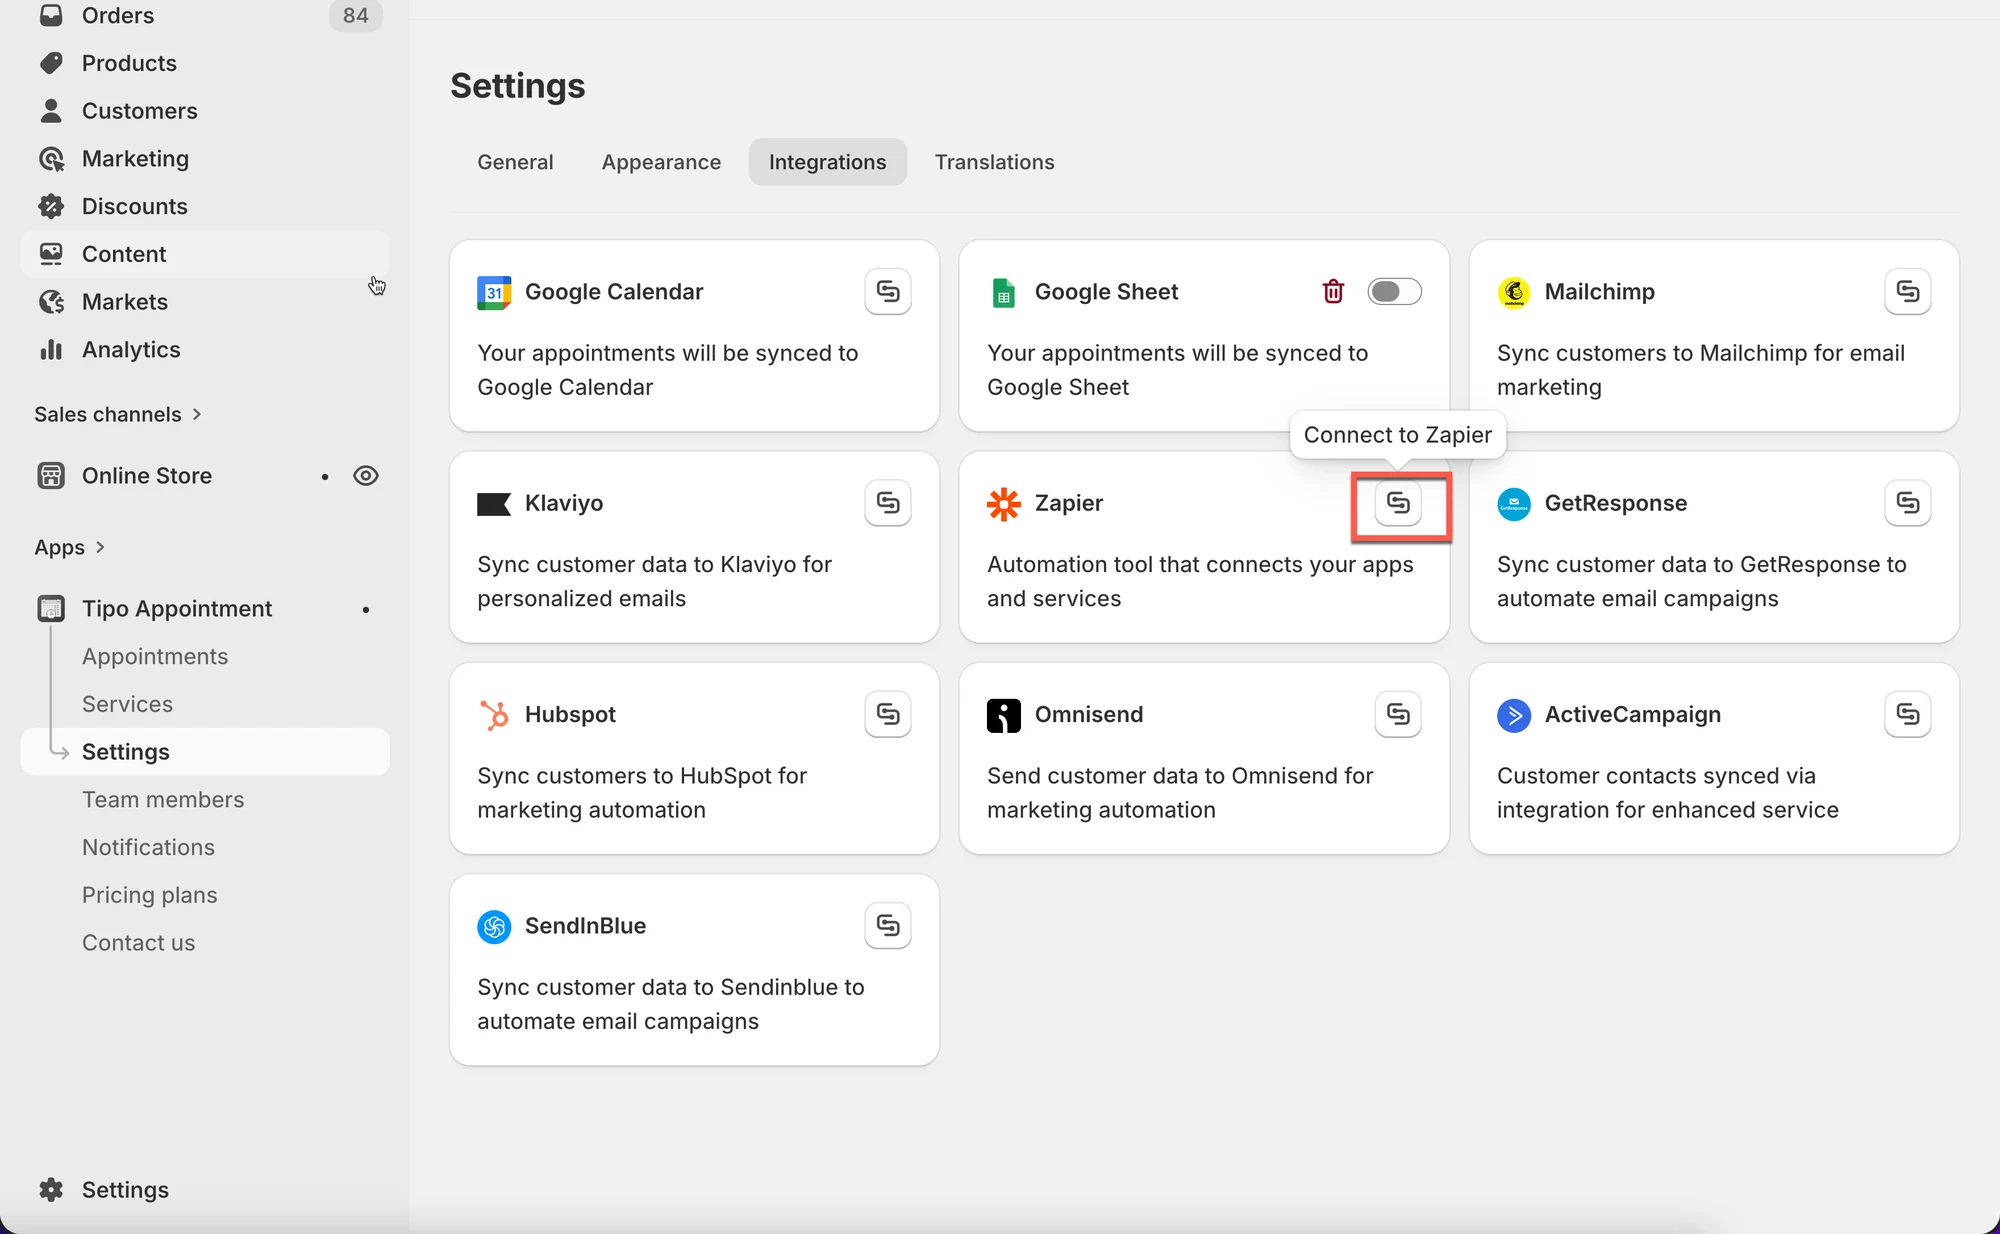
1. 開啟應用程式 > **Settings** > **Integrations** > 找到 **Zapier**
2. 點擊 **Connect** 圖示
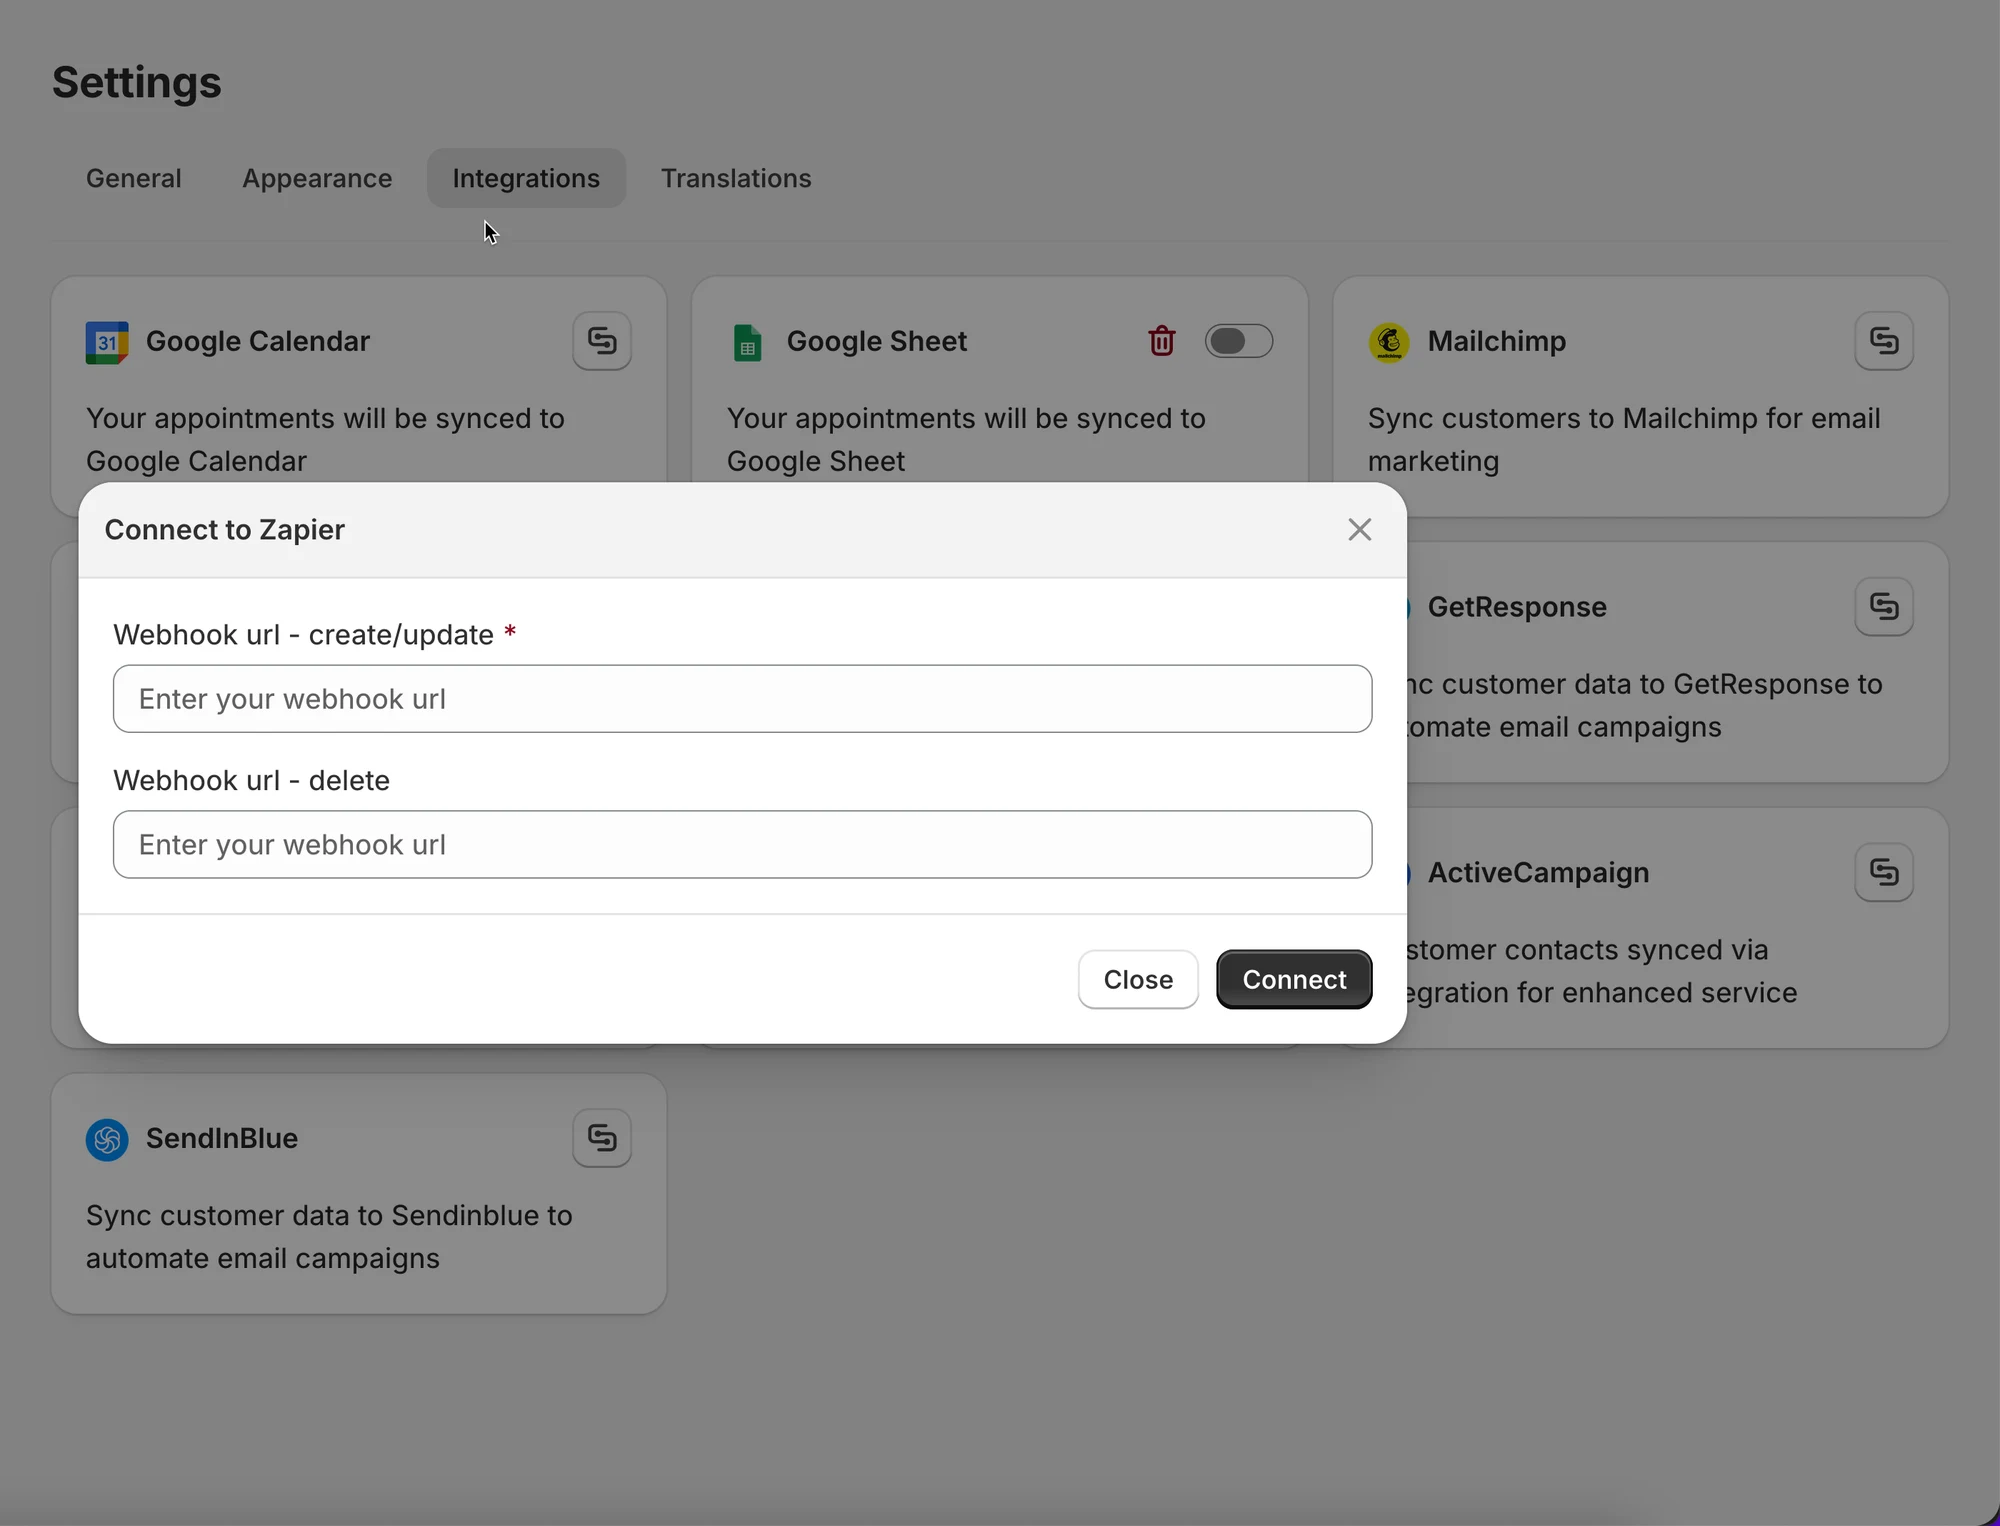
3. 將 webhook 網址(來自您的 Zapier)貼到 **Webhook URL (create/update)** 欄位
4. 點擊 **Save**
 ***
### 💡 Zapier 如何與 Tipo 搭配運作
Zapier 使用 **webhooks** 來接收來自 Tipo 的預約資料。
流程如下:
1. **Tipo 傳送預約資料**(建立 / 更新 / 取消)
2. **Zapier 接收 webhook**
3. Zapier 在其他應用程式(Sheets、Slack、CRM 等)中執行**動作**
***
### 🧩 在 Zapier 中建立 Zap
#### 步驟 1:建立新的 Zap
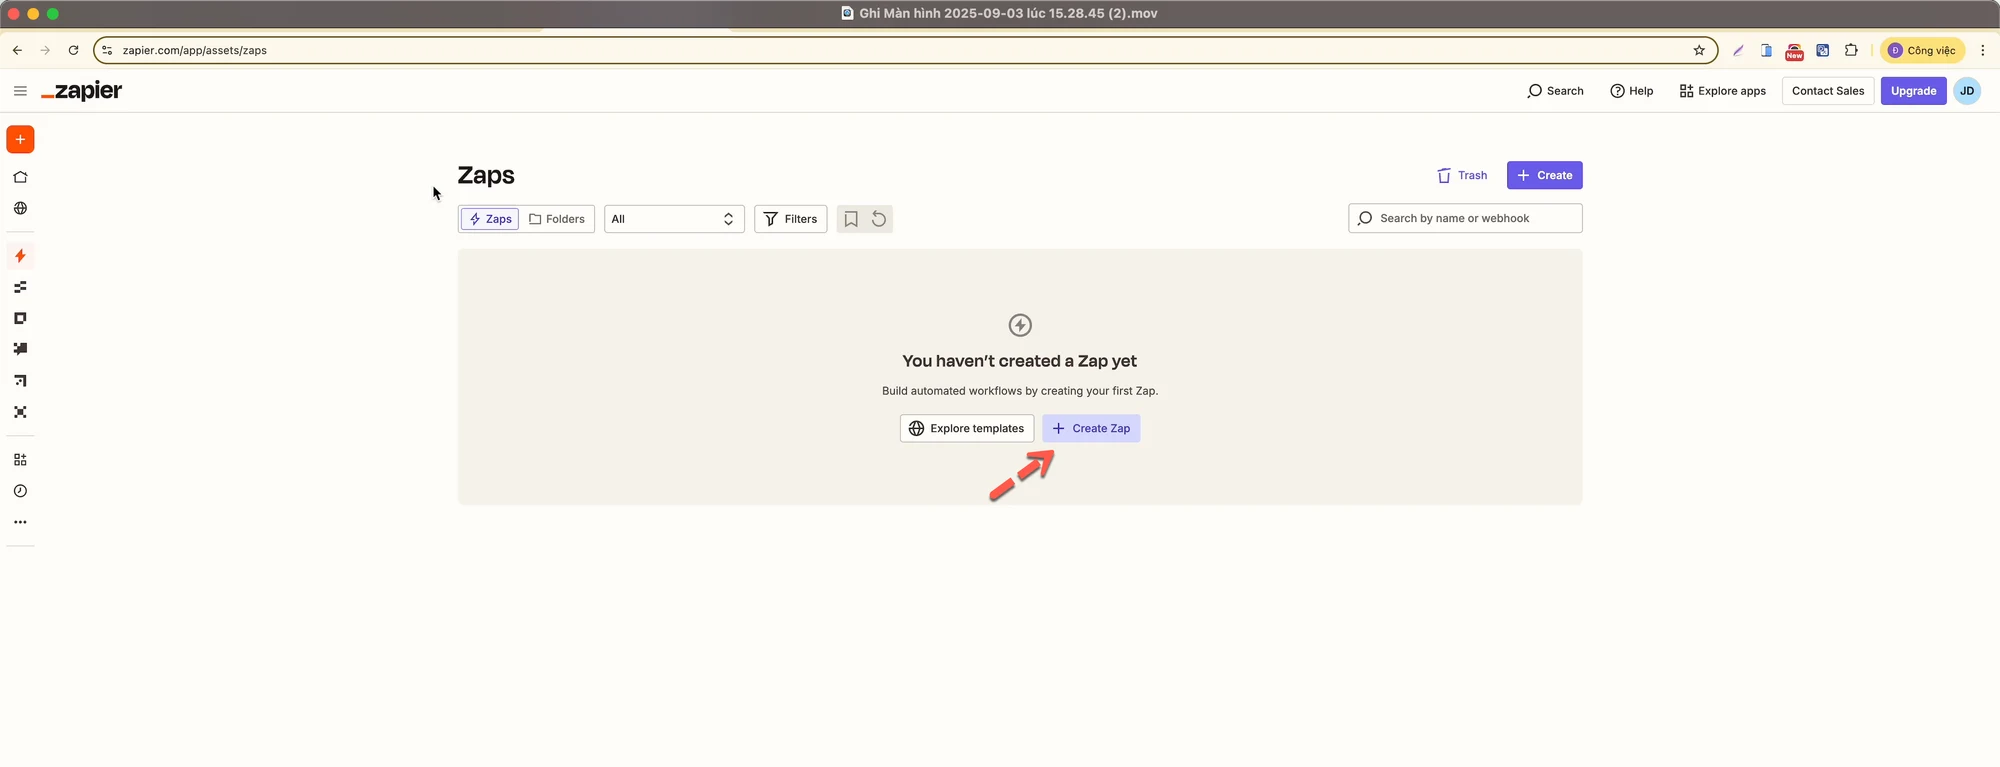
1. 登入 **Zapier**
2. 前往 **Zaps**
3. 點擊 **Create Zap**
 ***
#### 步驟 2:設定觸發條件(Webhook)
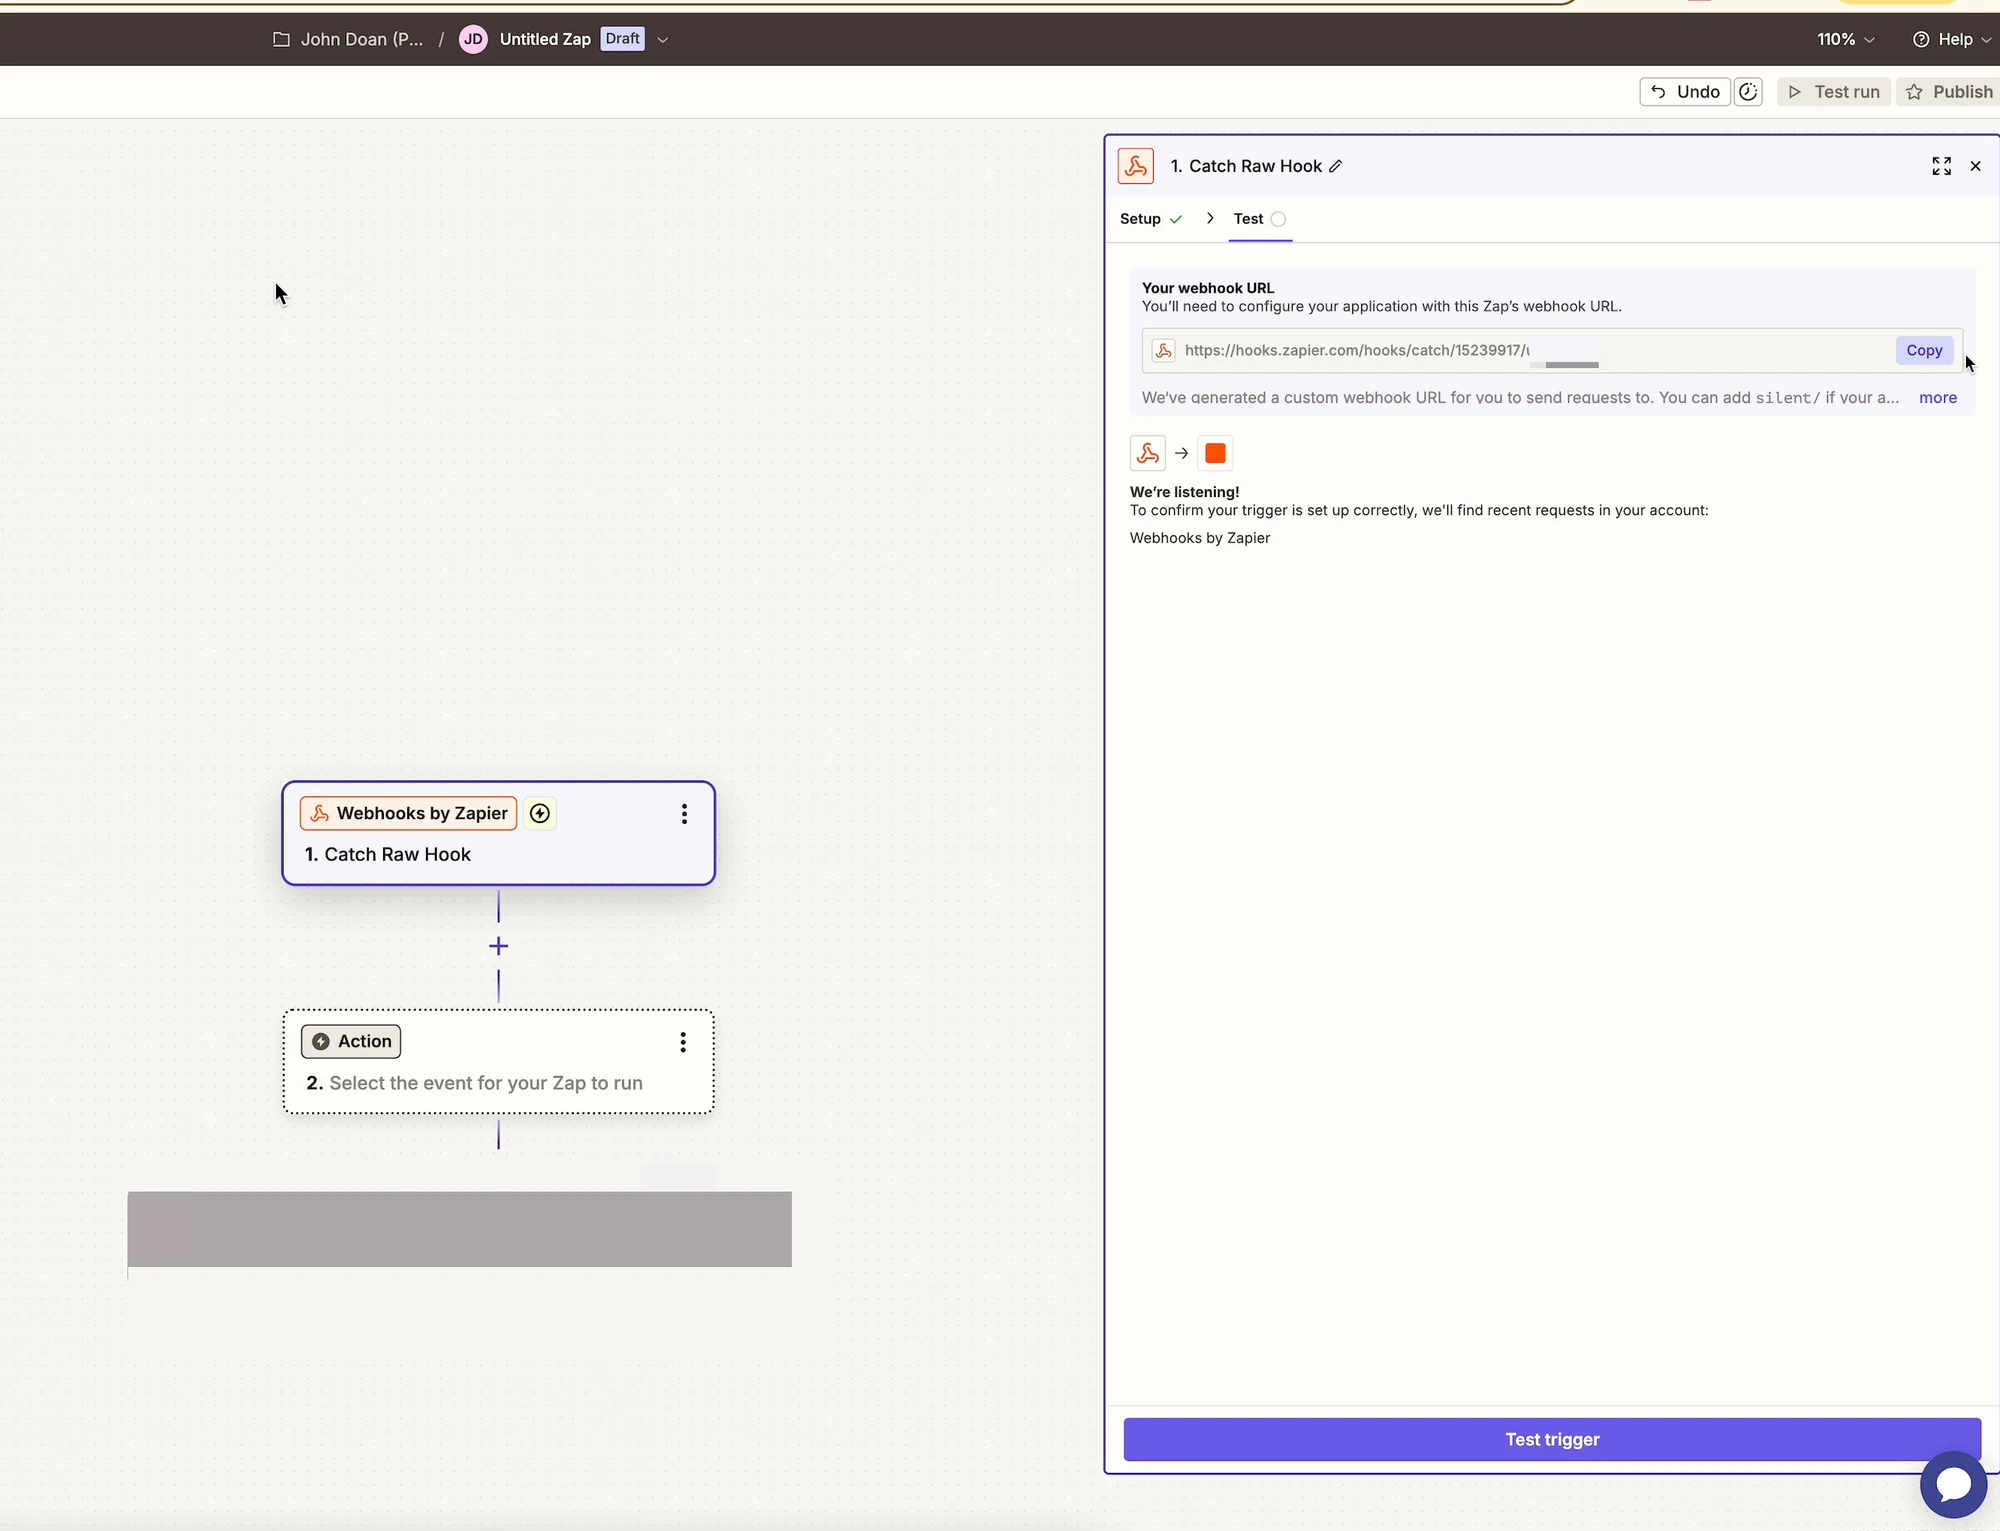
1. 選擇 **Webhooks by Zapier**
2. 選擇 **Catch Raw Hook**
3. 點擊 **Continue**
4. 複製 Zapier 顯示的 **Webhook URL**
 ***
#### 步驟 3:將 Zapier 與 Tipo 連接
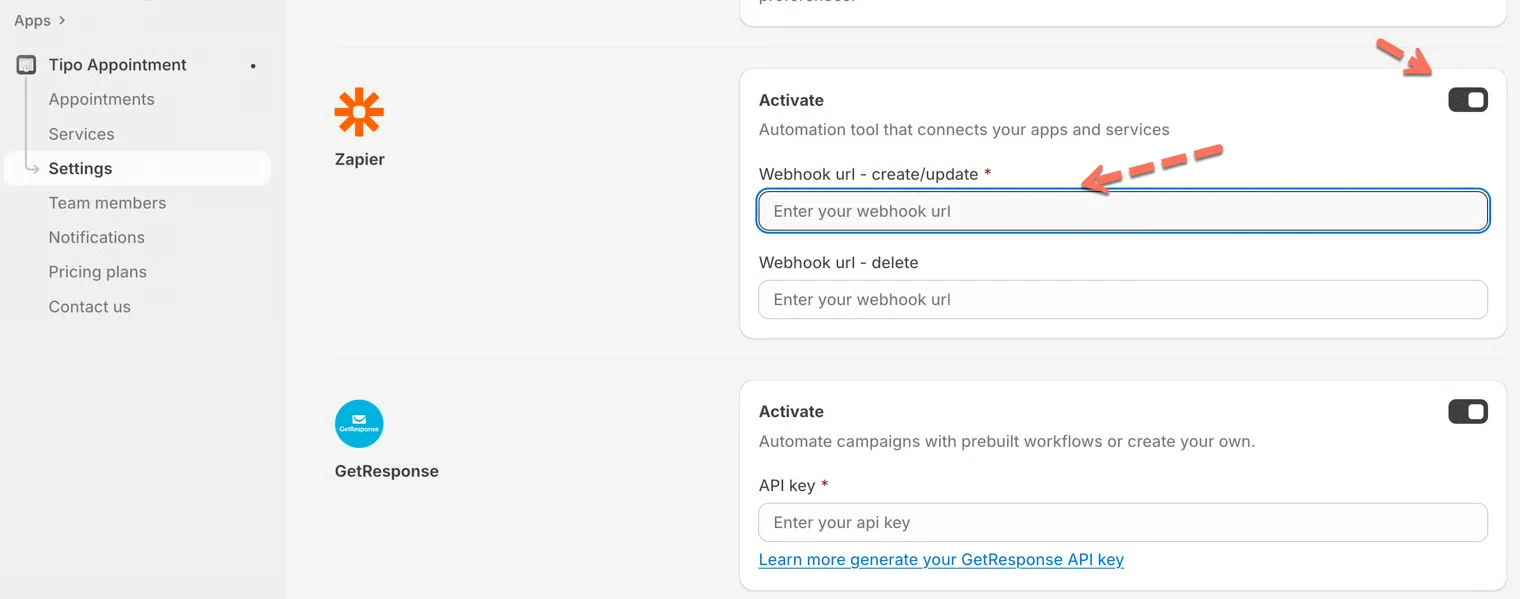
1. 回到 **Tipo app** > 開啟應用程式 **Settings > Integrations > Zapier**
2. 將 Zapier 的 **Webhook URL** 貼到 **Webhook URL – create/update field**
3. 儲存您的設定
 ***
#### 步驟 4:測試 webhook
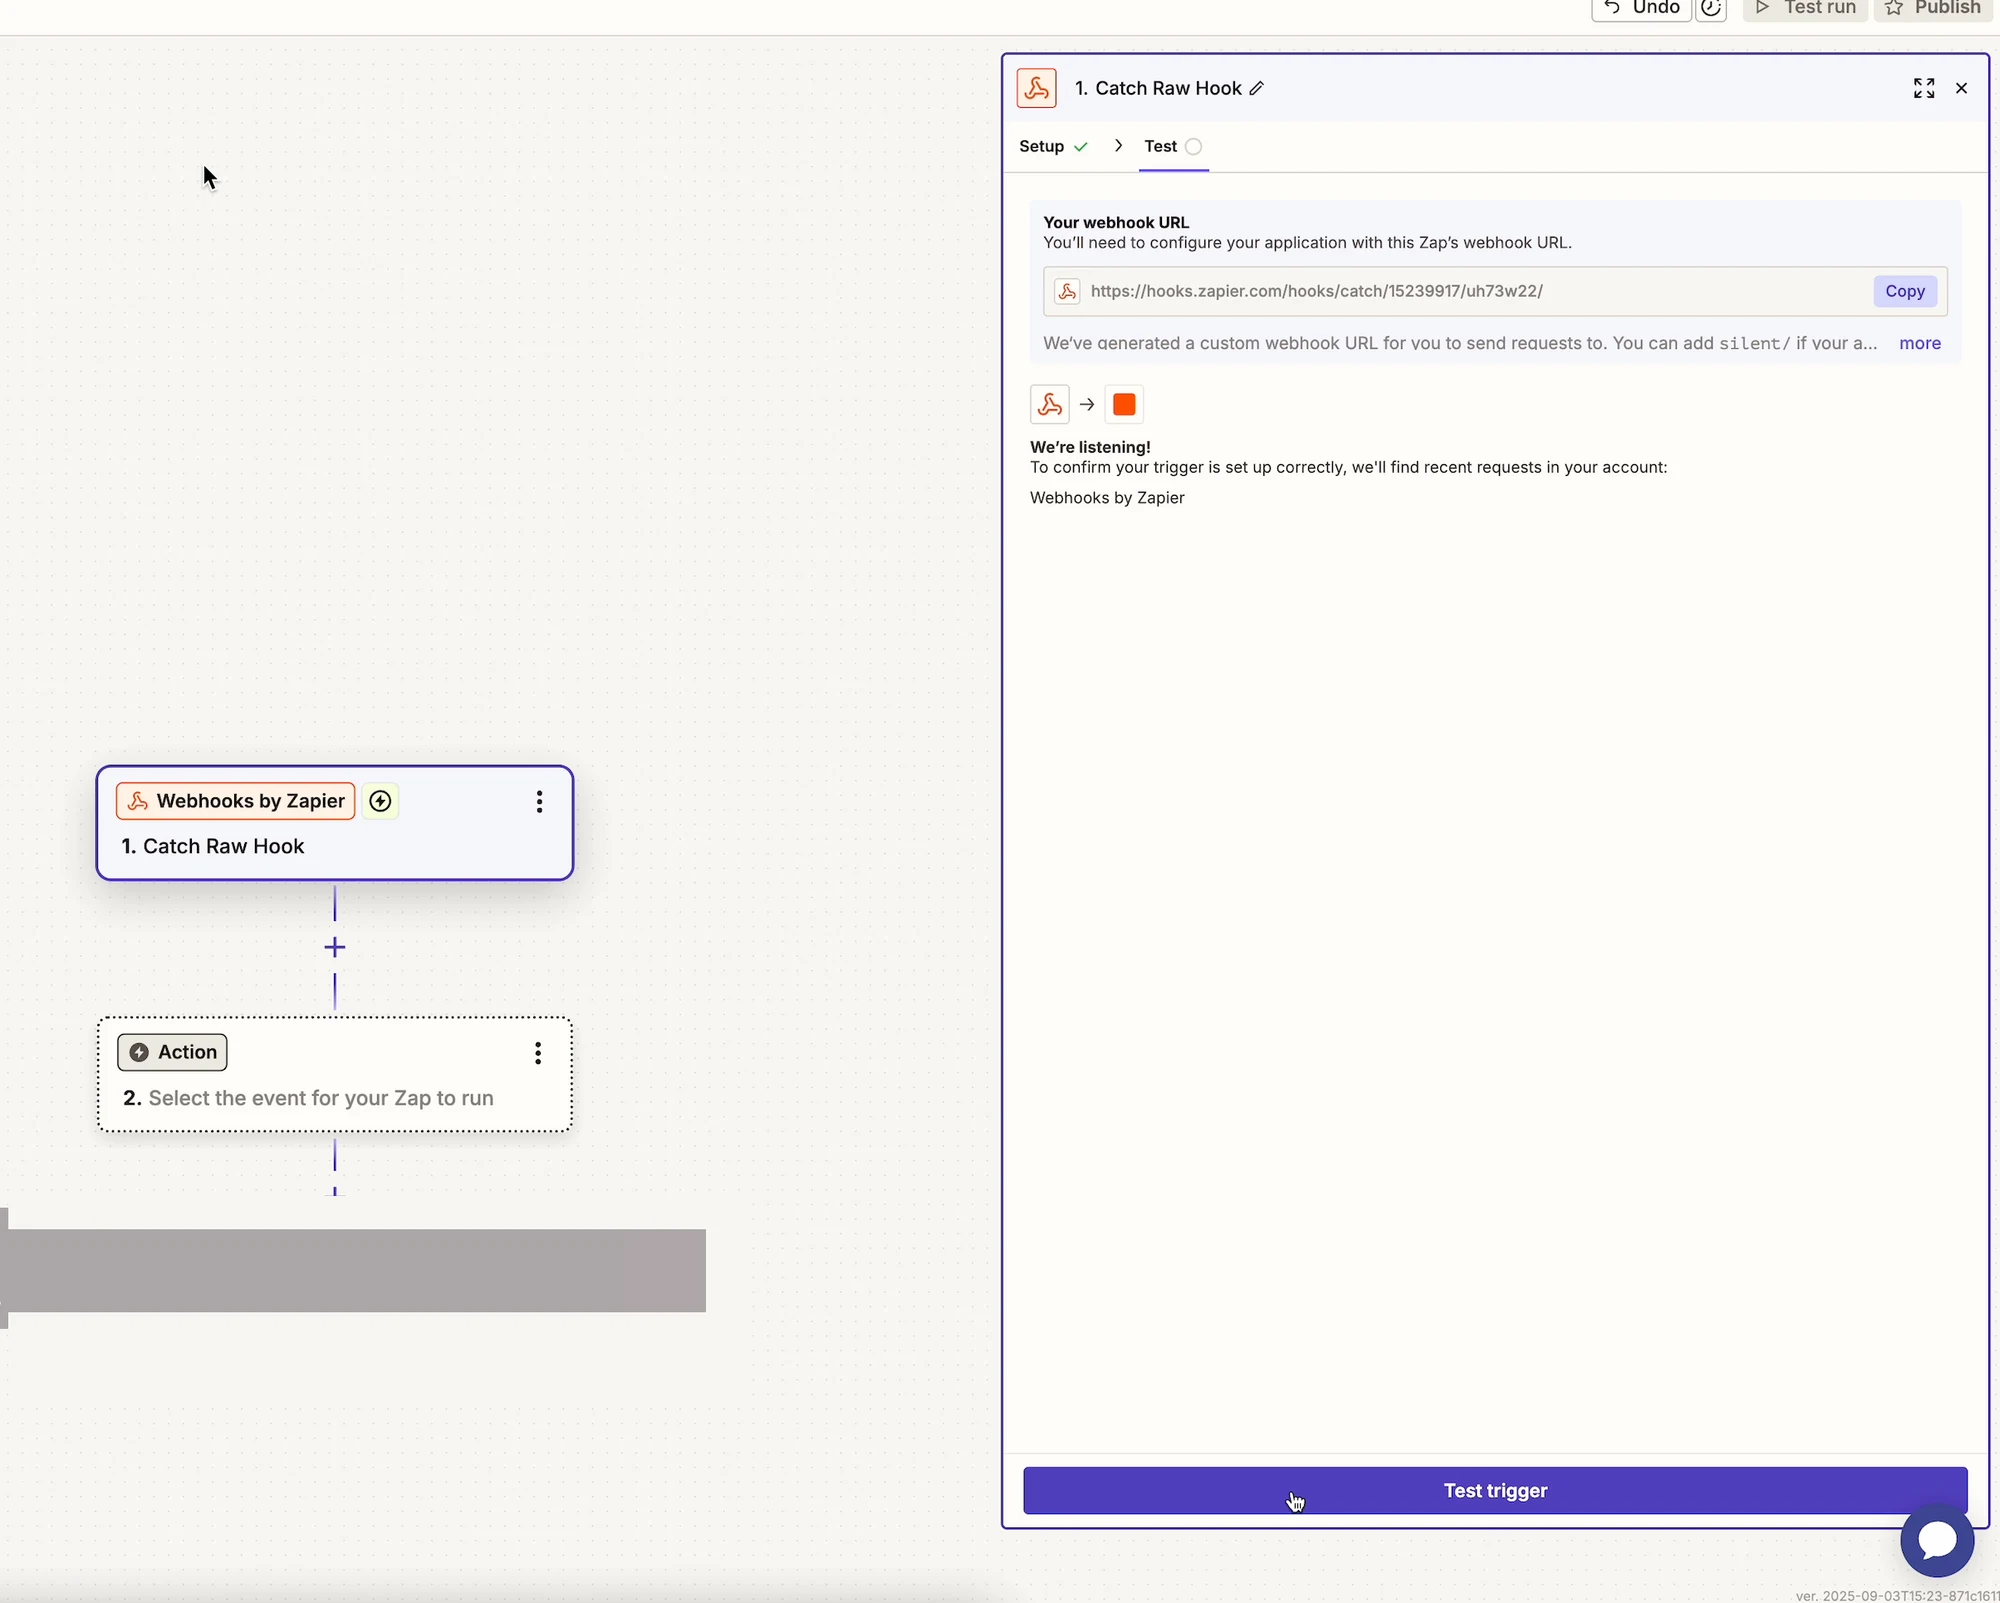
1. 在 Zapier 中,點擊 **Test trigger**
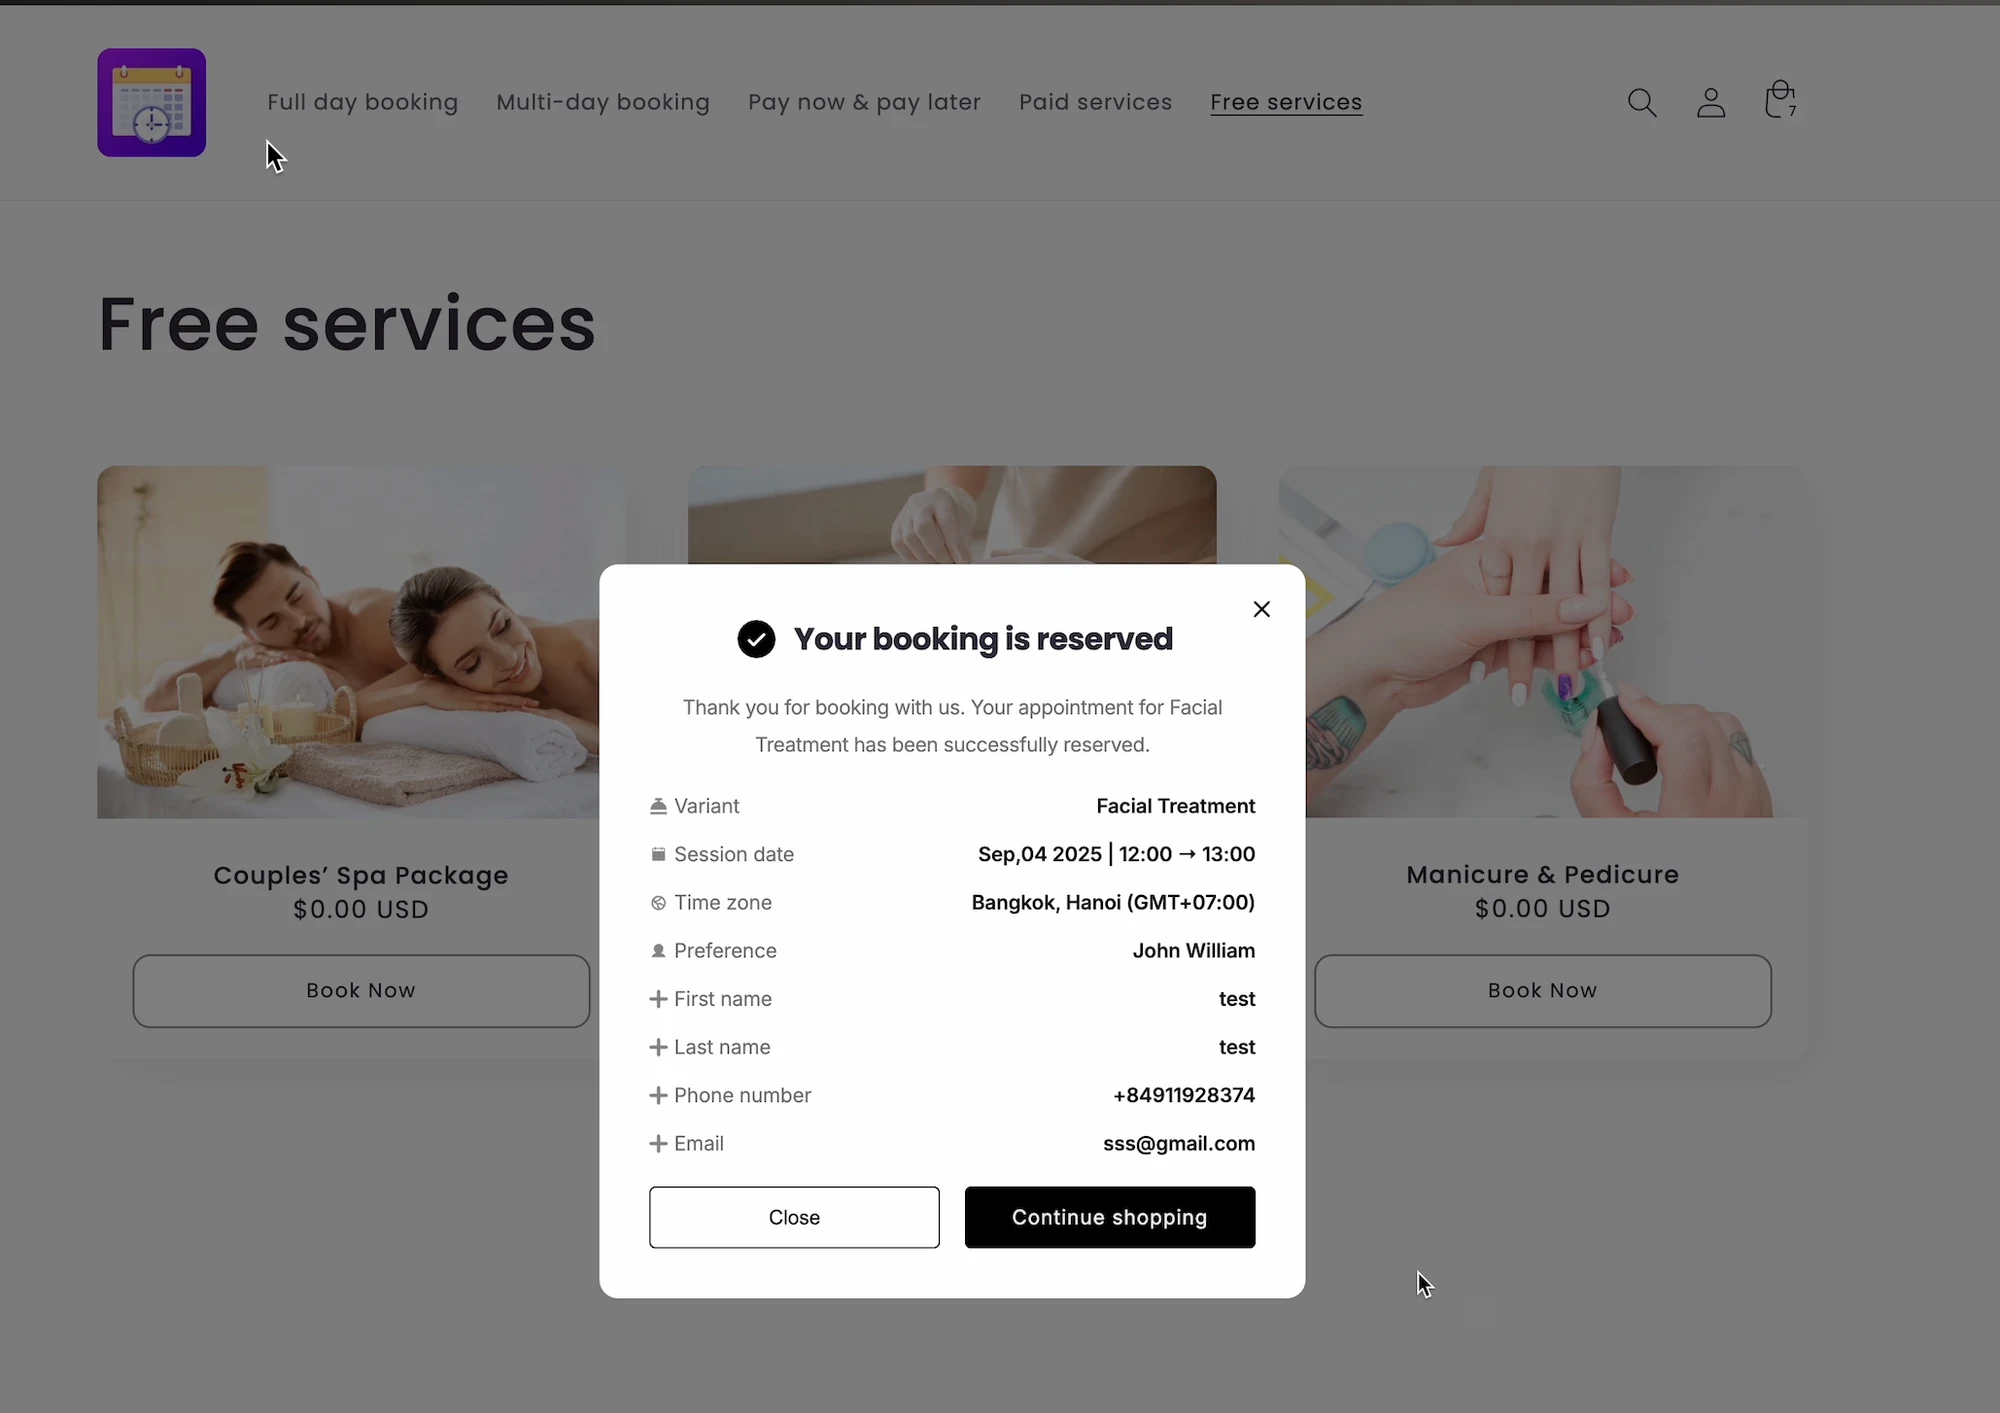
 2. 在您的商店中,建立或更新一筆預約
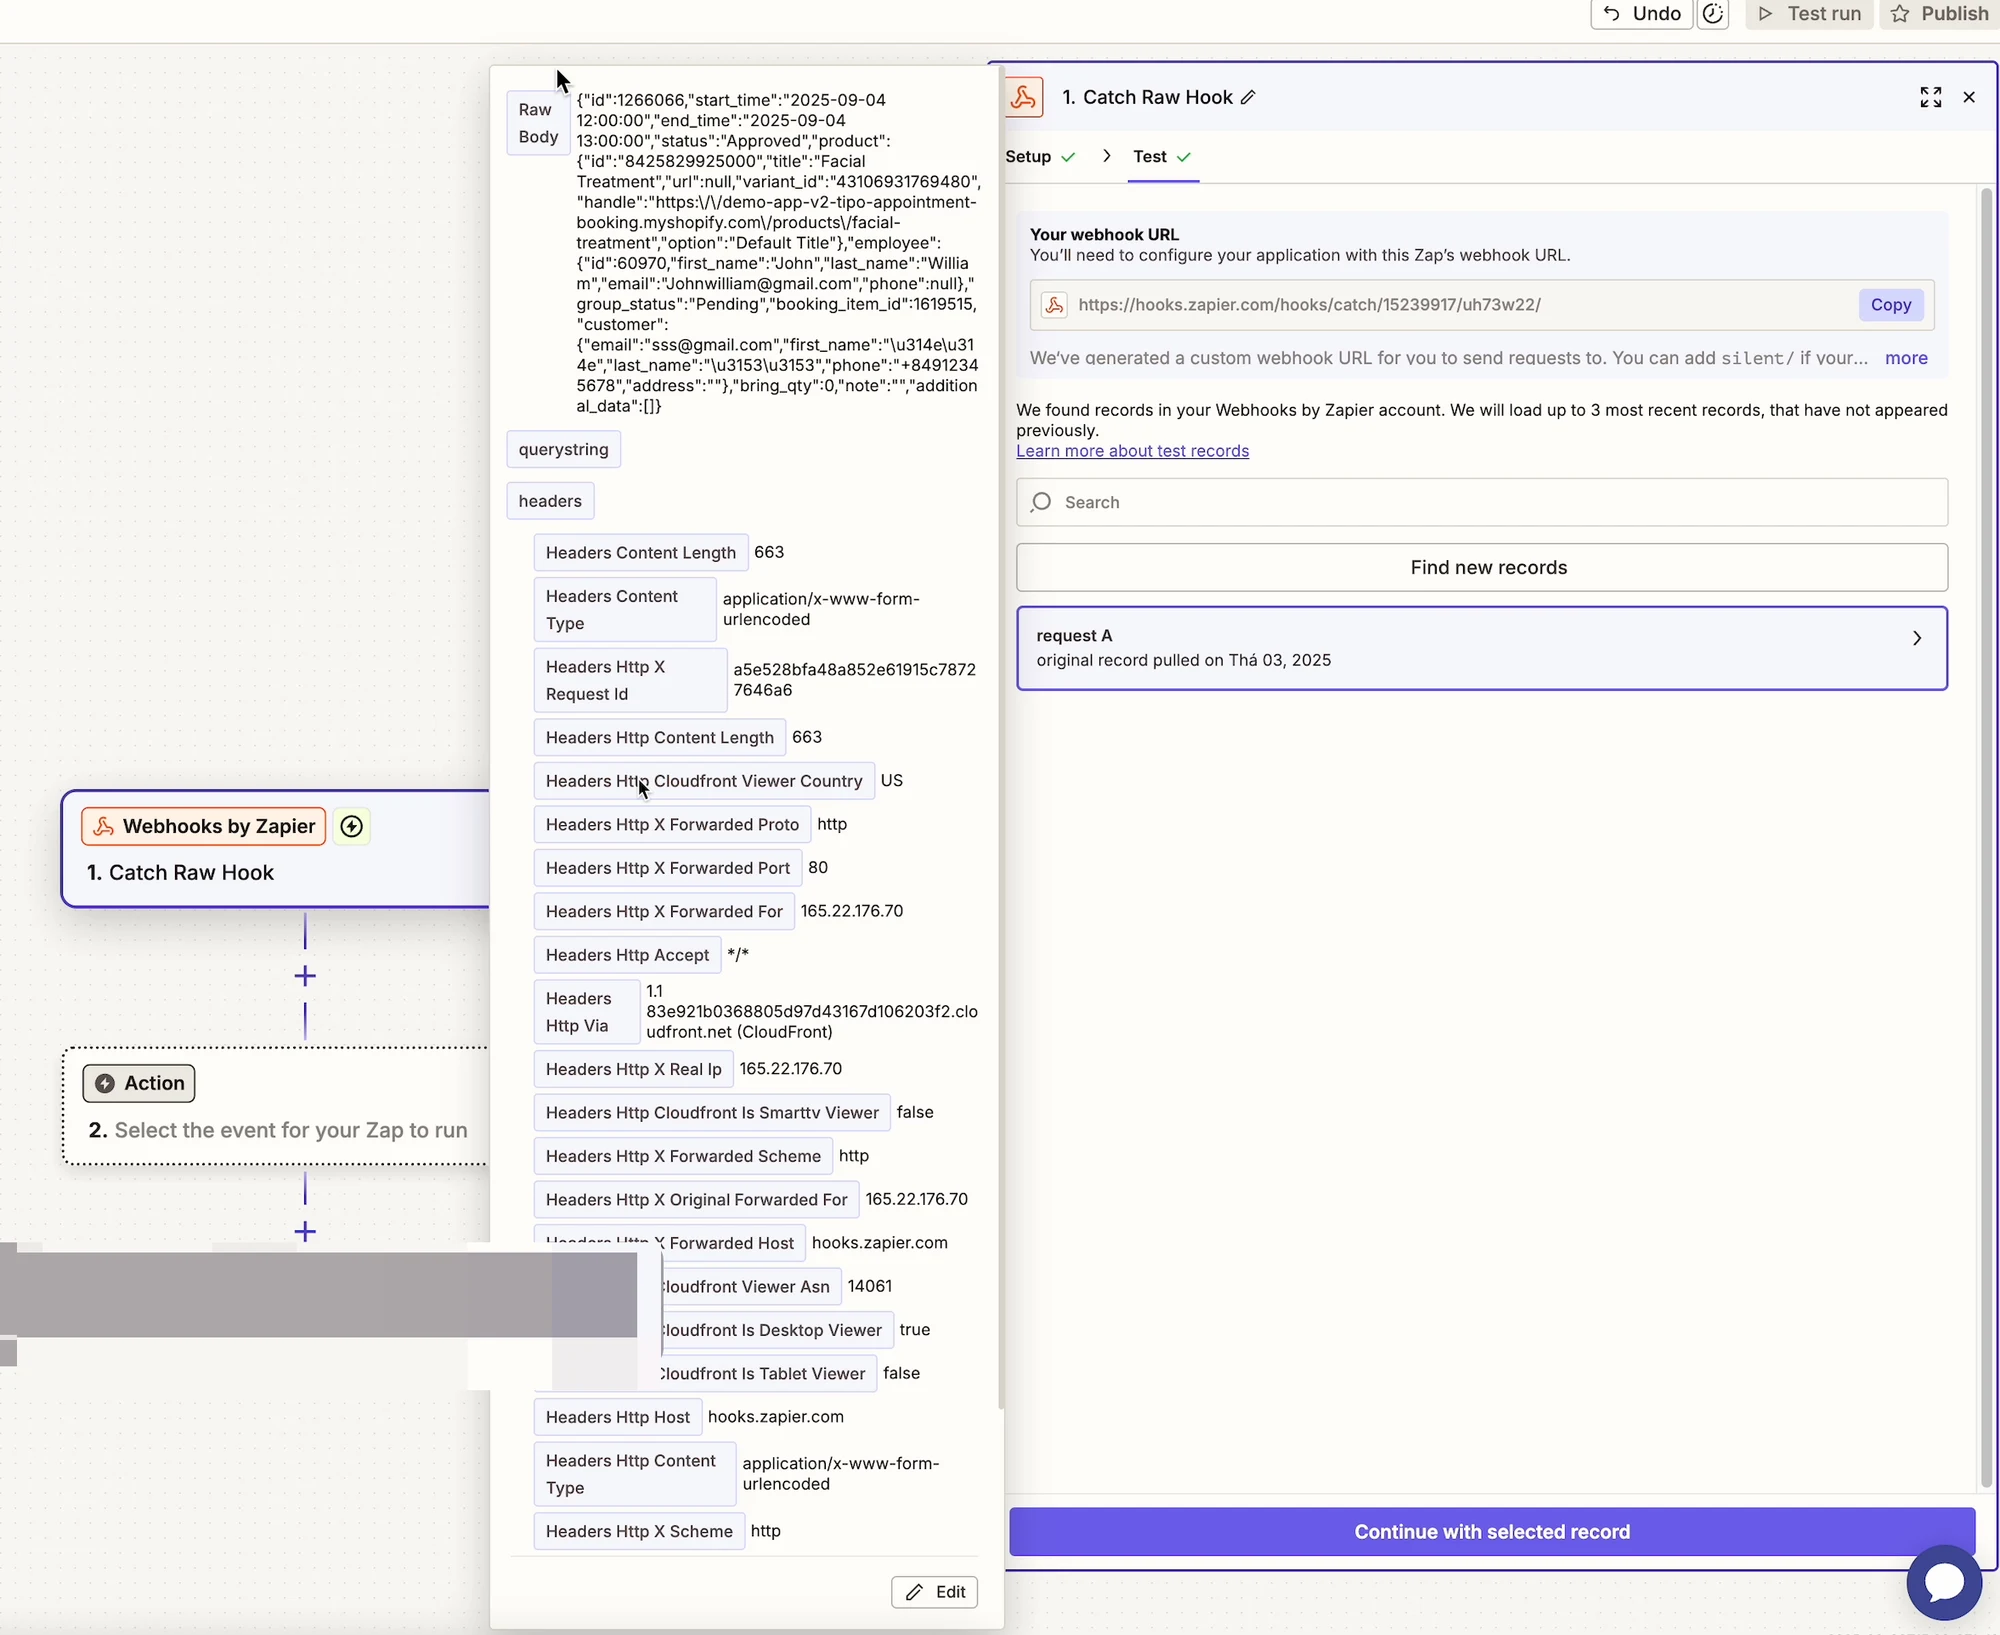
 3. Zapier 應該會成功接收到預約資料
 ***
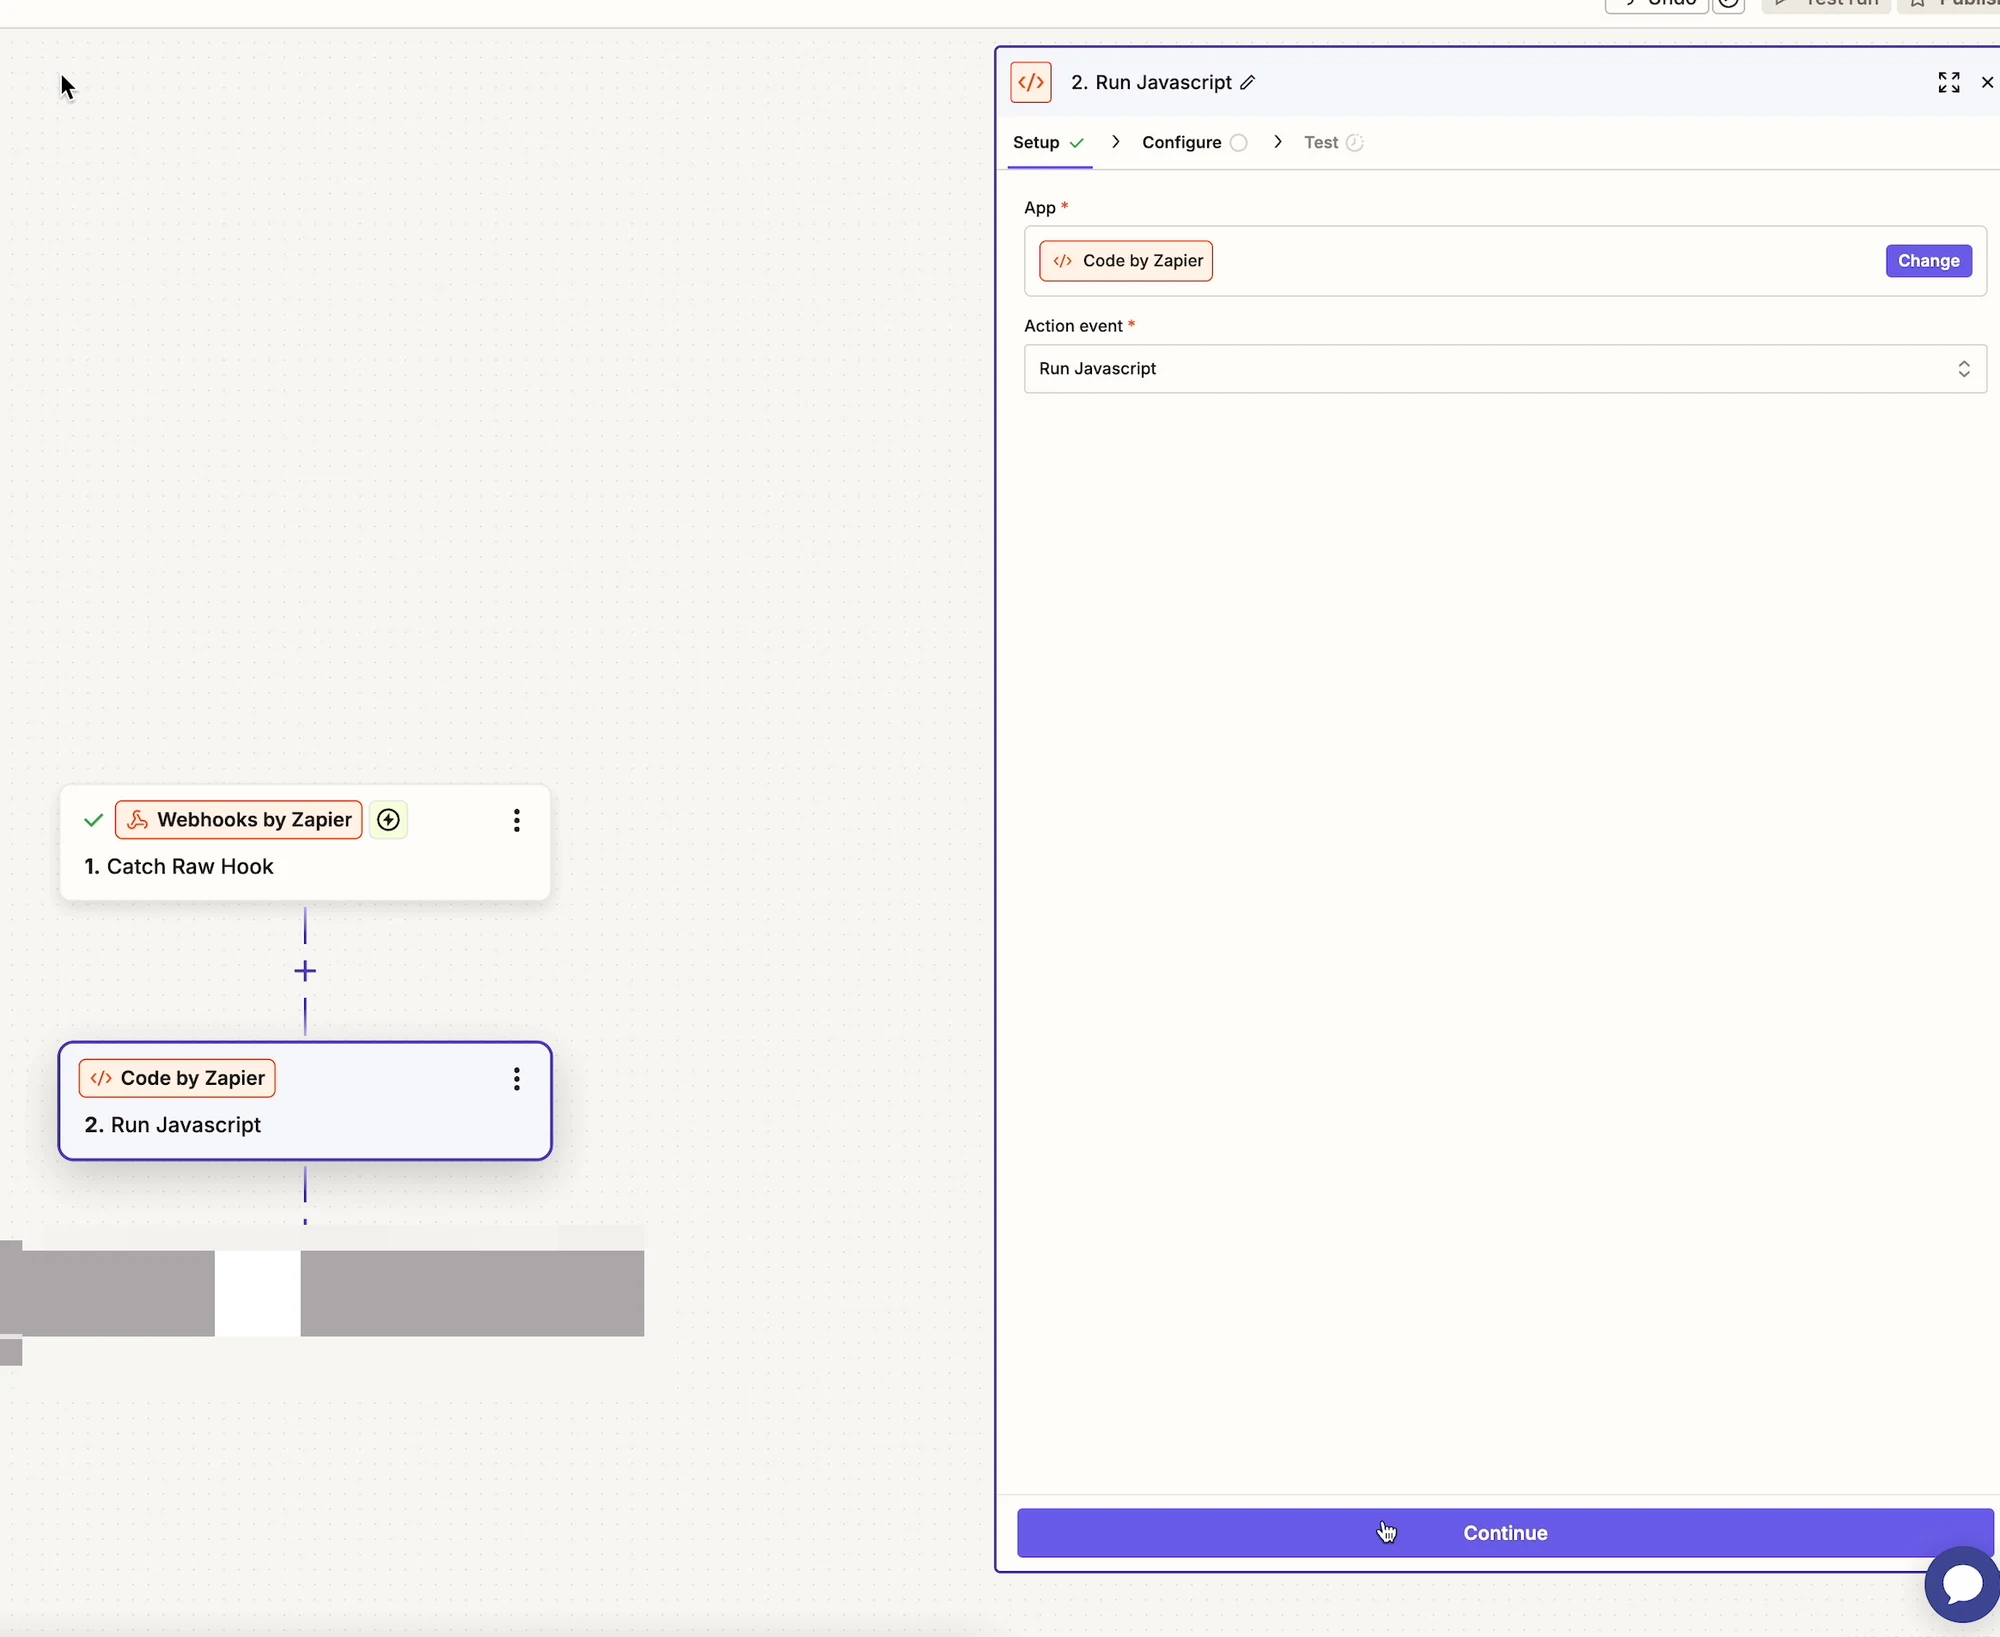
#### 步驟 5:新增「Code by Zapier」
1. 點擊 **+** 新增步驟
2. 選擇 **Code by Zapier**
3. 選擇 **Run Javascript**
 ***
#### 步驟 6:設定程式碼步驟
**Input Data**
* Name:`Booking`
* Value:來自 webhook 步驟的 `Raw Body`
**Code**
```js
return { body: JSON.parse(inputData.Booking) };
```
4. 點擊 **Continue**
5. 執行 **Test**
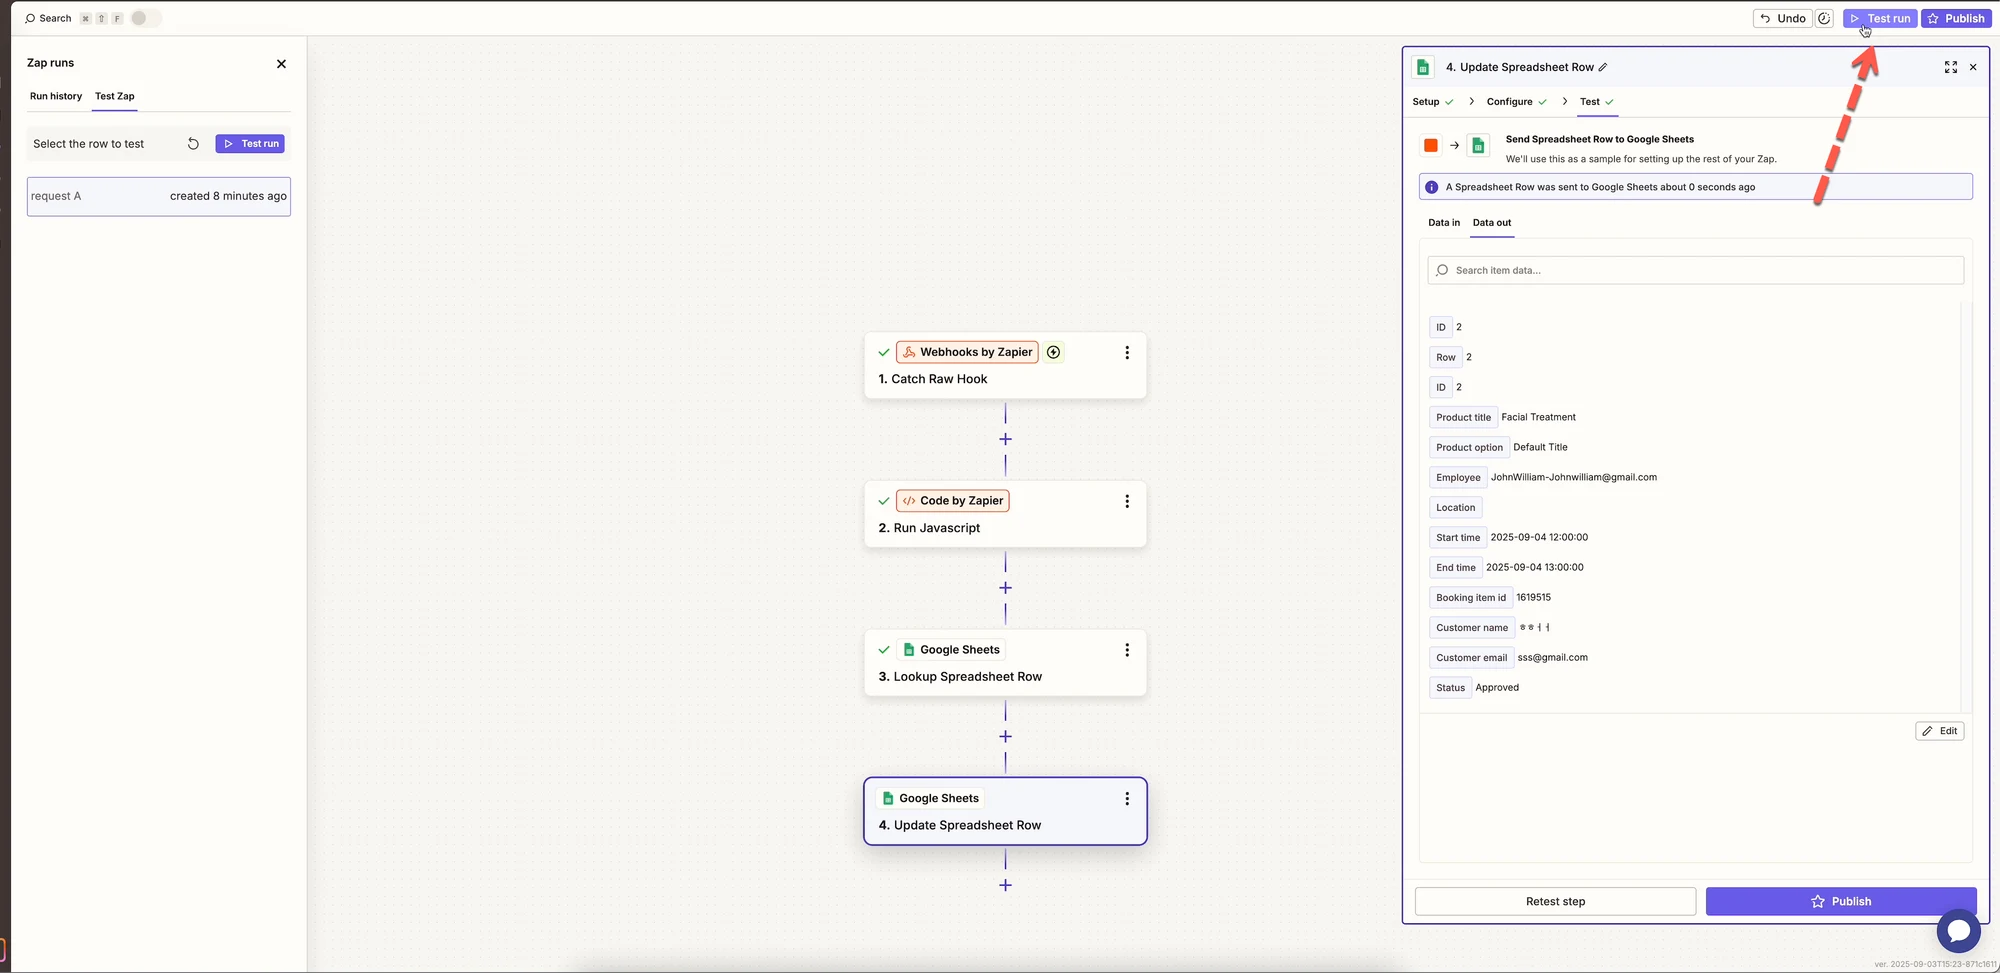
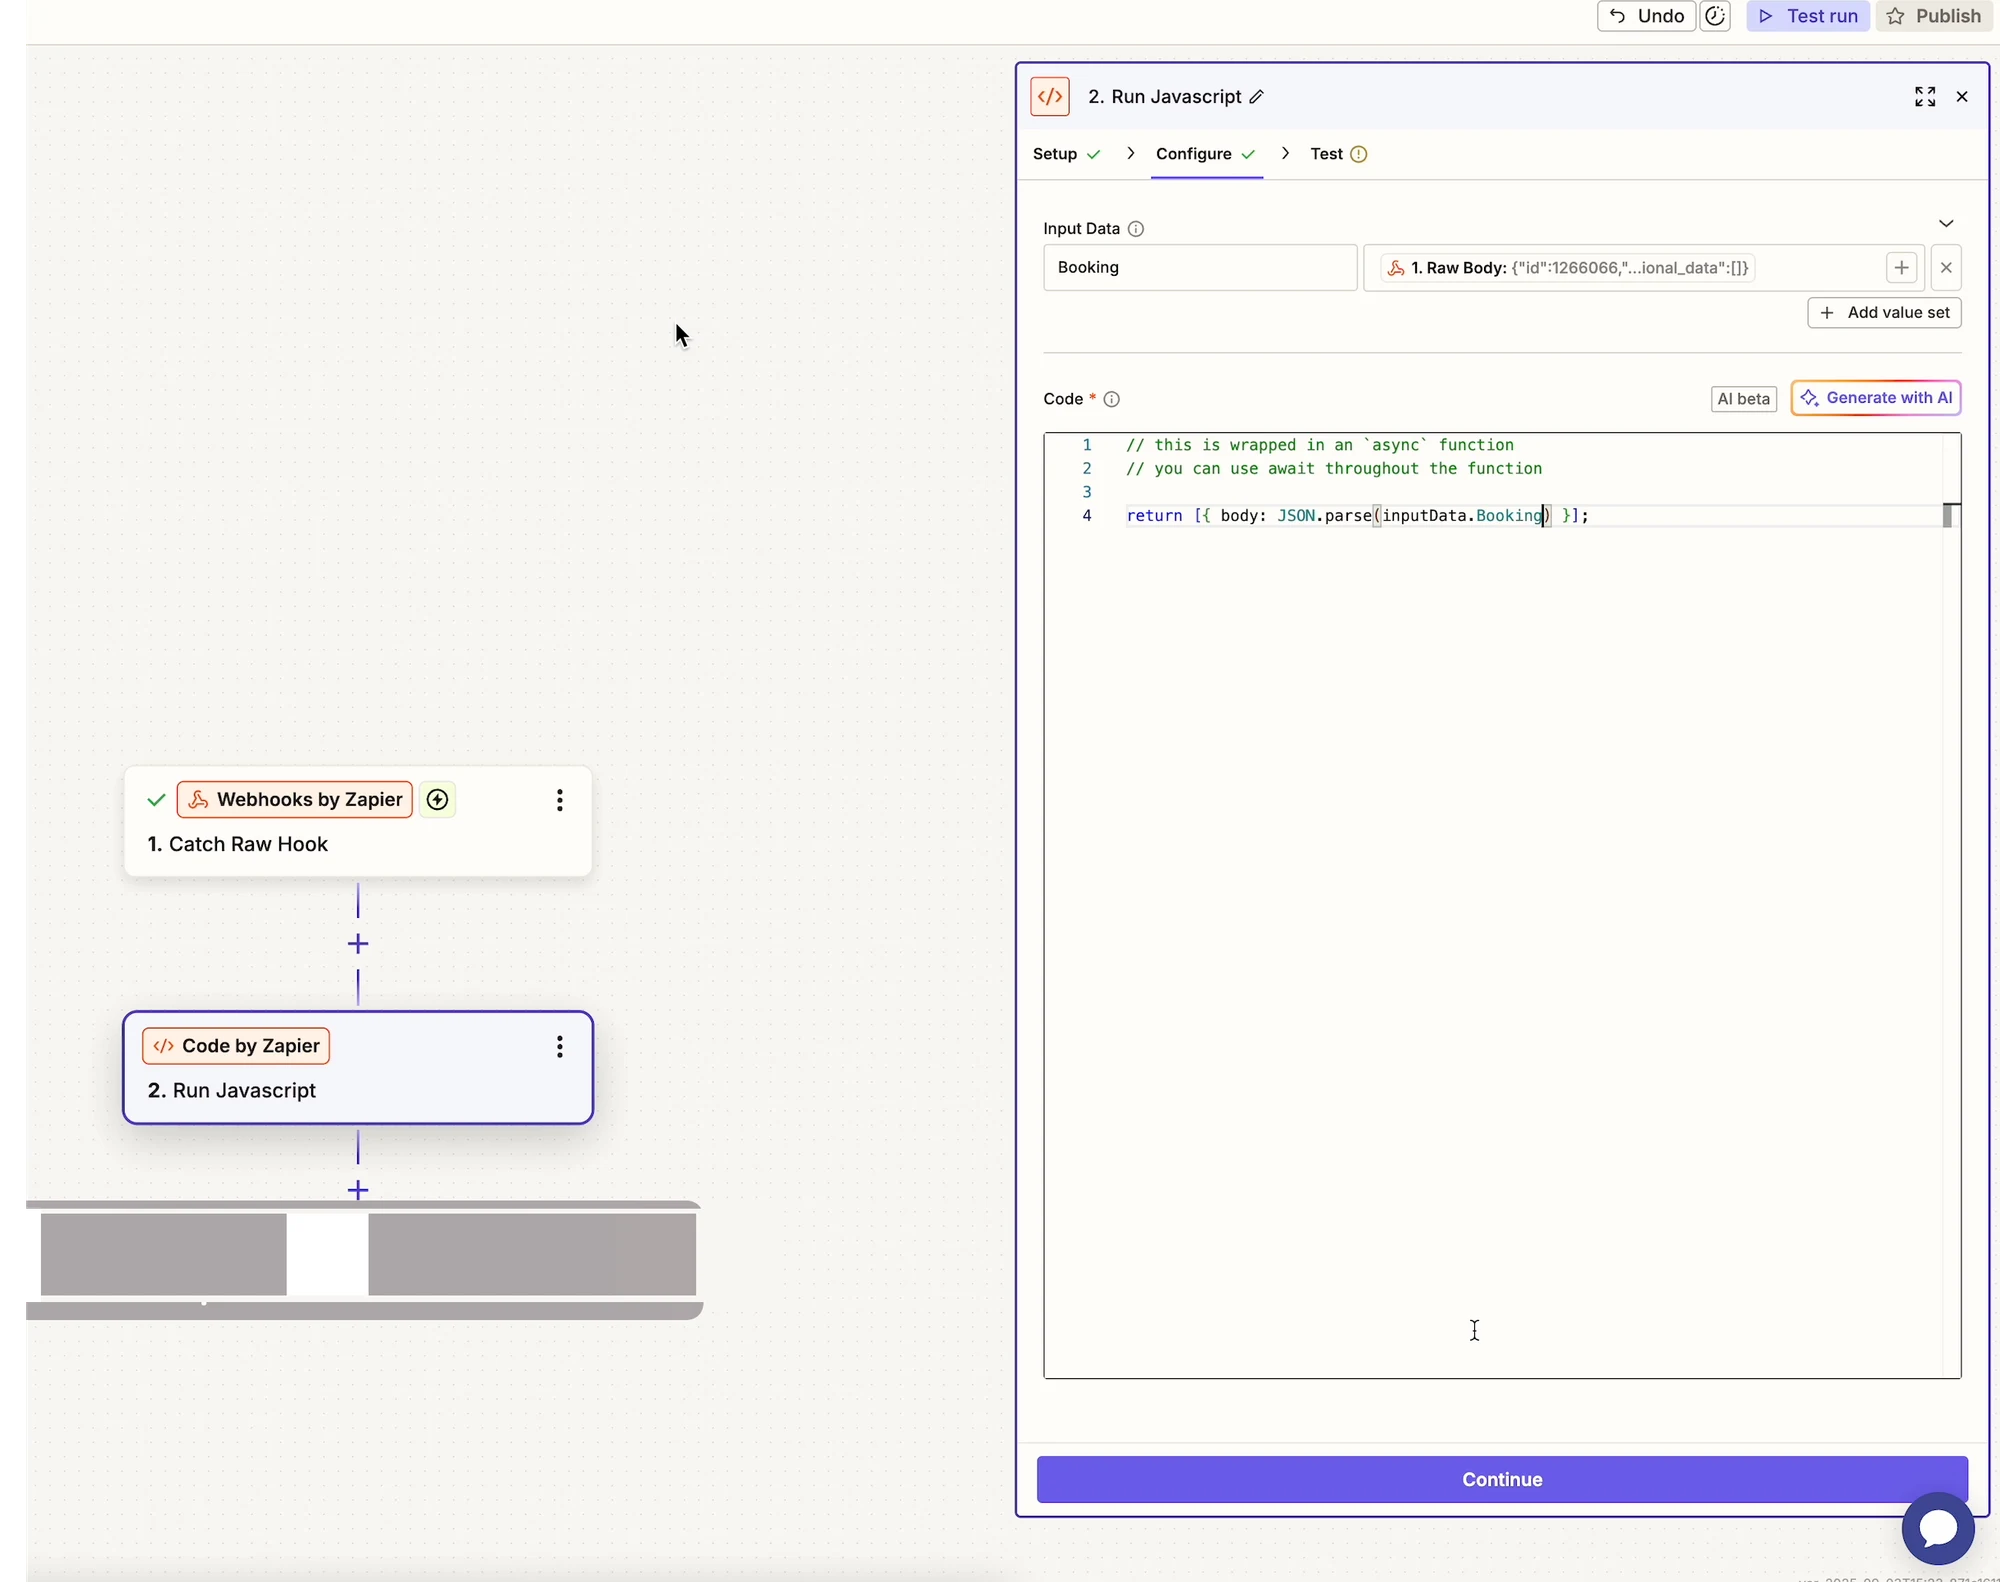 完成此步驟後,預約欄位(商品、員工、時間、顧客等)就會分別可供使用。
***
### 🧪 範例:將預約同步到 Google Sheets
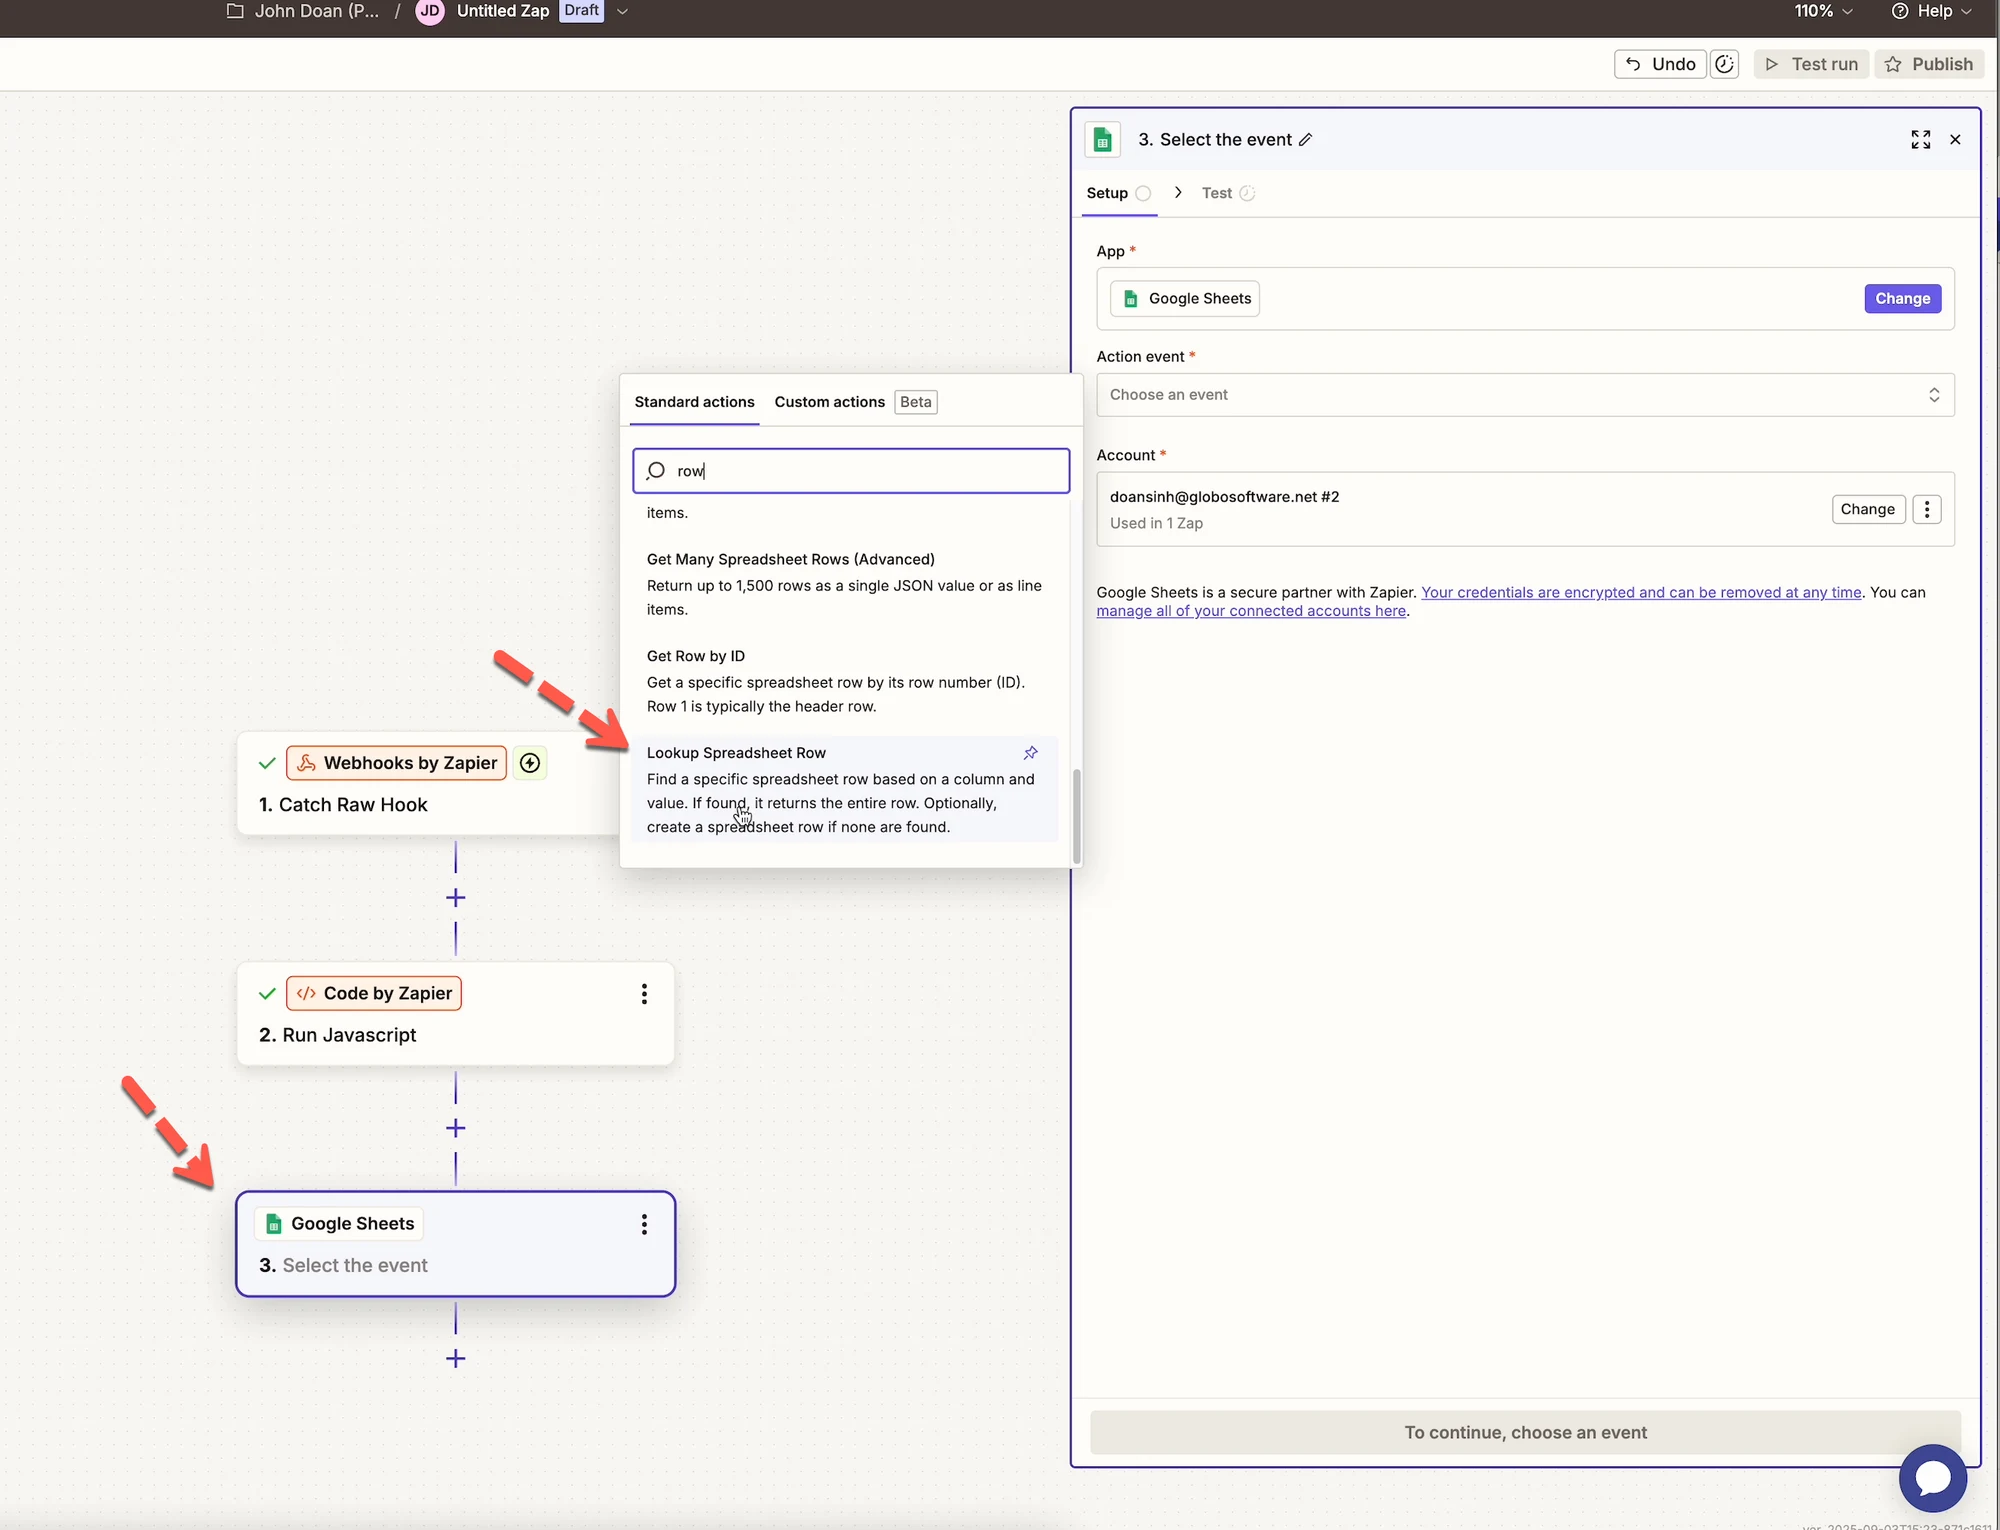
#### 步驟 7:尋找或建立資料列
1. 新增一個步驟
2. 選擇 **Google Sheets**
3. 選擇 **Lookup Spreadsheet Row**
4. 連接您的 Google 帳號
5. 選擇您的試算表與工作表
 ***
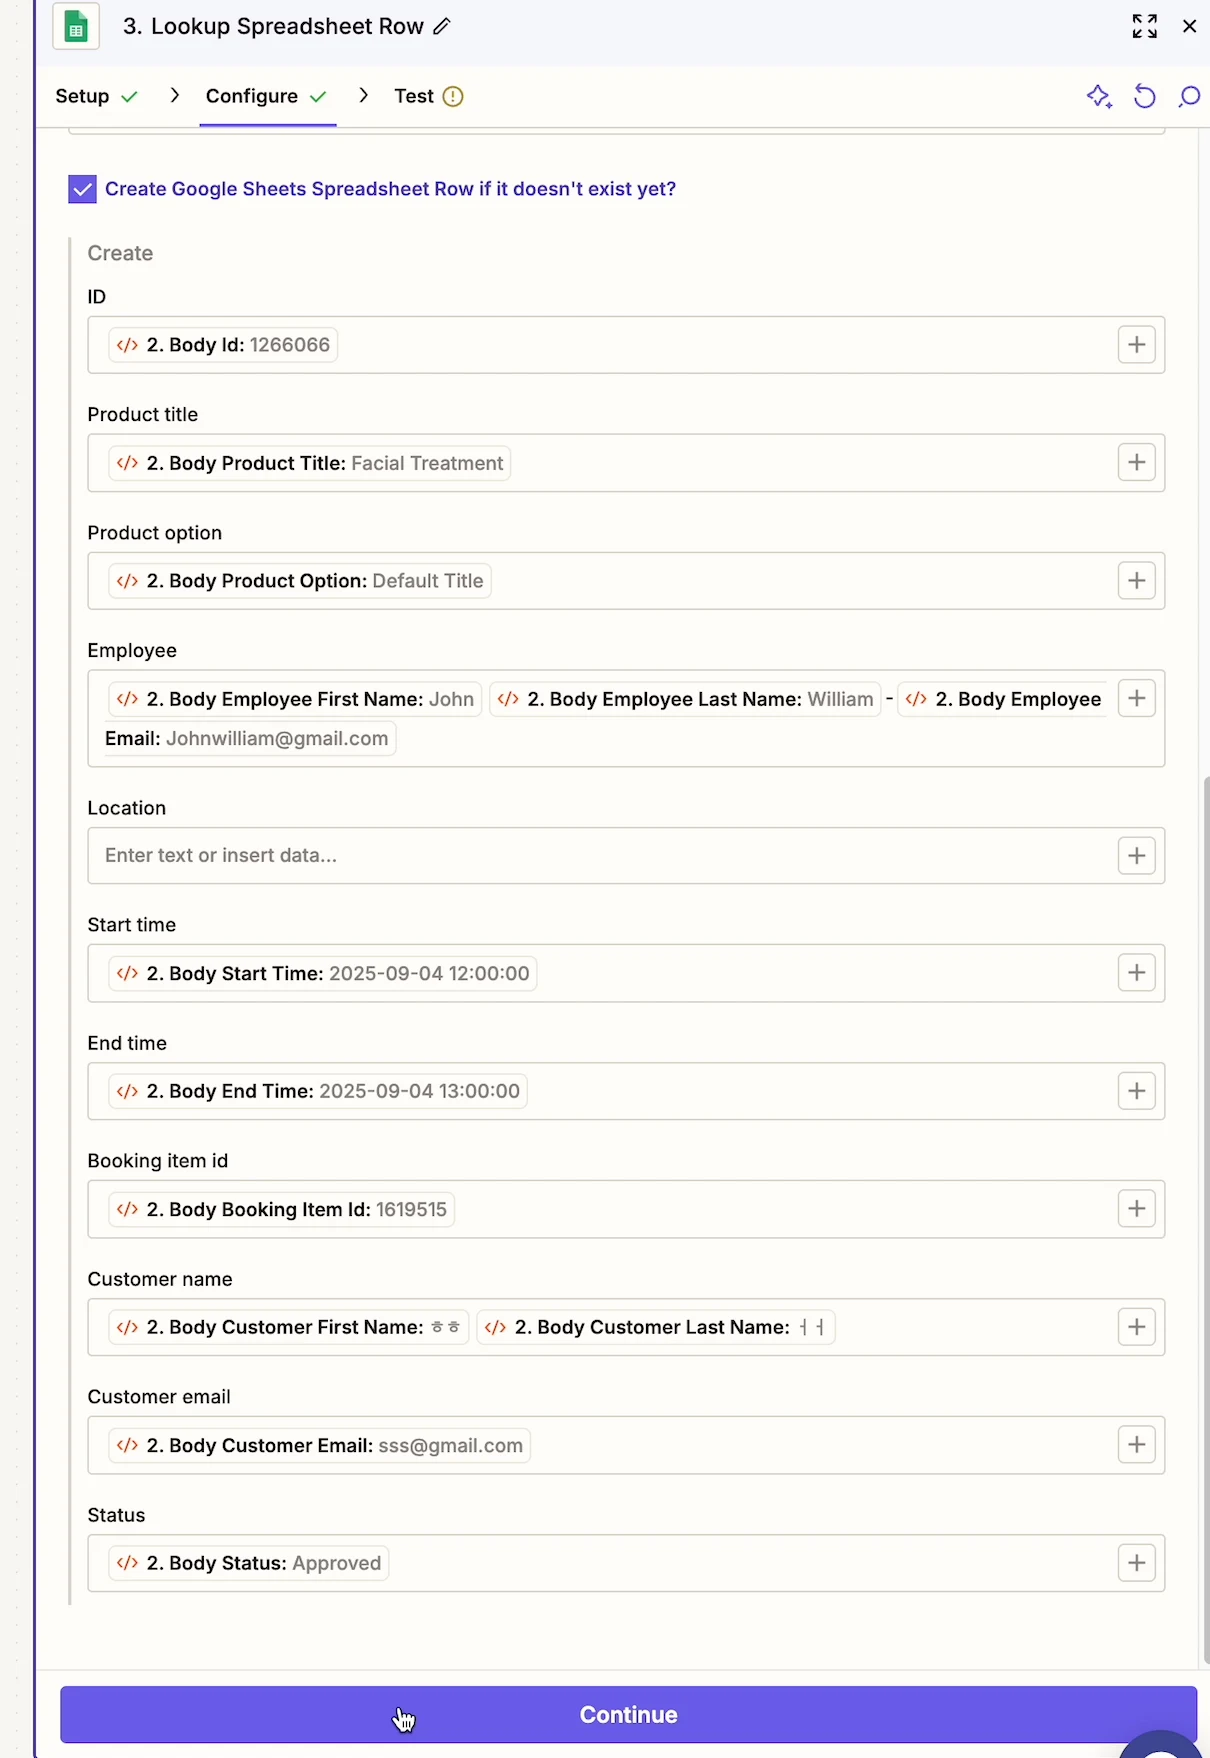
#### 步驟 8:更新試算表資料列
1. 再新增一個步驟
2. 選擇 **Google Sheets**
3. 選擇 **Update Spreadsheet Row**
4. 對應預約欄位:
* 商品標題
* 員工姓名
* 開始時間
* 結束時間
* 顧客資訊
 ***
### 🚀 發布您的 Zap
1. 檢查所有步驟
2. 點擊 **Publish**
3. 您的自動化現在已上線 🎉
來自 Tipo 的預約會自動觸發您的工作流程。
 ***
### 🔔 支援的預約事件
當預約發生以下情況時,Zapier 會收到資料:
* 已建立
* 已更新
* 已核准
* 已取消
* 已重新排程
***
### 💡 小技巧與最佳做法
* 先從一個簡單的 Zap 開始,再逐步擴充
* 先用 **Google Sheets** 測試資料
* 在 Zapier 中加入篩選條件,控制動作執行的時機
* 請將 webhook 網址保密
***
### ❓ 需要協助嗎?
如果您的 Zap 沒有觸發,或資料看起來不正確:
* 重新測試 webhook
* 確認 Tipo 中已啟用 Zapier
* 附上您的 Zap 詳細資料,聯絡 Tipo 客服
***
**🙋 還需要協助嗎?**
如果您仍需要協助,歡迎隨時寄信至 與我們聯繫,我們很樂意為您提供進一步的協助。