# Zapier Integration
Use Zapier to connect Tipo to thousands of apps (Slack, Google Sheets, HubSpot, Trello, etc.). Tipo acts as a trigger app in Zapier.
Tipo works as a trigger app in Zapier, meaning Zapier listens for booking events from Tipo and then runs actions in other tools.
### ⚡ What you can do with Zapier
With Zapier, you can automatically:
* Add bookings to **Google Sheets**
* Send notifications to **Slack**
* Create or update contacts in **CRM tools**
* Sync bookings to internal systems
* Build custom workflows for advanced use cases
> 💡 Zapier is ideal if you want more flexibility than built-in integrations.
***
### 🔌 Enable Zapier in Tipo
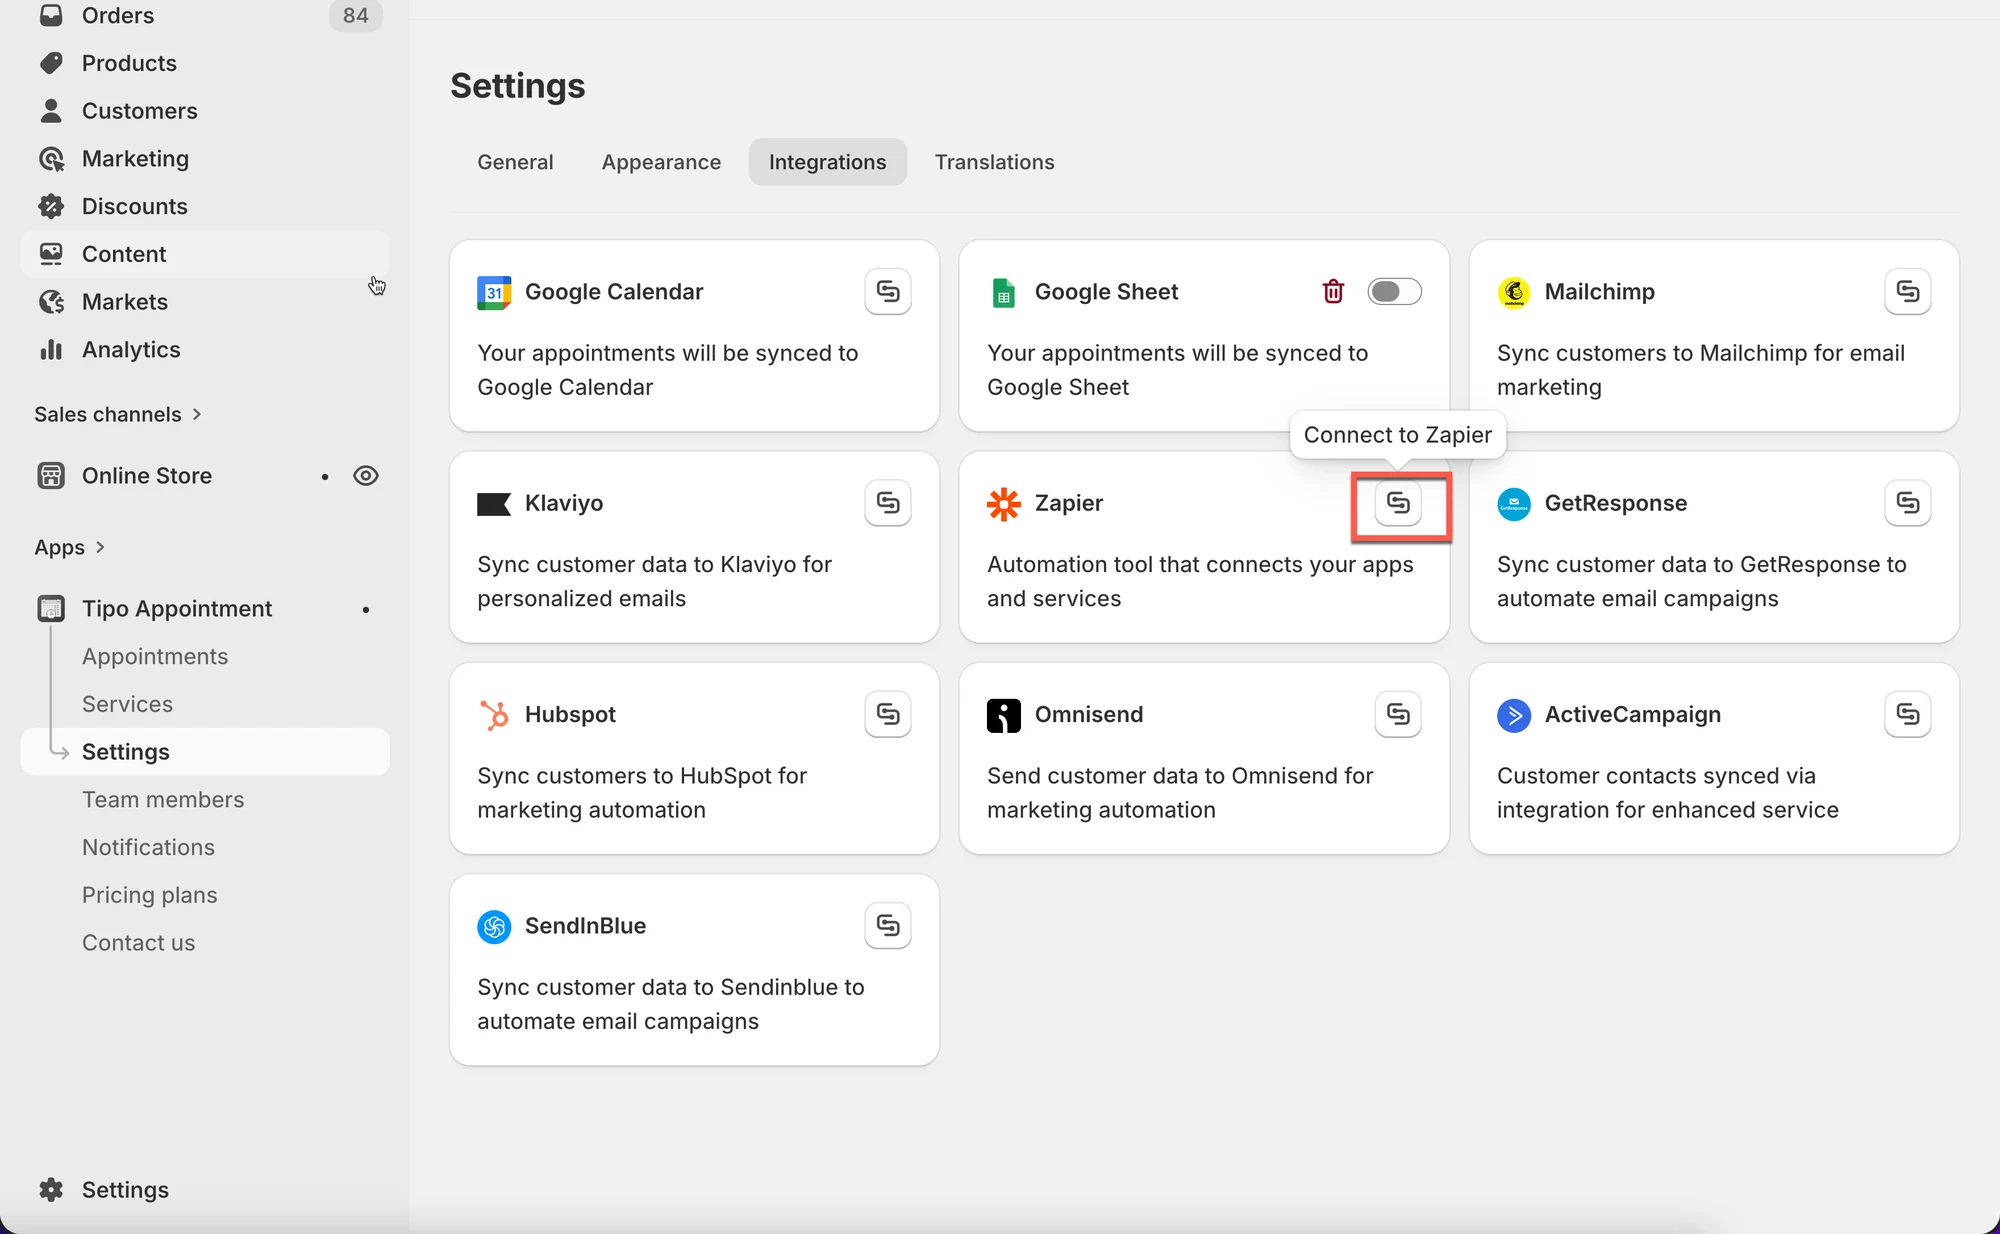
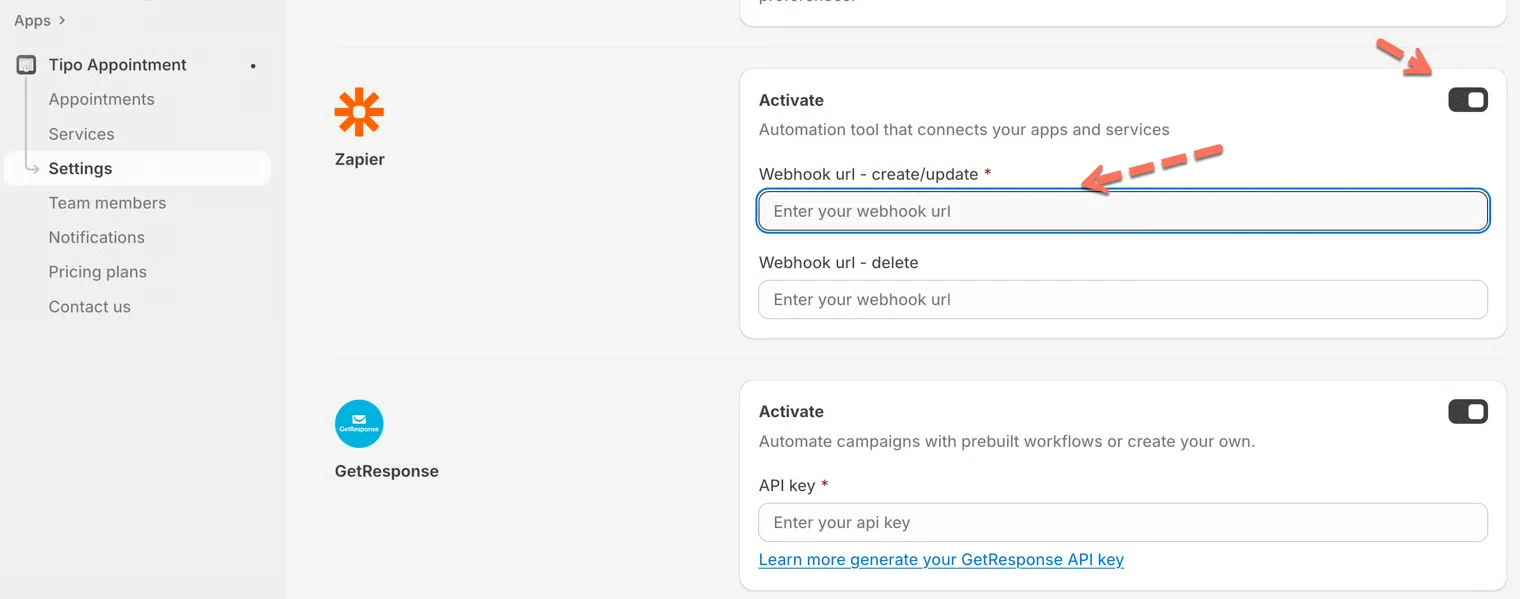
1. Open the app > **Settings** > **Integrations** > find **Zapier**
2. Click on the **Connect** icon
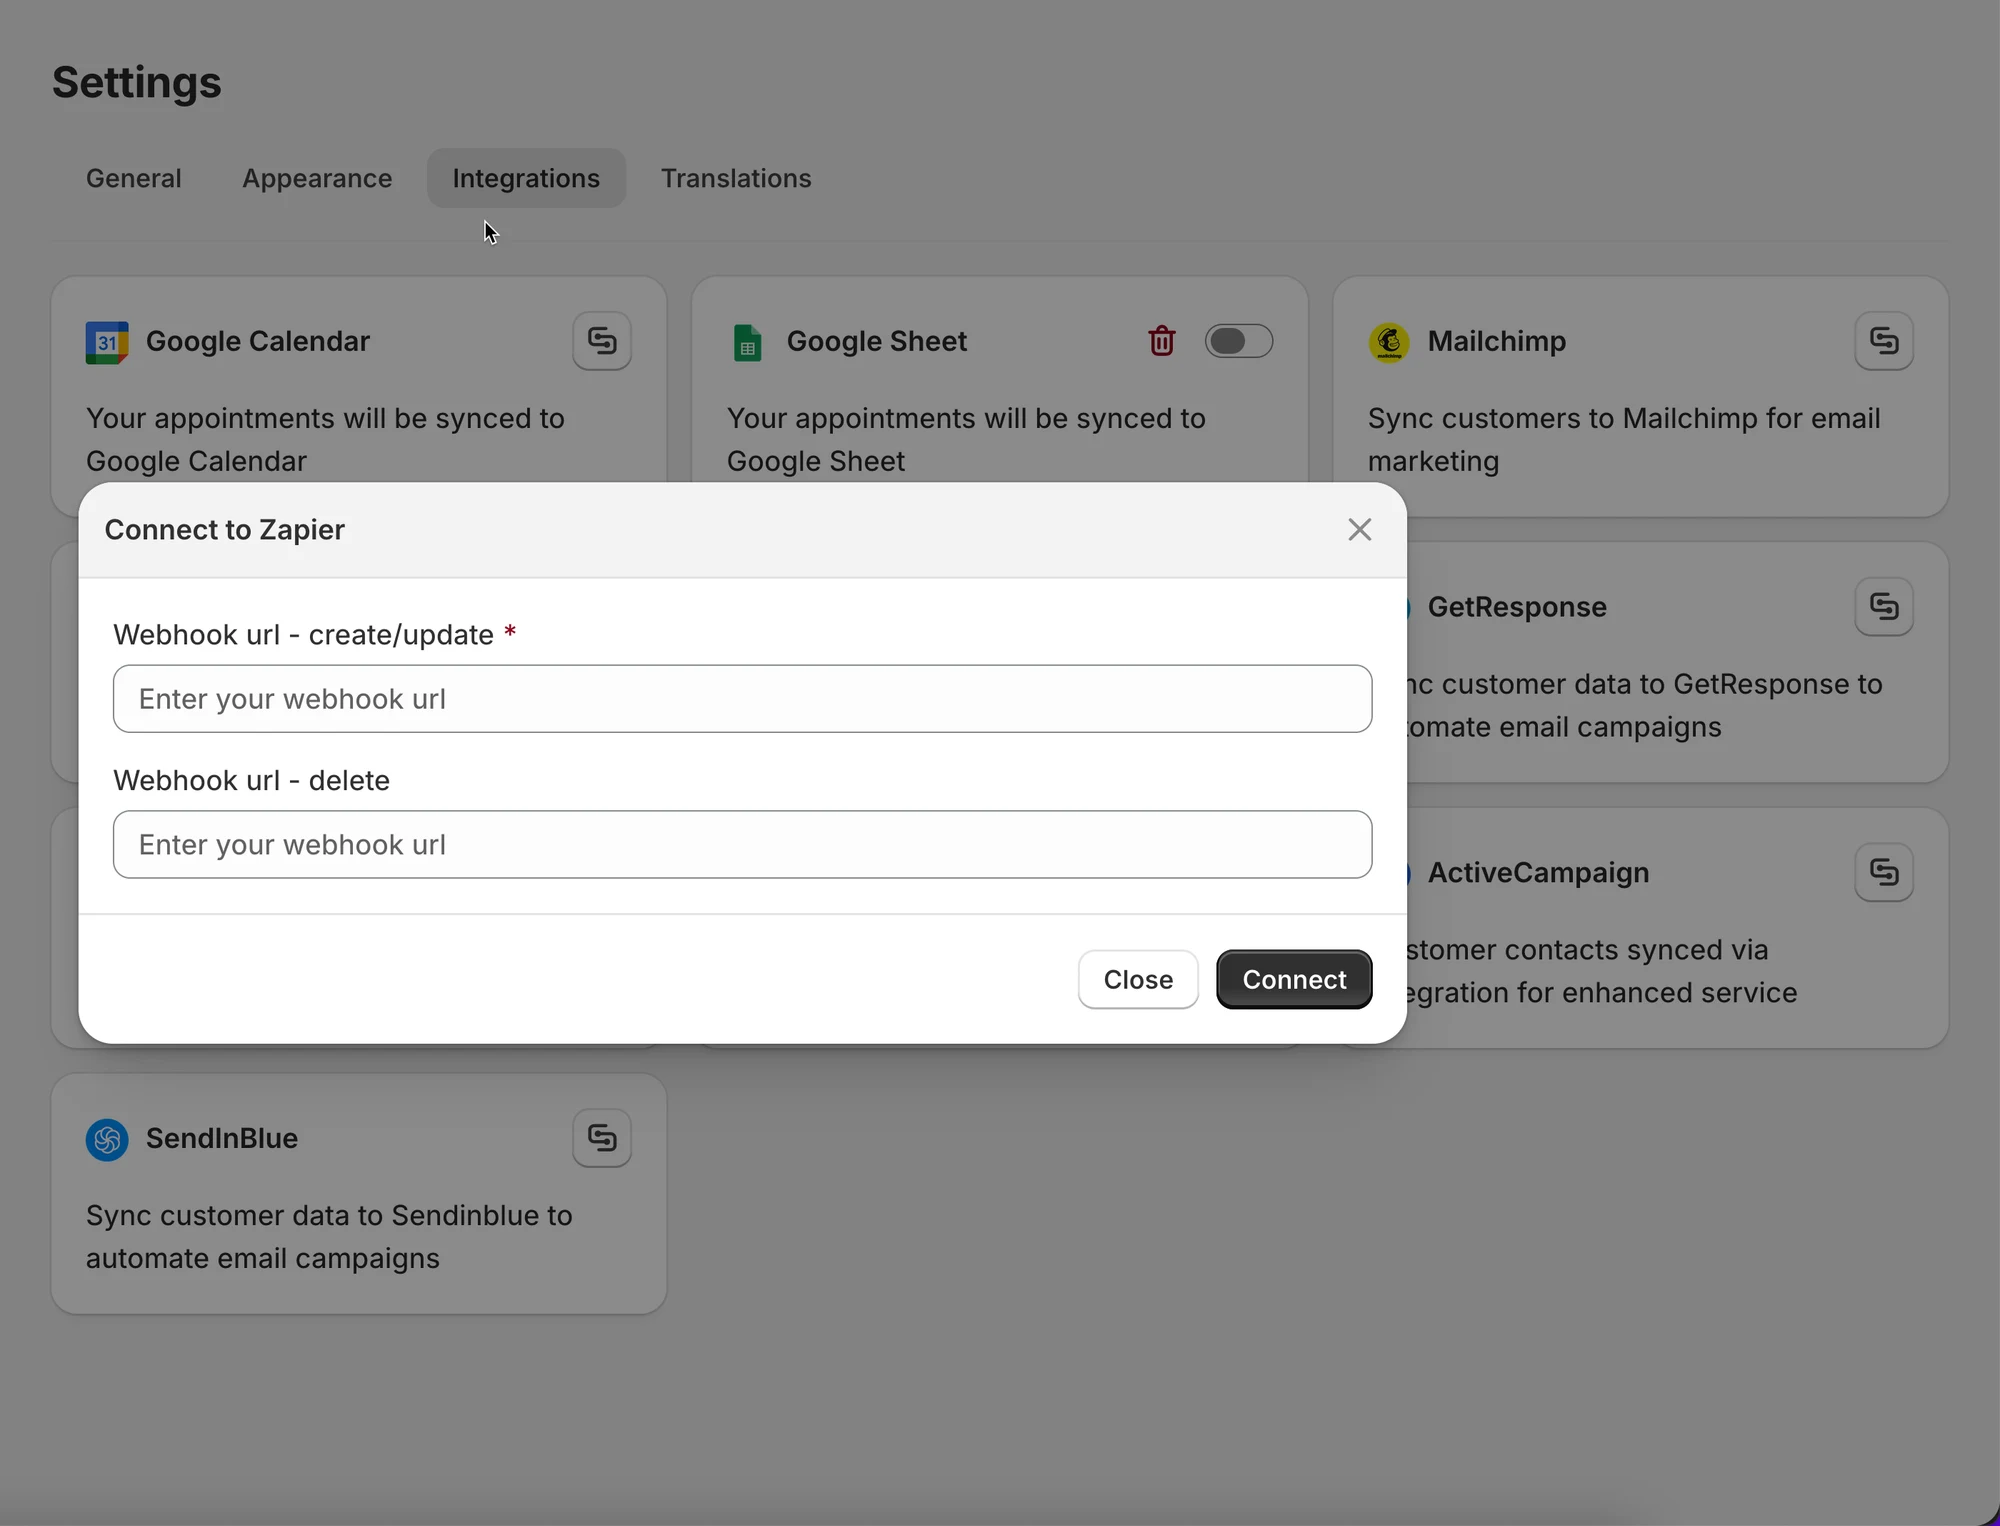
3. Paste the weebhook URL (from your Zapier) in **Webhook URL (create/update)** field
4. Click **Save**
***
### 💡 How Zapier works with Tipo
Zapier uses **webhooks** to receive booking data from Tipo.
The flow looks like this:
1. **Tipo sends booking data** (create / update / cancel)
2. **Zapier catches the webhook**
3. Zapier runs **actions** in other apps (Sheets, Slack, CRM, etc.)
***
### 🧩 Create a Zap in Zapier
#### Step 1: Create a new Zap
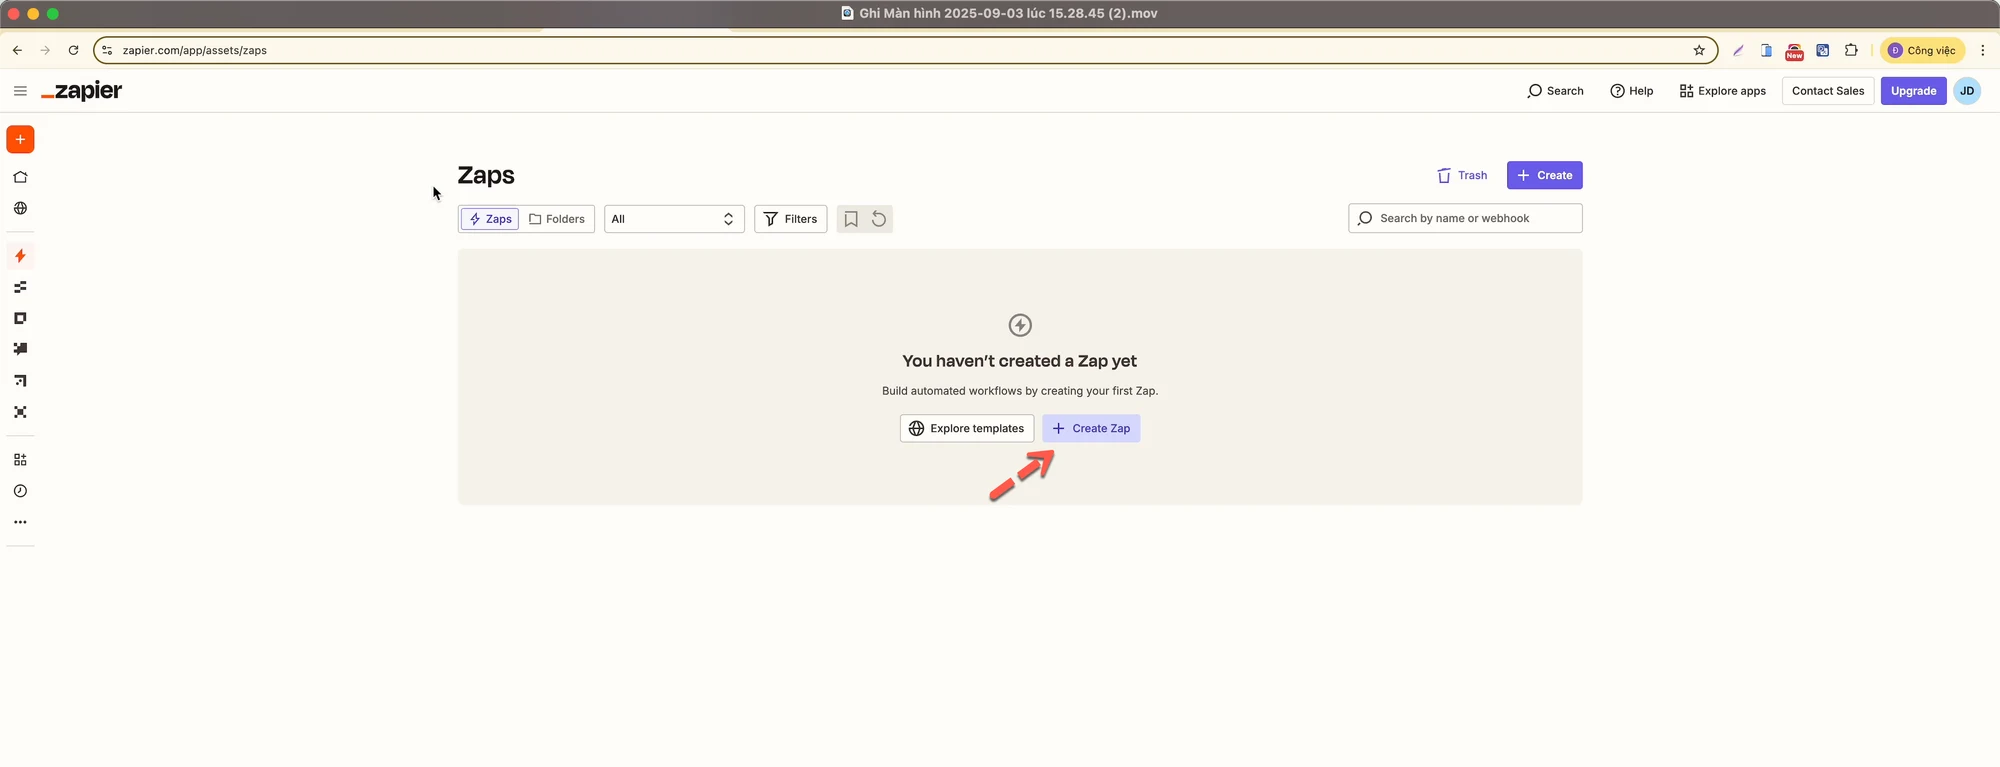
1. Log in to **Zapier**
2. Go to **Zaps**
3. Click **Create Zap**
***
#### Step 2: Set the trigger (Webhook)
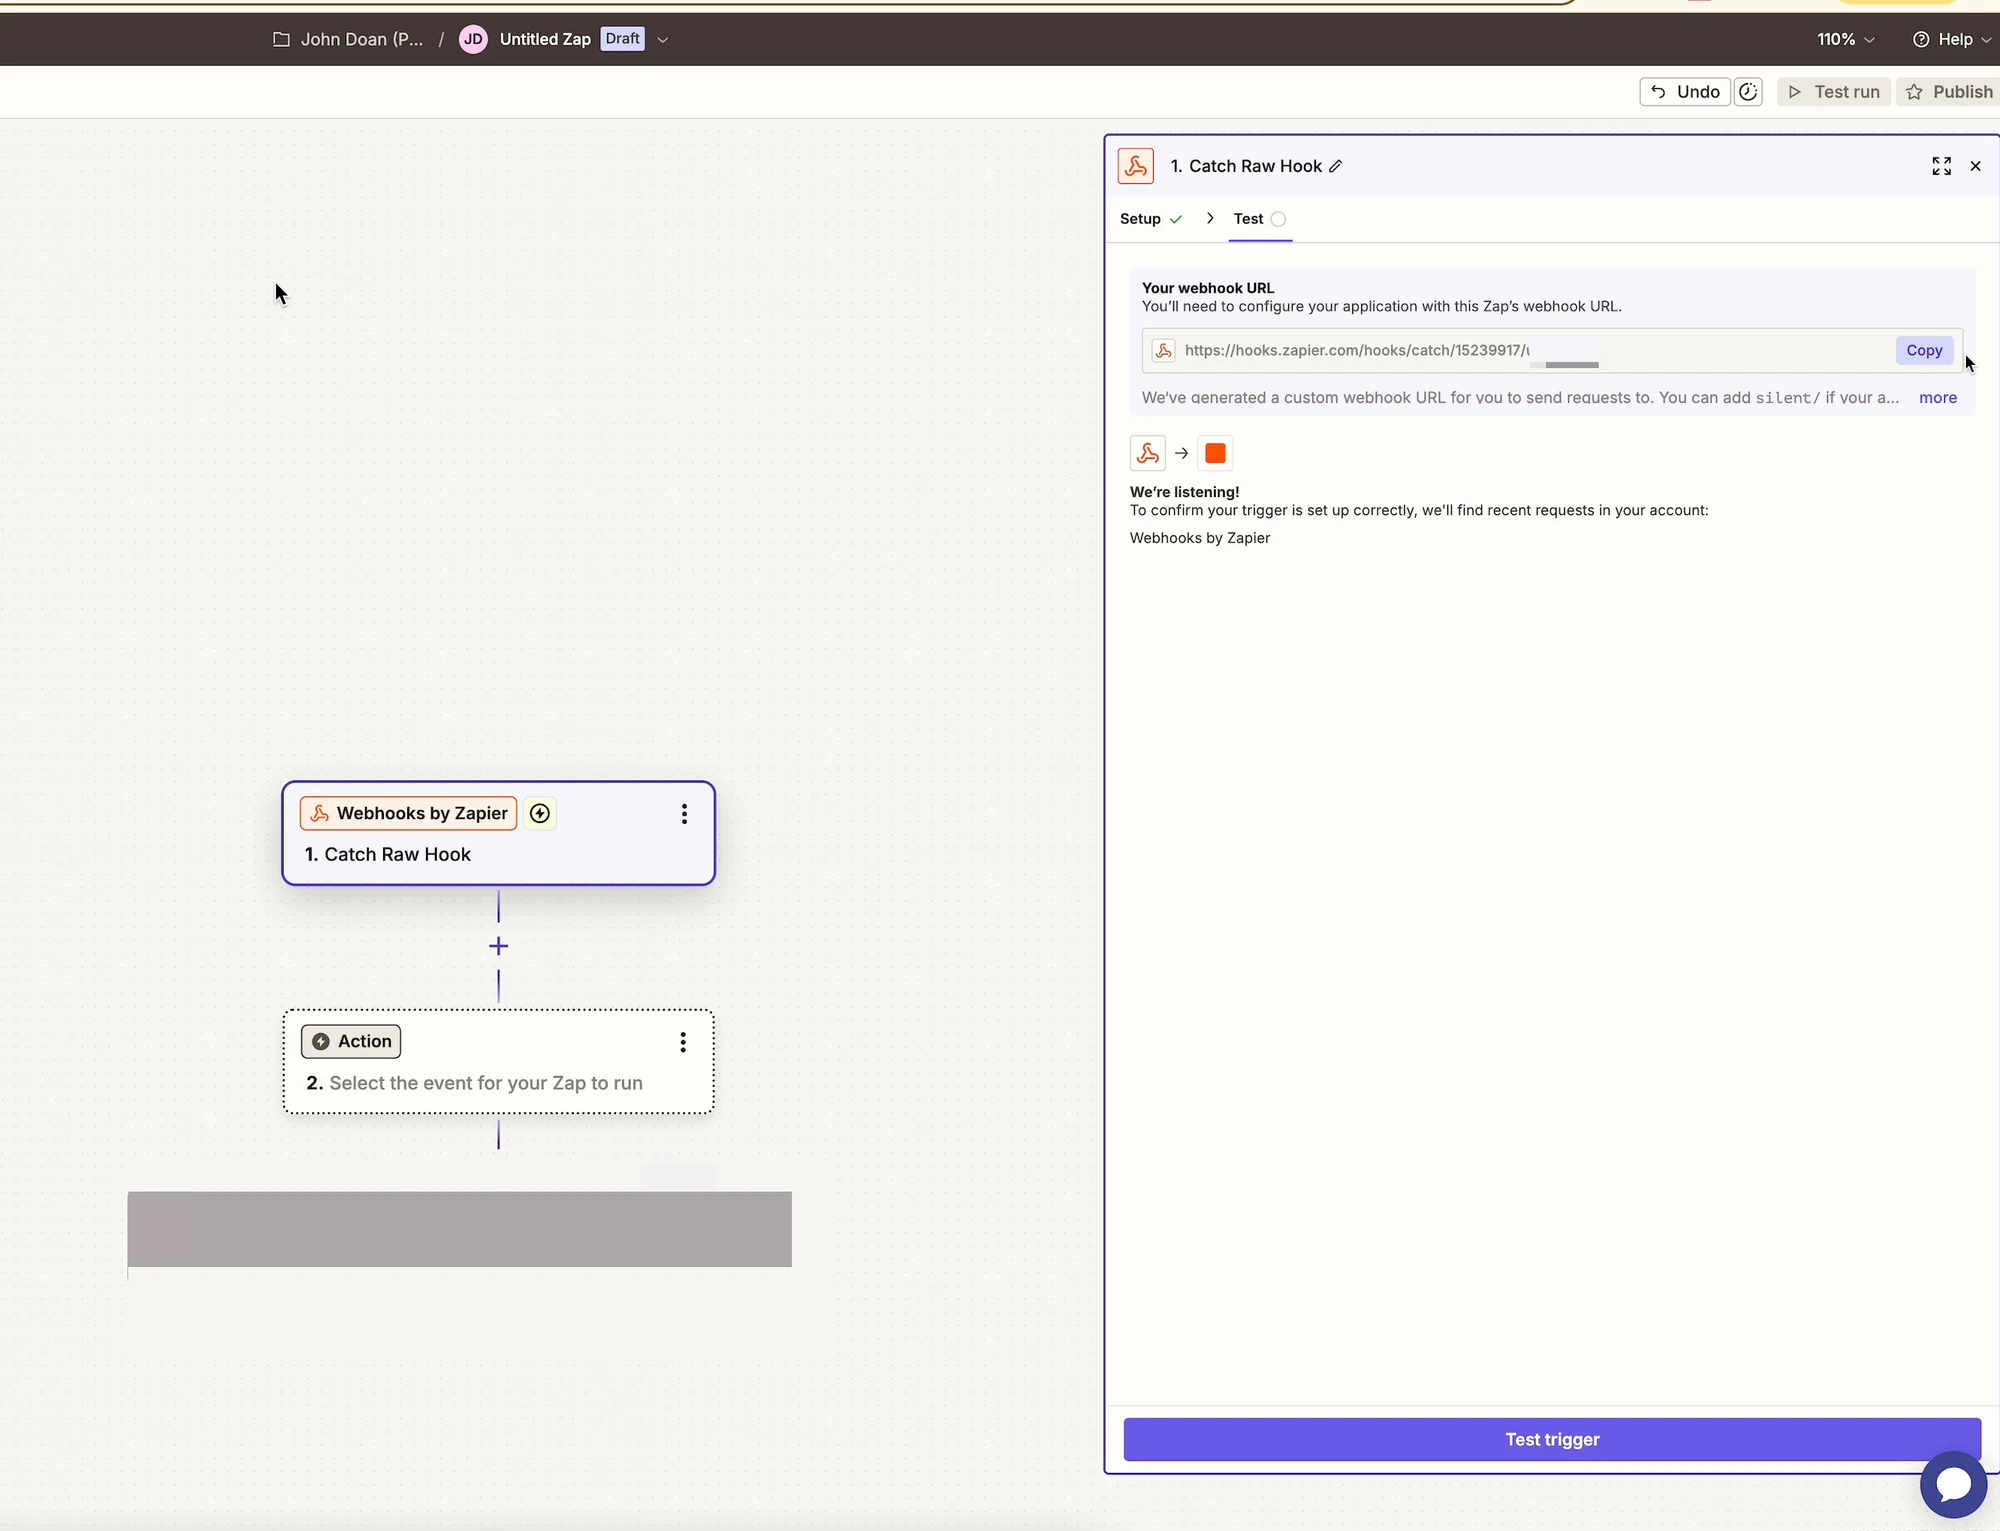
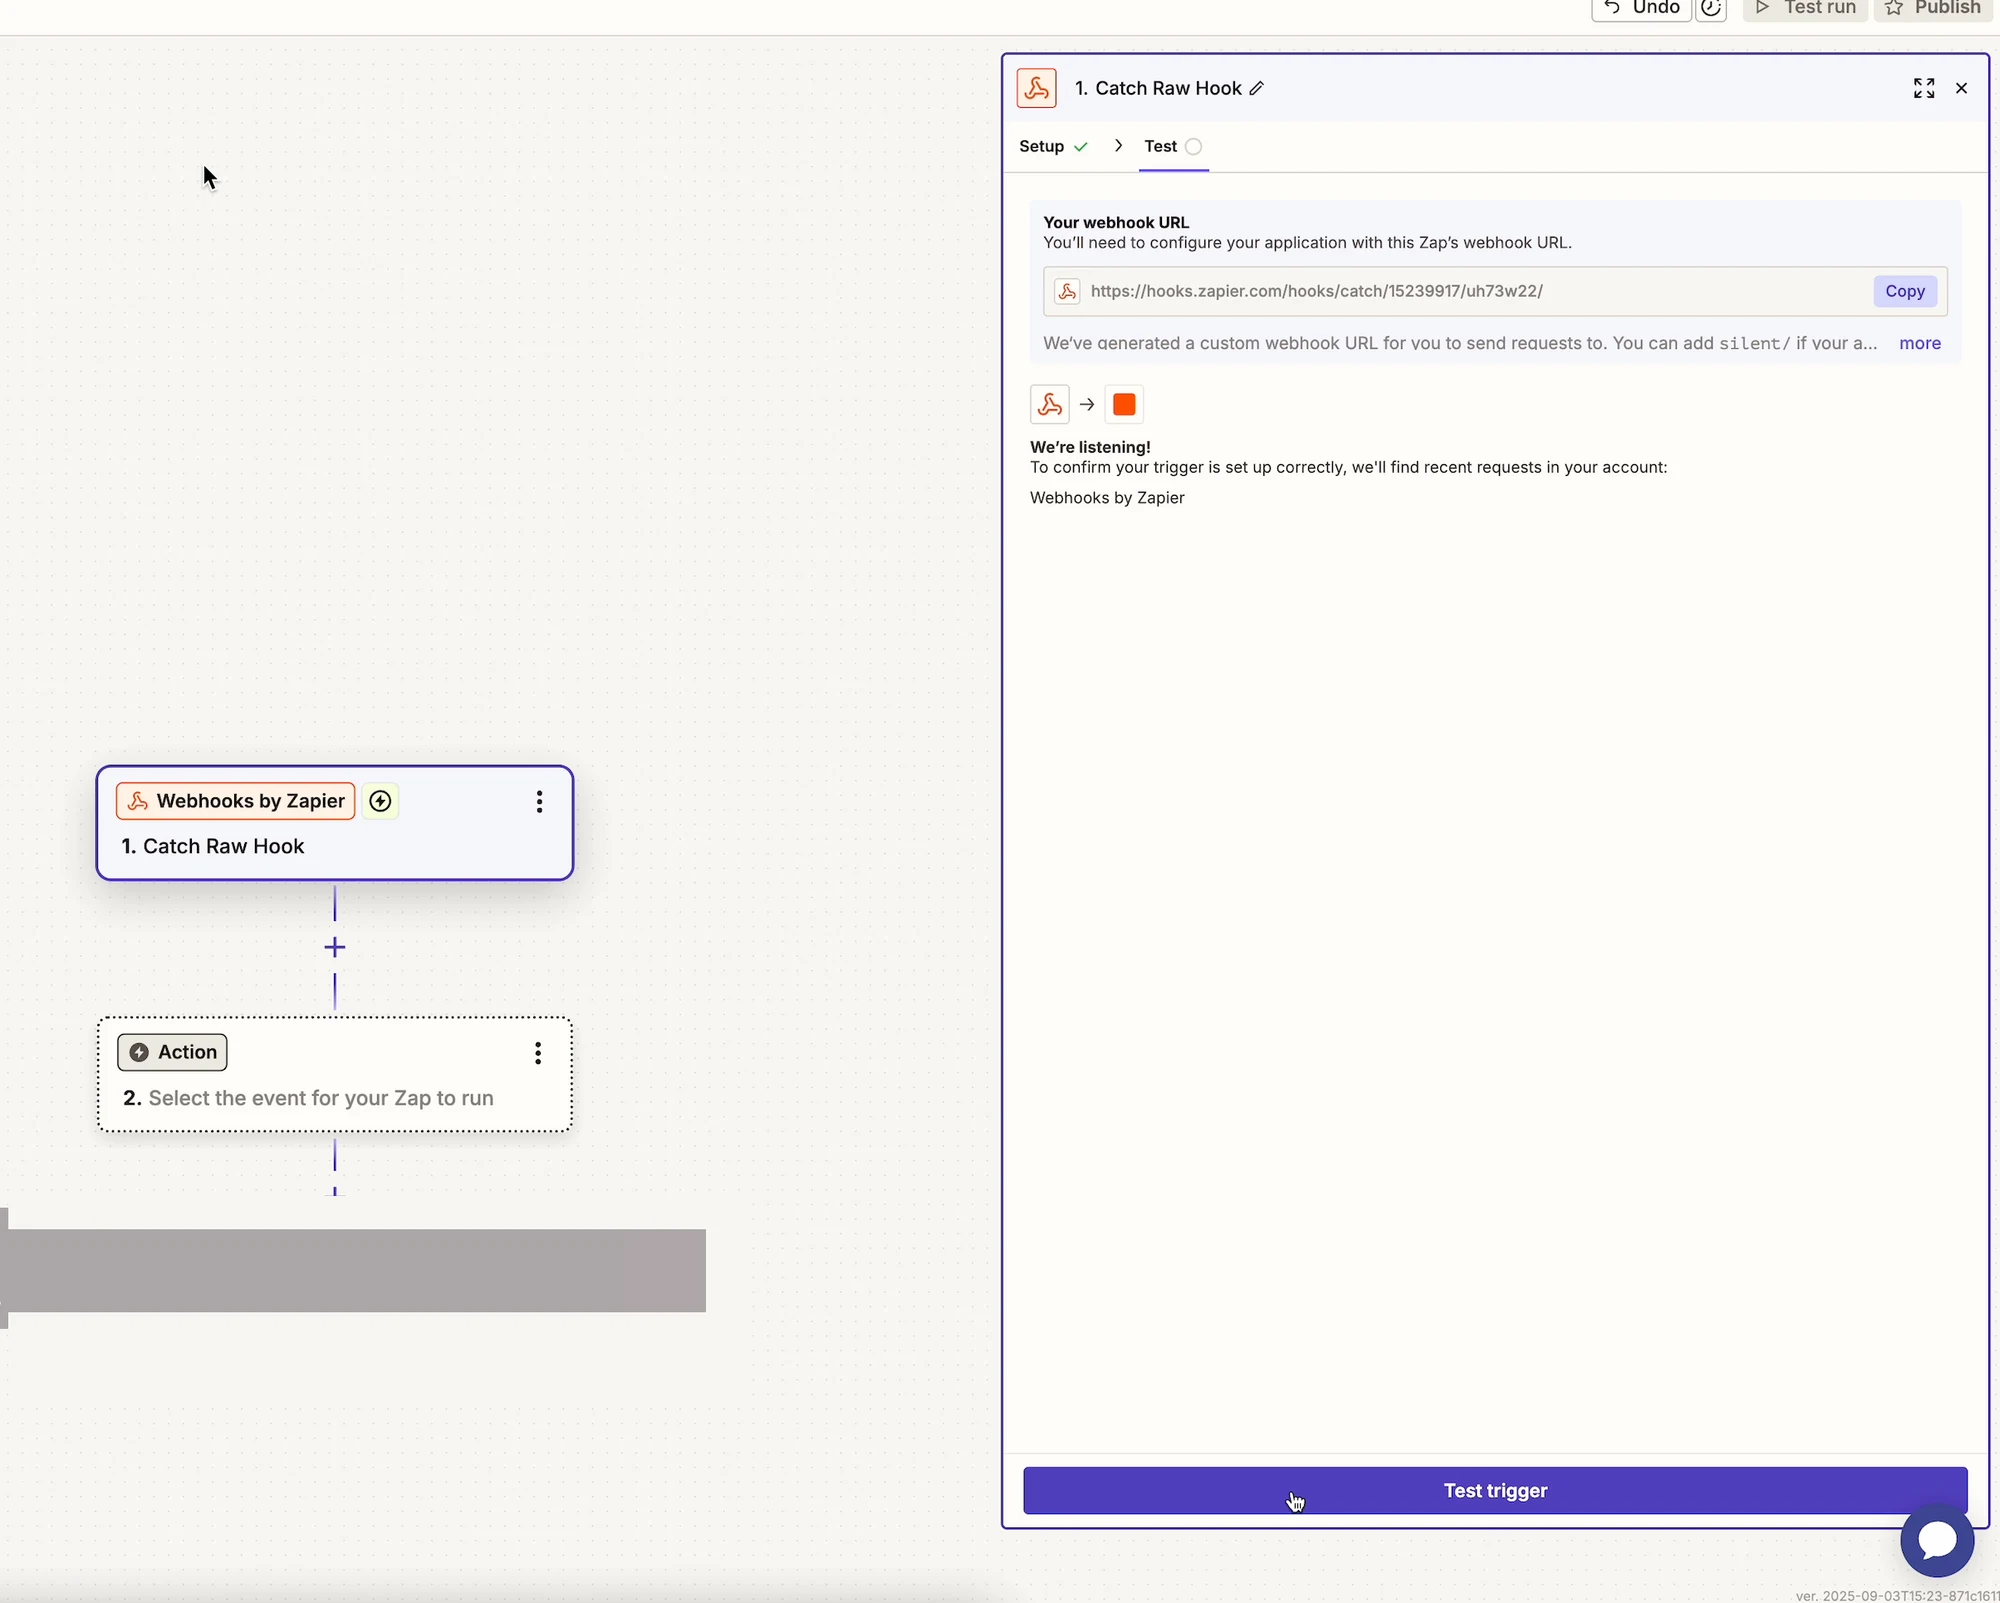
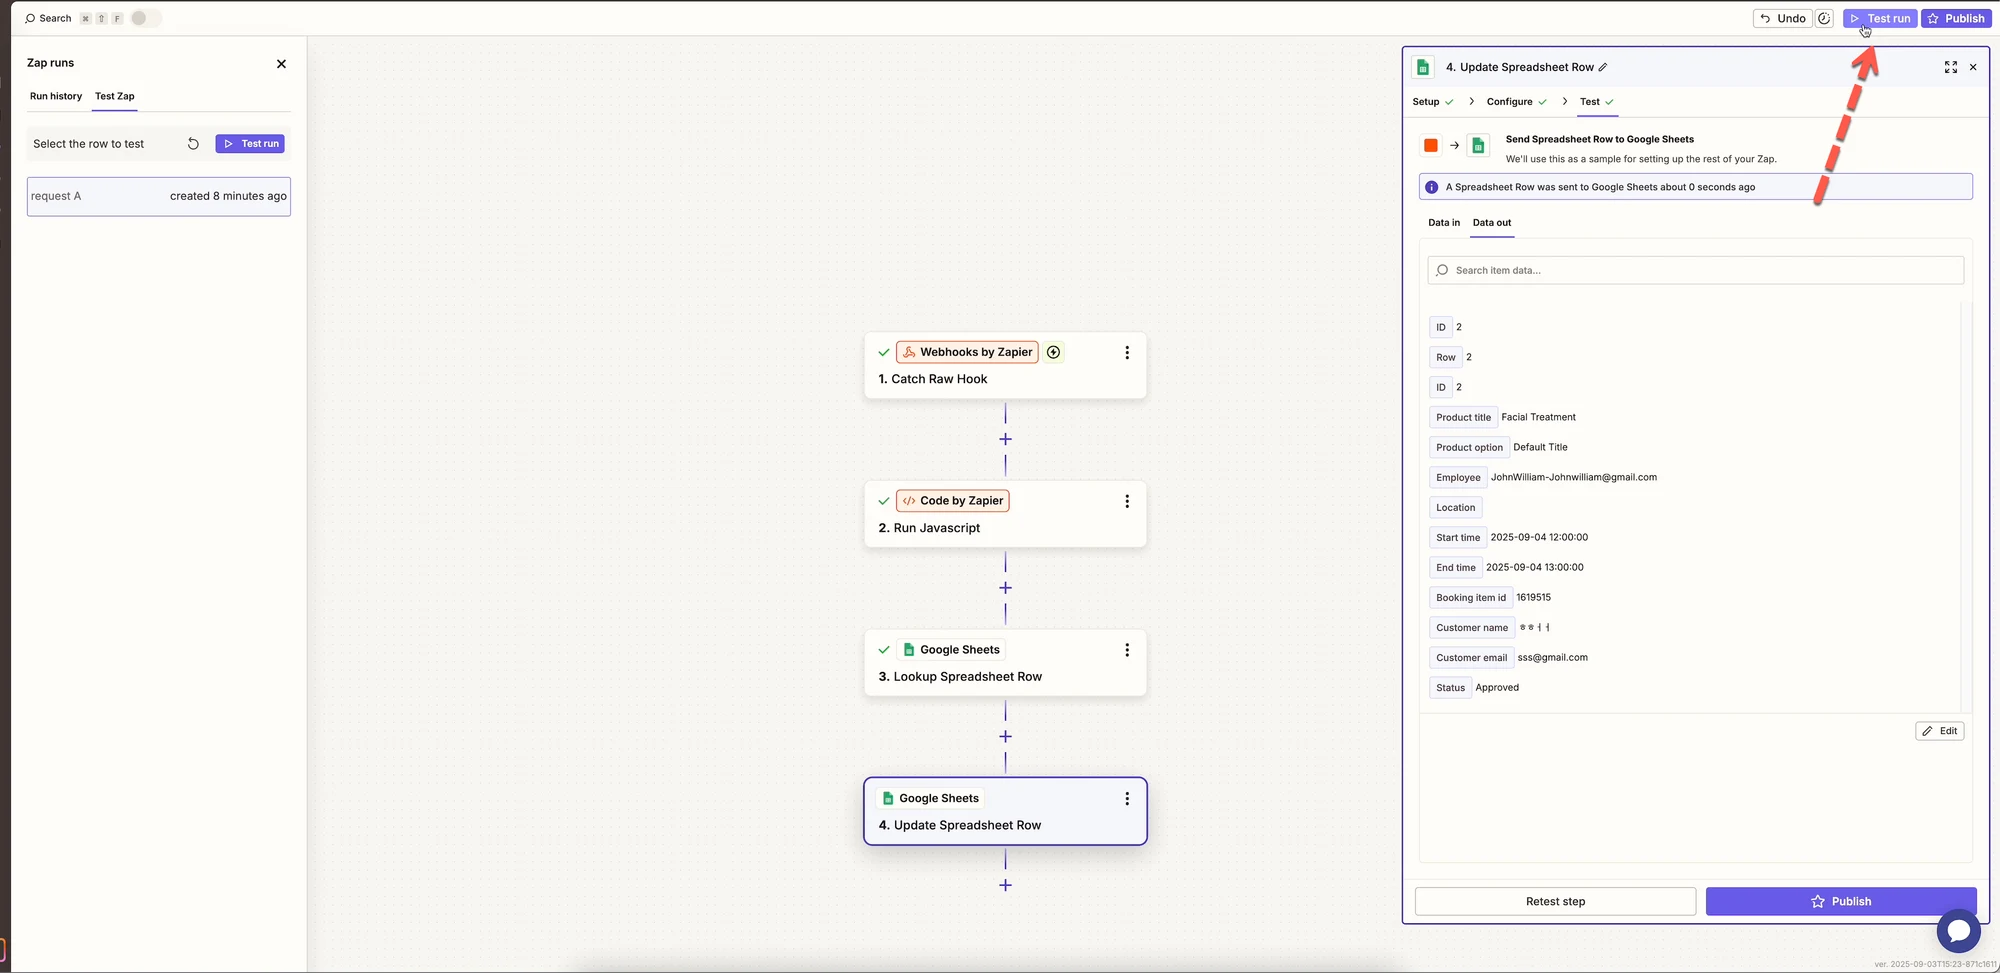
1. Choose **Webhooks by Zapier**
2. Select **Catch Raw Hook**
3. Click **Continue**
4. Copy the **Webhook URL** shown by Zapier
***
#### Step 3: Connect Zapier with Tipo
1. Go back to **Tipo app** > open app **Settings > Integrations > Zapier**
2. Paste the Zapier **Webhook URL** into **Webhook URL – create/update field**
3. Save your settings
***
#### Step 4: Test the webhook
1. In Zapier, click **Test trigger**
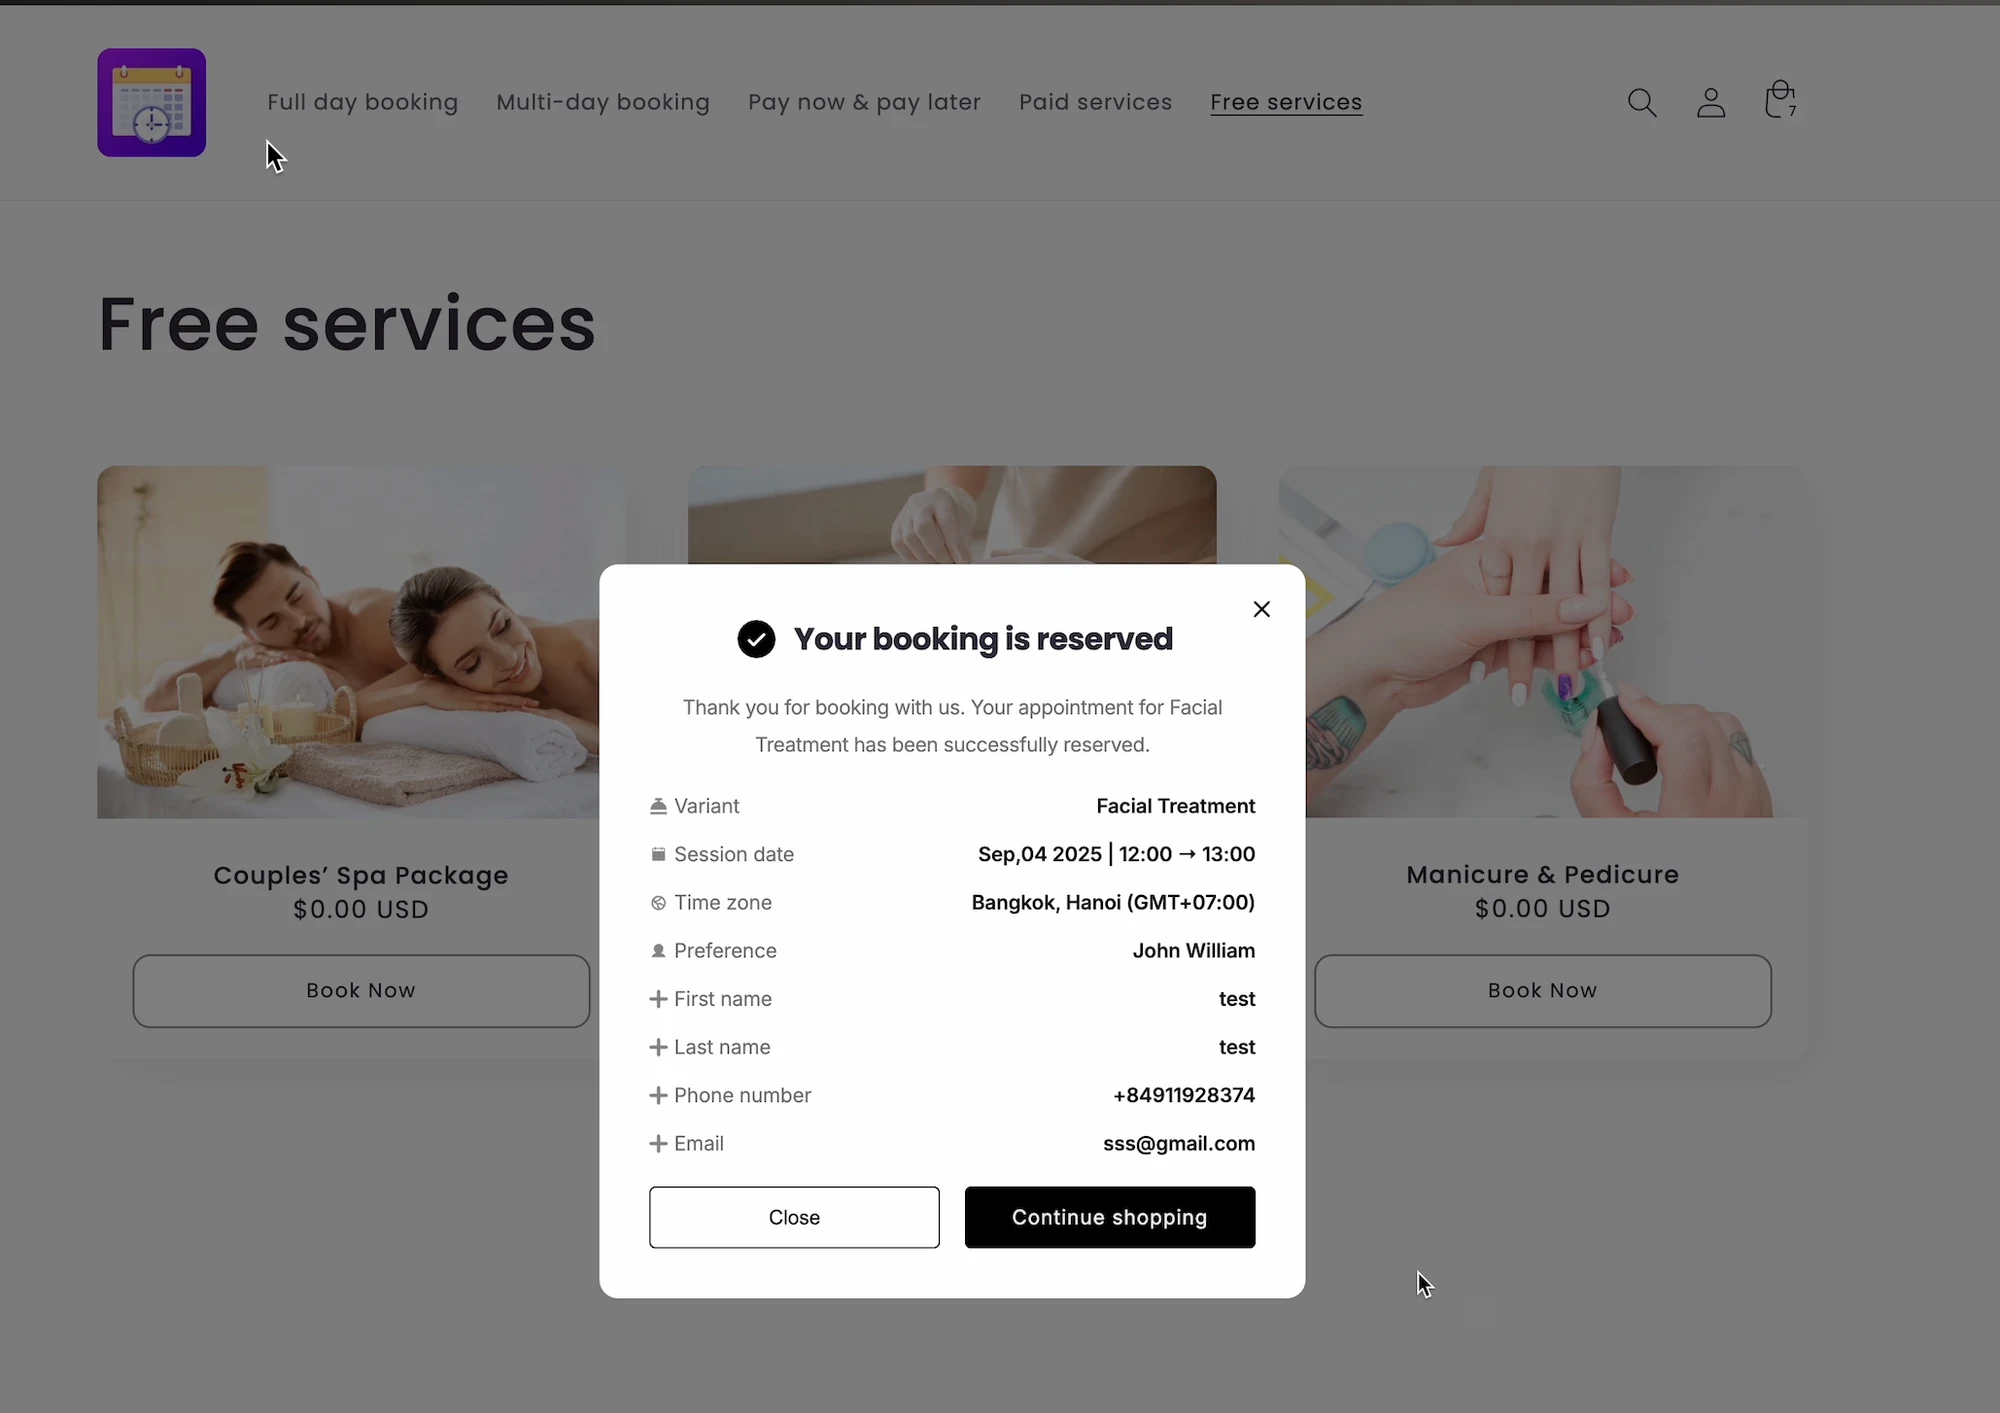
2. In your store, create or update a booking
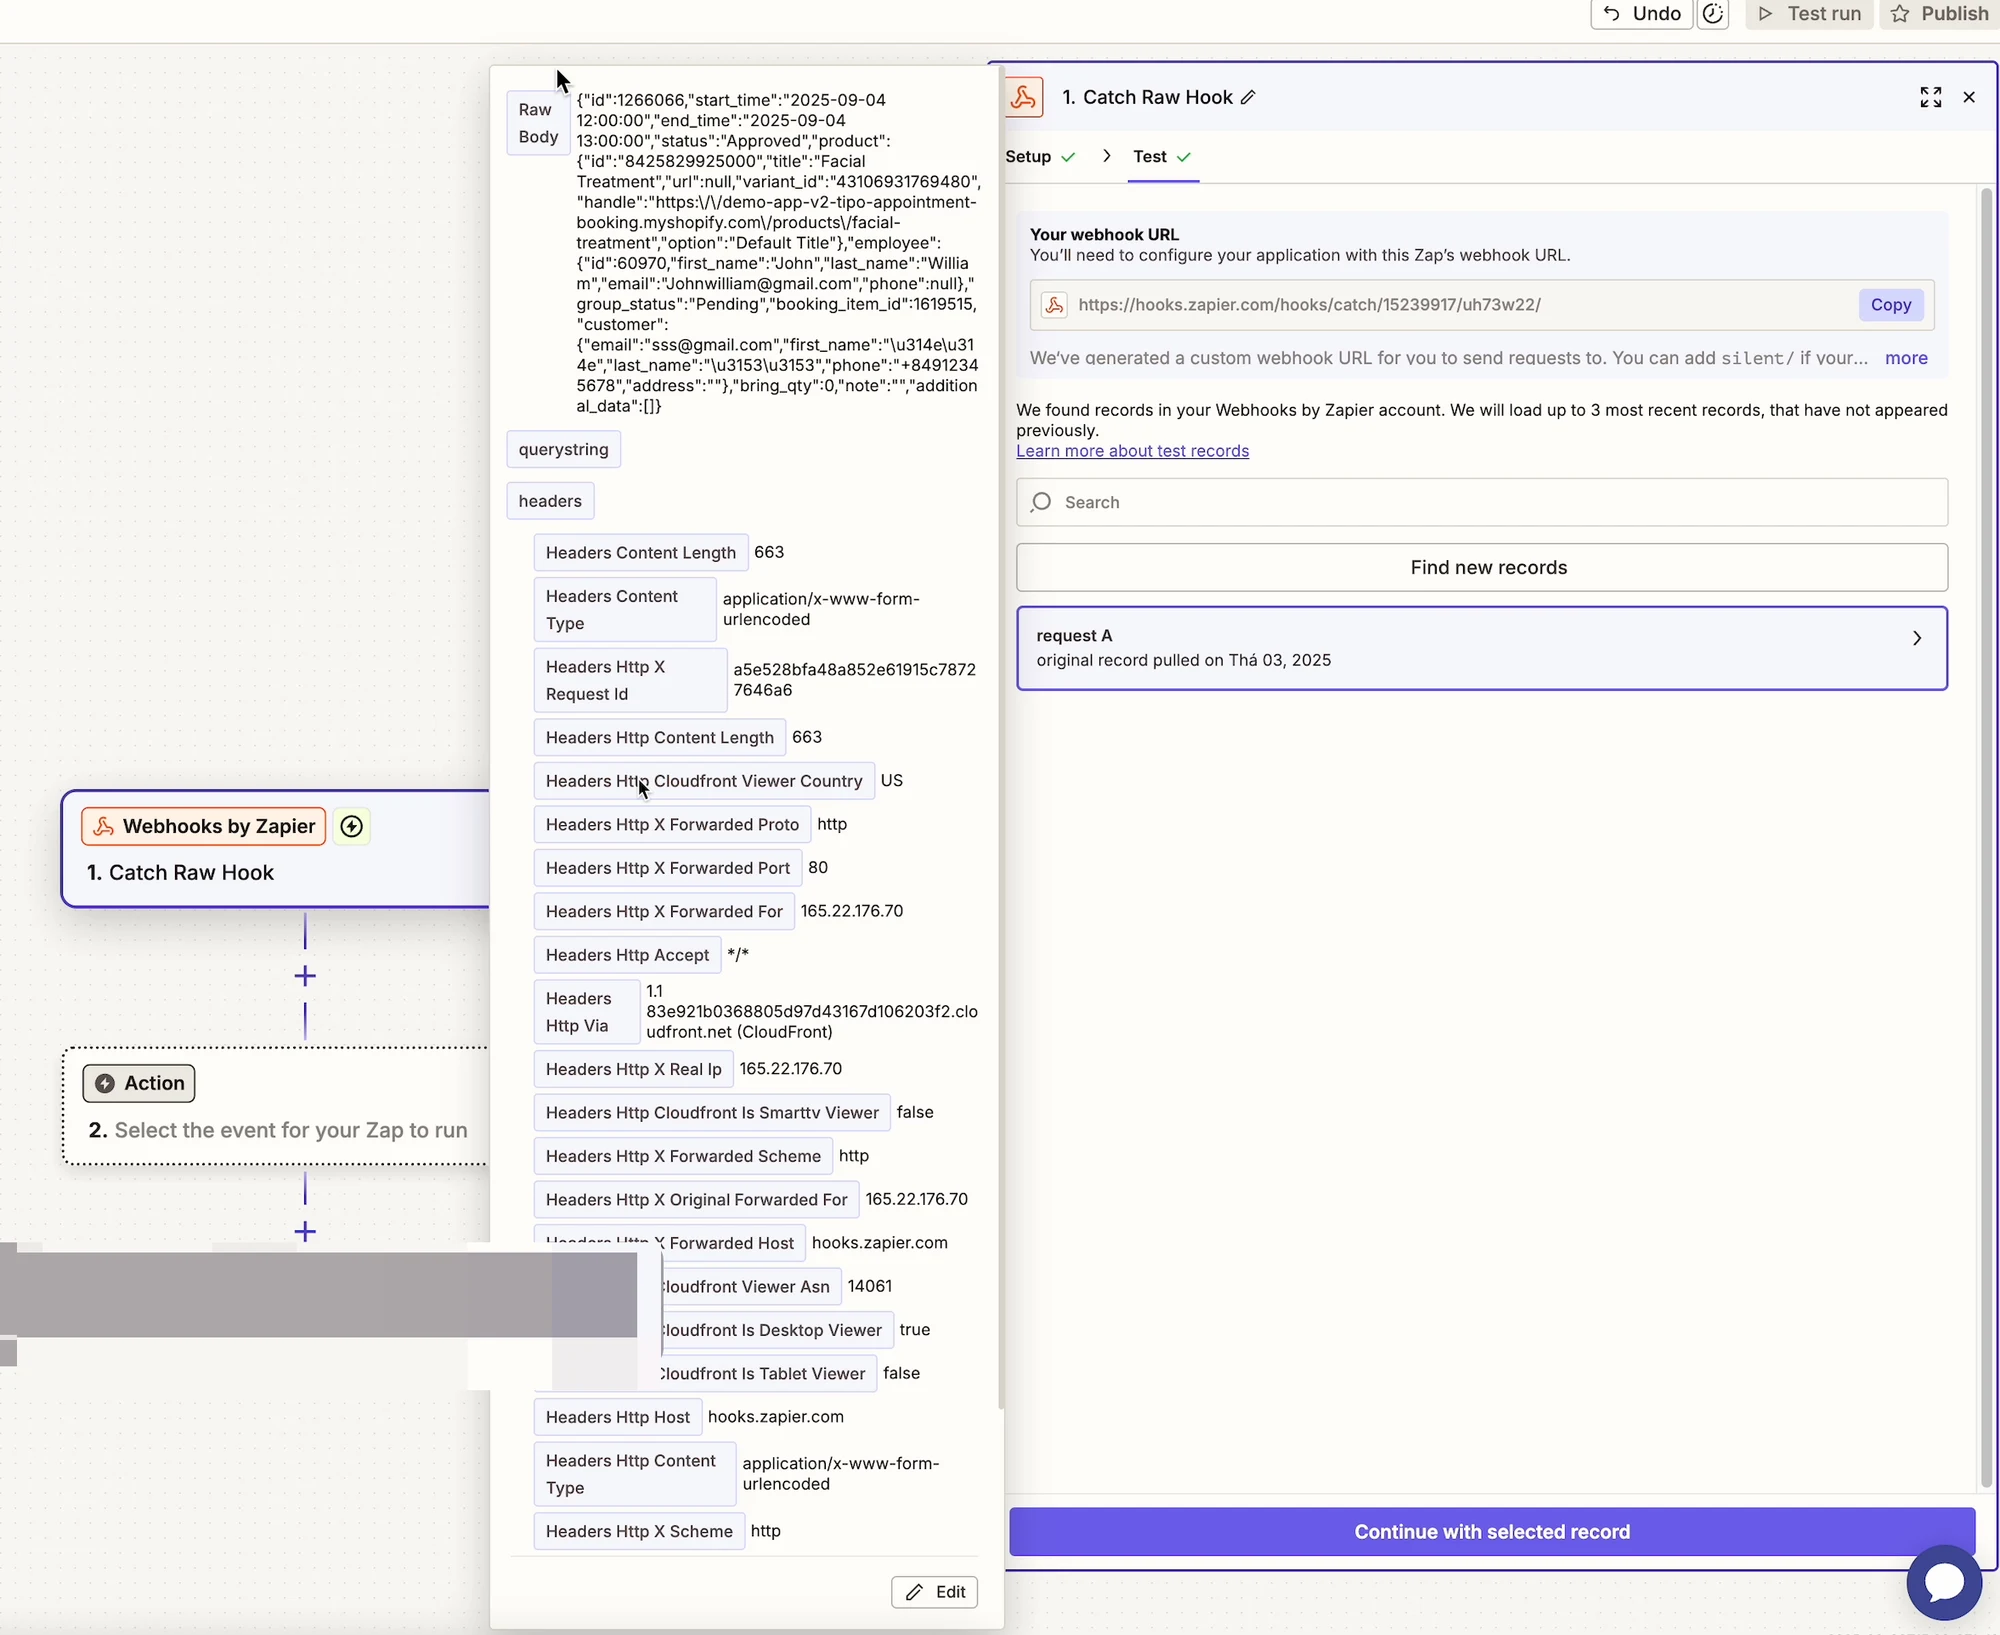
3. Zapier should receive booking data successfully
***
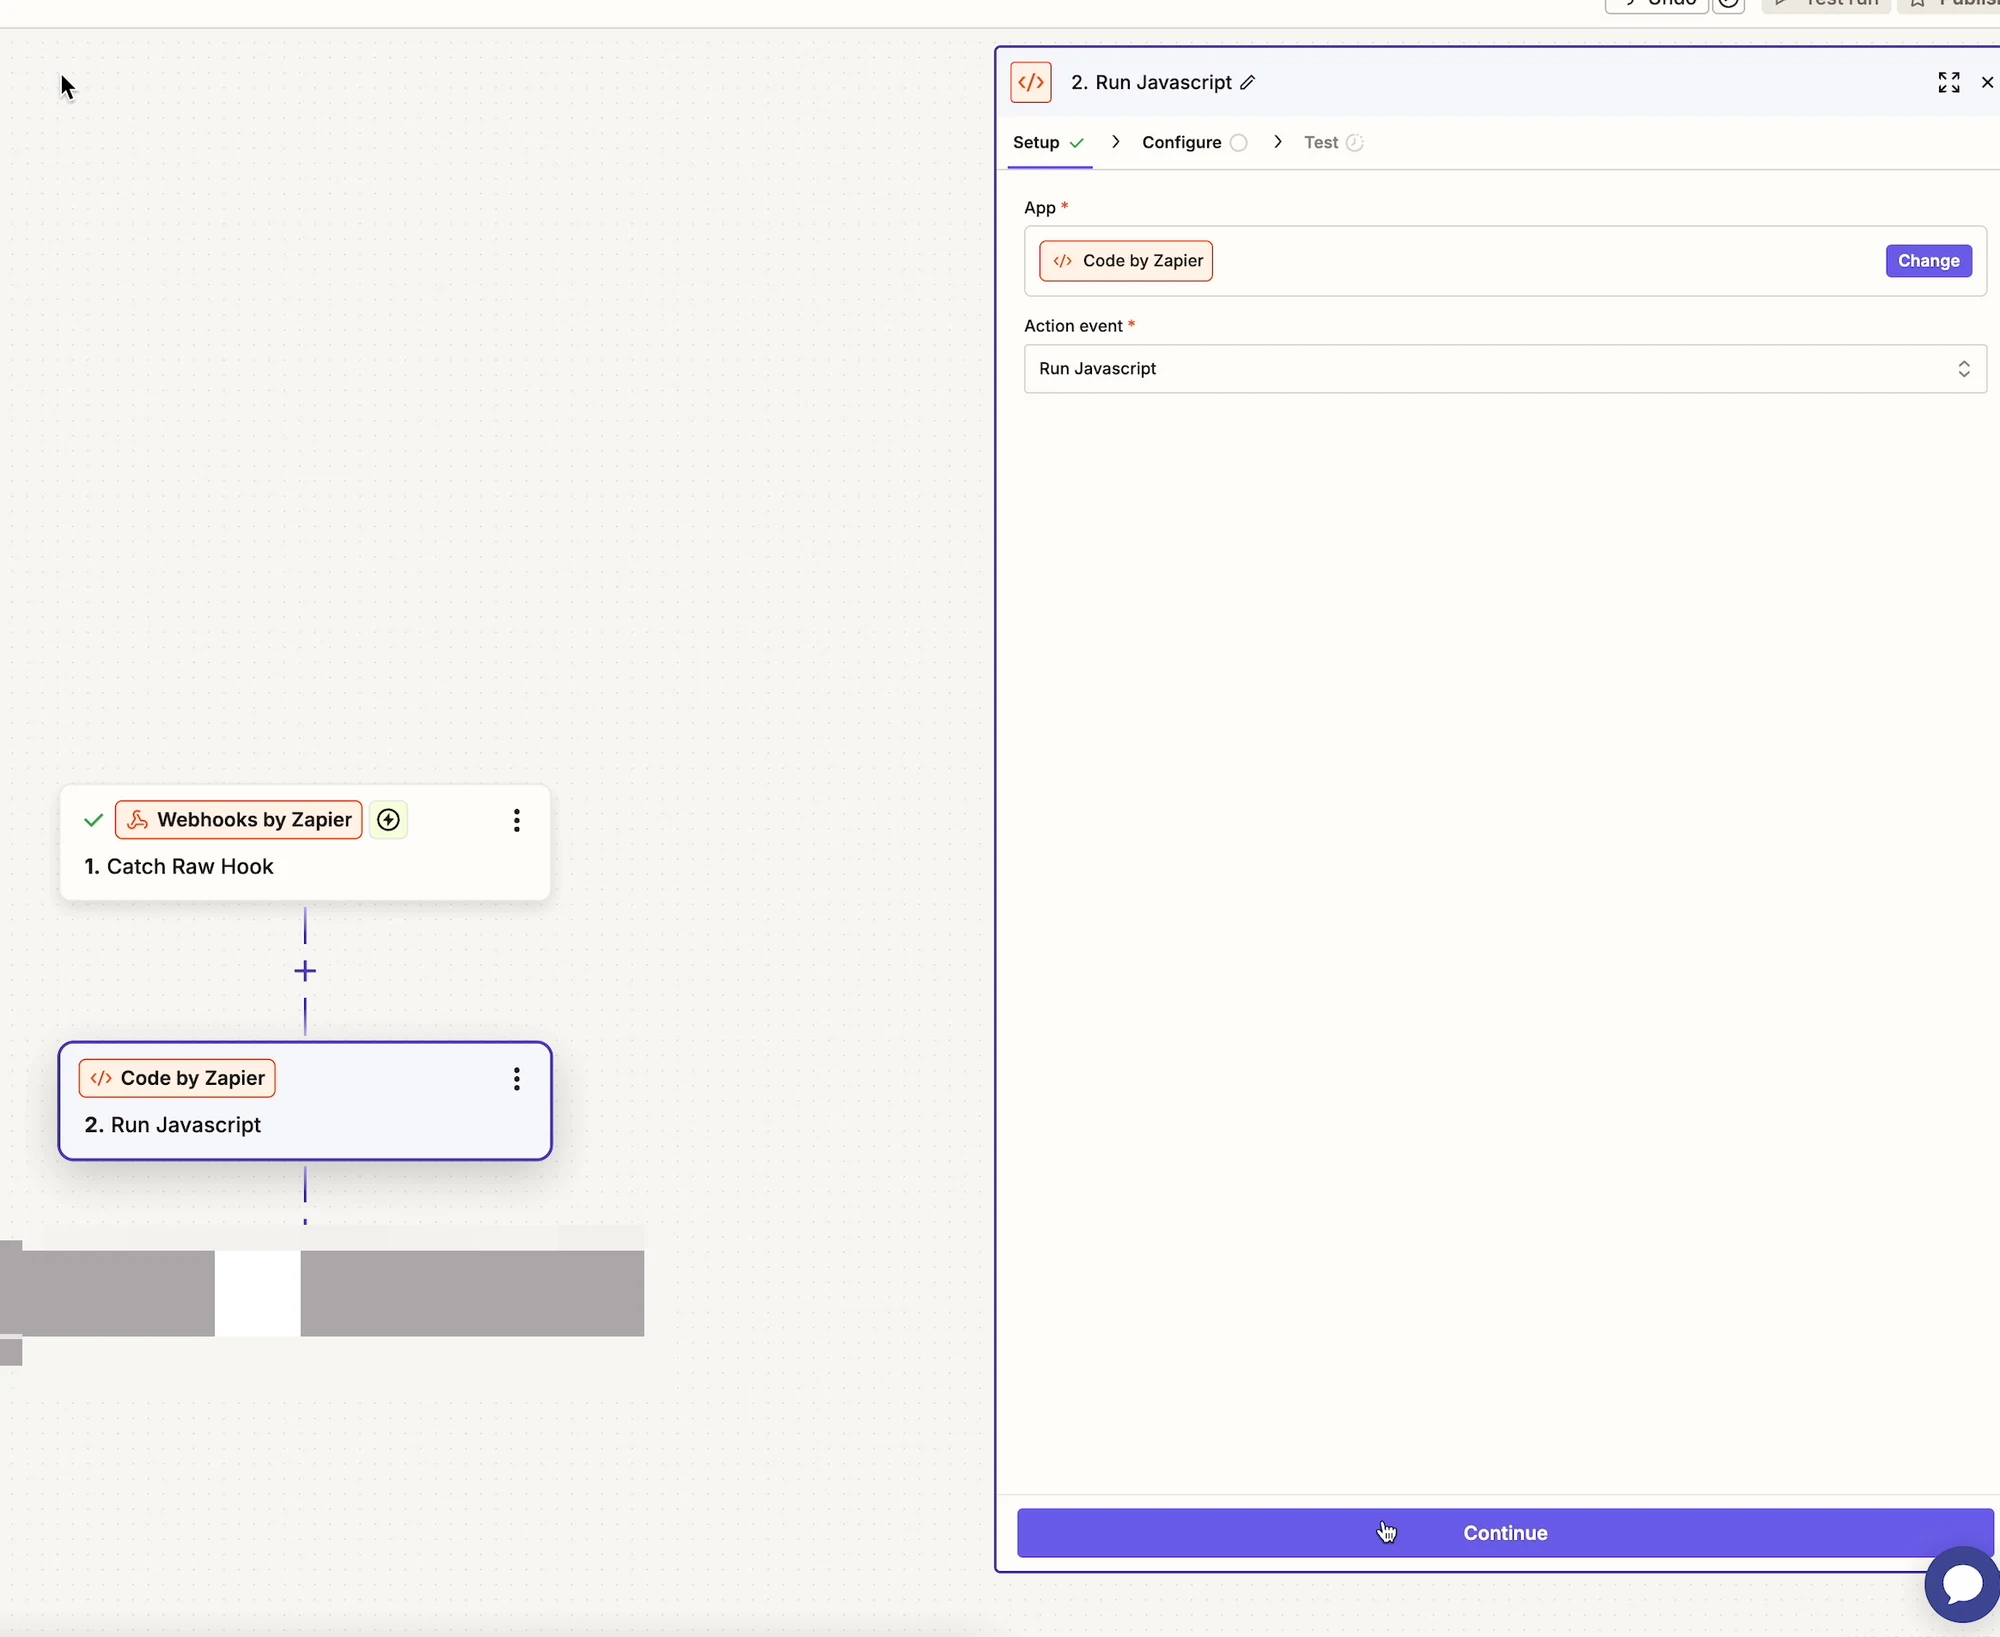
#### Step 5: Add “Code by Zapier”
1. Click **+** to add a new step
2. Choose **Code by Zapier**
3. Select **Run Javascript**
***
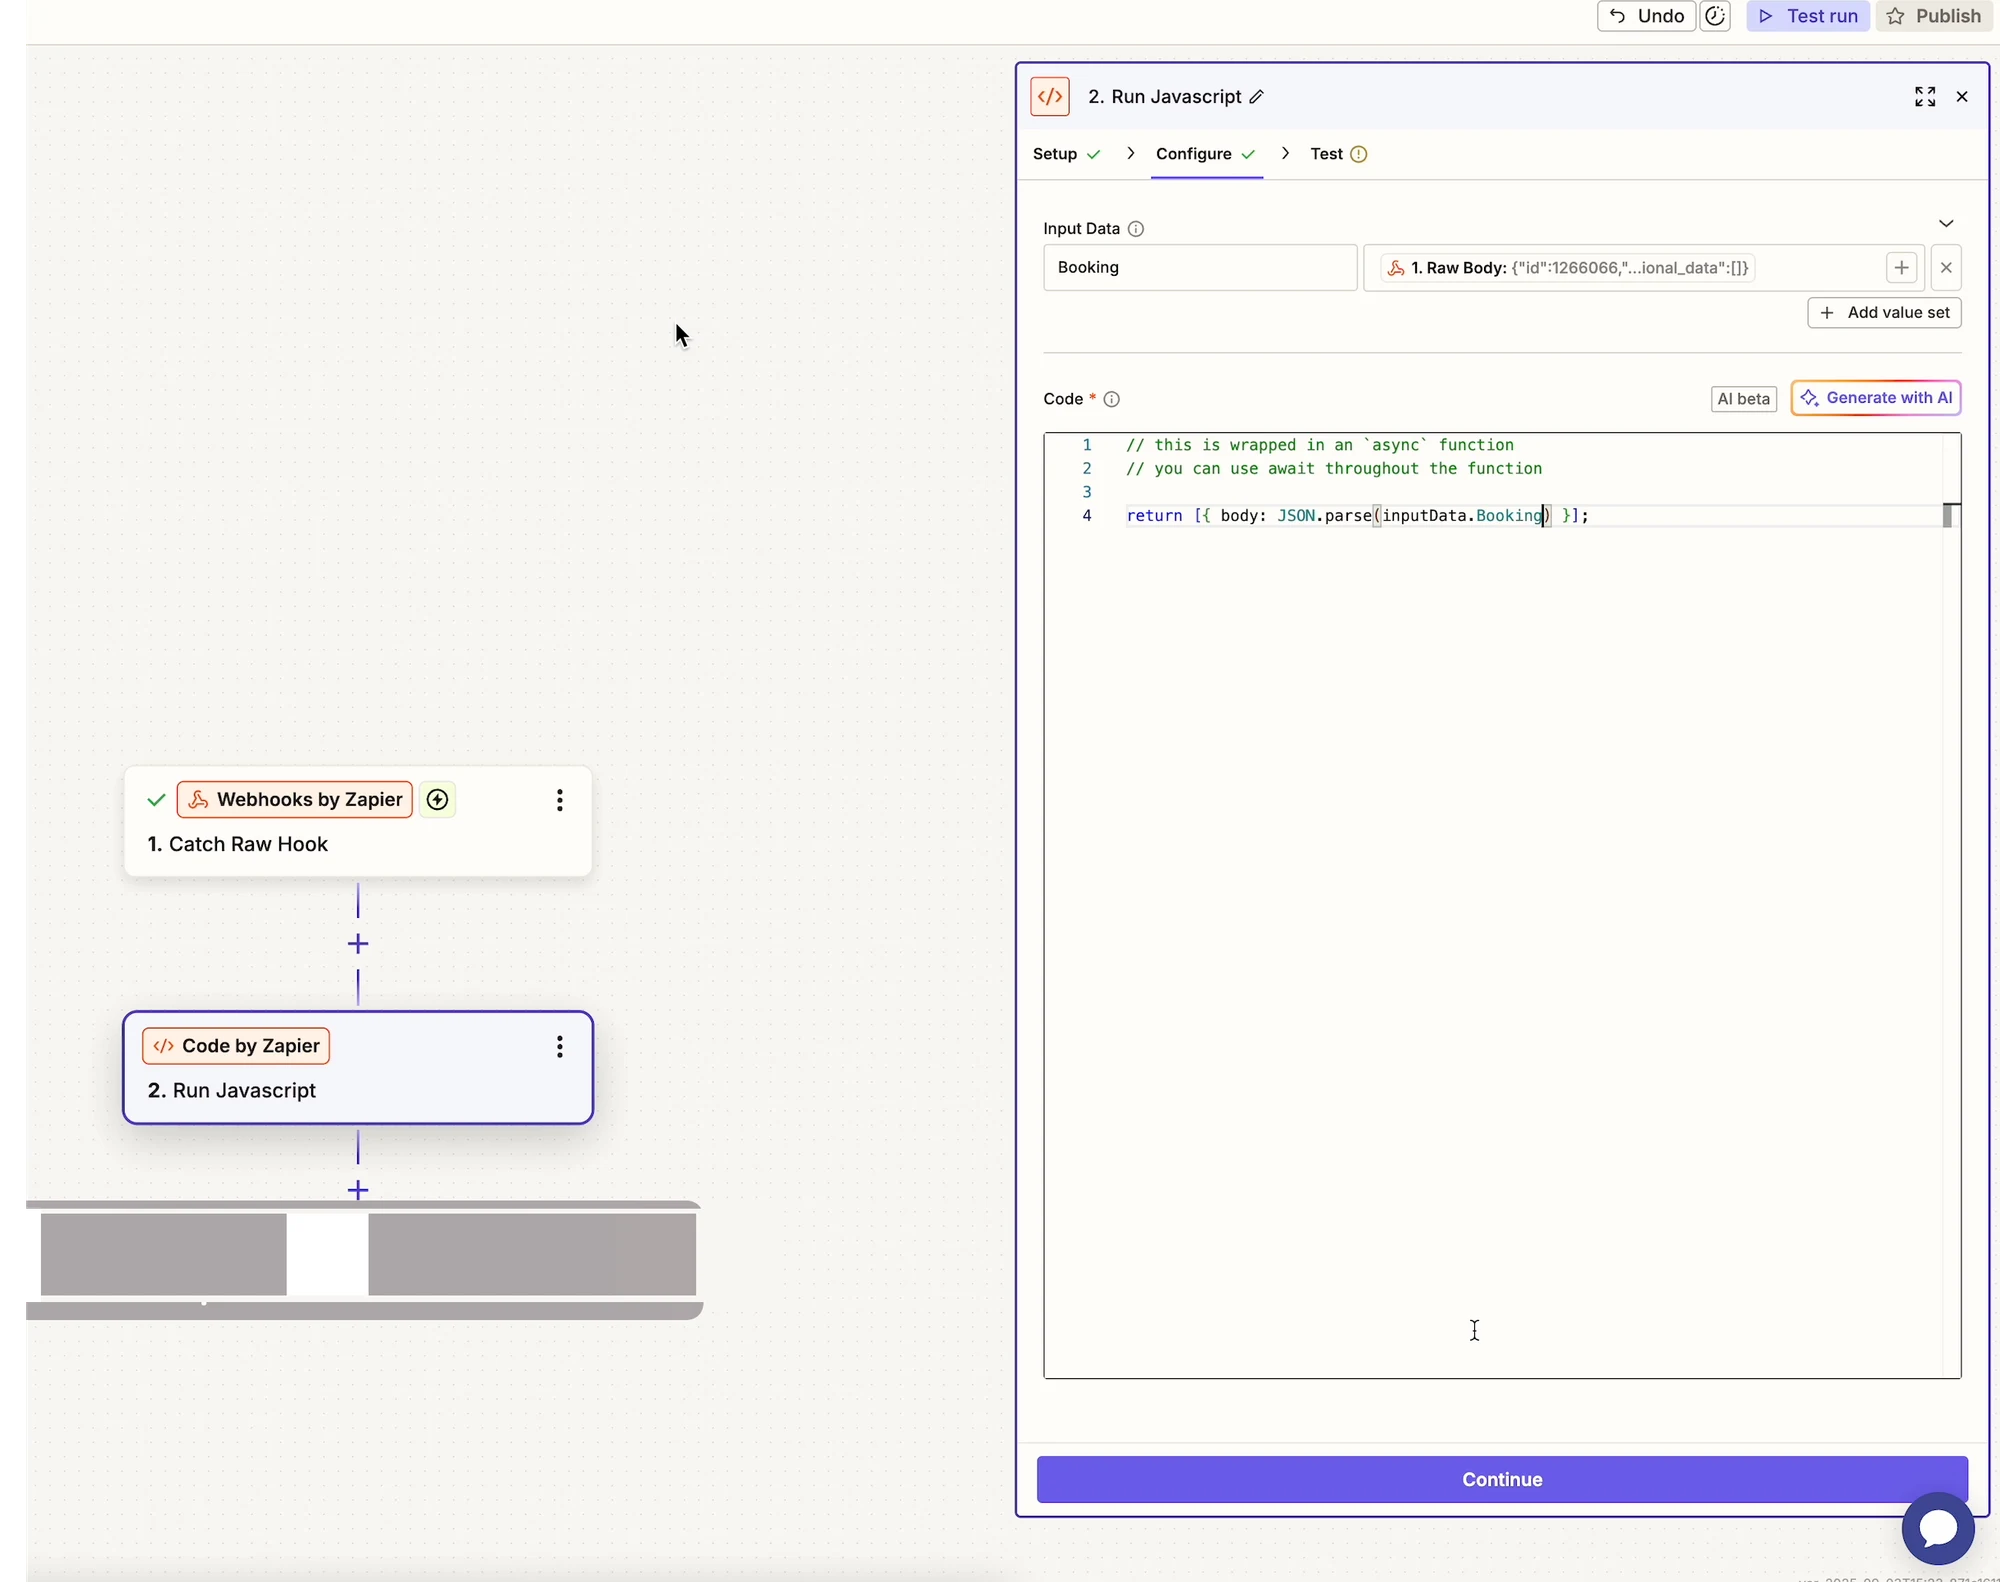
#### Step 6: Configure the code step
**Input Data**
* Name: `Booking`
* Value: `Raw Body` from the webhook step
**Code**
```js
return { body: JSON.parse(inputData.Booking) };
```
4. Click **Continue**
5. Run **Test**
After this step, booking fields (product, employee, time, customer, etc.) will be available separately.
***
### 🧪 Example: Sync bookings to Google Sheets
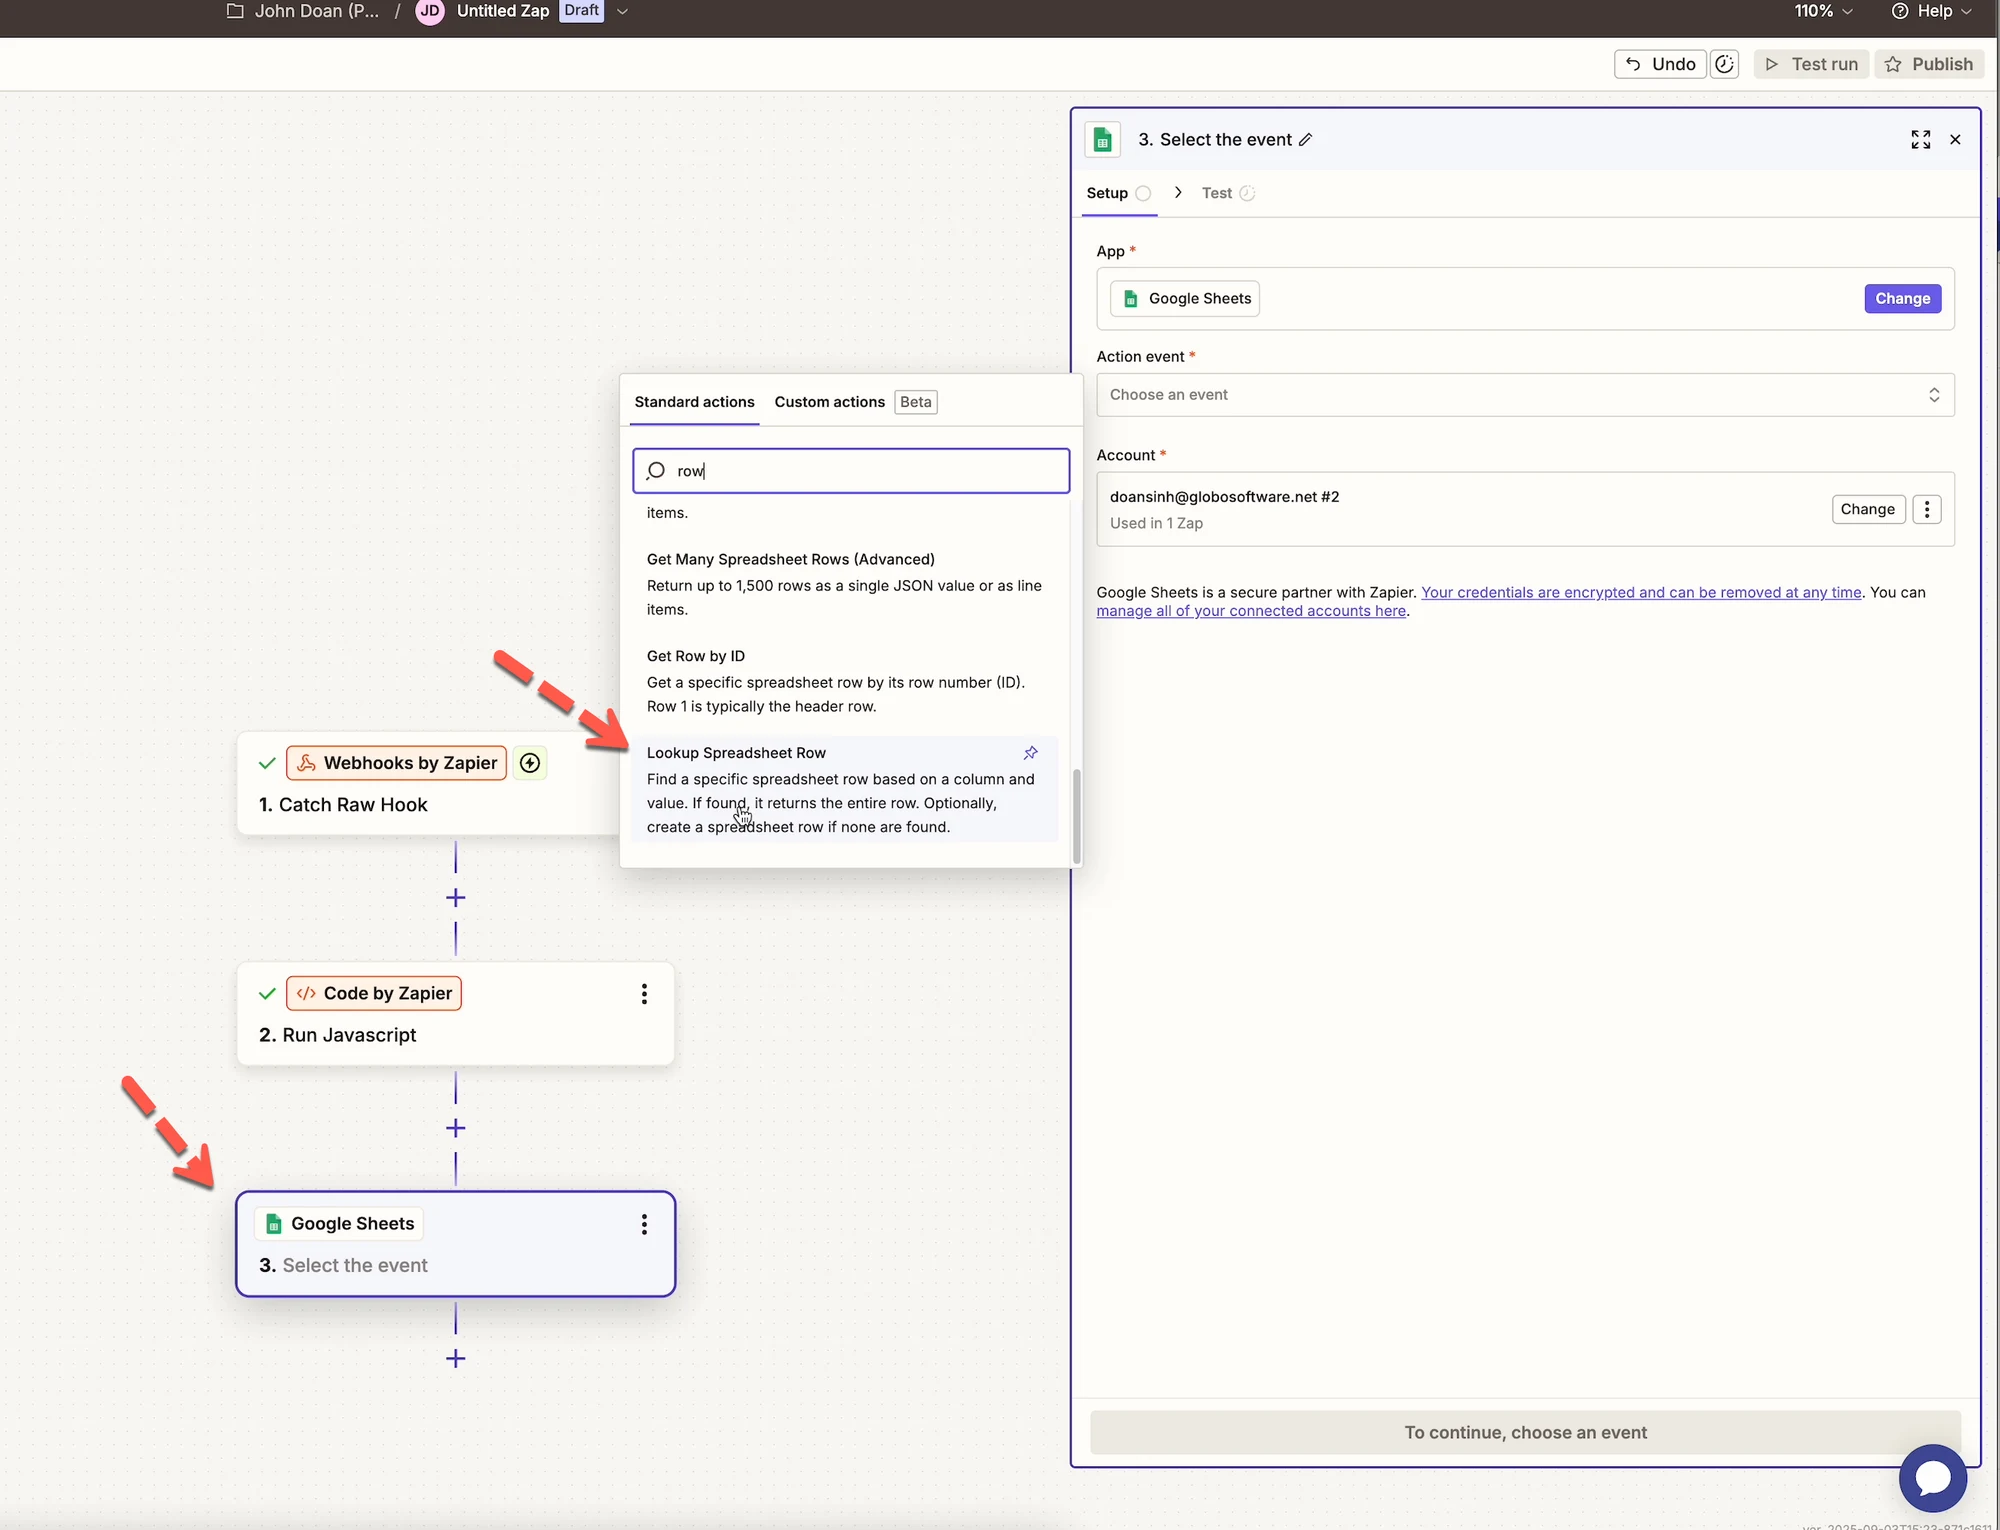
#### Step 7: Find or create a row
1. Add a new step
2. Choose **Google Sheets**
3. Select **Lookup Spreadsheet Row**
4. Connect your Google account
5. Choose your spreadsheet and worksheet
***
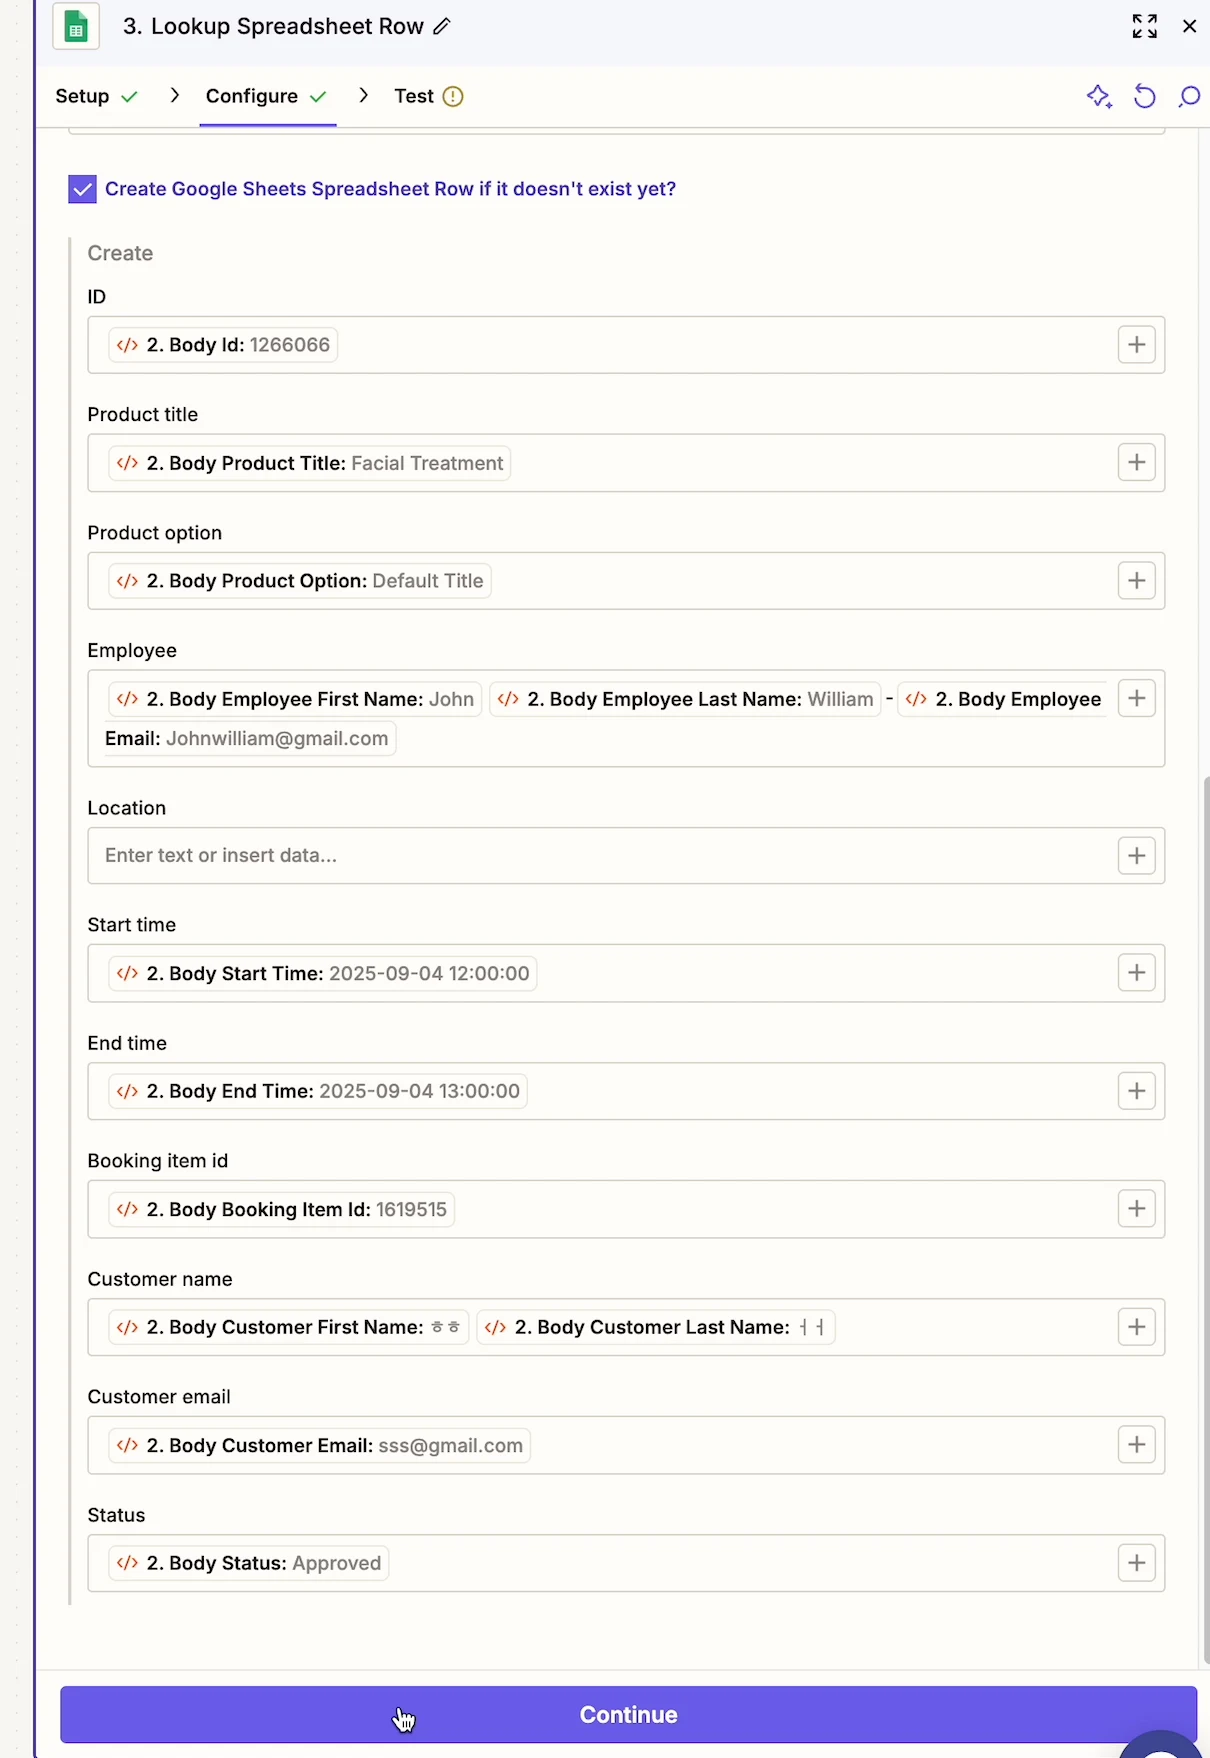
#### Step 8: Update the spreadsheet row
1. Add another step
2. Choose **Google Sheets**
3. Select **Update Spreadsheet Row**
4. Map booking fields:
* Product title
* Employee name
* Start time
* End time
* Customer info
***
### 🚀 Publish your Zap
1. Review all steps
2. Click **Publish**
3. Your automation is now live 🎉
Bookings from Tipo will automatically trigger your workflow.
***
### 🔔 Supported booking events
Zapier receives data when a booking is:
* Created
* Updated
* Approved
* Canceled
* Rescheduled
***
### 💡 Tips & best practices
* Start with one simple Zap, then expand
* Use **Google Sheets** to test data first
* Add filters in Zapier to control when actions run
* Keep webhook URLs private
***
### ❓ Need help?
If your Zap doesn’t trigger or data looks incorrect:
* Re-test the webhook
* Confirm Zapier is enabled in Tipo
* Contact Tipo Support with your Zap details
***
**🙋 Still need support?**
If you still need help, please feel free to contact us at . We’ll be happy to assist you further.