# Paid Service (Pay to book)
Use **Pay to book** when you want customers to confirm their appointment only after they pay.\
The app connects your booking flow with Shopify checkout so you get confirmed, paid bookings.
### 💡 When to use “Pay to book”
Perfect for services where payment is required or recommended:
* **Salon & spa appointments**
* **Classes & workshops** (yoga, dance, courses)
* **Consultations & sessions** (therapy, coaching, beauty)
* **Events with limited seats** where no-shows are costly
* **Tours, rentals, or experiences** requiring upfront payment or deposit
If you don’t want to charge online, use **Free booking (no payment)** instead.
***
### ⚙️ How to set up a Paid service (Pay to book)
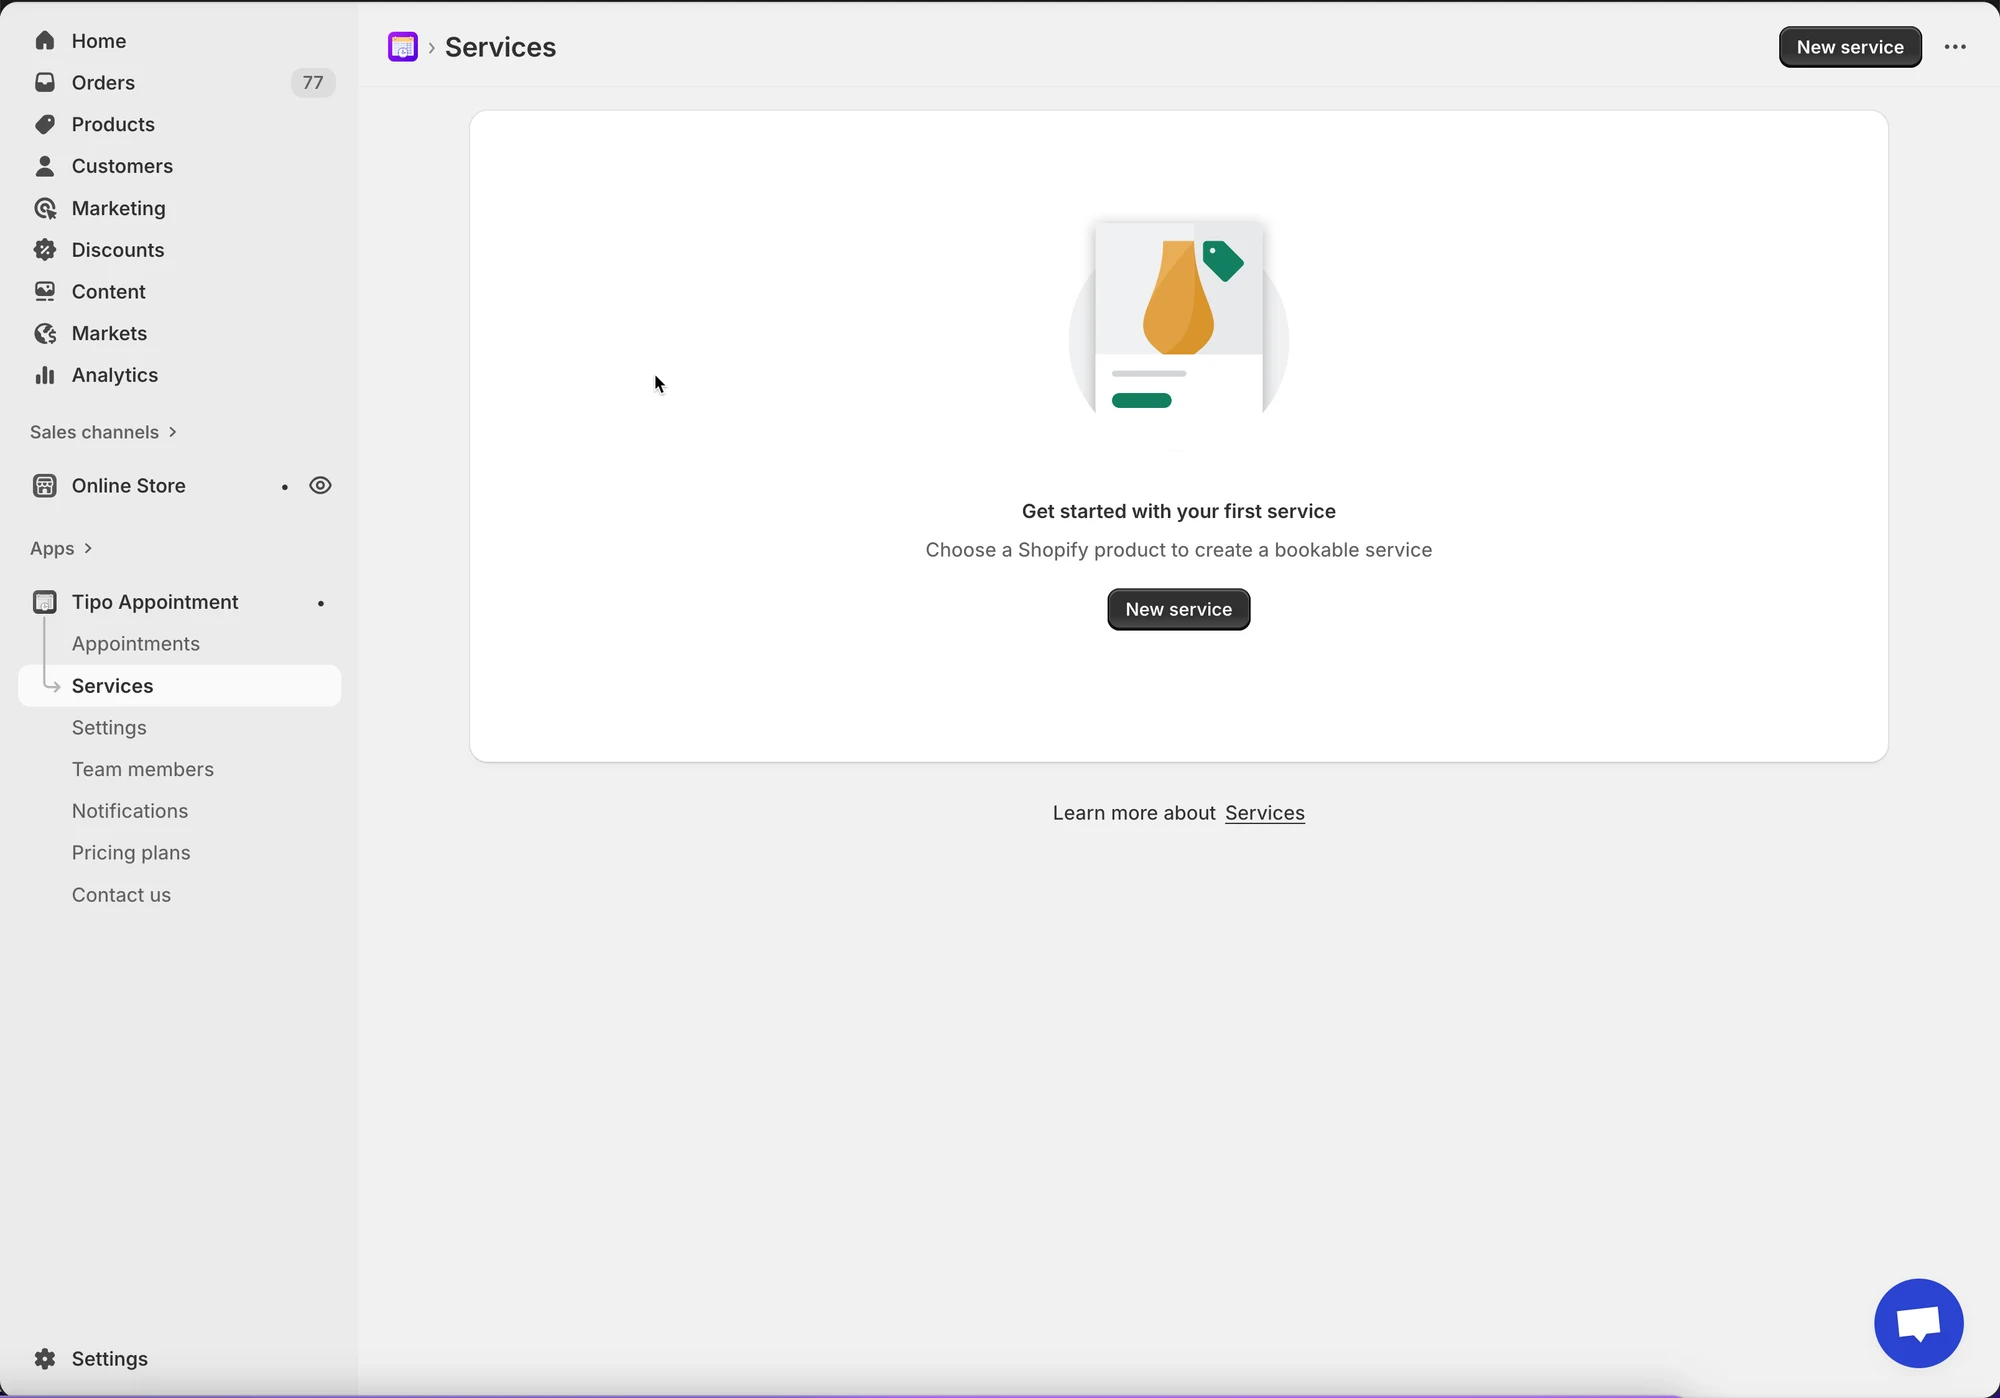
#### Step 1: Open Services
* Open the app > click **Services**
* Click **New service** button
***
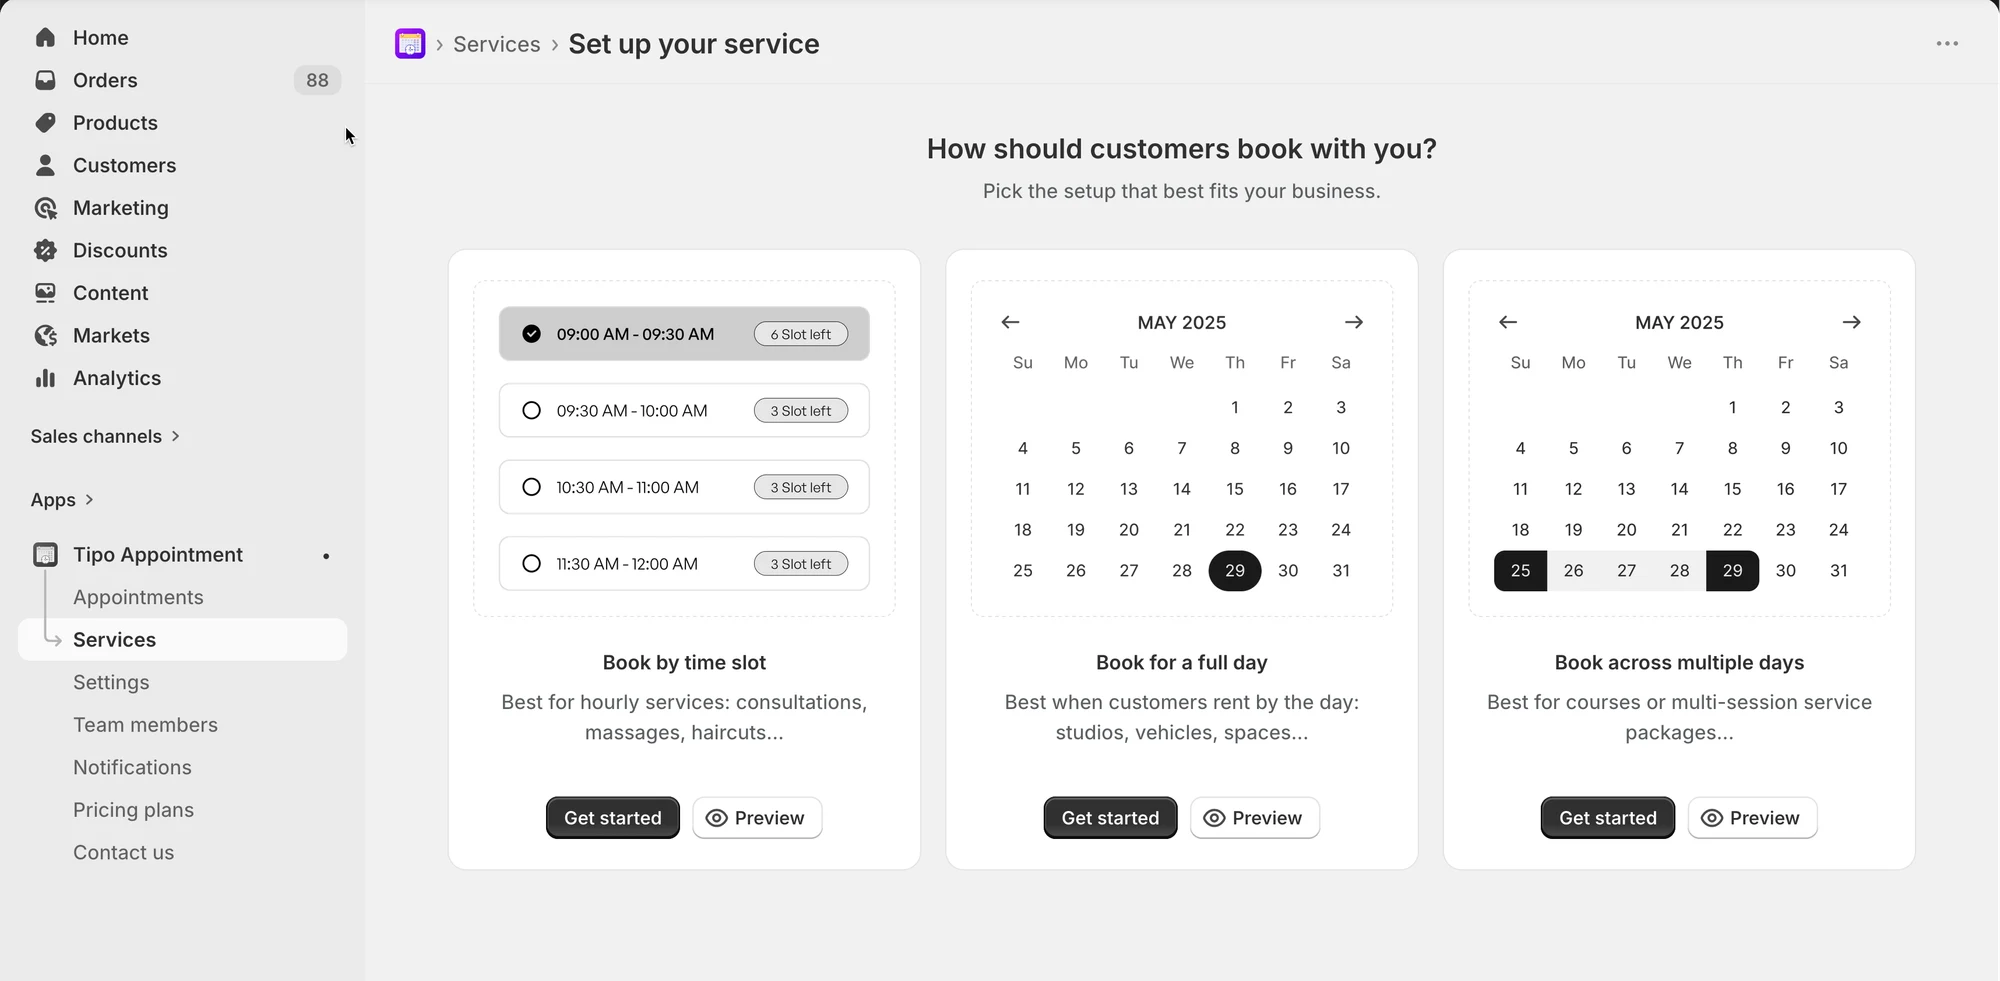
#### Steps 2: Choose a service type
**A. Book by Time Slot**
Best for services that happen within a day and have a set duration.
* Examples: \* Barber Shop: 30-minute haircut slots.
* Customer View: A list of specific times (e.g., 10:00 AM, 10:30 AM) showing available slots.
**B. Book for a Full Day**
Used for services where the customer occupies the entire date from start to finish.
* Examples: \* Photography Studio: Renting the space for a full day shoot.
* Car Rental: Hiring a vehicle for a 24-hour period.
* Customer View: A calendar where they select one specific day.
**C. Book Across Multiple Days**
Best for services that span several consecutive days.
* Examples: \* Summer Camp: A 5-day youth program.
* Customer View: A date-range picker where they select a Start Date and End Date.
***
#### Step 3: Create the service product in Shopify
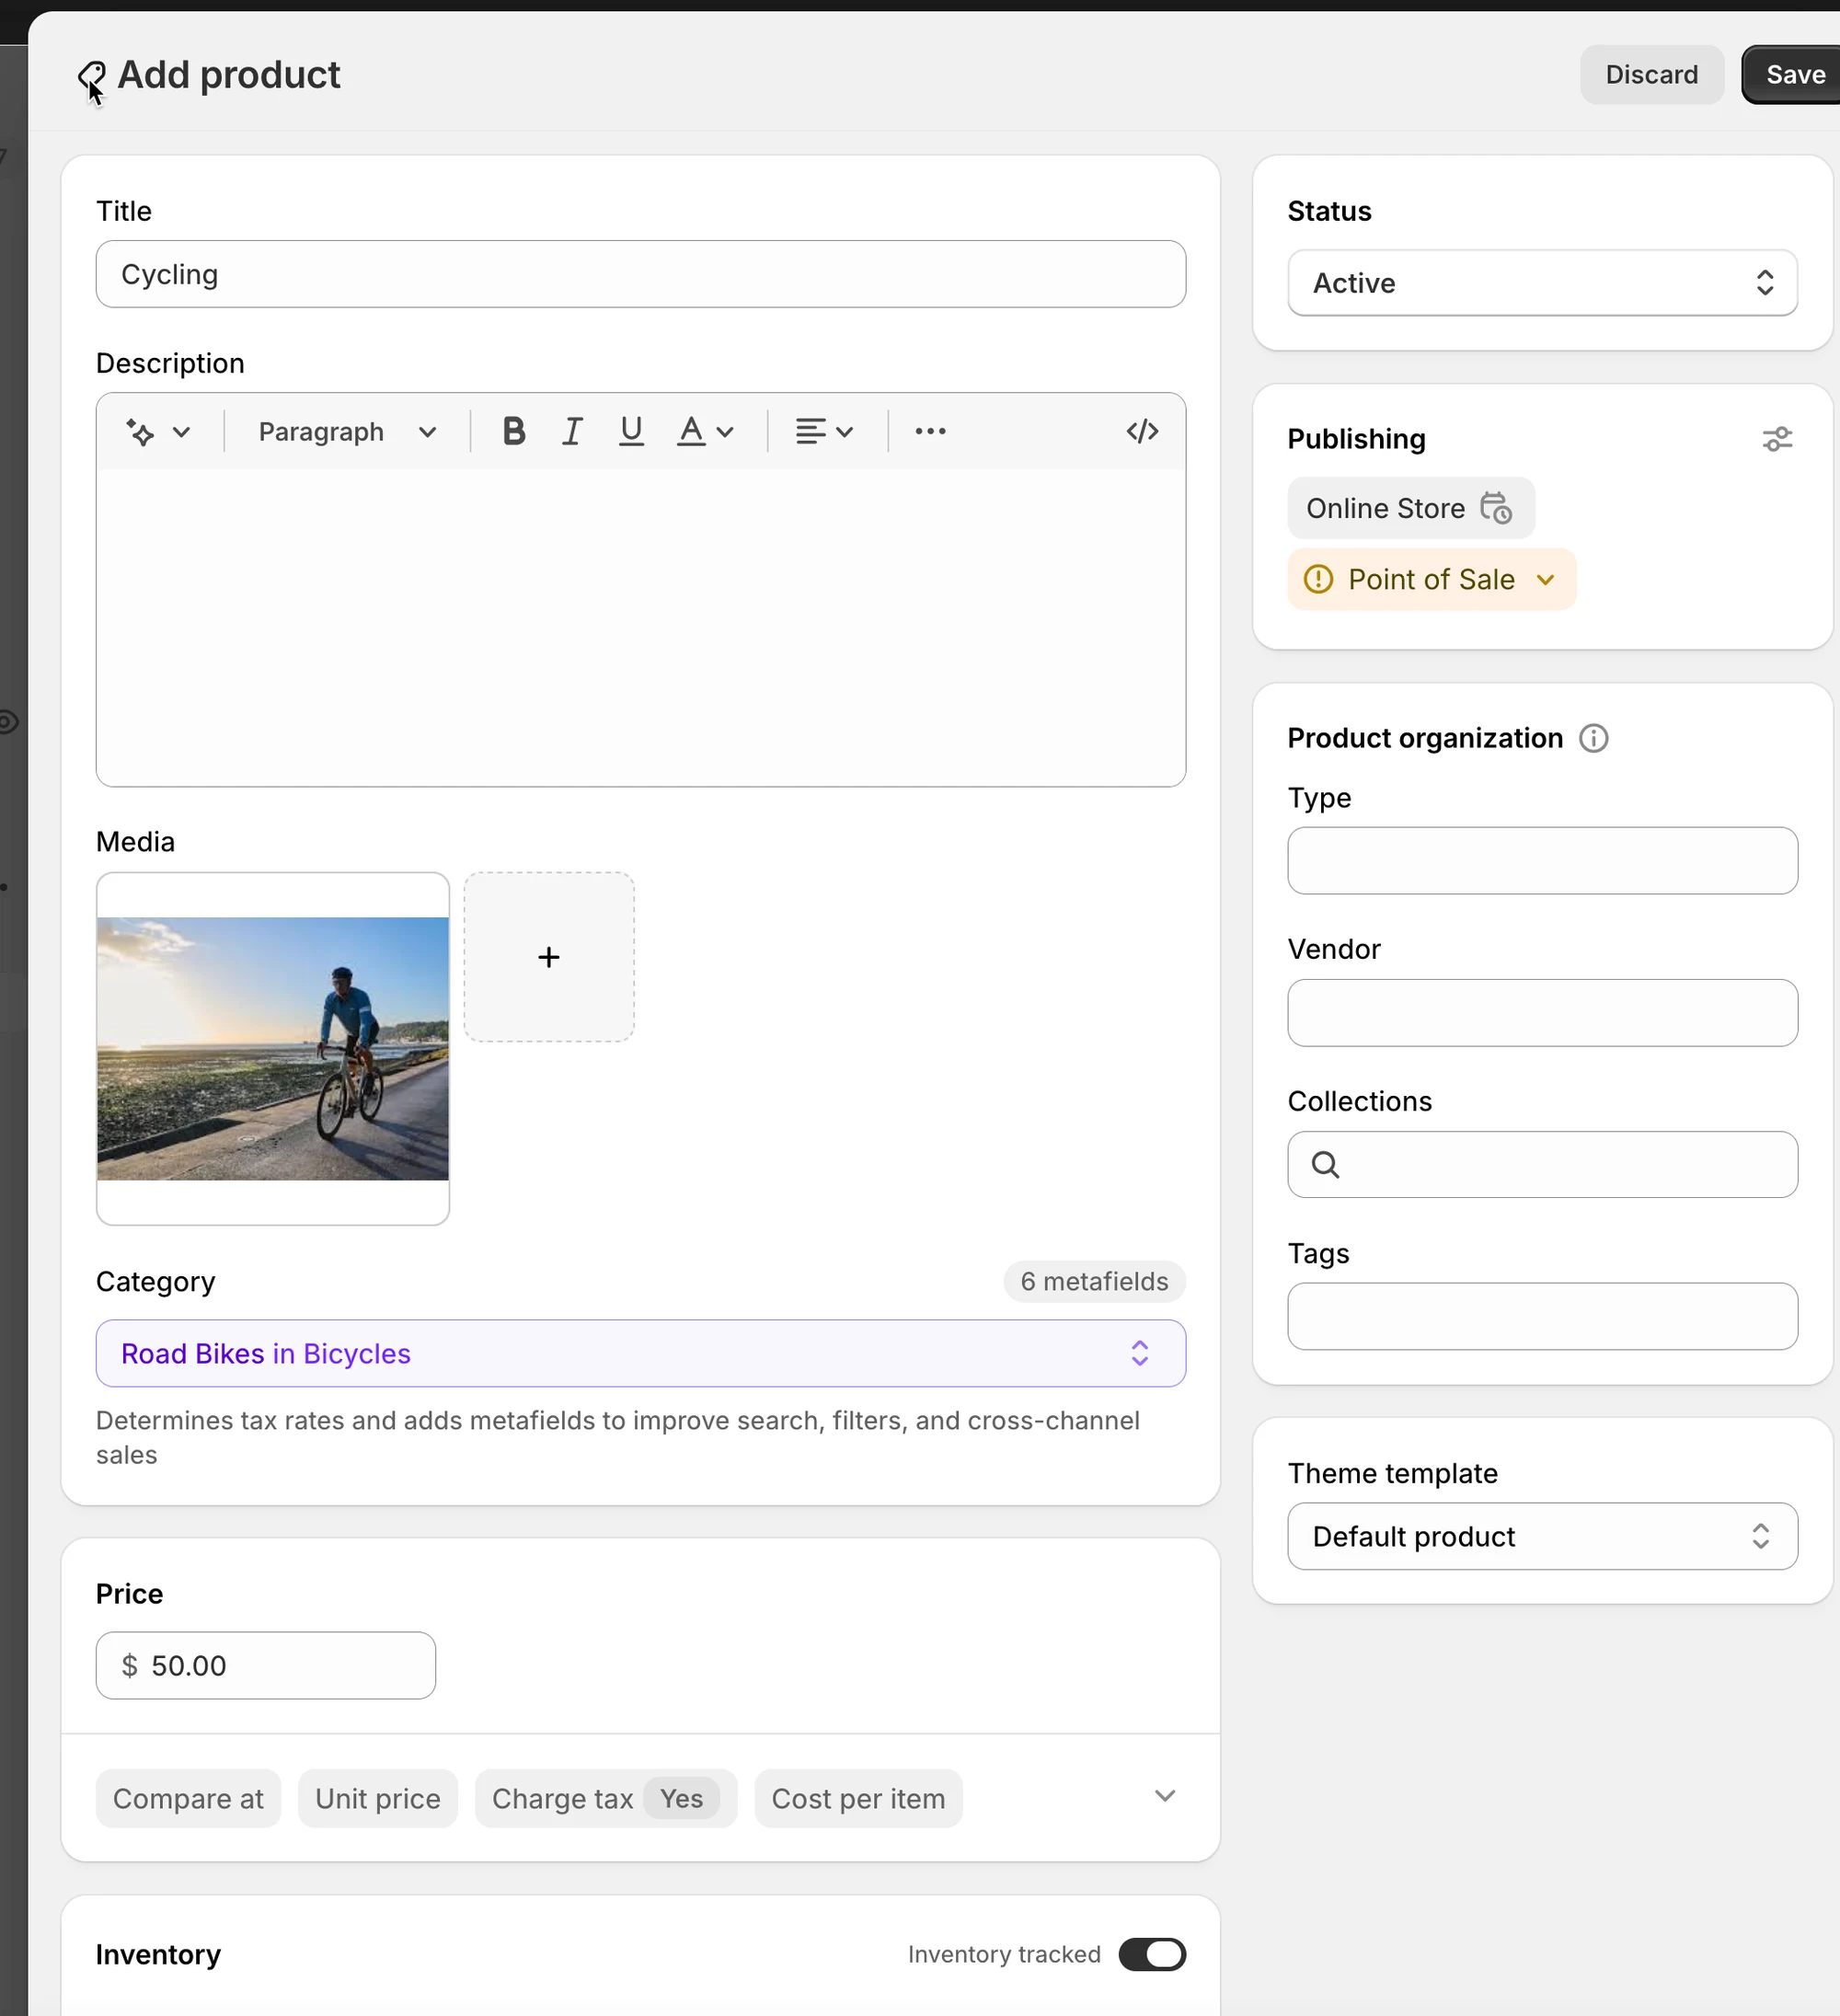
The app creates/uses a Shopify Product for your service. In the **Add product** screen:
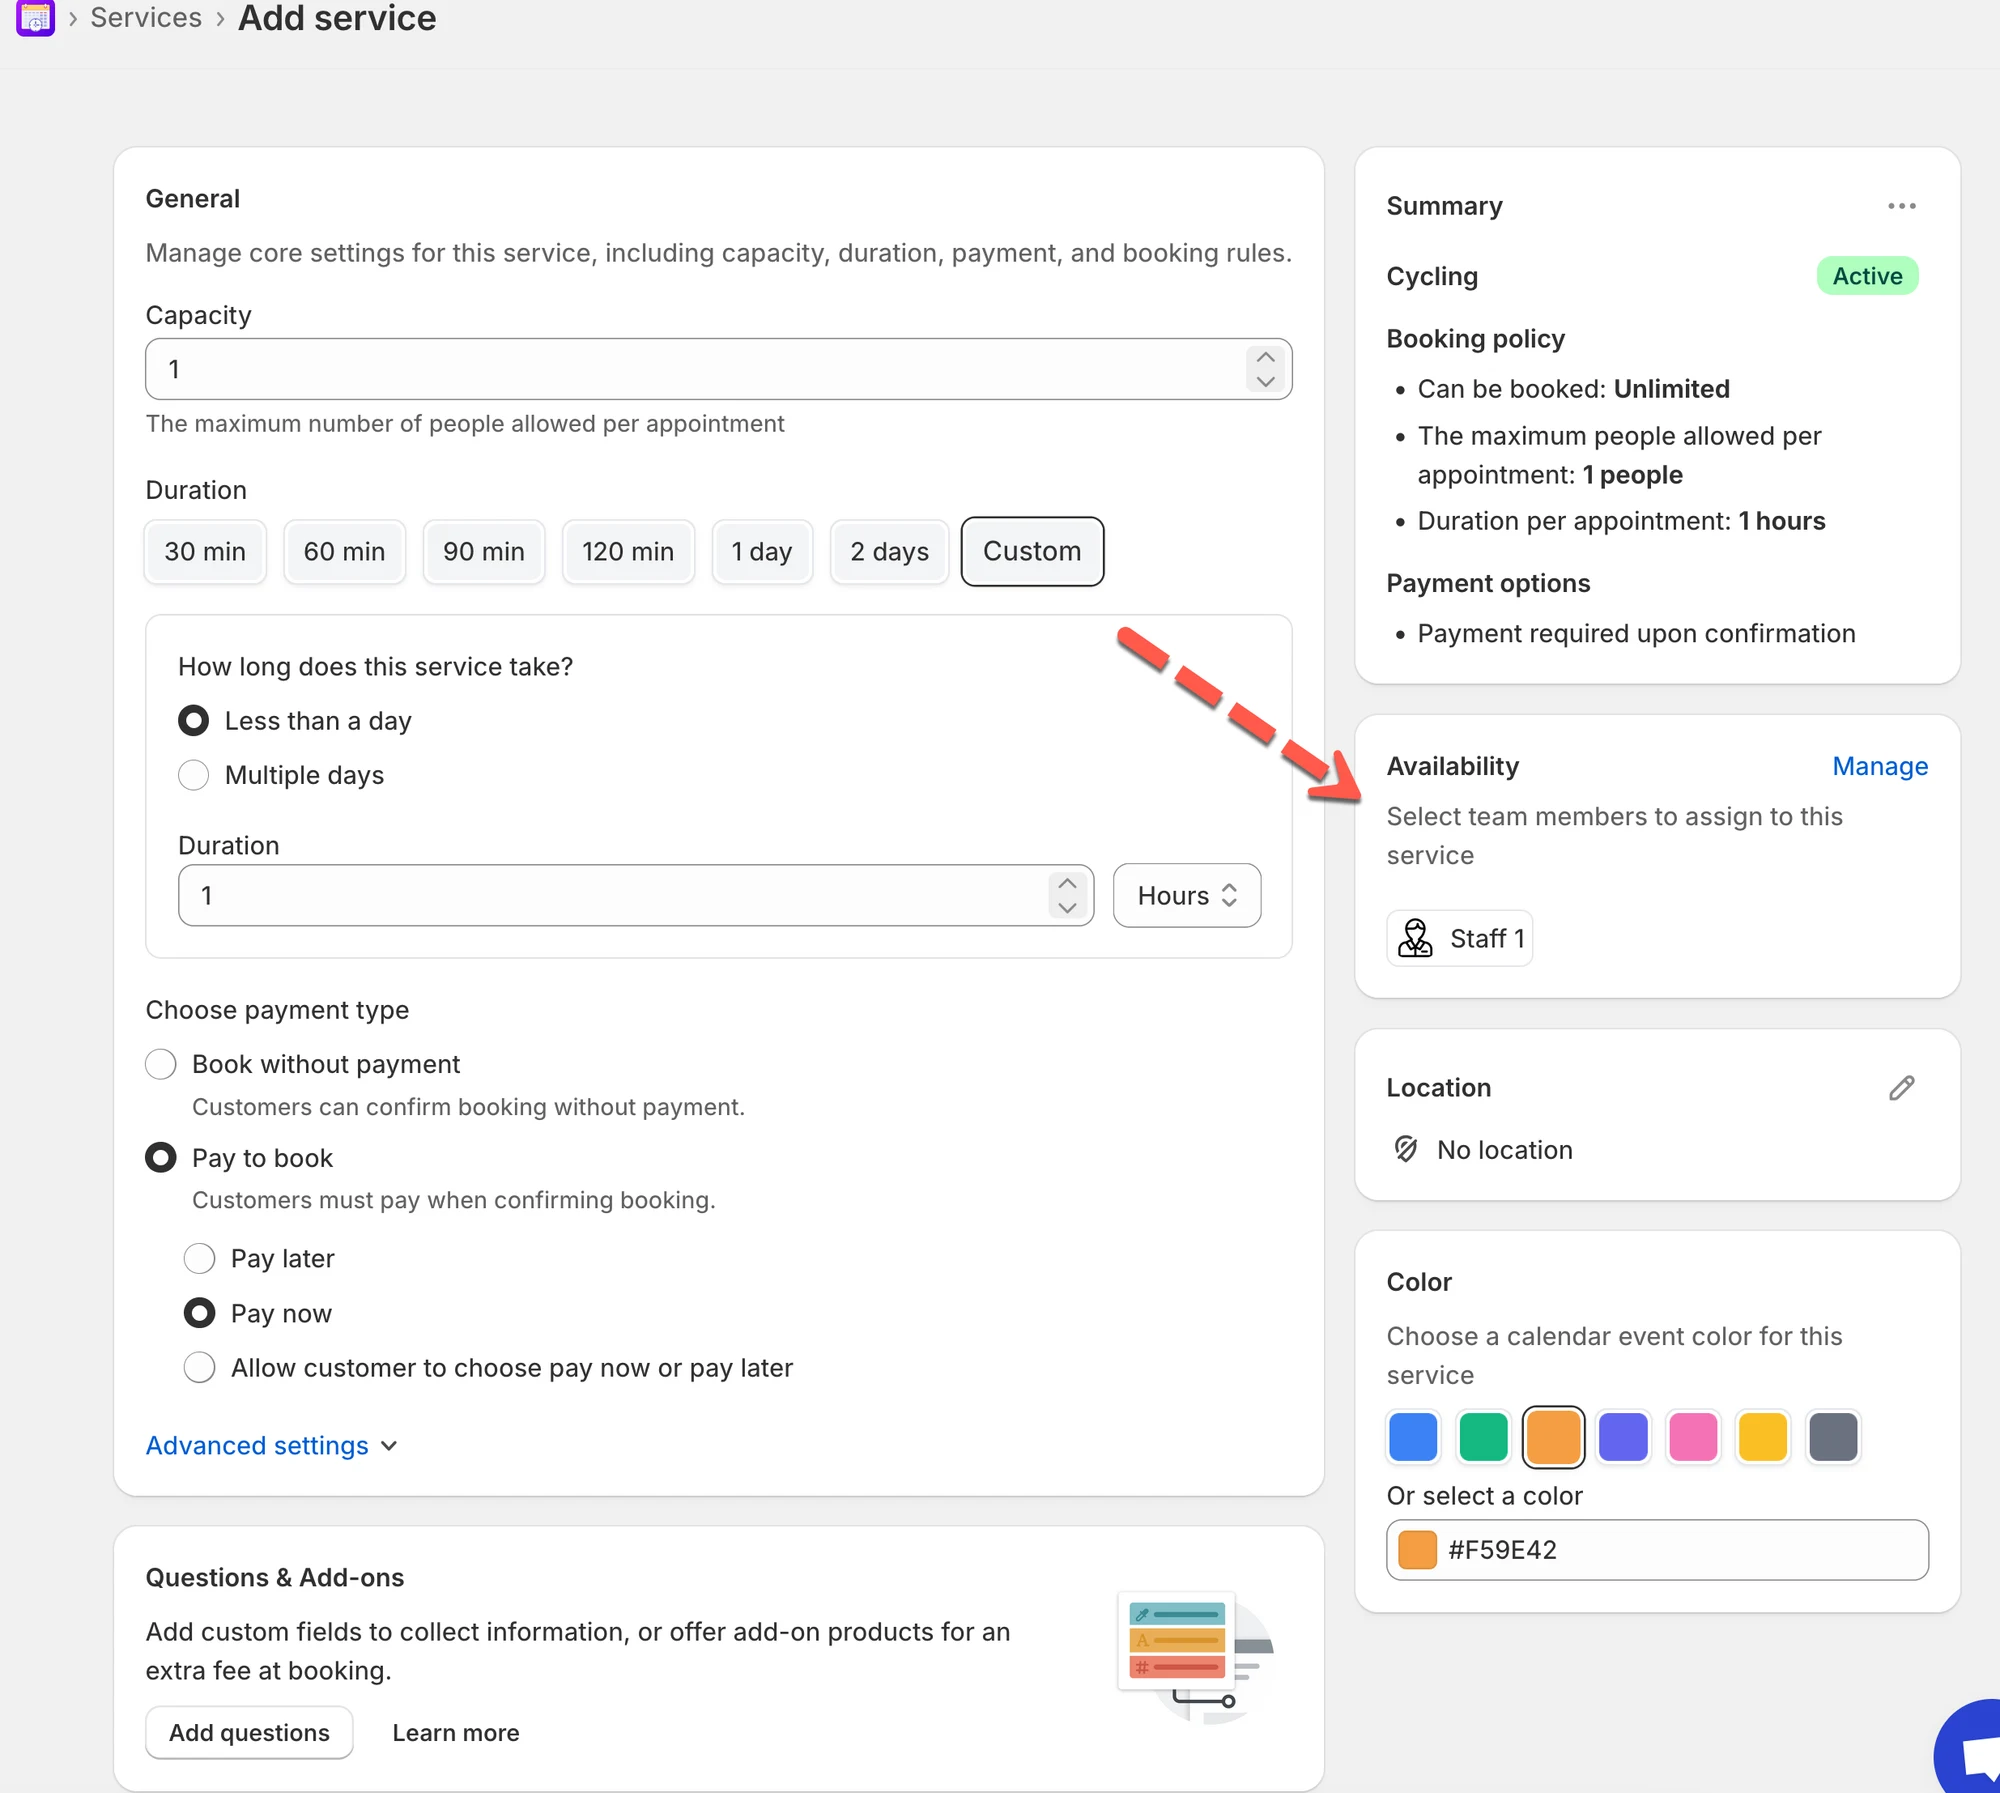
* **Title**: e.g., Cycling
* **Status**: Active
* **Category**: choose the closest match (optional)
* **Price**: set your service price (for checkout services)
Click **Save**.
#### Step 4: Configure service settings
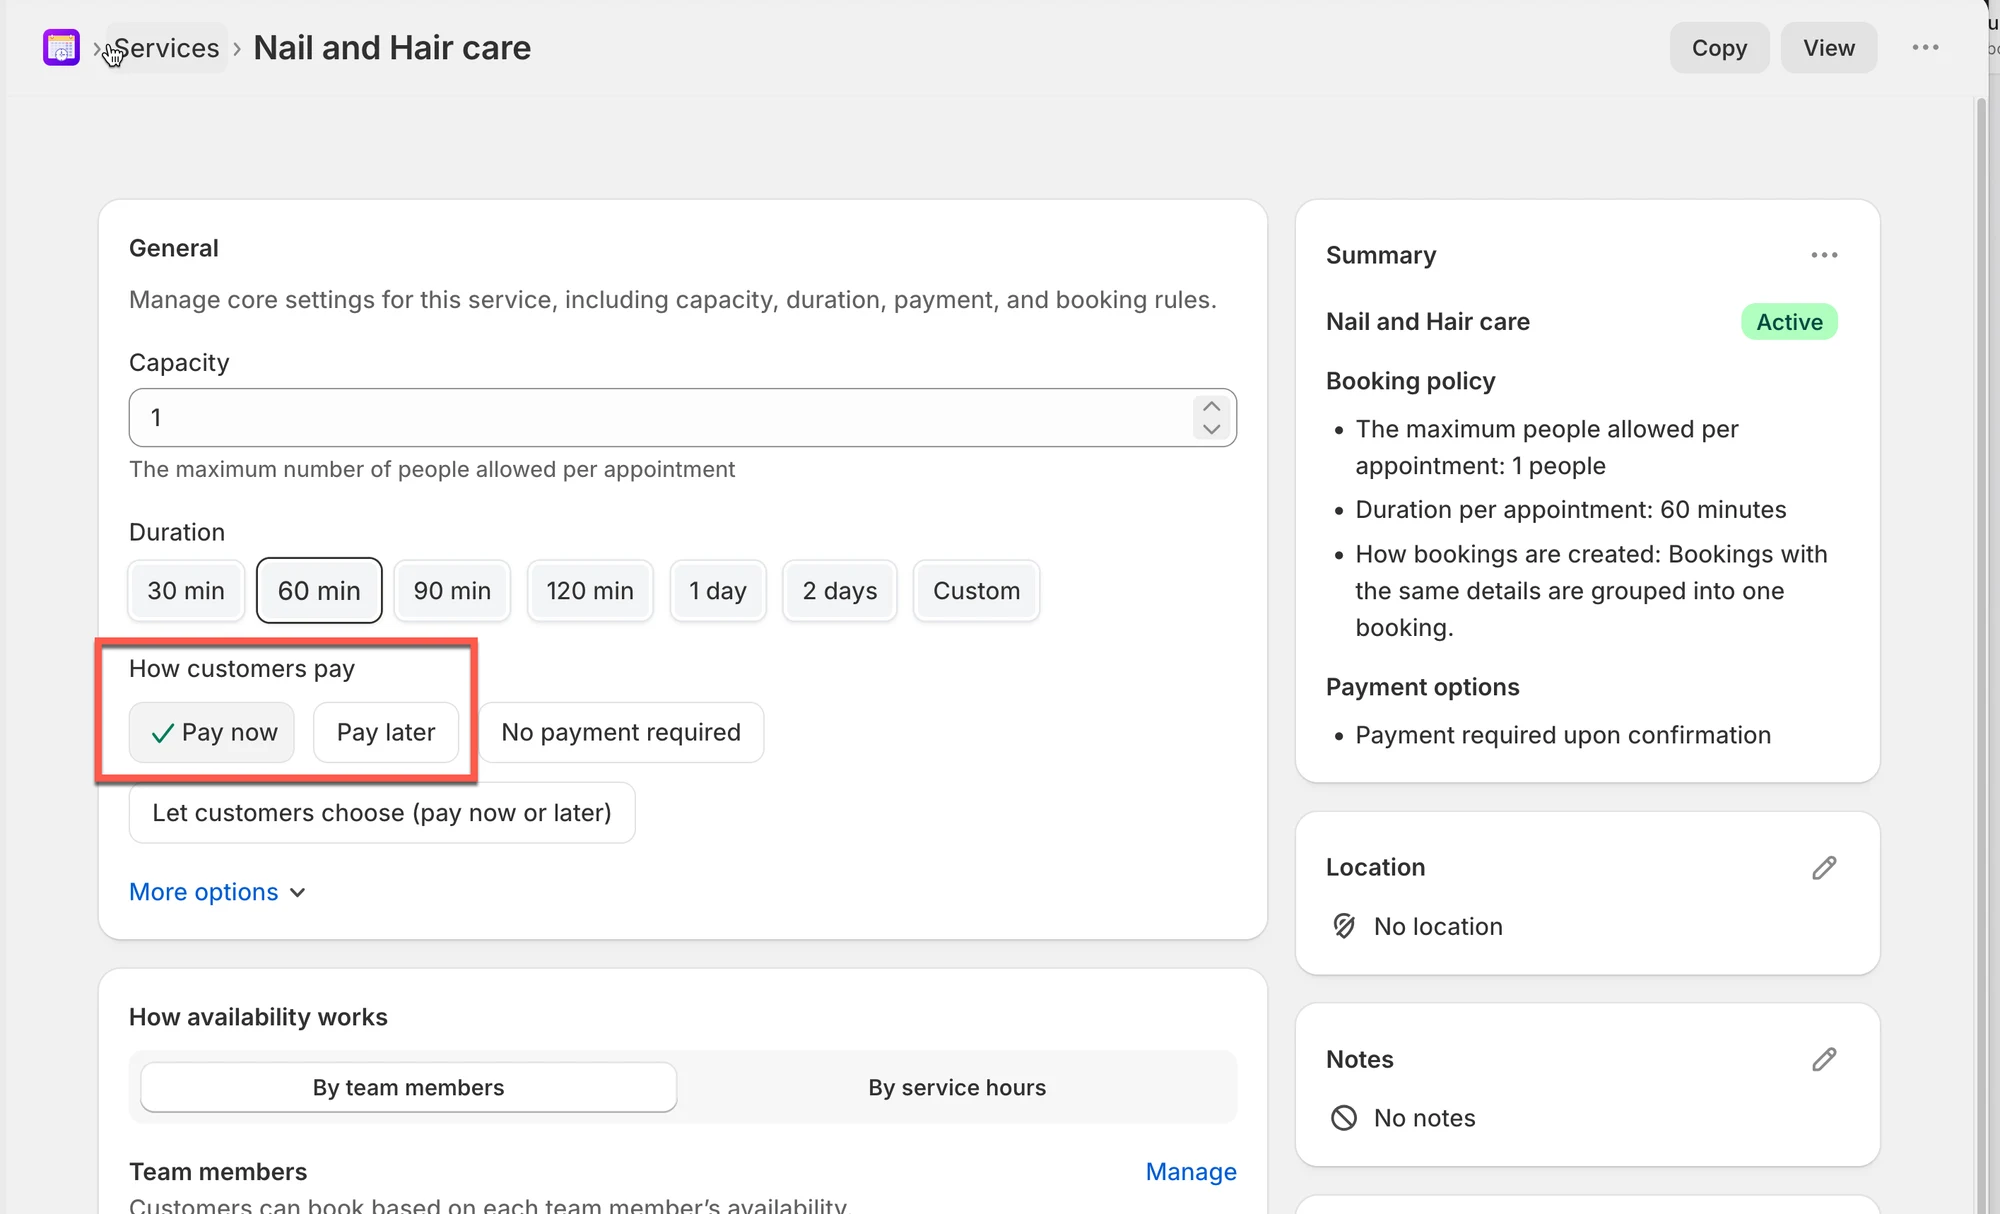
**👥 Capacity**
Set how many people can book the same time slot.
* Example: `1` for 1-on-1 appointments
* Example: `5` for group sessions
**⏱️ Duration**
Choose how long each booking takes:
* Quick buttons (30, 60, 90, 120 min…)
* Or **Custom**
* If your service supports it, you can choose:
* **Less than a day**
* **Multiple days**
**Example**: Haircut = `60 min`
***
#### Step 5: Choose payment type
Select one of the option below:
You’ll see these options under it:
* **Pay now** – customer must pay immediately at checkout
* **Pay later** – a draft order & invoice are created; customer pays later
* **Allow customer to choose pay now or pay later** – customer picks at booking time
***
#### Step 6: Set Availability
In the **Availability** section, click **Manage**
* Assign team members to this service (required). If you have not had a team member, create a new one.
* Their schedules determine what time slots are available
[Learn more](/tipo-appointment-booking/availability-team-members/set-availability-for-services#how-to-set-availability)
***
#### Step 7: Customize more settings (Optional)
* In **Location** field, enter the location of the service
* **Color**: helps identify bookings in the calendar
* **Questions & Add-ons**: collect info (name, preferences) or sell add-ons
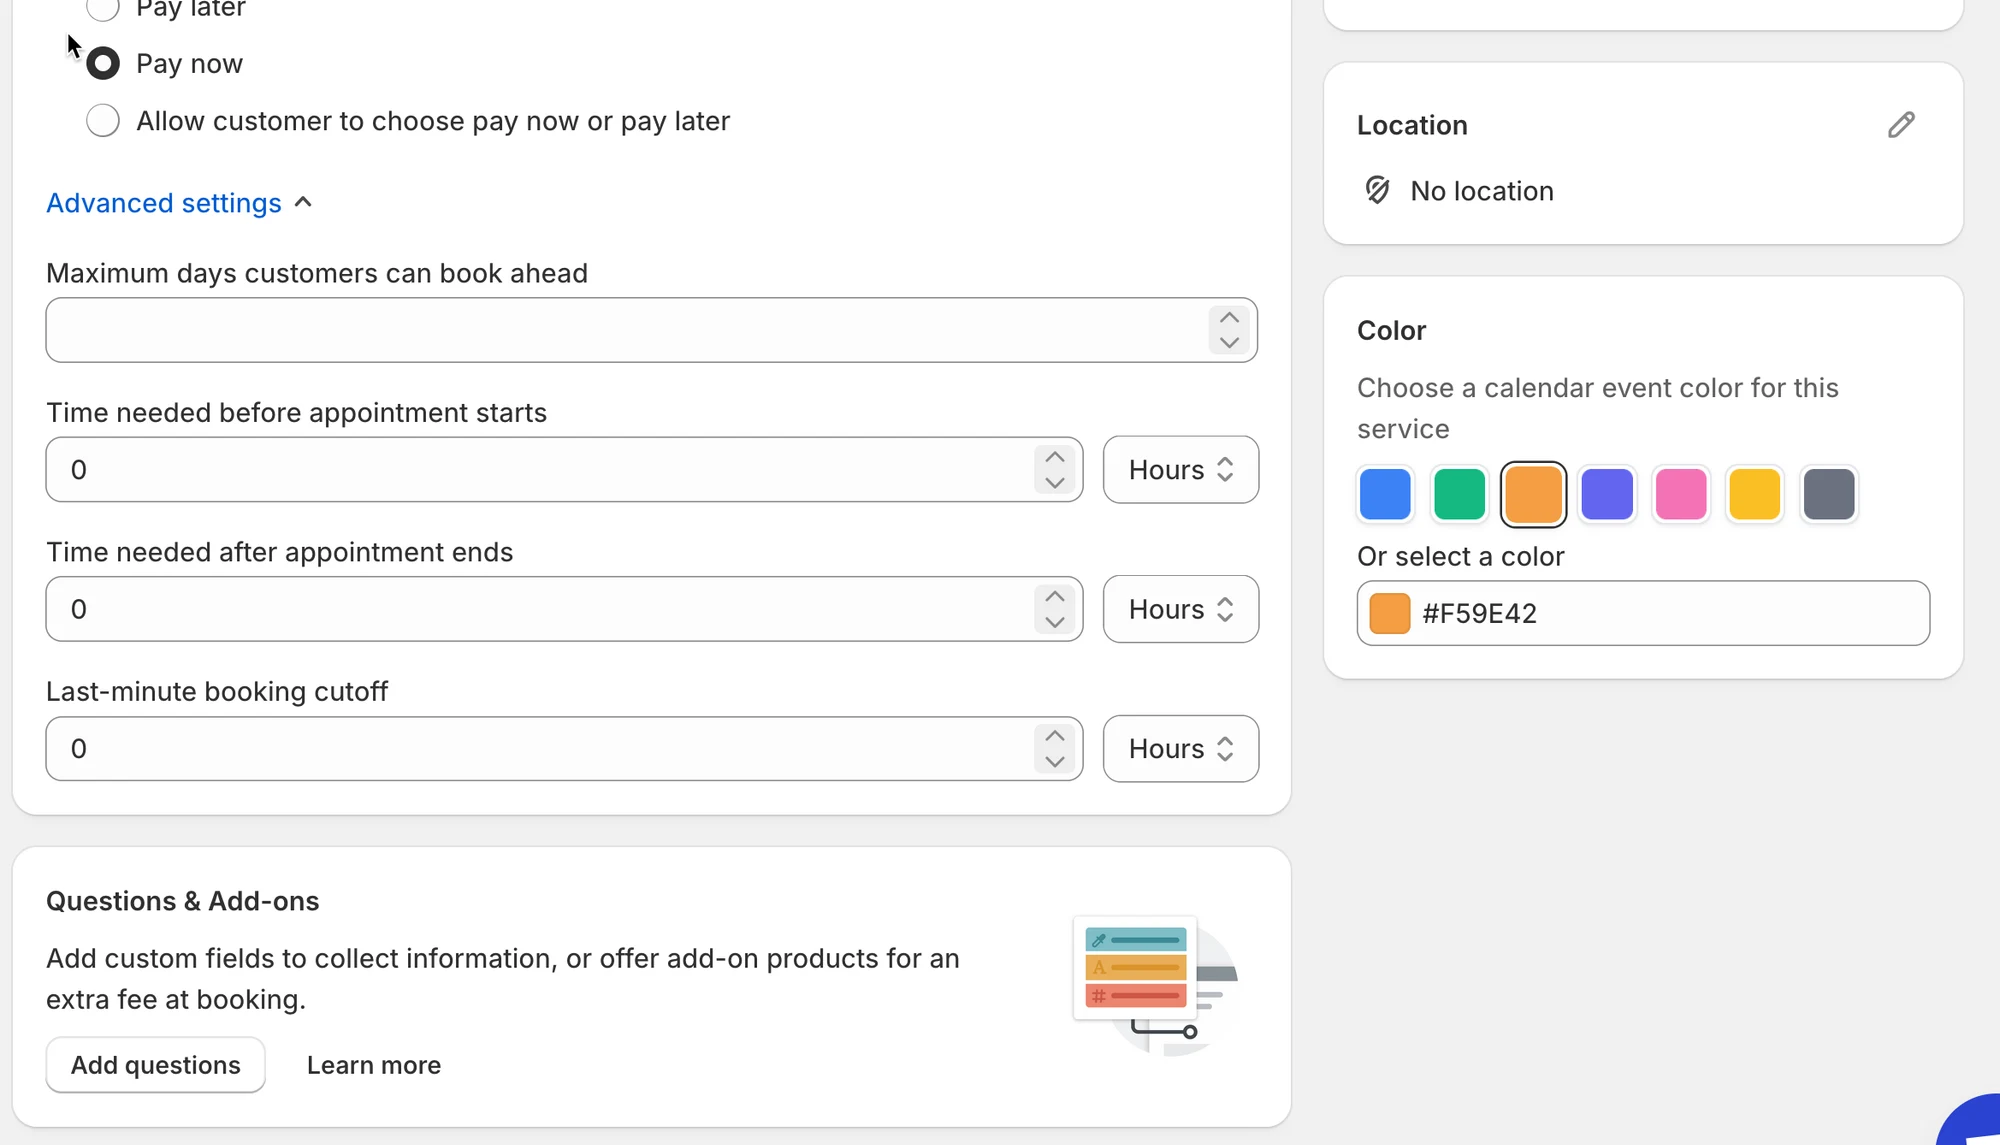
* **Advanced settings**: booking rules, lead time, buffer time, etc. (if available)
#### Step 8: Save the service.
Click **Save** at the top right of the service page.\
Your service is now a paid service (Pay to book).
***
#### ✅ How your service works on your online store
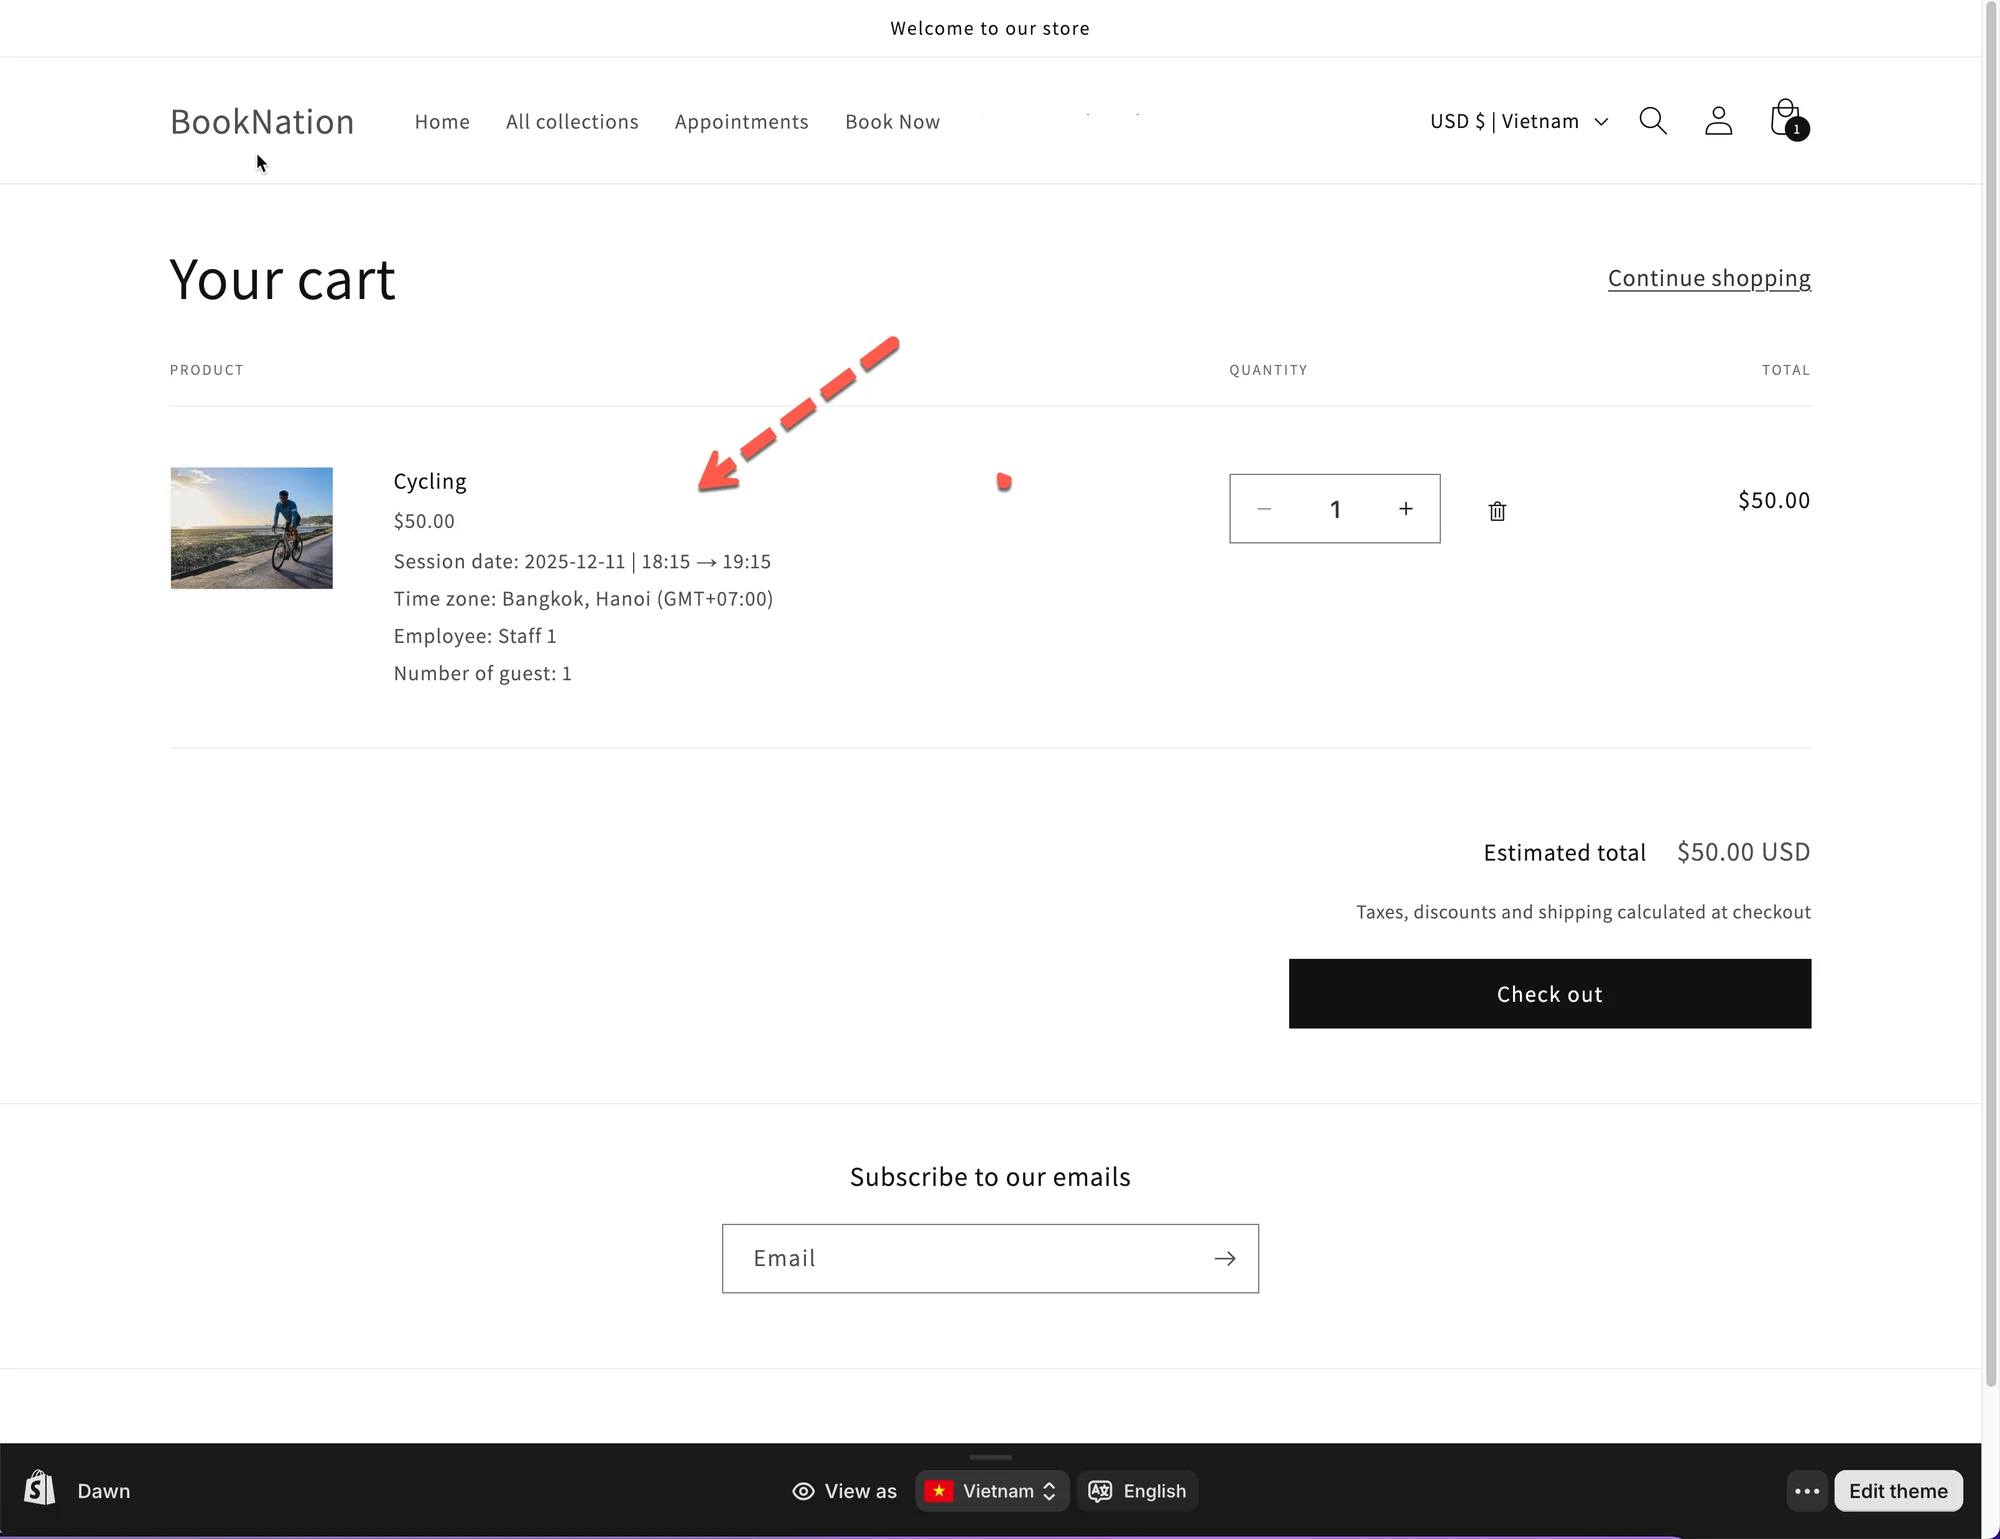
* Customer opens the service product page.
* Clicks the **Book now / Schedule** button.
* Selects a date, time, and fills in required details.
* Payment step:
* If **Pay now:** they are redirected to **Shopify checkout** to pay
* If **Pay later:** booking is confirmed, and they receive an invoice
* If **Customer chooses: t**hey pick **Pay now** or **Pay later** in the booking popup
Once complete:
* The appointment appears in the **Appointments** list in the Tipo app.
* A corresponding **order or draft order** appears in Shopify (depending on the payment option).
Video
***
### 📋 How it looks in admin
After a customer books a paid service:
* In **Tipo app > Appointments**, you’ll see the booking with its status and payment note.
* In **Shopify Orders**
* **Pay now** → a regular **paid order** is created.
* **Pay later** → a **draft order / invoice** is created, awaiting payment.
You can still:
* Reschedule or cancel appointments
* Manually mark payments as received (for Pay later)
* Communicate with the customer as usual
***
### ✅ Quick comparison: Free service vs Paid service
| Type | Payment step | Booking status | Best for |
| --------------------------- | --------------------------------------------- | ---------------------------------- | ----------------------------------------------- |
| **No payment required** | No payment – booking only | Appointment created, no order | Free |
| **Pay to book – Pay now** | Checkout immediately after booking | Appointment + **paid** order | Online paid services, deposits, no-show control |
| **Pay to book – Pay later** | Invoice / draft order sent after booking | Appointment + draft order (unpaid) | Invoice workflows, offline payments |
| **Customer chooses** | Customer selects **Pay now** or **Pay later** | Depends on selected option | Flexible or mixed payment models |
***
### ❓ FAQ
#### **Q: Can I switch a service from free to paid later?**
Yes. Edit the service, change Choose payment type from Book without payment to Pay to book, set a price, and save.
#### **Q: What happens if a customer abandons checkout (Pay now)?**
The appointment is not confirmed until payment succeeds. You’ll see the status/order in Shopify if they complete payment.
***
**🙋 Still need support?**
If you still need help, please feel free to contact us at . We’ll be happy to assist you further.