# Assign Locations
Use locations to tell customers where the appointment happens: in-store, online, at a studio, etc. A clear location helps avoid confusion and makes your calendar easier to manage.
### 💡 What locations are used for
* Show customers where their booking will take place
* Allow you to run multiple branches or rooms (Salon A, Salon B, Studio 1…)
* Help staff know where they need to be
* Keep your calendar clear when you have online + in-person services
***
### 📍 Assign a location to a service
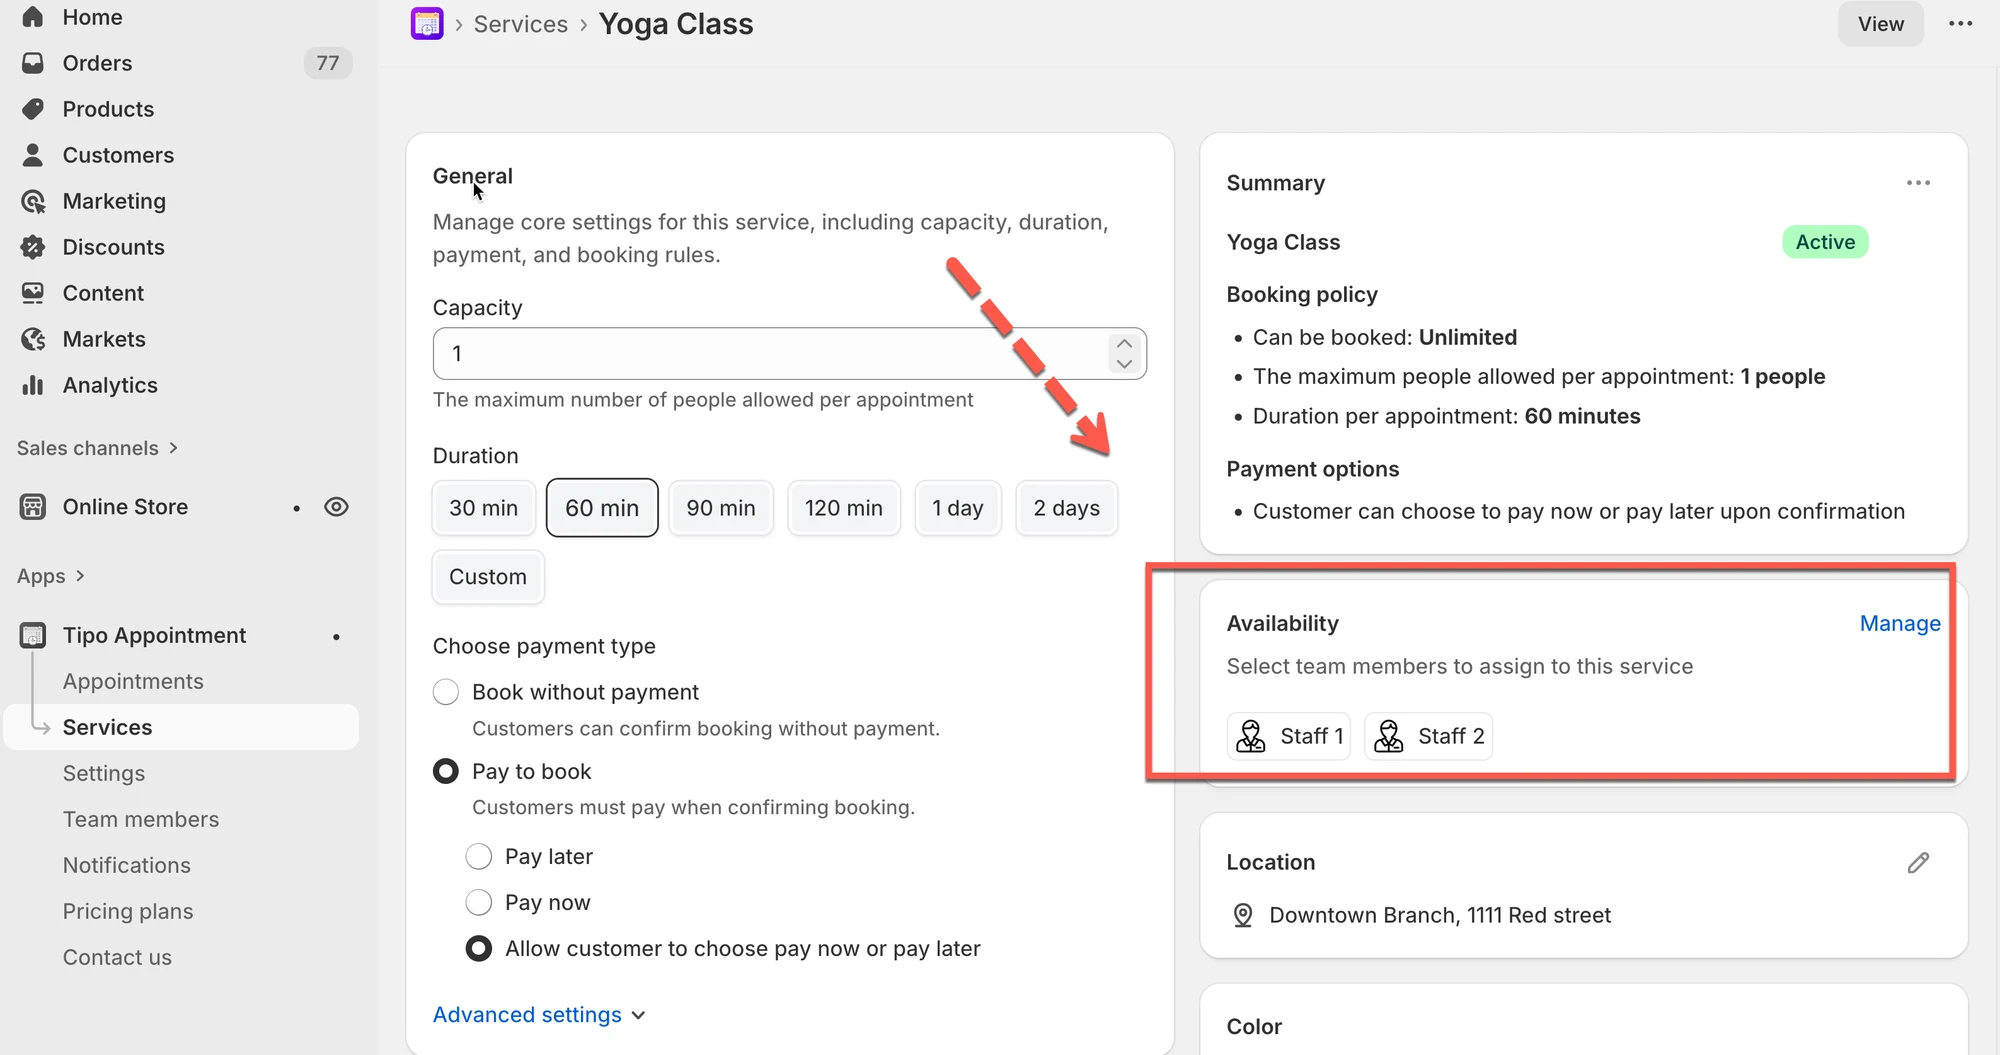
If your service takes places at one location, you can add the location directly to the service.
#### How to set
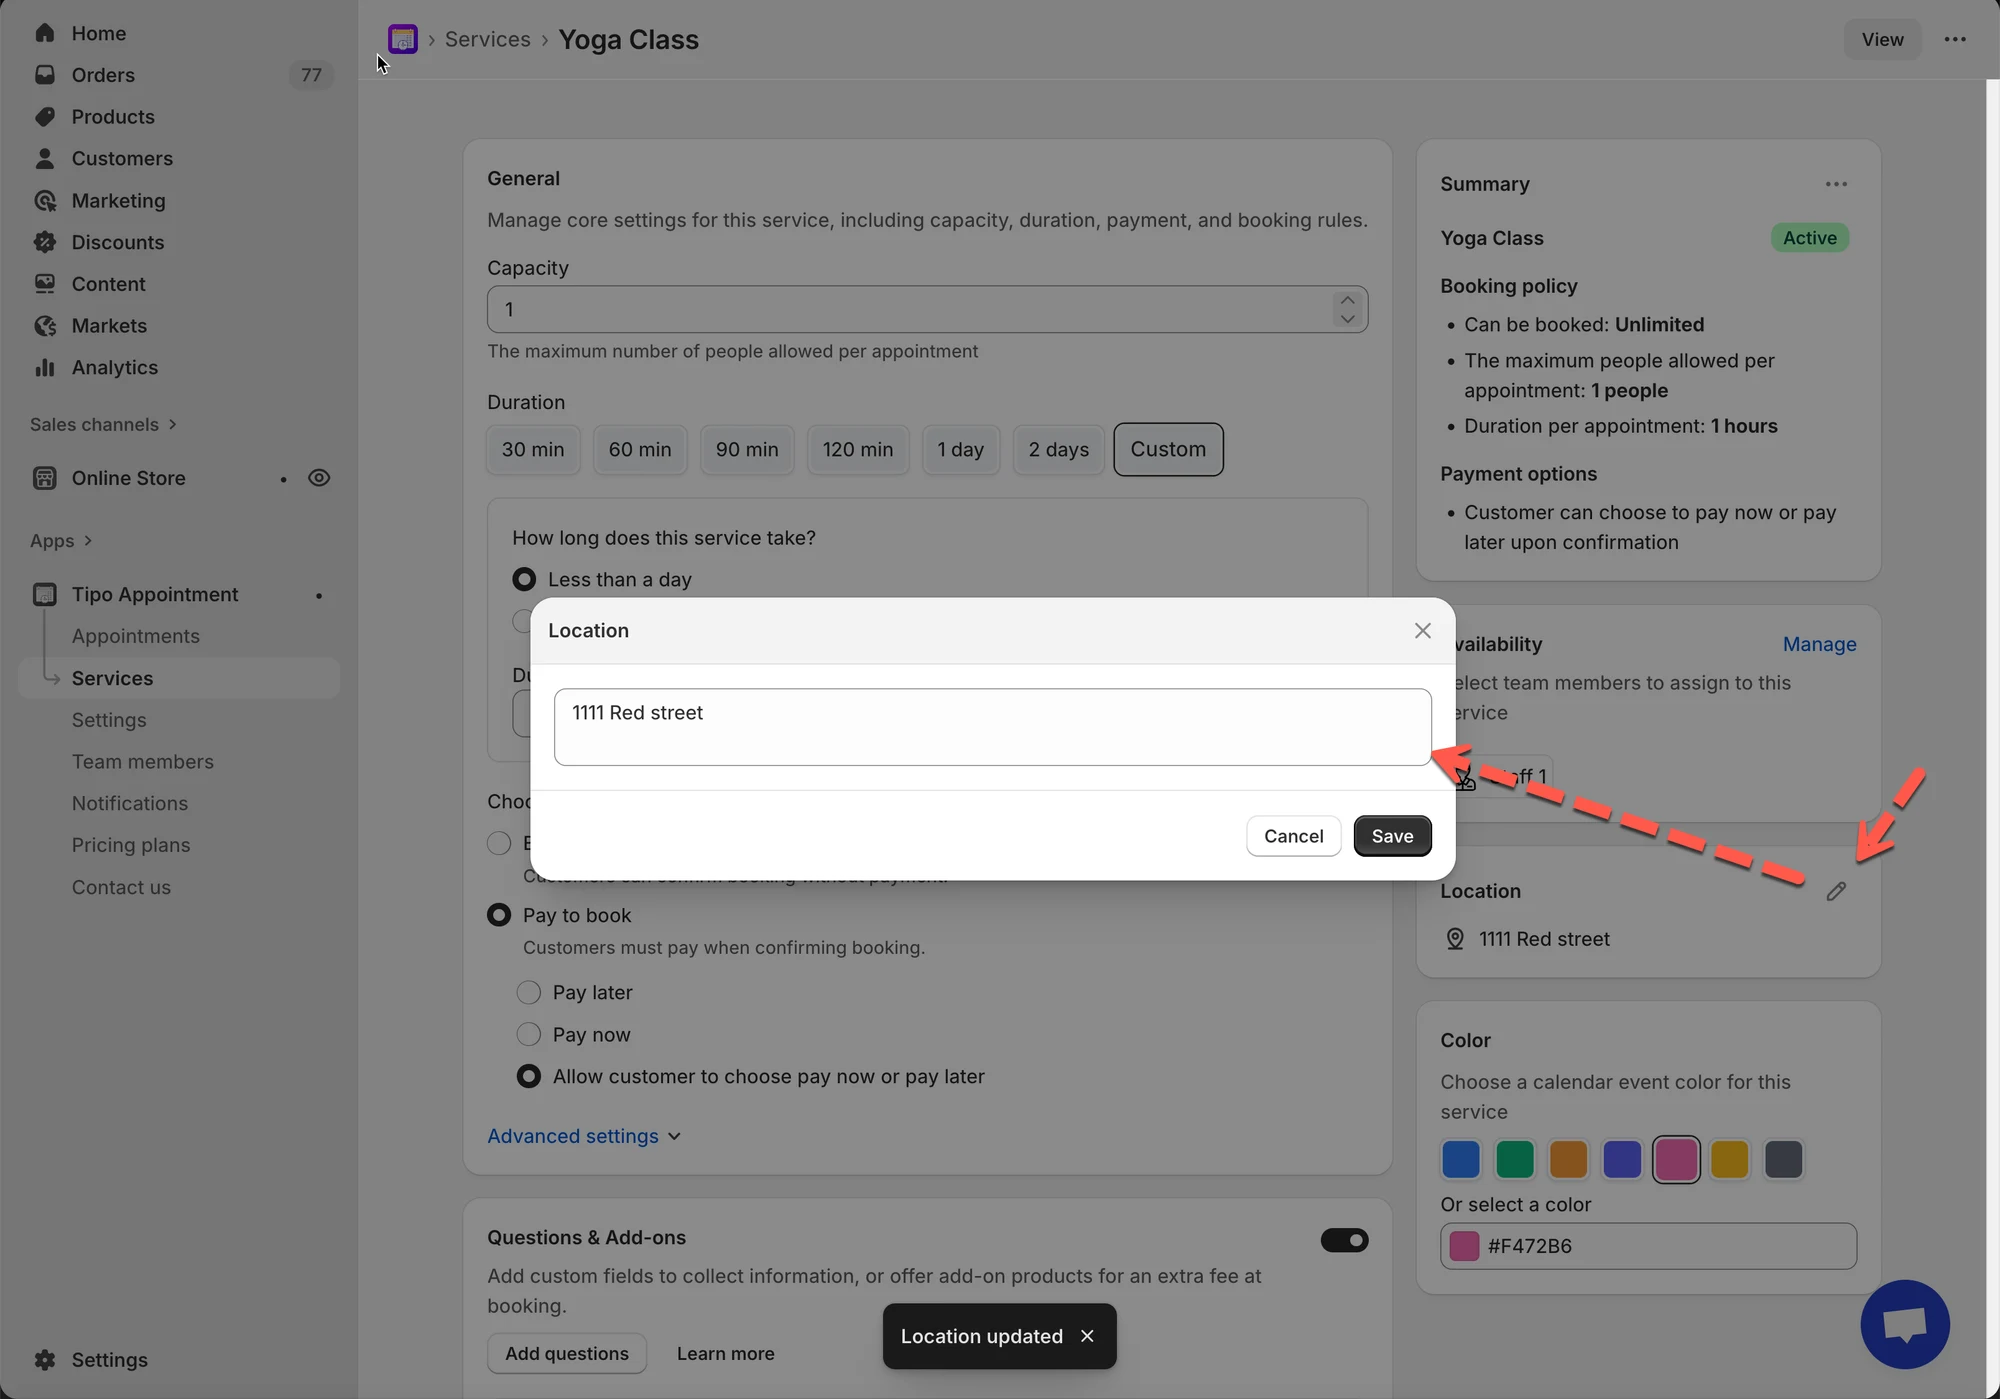
1. Go to app > go to **Services** tab of the app > open the service you want
2. Find Location section on the right > click **pencil** icon to edit
3. Add location detail to the **Location** field. For example: *1111 Red street*
4. Save the service
If you add location to employee detail, the employee’s location will be prioritized if available.
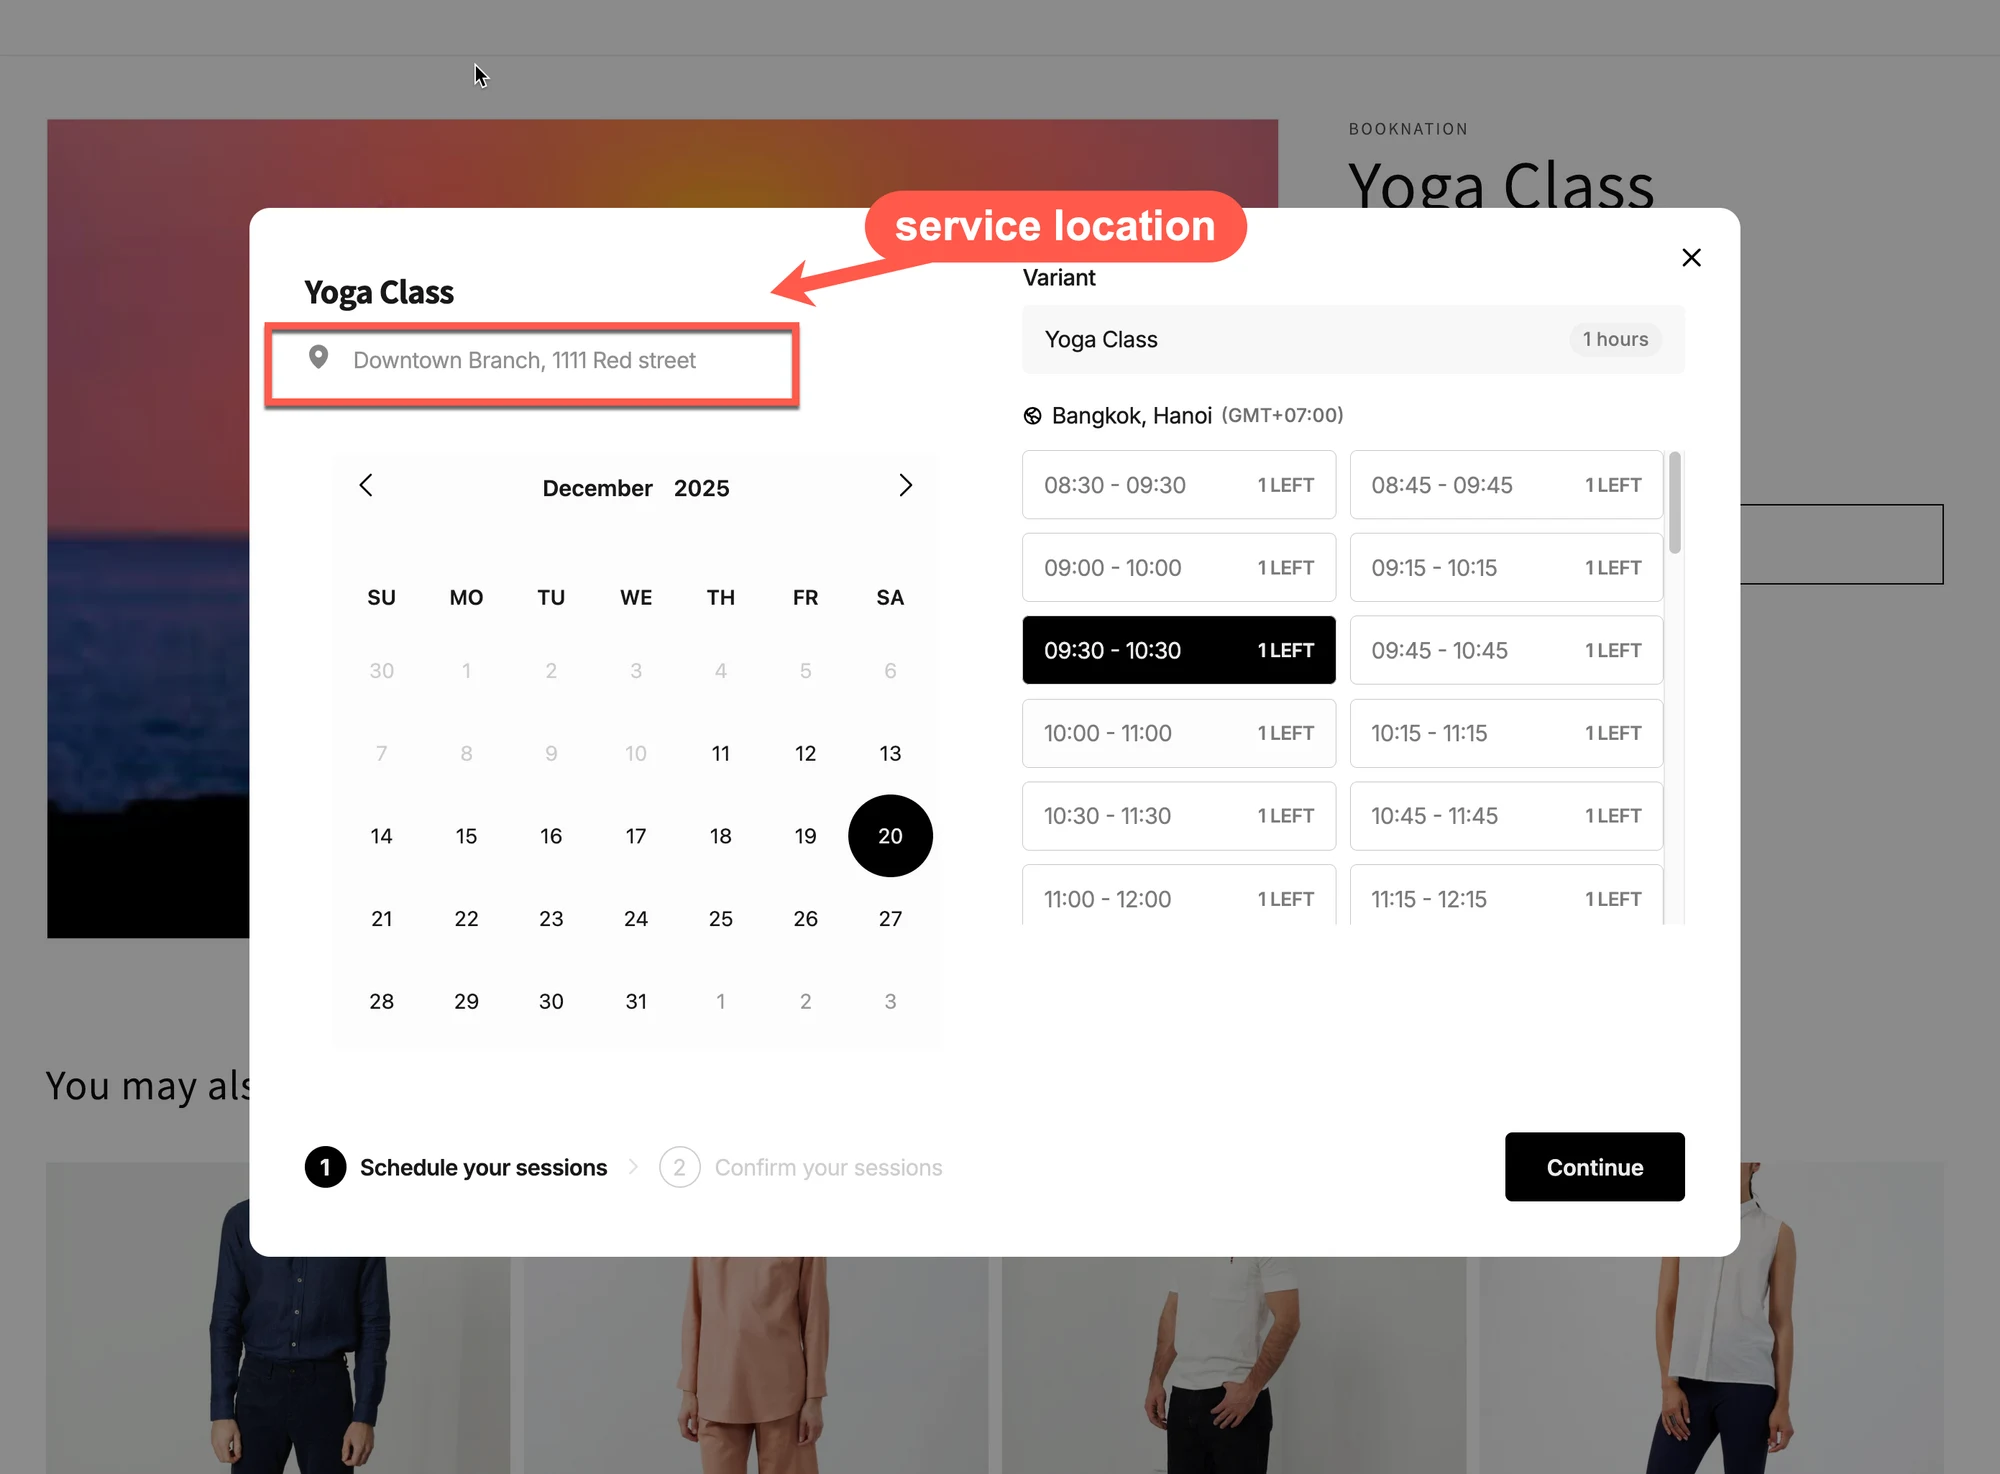
#### **How it looks**
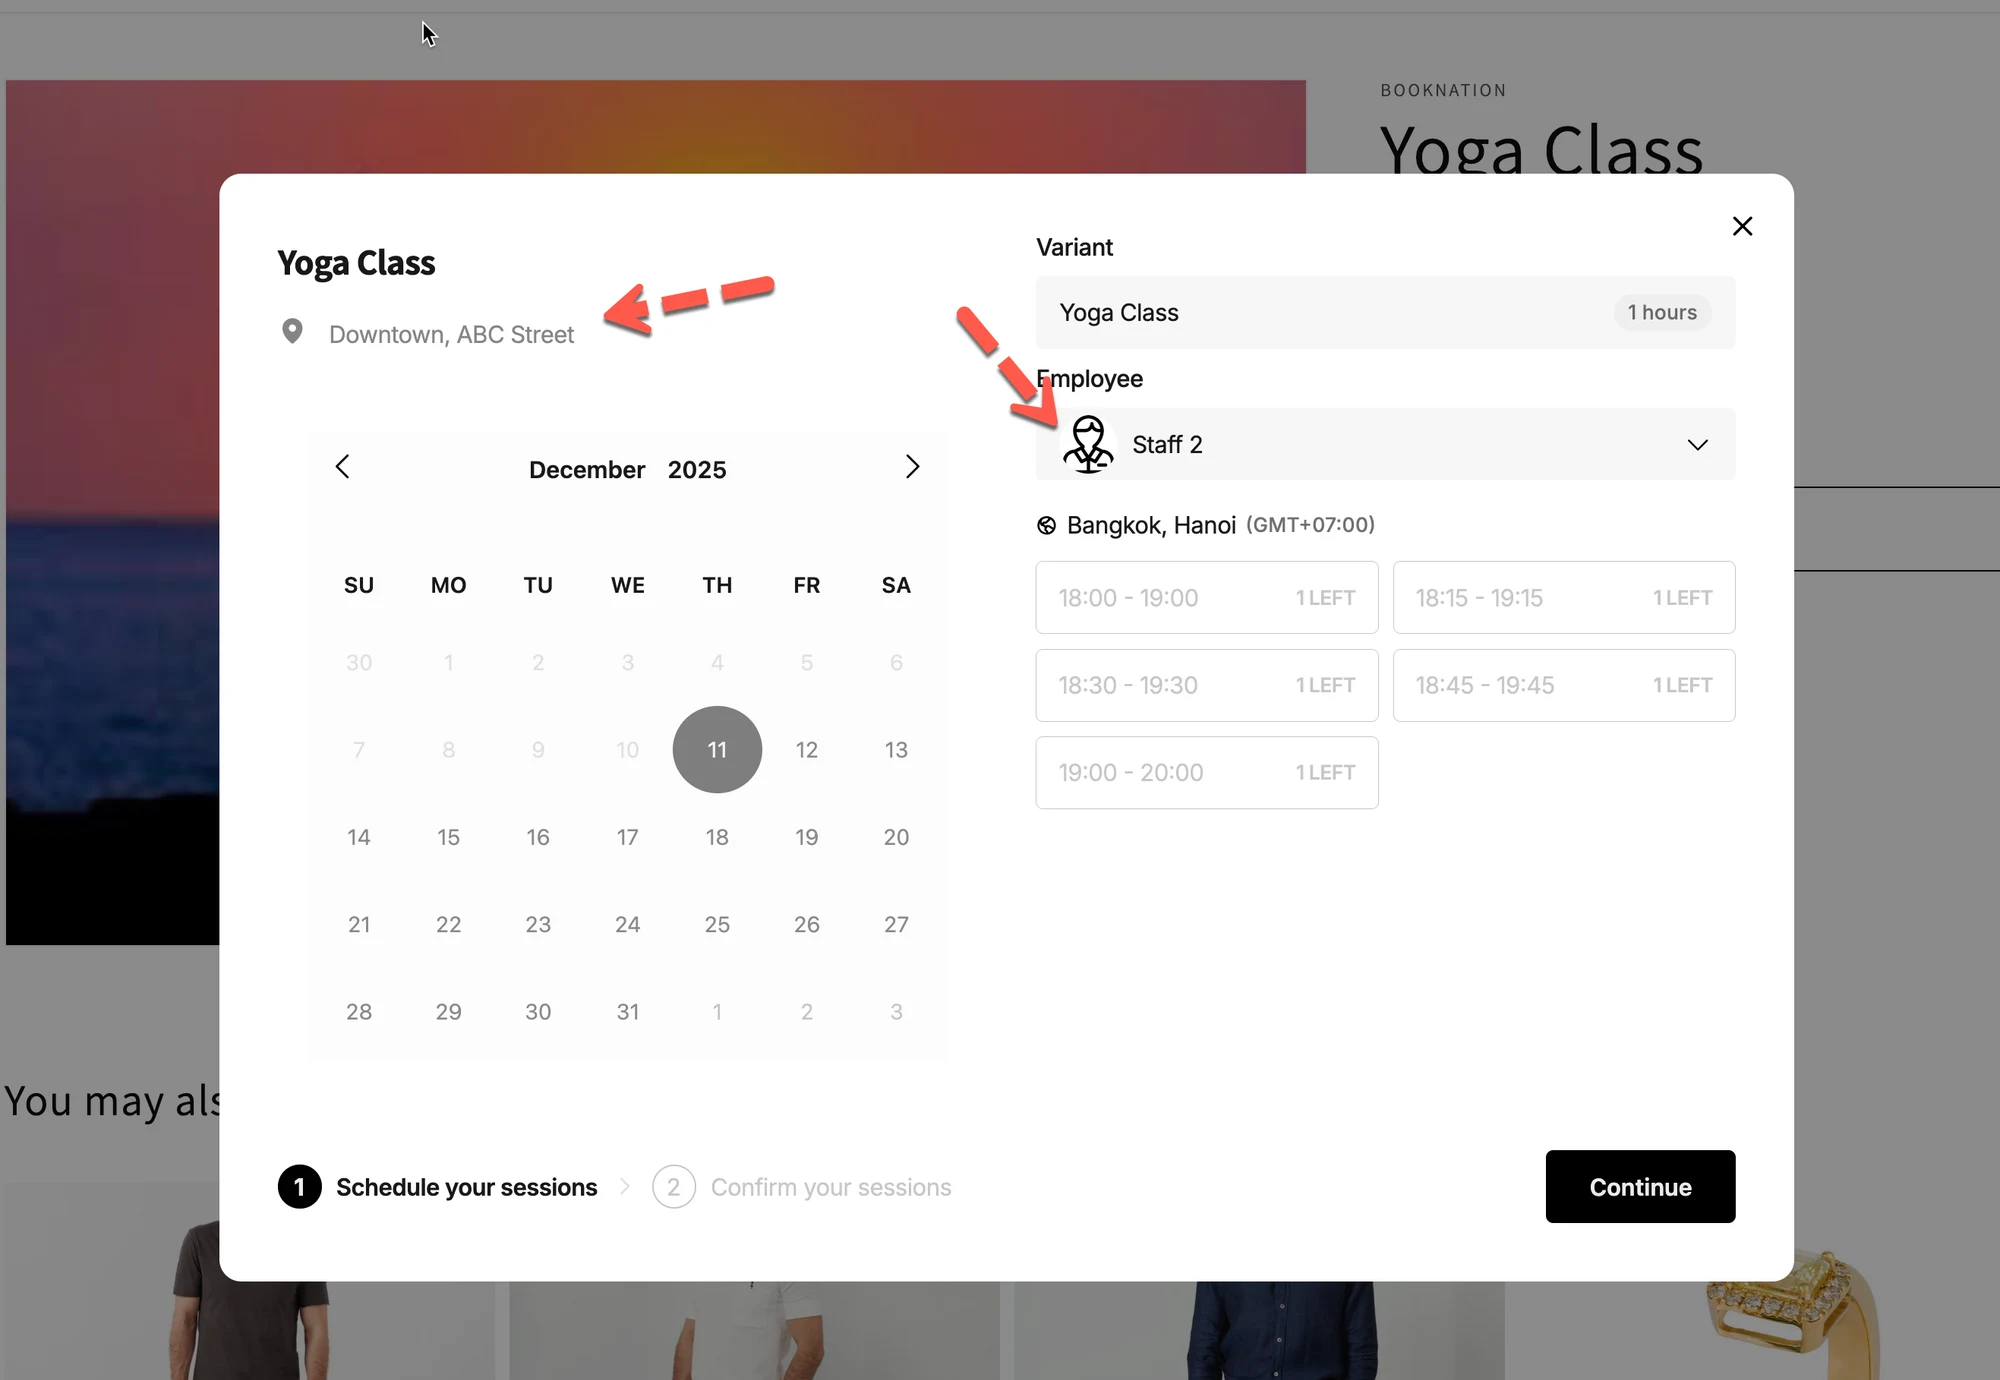
The location field will shows up on the booking form after you select employee.
***
### 📍 Using multiple locations
**Note** : The location depends on the assigned team member. One team member is only available at one location. So if you want to assign 3 locations to service for example, you need to assign the 3 team members to service.
#### **How to set**
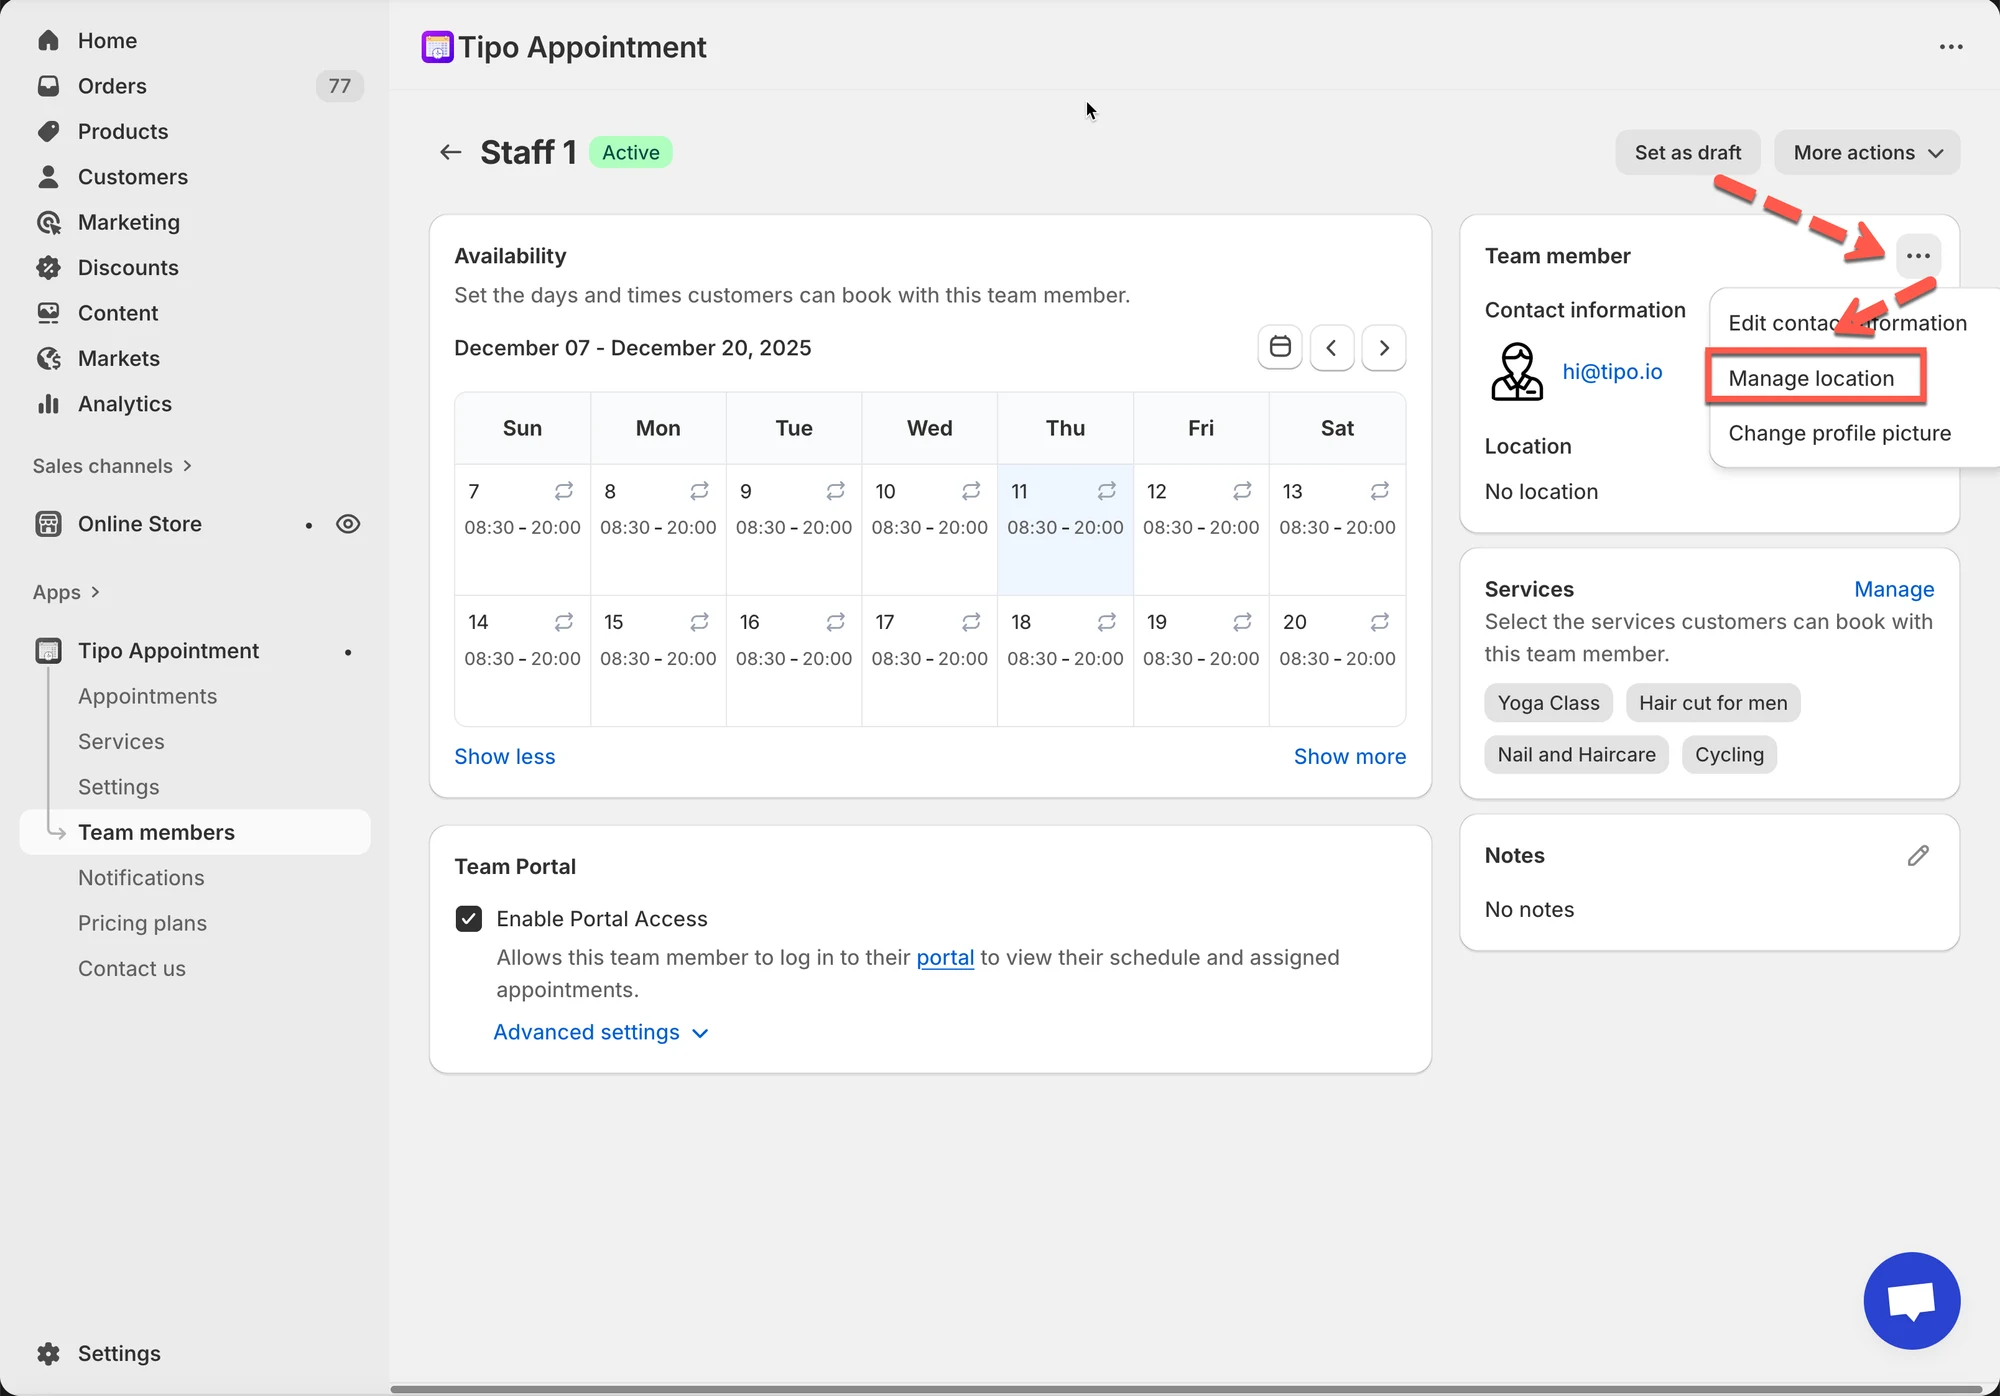
1. Open the app > click Team members > open the team member you want to edit
2. Click more actions icon on the right of the team member email address > click **Manage location**
3. In **Location** field, enter the location where the team member works. For example: *Uptown, ABC street*
4. Click **Save**
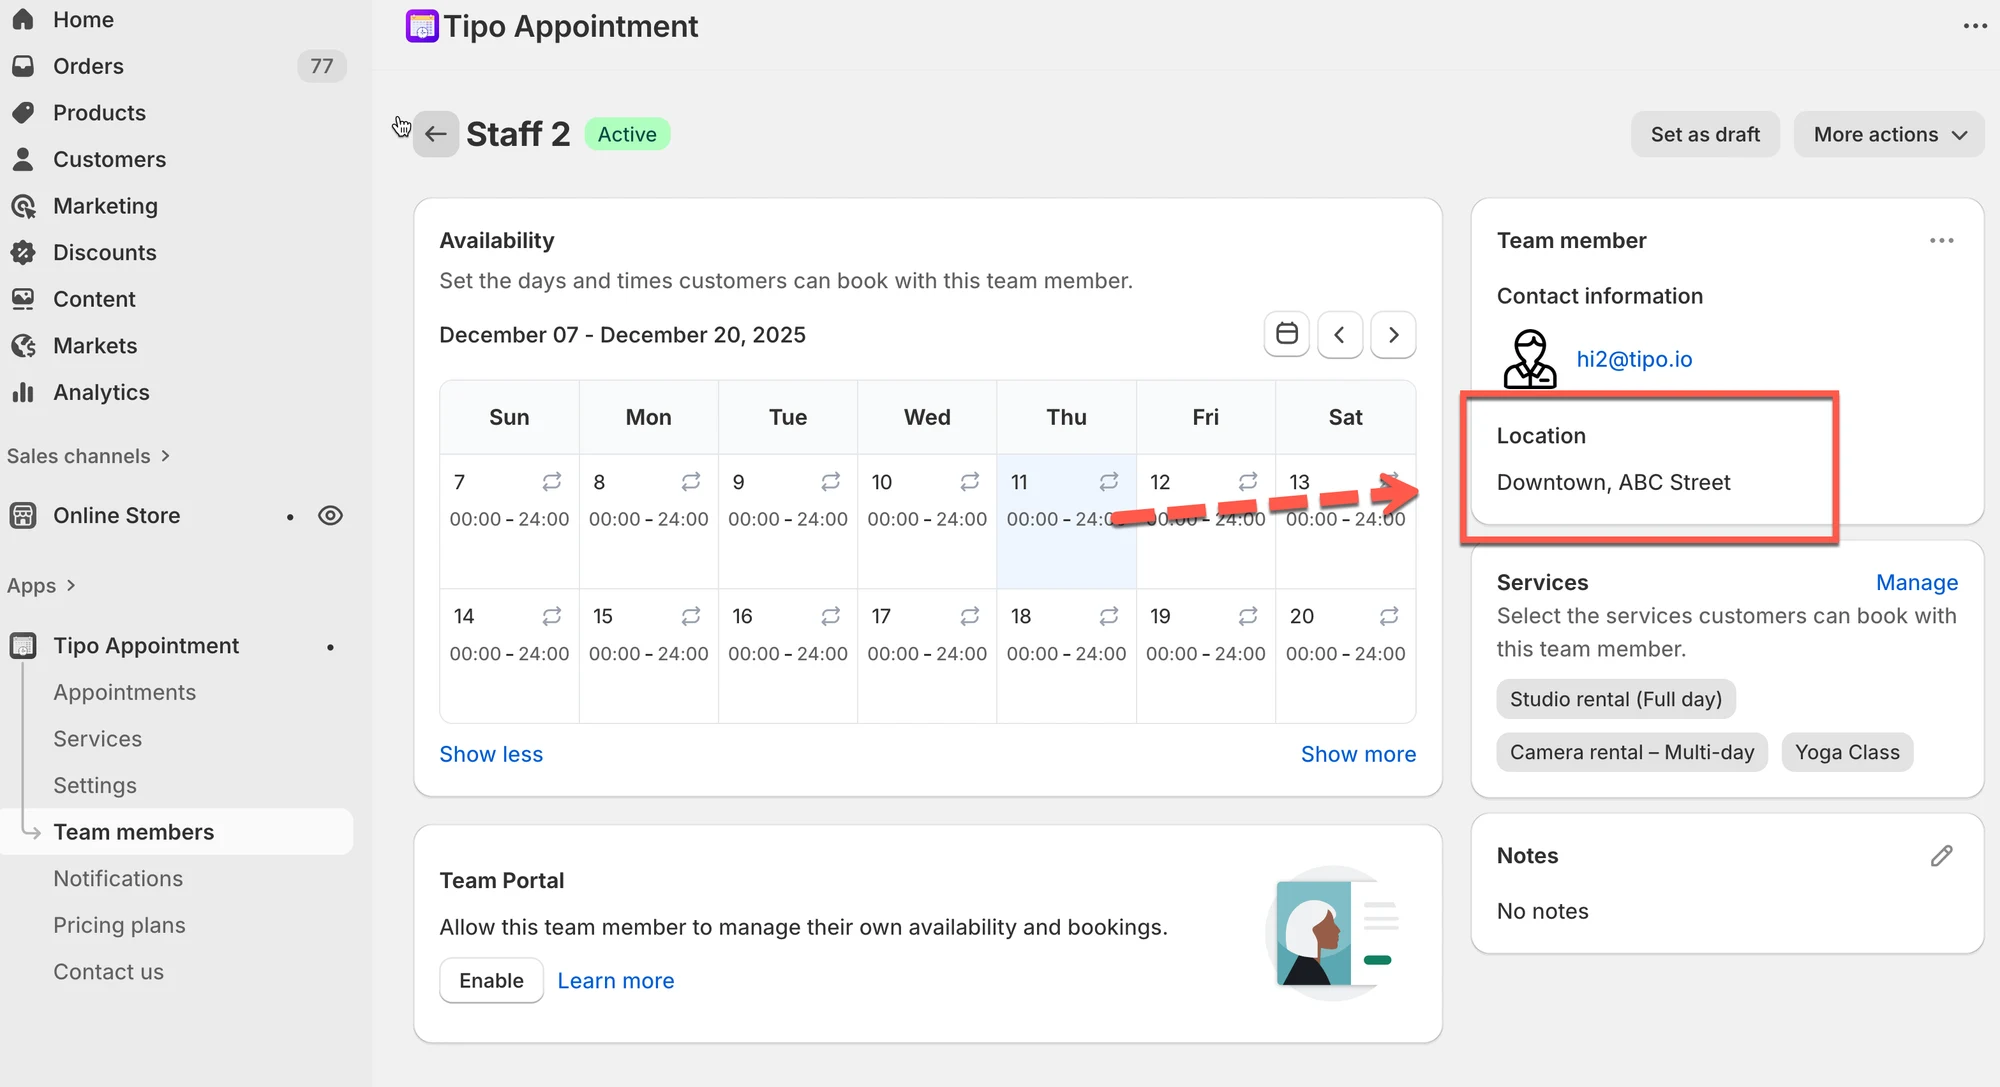
5. Open another team member of the service and add the location
6. Go to the service detail, make sure the 2 team members are assigned to the service
#### **How it works**
On the booking form, customers choose employee and then the corresponding location appear.
This screenshot is unavailable in the original documentation.
***
**🙋 Still need support?**
If you still need help, please feel free to contact us at . We’ll be happy to assist you further.