# General steps to connect stores
This guide shows how to connect two Shopify stores so Tipo Sync can sync products, inventory, and other data between them.
In Multi-store sync, you will connect:
* **Source store** (sends data)
* **Destination store** (receives data)
### 🛠️ Step 1: Install the app and select store types
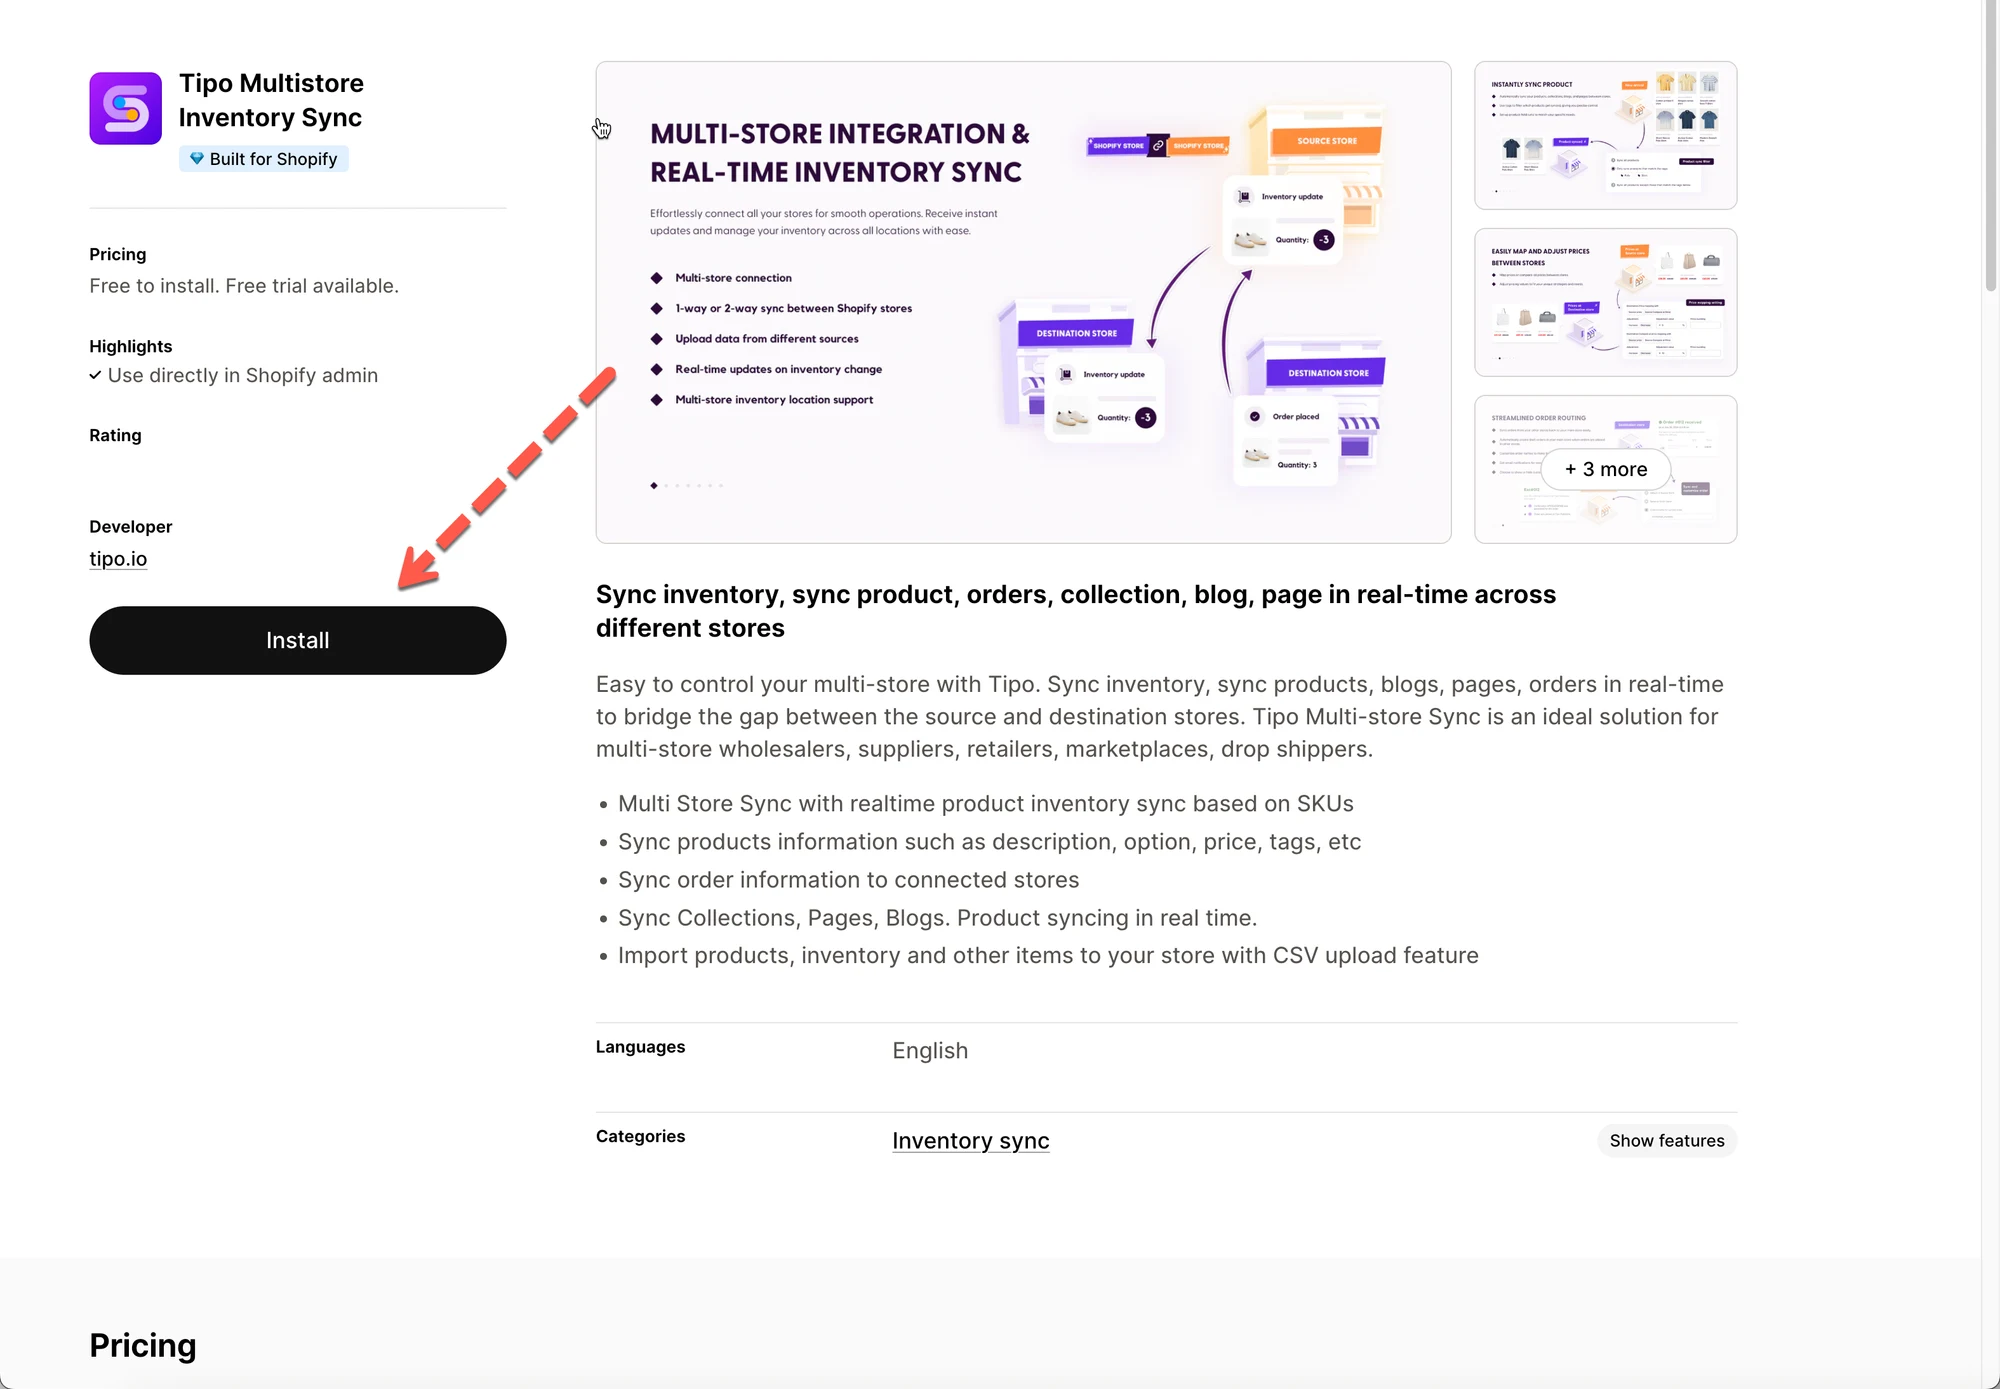
Before connecting, make sure Tipo Sync is installed on **both stores**.
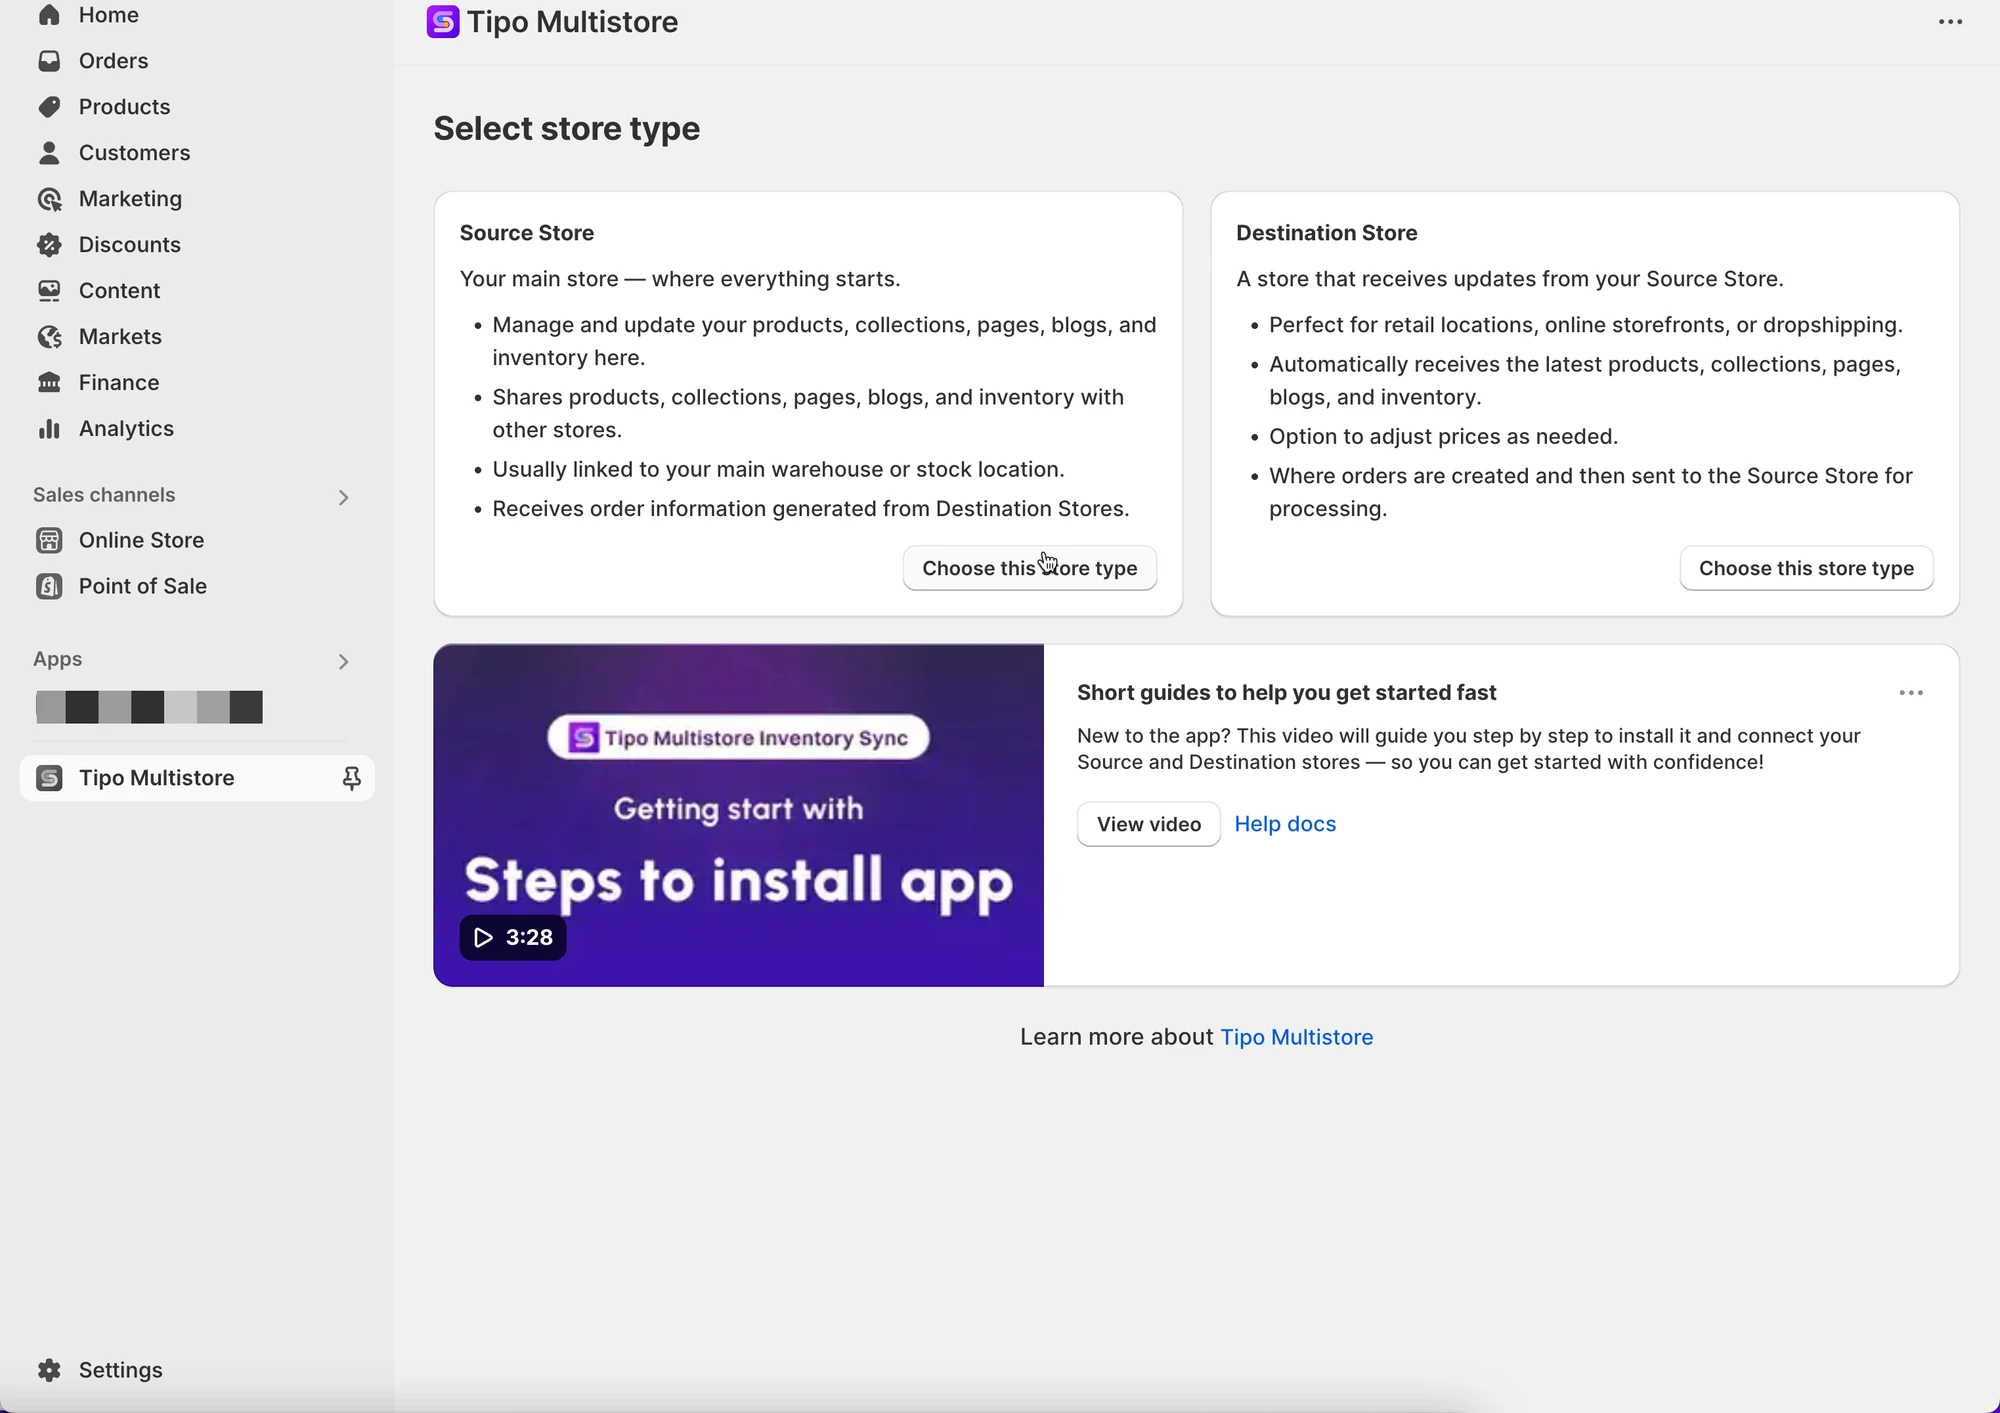
Upon first accessing the app, you’ll be prompted to designate the store as either a Source or Destination. Choose the appropriate type for each store. For more information on store types, refer to [this guide](/overview/connect-stores).
* Install the app on store 1 > select Source store type
* Install the app on store 2 > select Destination store type
***
### 🛠️ **Step 2: Configure app settings**
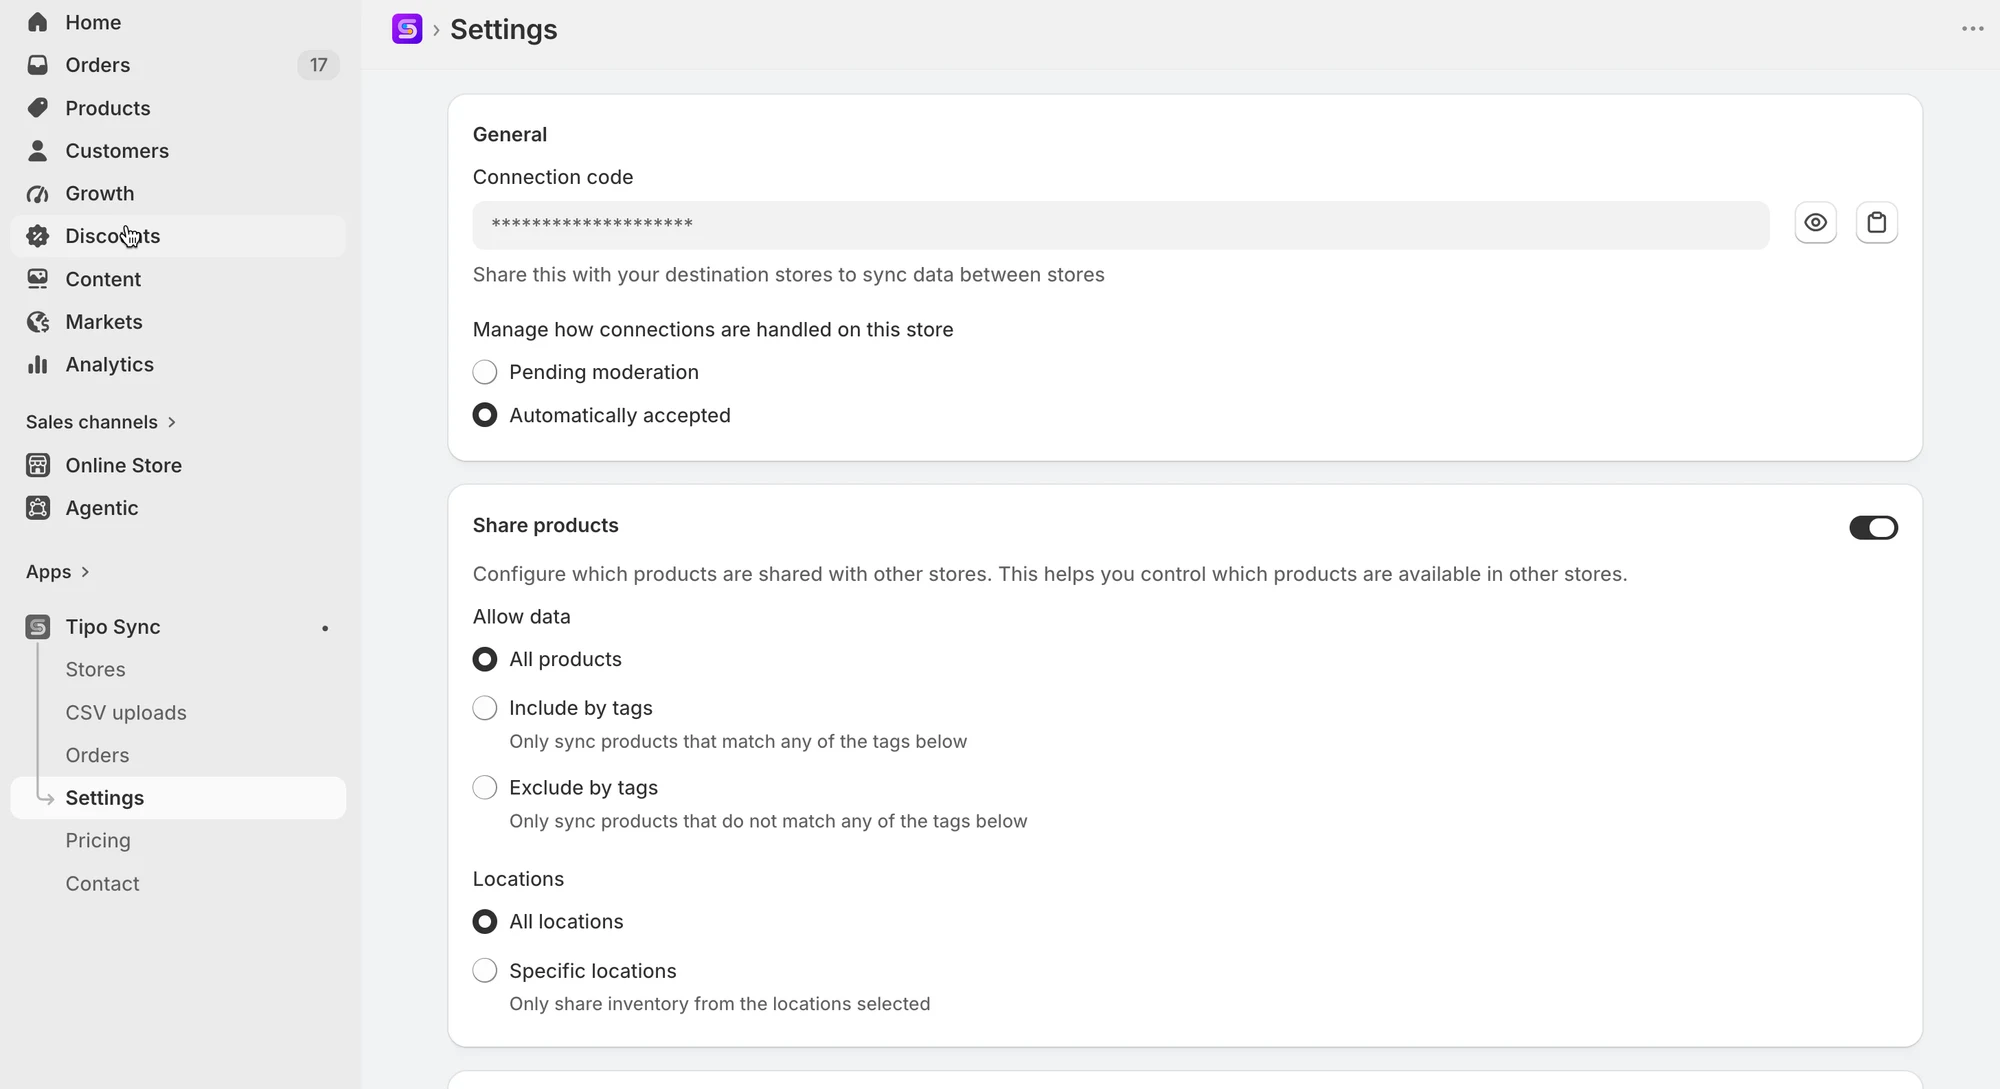
After the app is installed in 2 stores, check the app **Settings** in the app in both store and configure it to make sure it works as expected.
Source store:
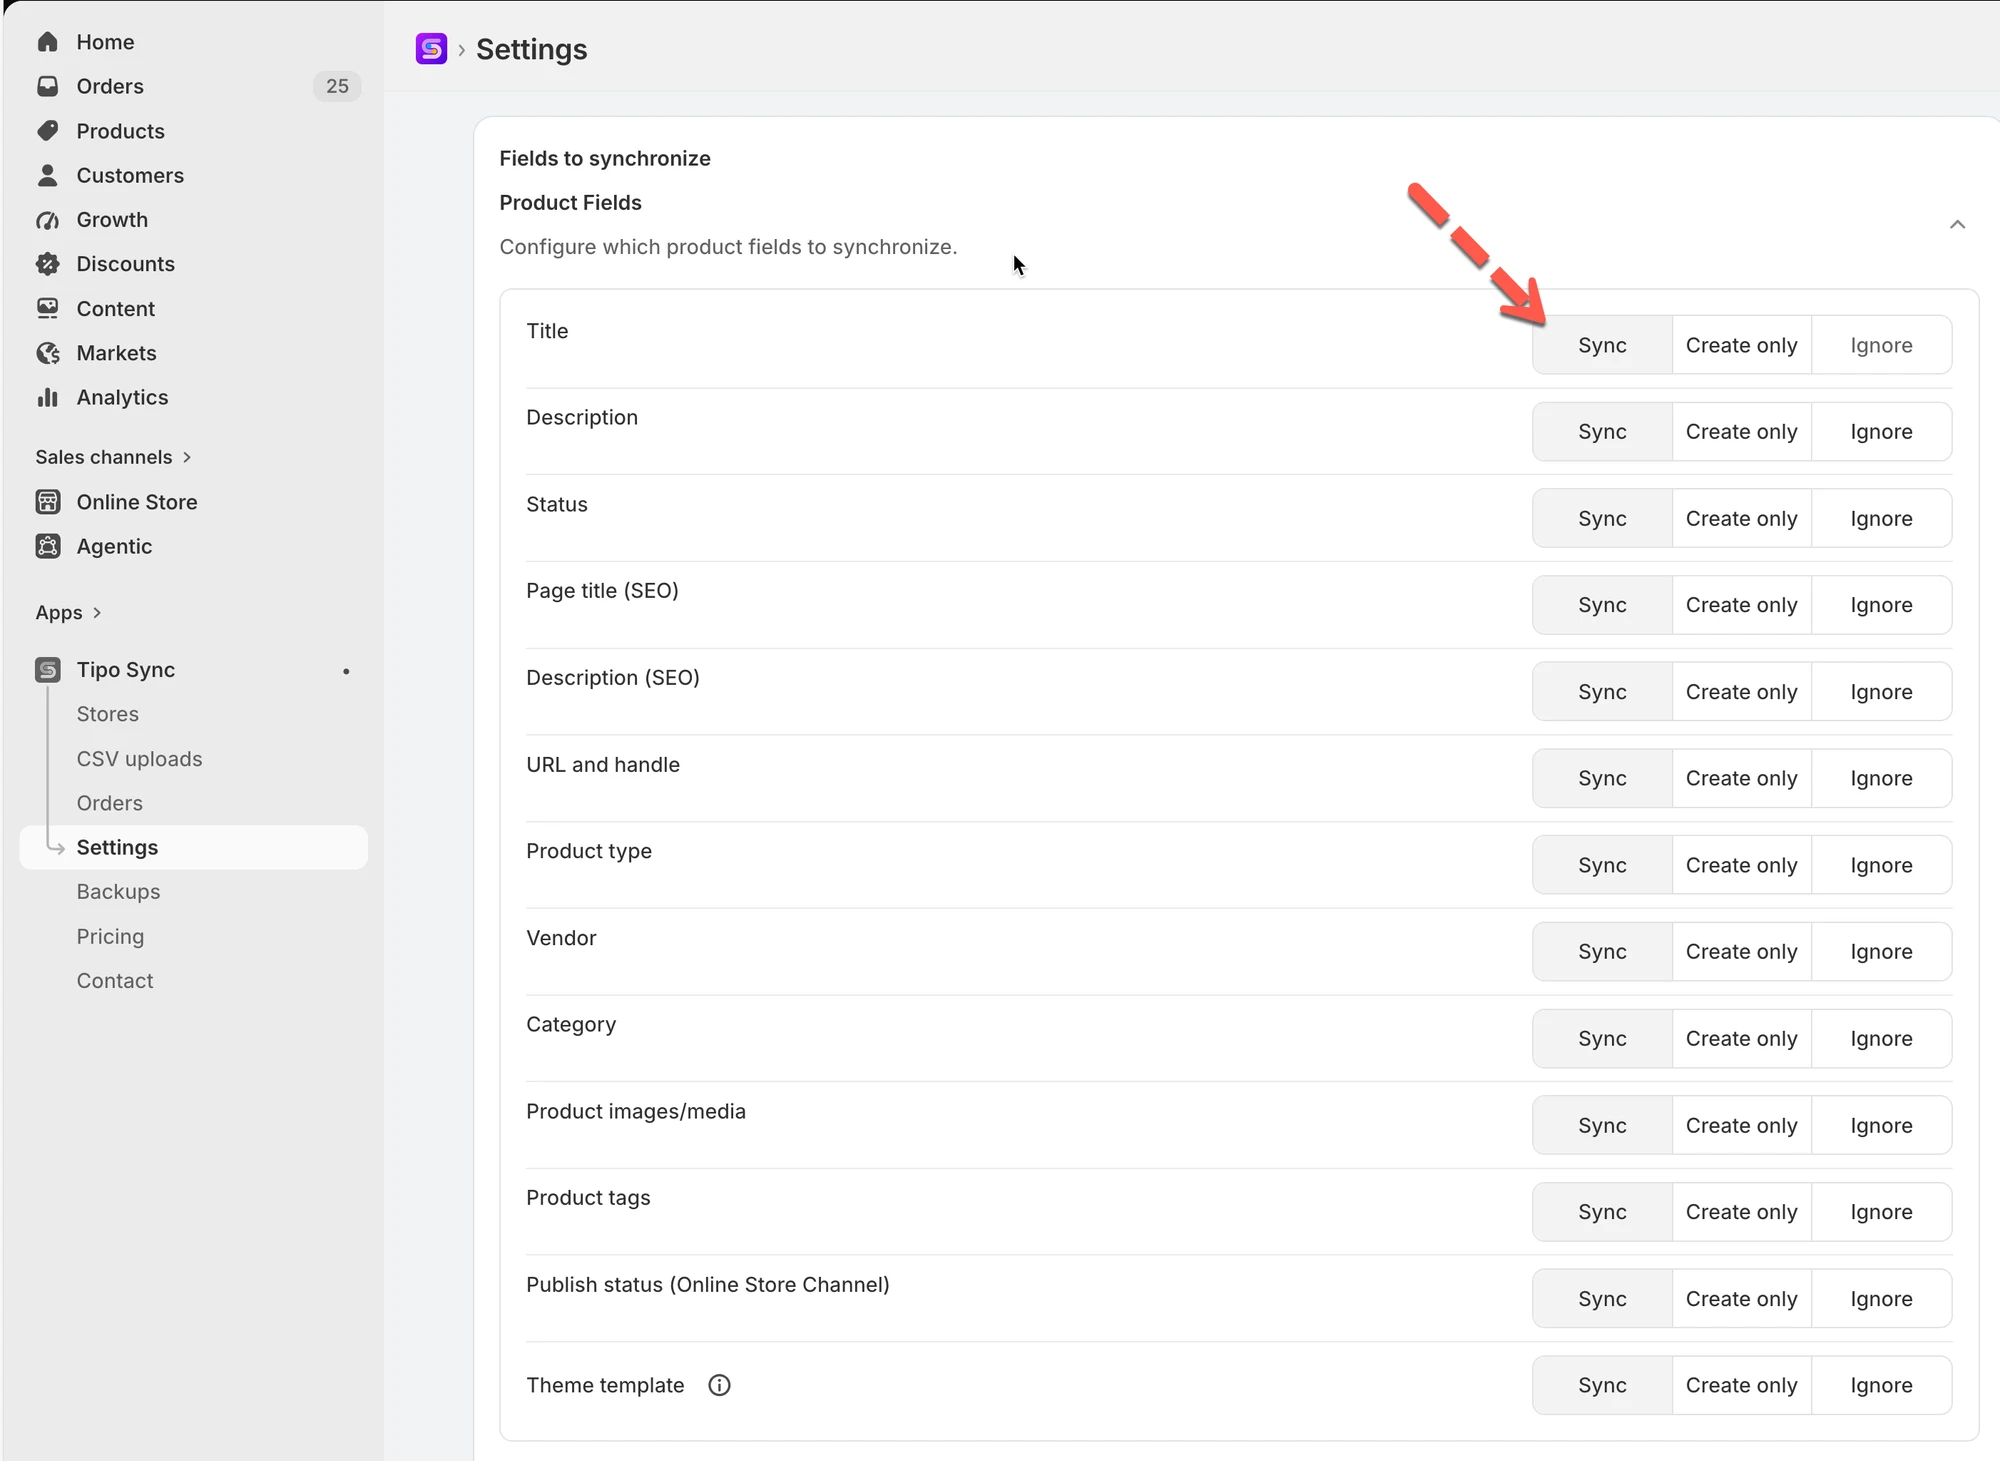
Destination store
Decide the product data you want to sync in app **Settings** in Destination store
***
### 🛠️ Step 3: Connect a Destination store to a Source store
**Note**: Connections are initiated from the Destination store.
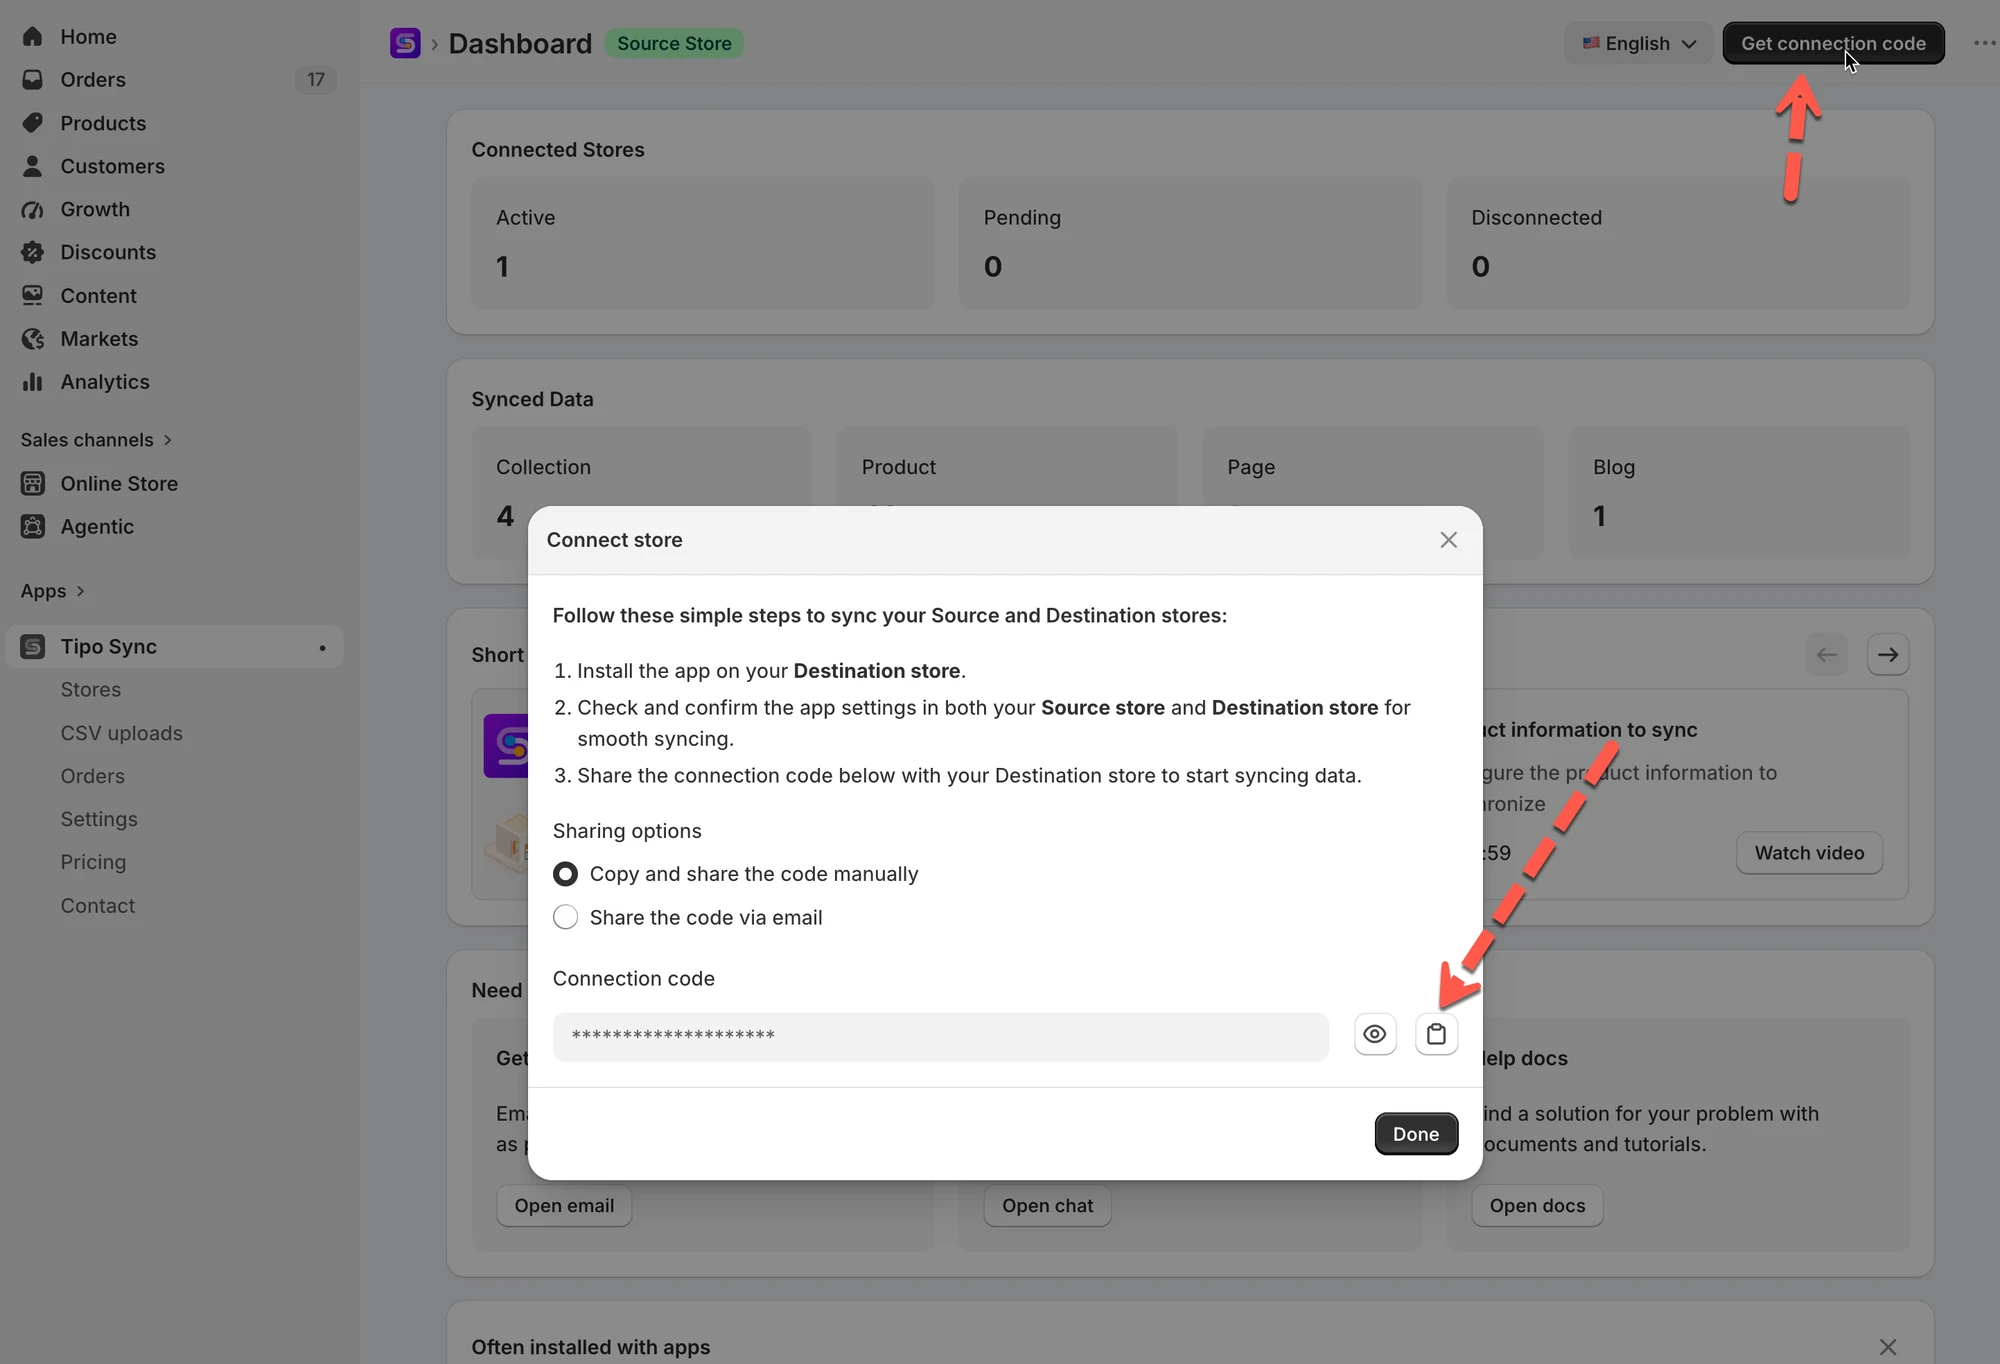
#### Get the connect code (in the Source store)
The **Source Store** is the store that sends products, inventory, collections, or other data.
1. Open the app in Source store > click **Stores**
2. Click **Get connect code** button
3. Copy the connect code on the popup
#### Use the connect code (in the Destination store)
The **Destination Store** is the store that receives synced data from the Source store.
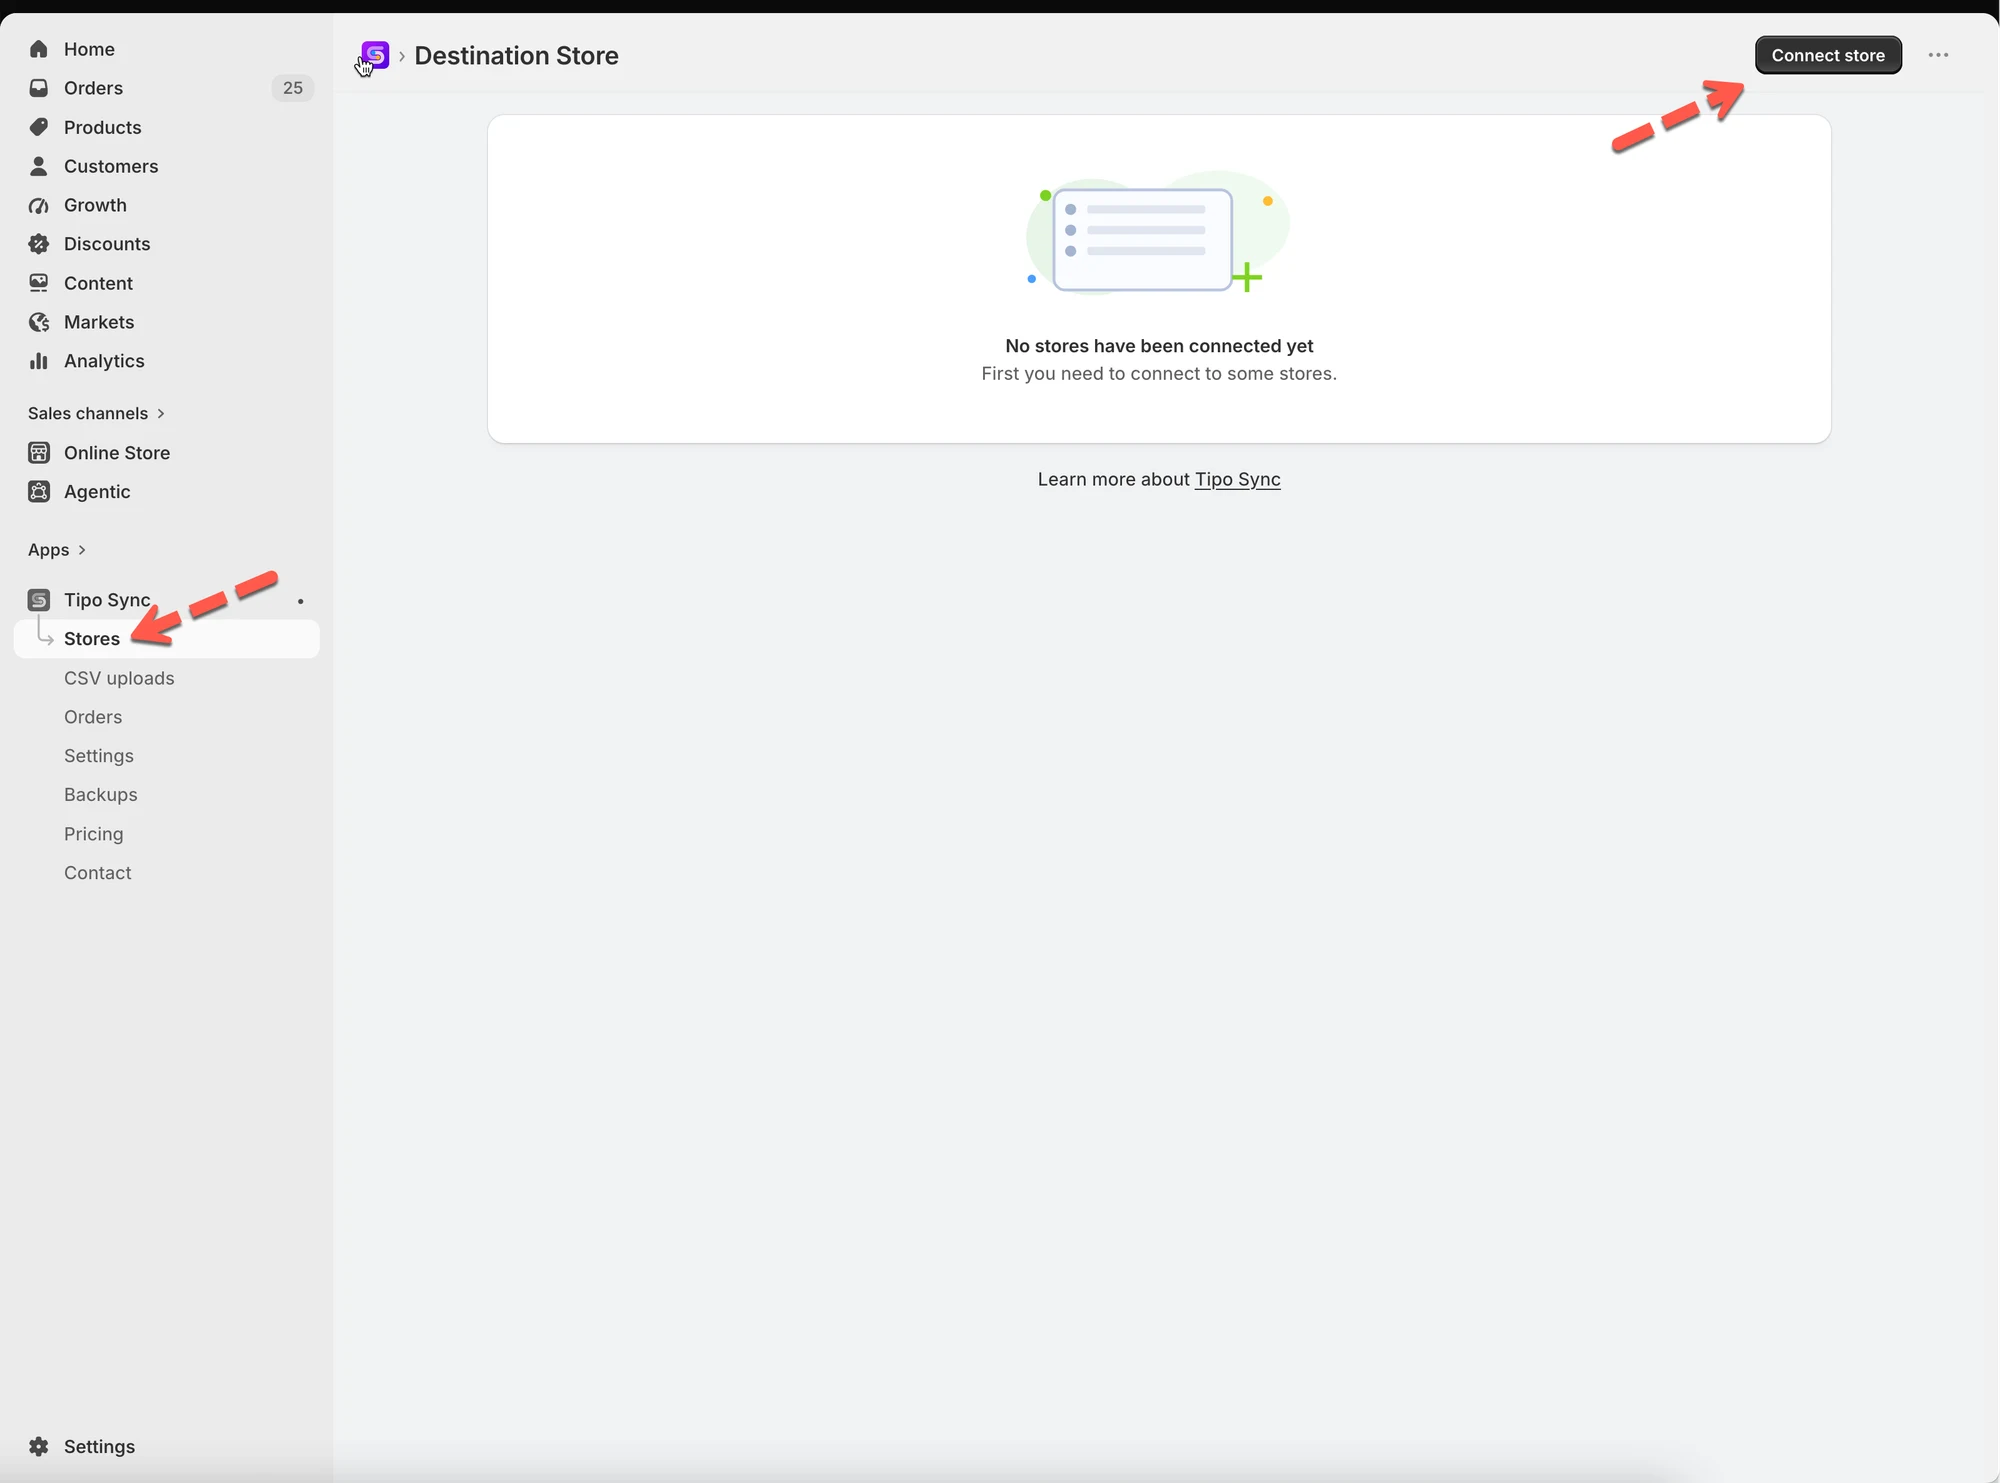
1. Go to the **Destination** store > open the app
2. Click **Stores** > click **Connect** **Store** button
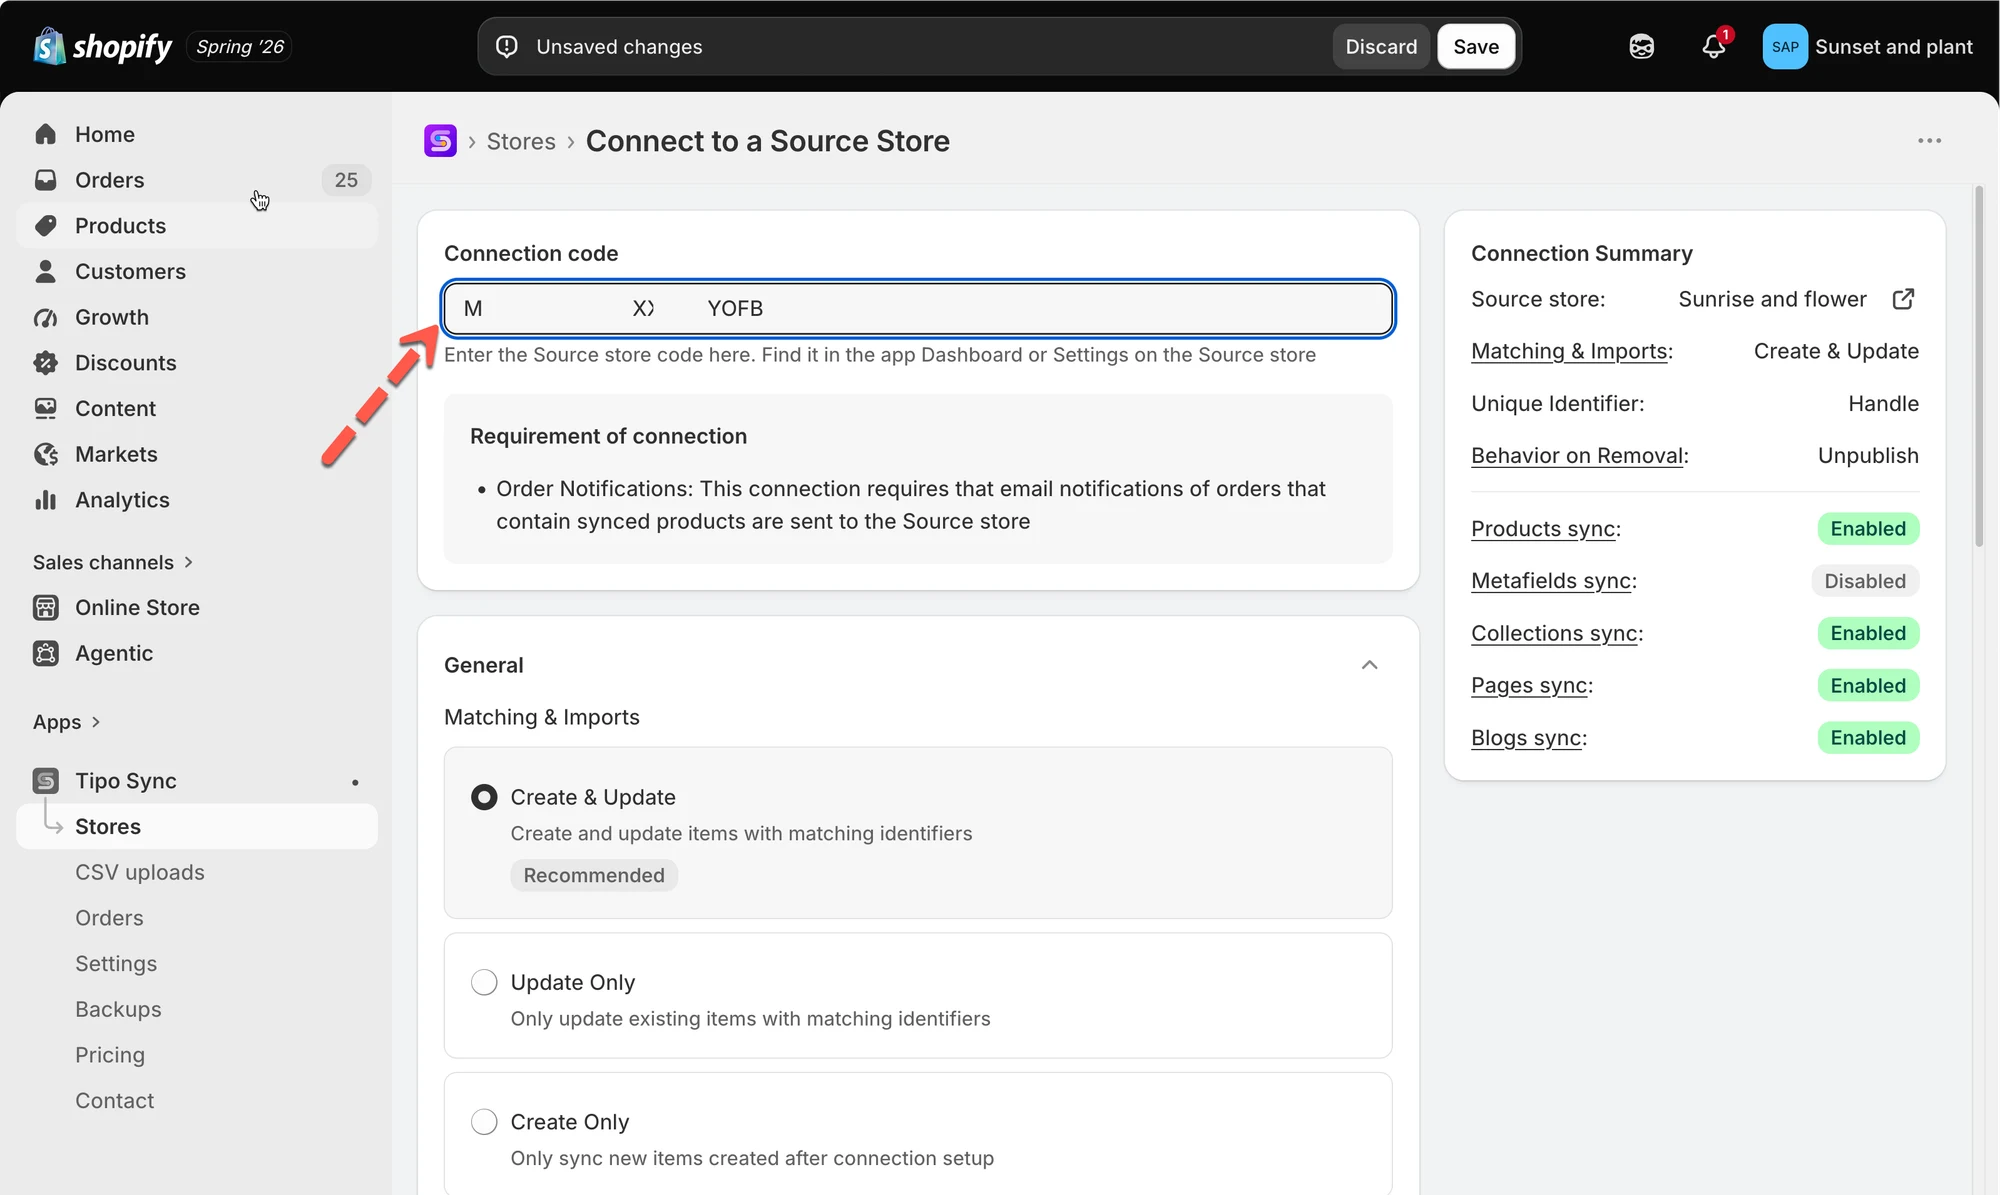
3. Paste the connection code from the Source store into the **Connection code** field
4. Configure sync setting details
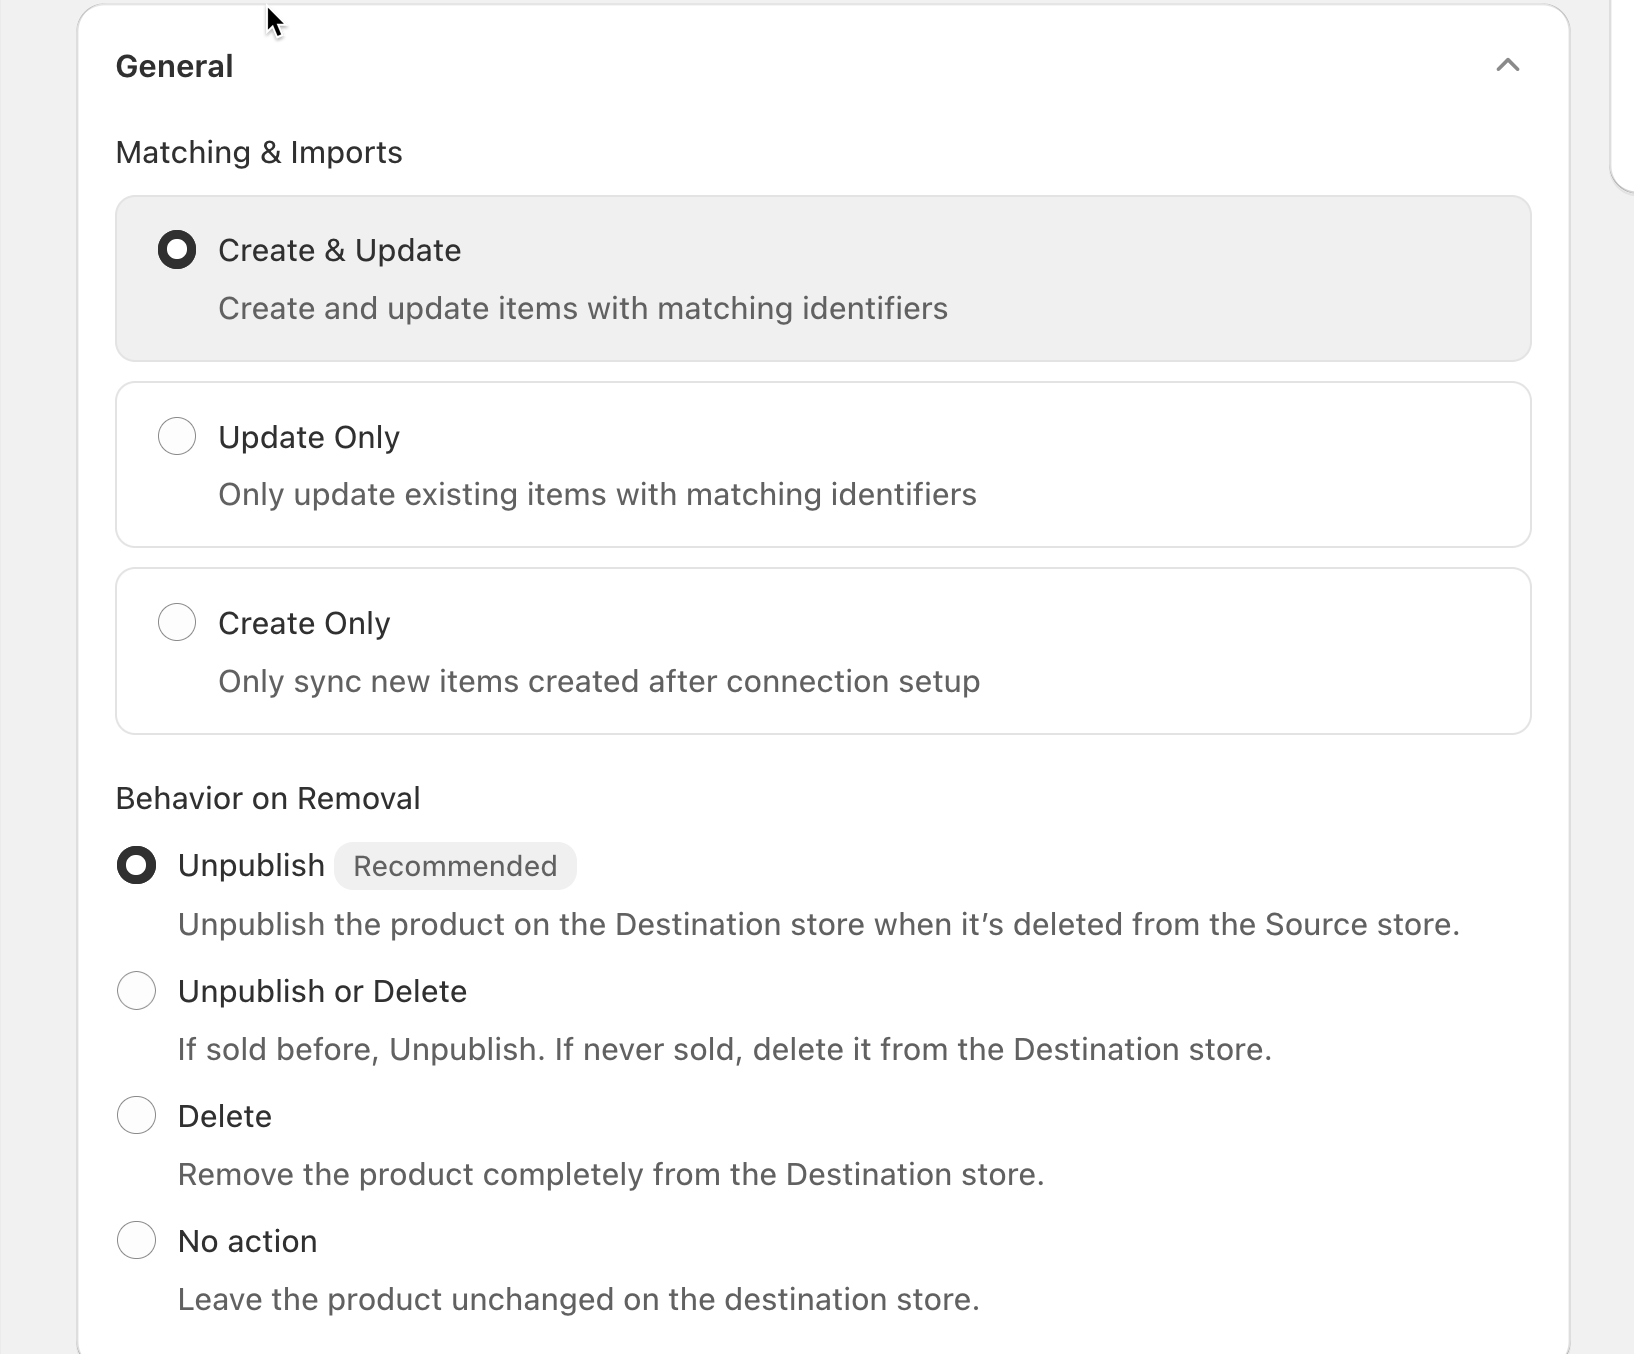
After connecting the stores, choose how the synchronization should work.
* **Matching & Imports**
> Choose **Create & Update** if you want the Destination store to automatically create missing products and keep existing products updated.
>
> Choose **Update Only** if products already exist in both stores and you only want to sync updates.
* **Behavior on Removal**
> Example:\
> If a product is deleted from the Source store, selecting **Unpublish** will hide the product from the Destination store without permanently deleting it.
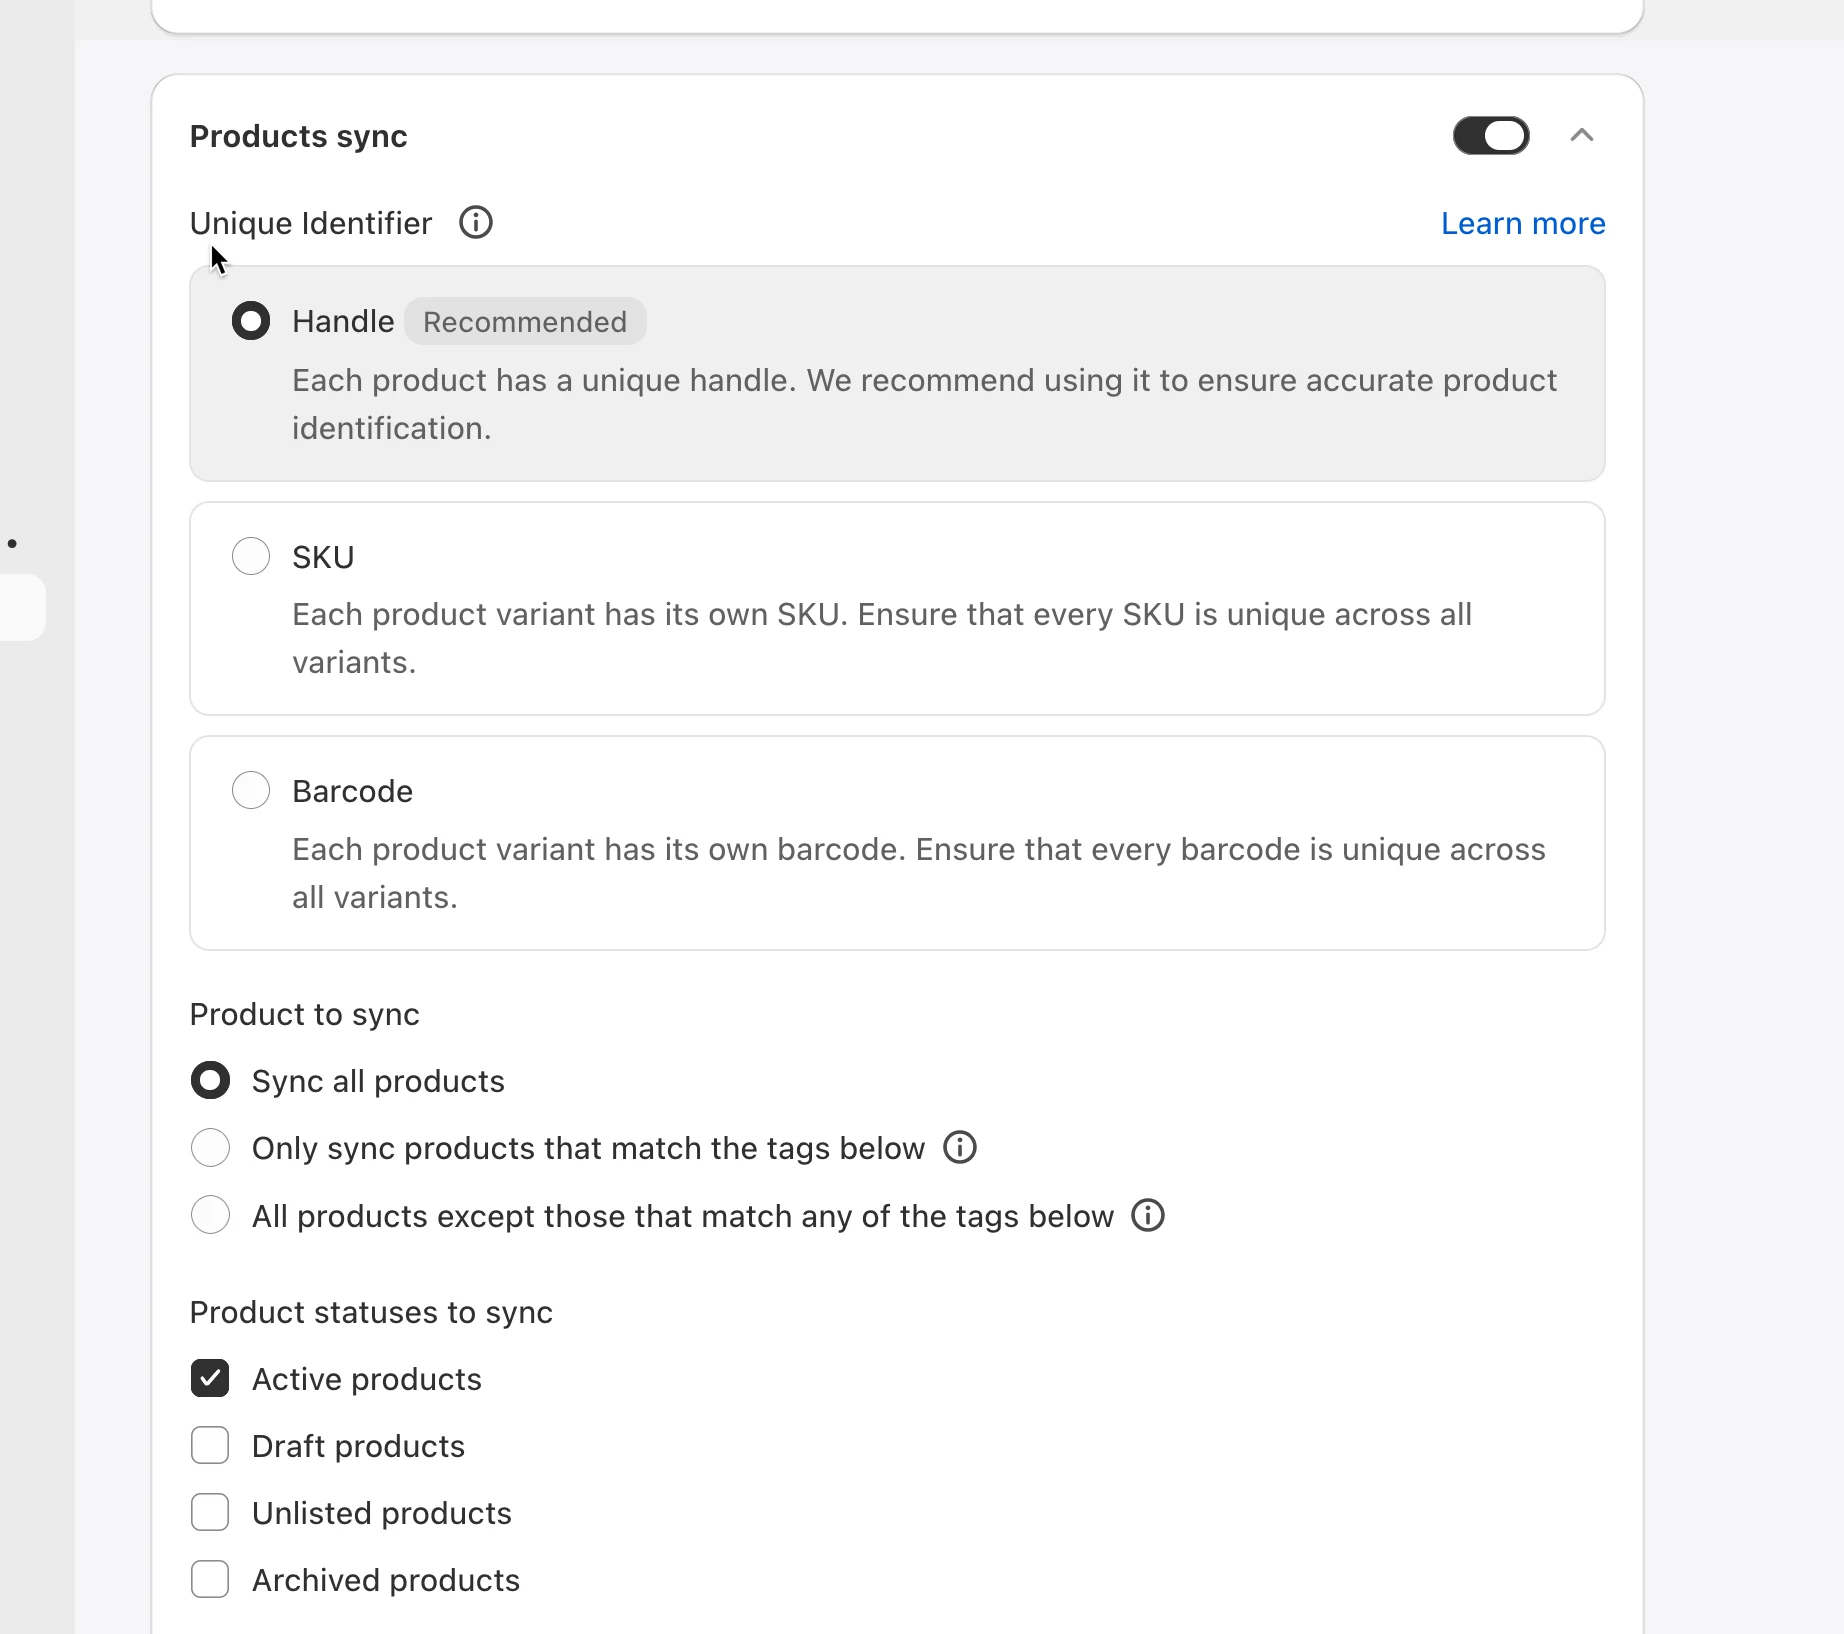
5. Enable product sync option
* Turn on the **Products sync** option
* Choose a **Unique Identifier t**o match products between stores
> Example:\
> If both stores already have the same product handles, choose **Handle** for the most accurate matching.\
> Choose **SKU** if your products use unique SKUs across all variants.
* Choose Which Products to sync
> Example:\
> Select **Only sync products that match the tags below** if you only want to sync products tagged `wholesale`.
* Select **Product Statuses** to sync
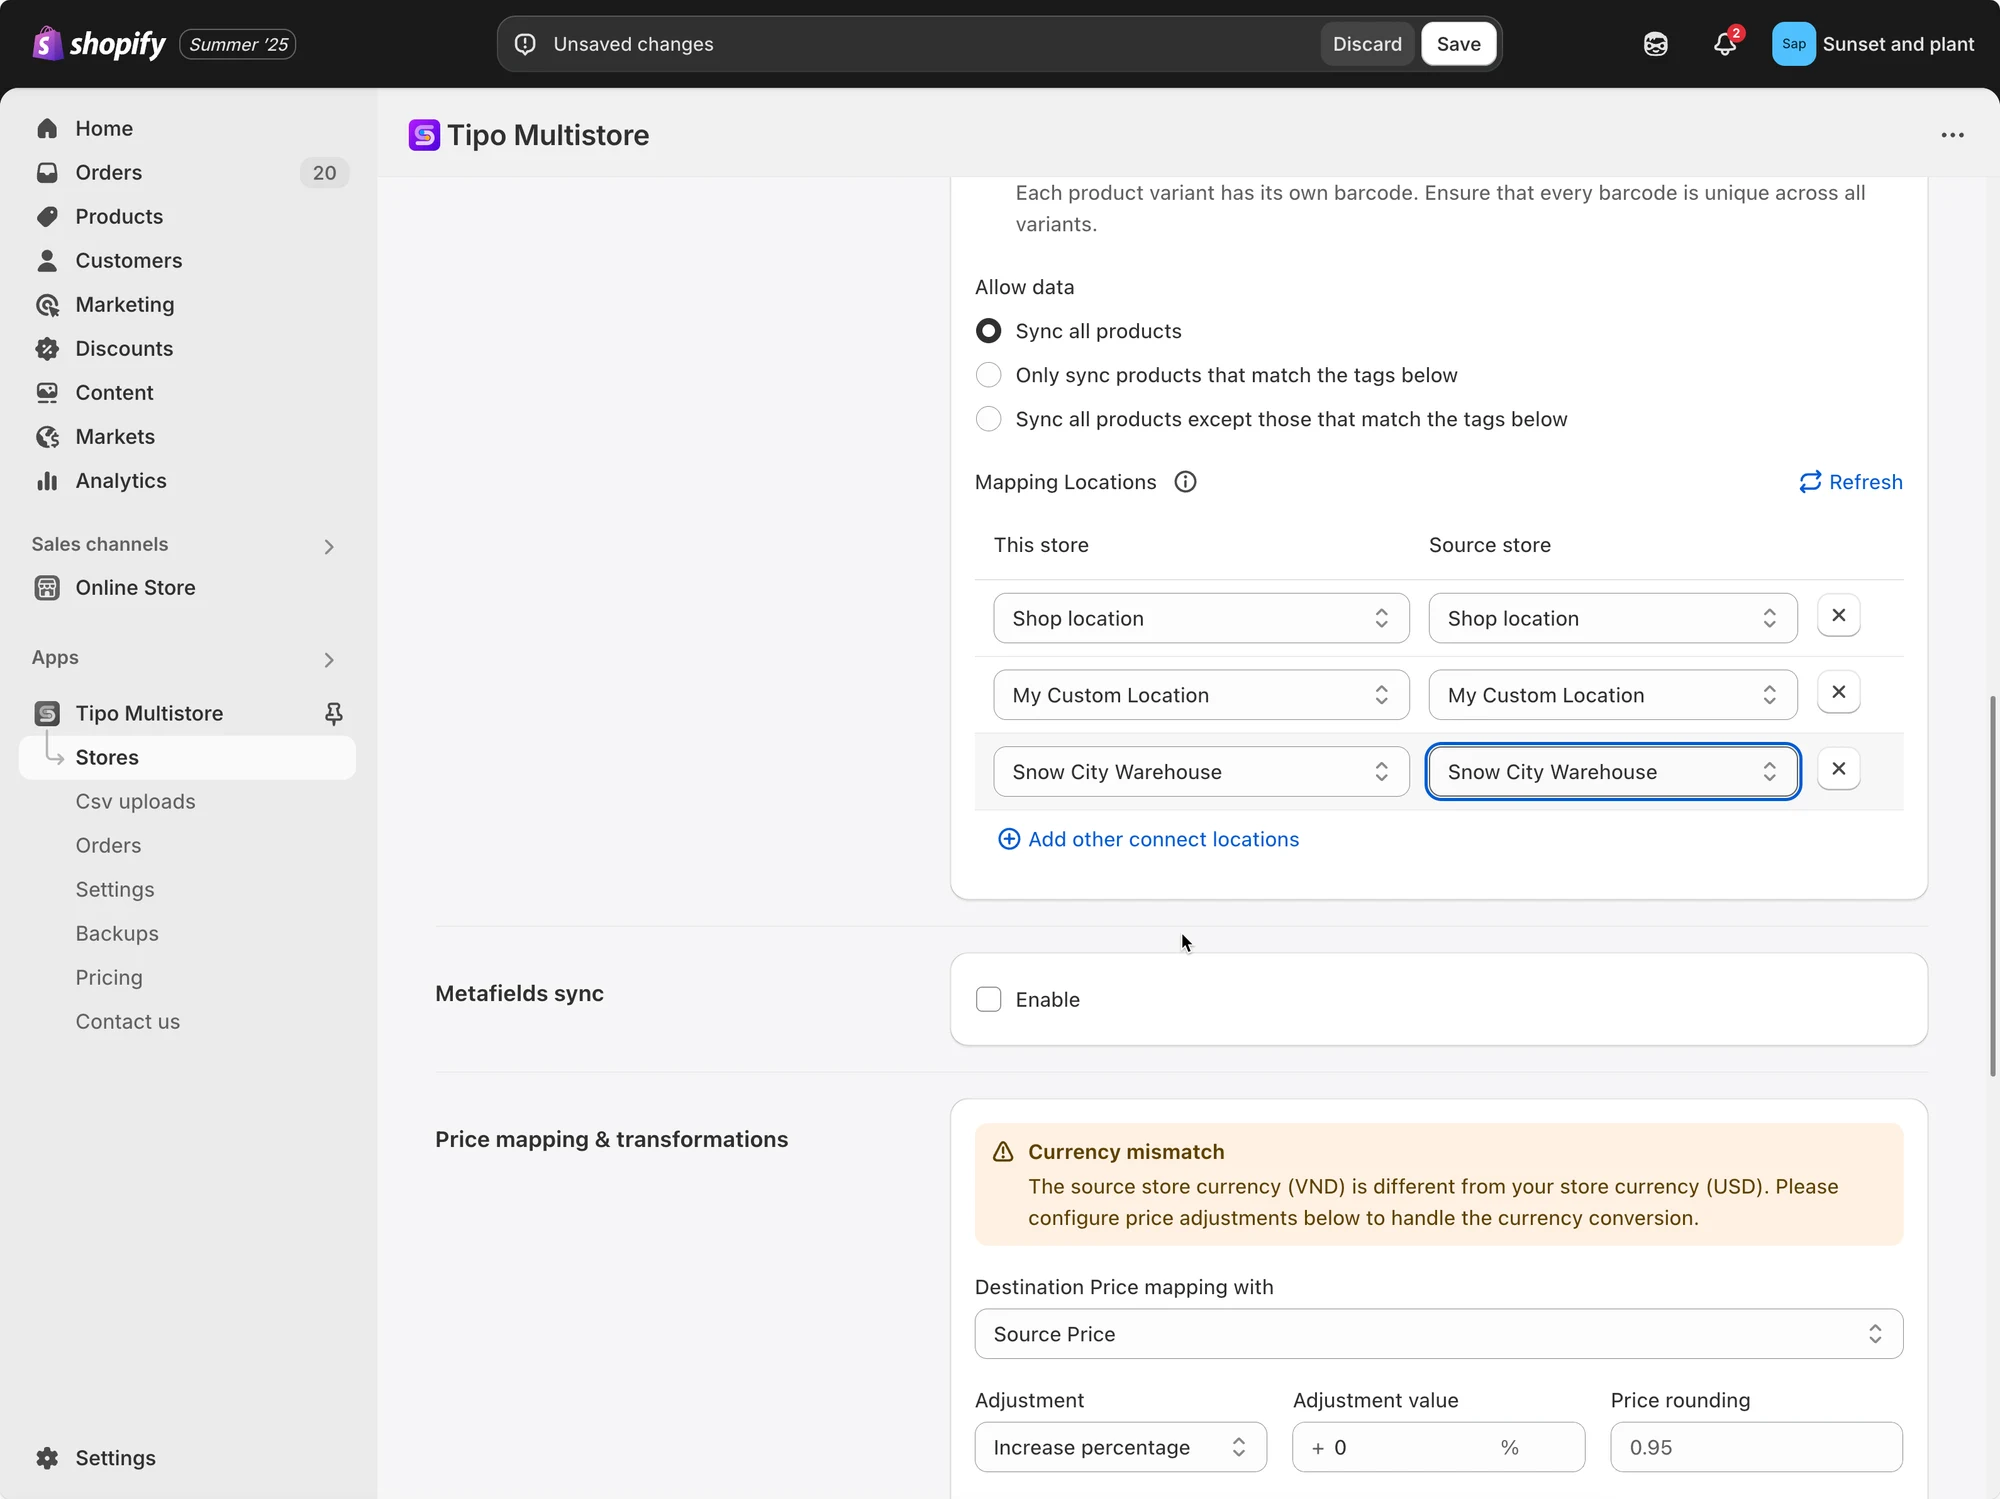
5. Select **Locations** you want to map between stores (required)
6. Click **Save.**
The sync will be run immediately. The first sync may take some time depending on how many products you sync.
***
### 🔄 After the sync
Once connected, Tipo Sync can:
* import/sync products from Source to Destination (based on your selection)
* sync inventory (if you mapped locations and enabled inventory sync)
* keep updates running based on your connection settings
For example:
Product New Shirt is created in source store, the app will automatically creates the product New Shirt product on destination store (same product handle).
***
### ▶️ A Tutorial video
***
**🙋 Still need support?**
If you still need help, please feel free to contact us at . We’ll be happy to assist you further.